

The 15 best Drain The Lake secrets are mostly faster farming habits, smarter upgrade choices, badge rewards, checkpoint routing, and the two key ending routes: the phone ending and hidden treasure ending.
Drain The Lake looks like a simple bucket loop at first: fill, dump, earn, upgrade, repeat. The faster players are really winning through cleaner routing, better upgrade timing, badge claims, and knowing when to take the phone ending or skip it for hidden treasure.
- 15 Drain The Lake secrets at a glance
- Bucket control and drain travel habits
- Upgrade order for faster progression
- Tokens, gems, badges, and permanent rewards
- Checkpoint route through the lake
- Phone ending route
- Hidden treasure ending route
- Full-run strategy for long-term progress
- Frequently Asked Questions
15 Drain The Lake secrets at a glance
| Secret | What |
|---|---|
| Cursor-on-water filling | Aim your cursor directly at the water before clicking. |
| Bucket range | Fill from safer edges instead of standing in danger. |
| F teleport | Use F on PC while in the lake to return to the drain faster. |
| Early money upgrades | Increase earnings first so every later upgrade is easier to afford. |
| Quick drain | Speed up the deposit part of the loop. |
| Movement speed | Move, dodge, and recover faster in deeper zones. |
| Bucket capacity balance | Upgrade capacity until it feels smooth, not at the cost of everything else. |
| Direct deposit | Unlock it once available to reduce waiting near the machine. |
| Jackpot timing | Use it later when bigger buckets and better payouts make it valuable. |
| Tokens vs gems | Use tokens for run upgrades and gems for longer-term progress. |
| Badge rewards | Claim badge gems in the lobby instead of leaving them untouched. |
| Checkpoints | Push through flagged areas so deaths do not waste as much progress. |
| Phone ending | Reach the bottom path and interact with the phone. |
| Hidden treasure ending | Walk past the phone, drain the small pool, and interact with the huge door. |
| Run-based planning | Give each run a goal: gems, badges, checkpoint progress, phone, or treasure. |
These are not true software glitches as much as secrets, shortcuts, hidden mechanics, and progression habits. Use them together and the game stops feeling like a slow walk between the lake and the drain.
Bucket control and drain travel habits
| Habit | Best use |
|---|---|
| Aim at water | Use this every fill so clicks actually count. |
| Fill from the edge | Use it near sharks, lava, and awkward terrain. |
| Press F | Use it on PC while in the lake to shorten the return trip. |
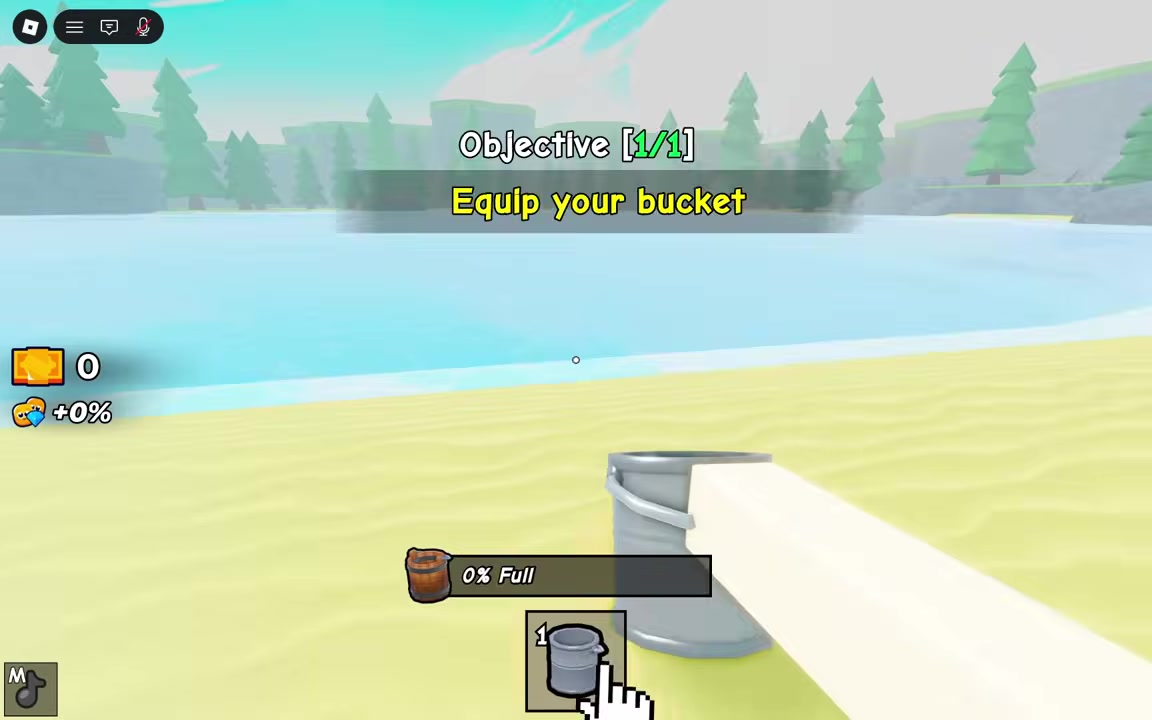
The first secret is basic but easy to miss: your cursor matters more than your character’s feet. If you are standing near the lake and clicking without aiming at the water, the bucket can feel broken even though the game simply is not detecting the water properly.
The second trick is using the bucket’s short range. You do not always need to jump straight into the lake or stand in a bad spot. When sharks, lava, awkward ledges, or tight terrain start becoming a problem, stand on a safer edge, keep the camera clean, and aim at the water from there.
The third habit is the F return. On PC, while you are in the lake, pressing F can teleport you back to the drain, which cuts out a huge amount of dead travel time. The clean loop is simple: fill safely, press F, dump, repeat.
Stop walking every bucket back manually: fill from a safe edge, press F while in the lake, then spend the saved time on more deposits and upgrades.
Upgrade order for faster progression
| Priority | Upgrade focus |
|---|---|
| 1 | Money upgrades for better earnings per trip. |
| 2 | Quick Drain so deposits do not slow the loop. |
| 3 | Movement speed for travel, dodging, lava, and deeper zones. |
| 4 | Bucket capacity until filling feels comfortable. |
| 5 | Direct Deposit once it becomes available. |
| 6 | Jackpot after your payouts are large enough to multiply well. |
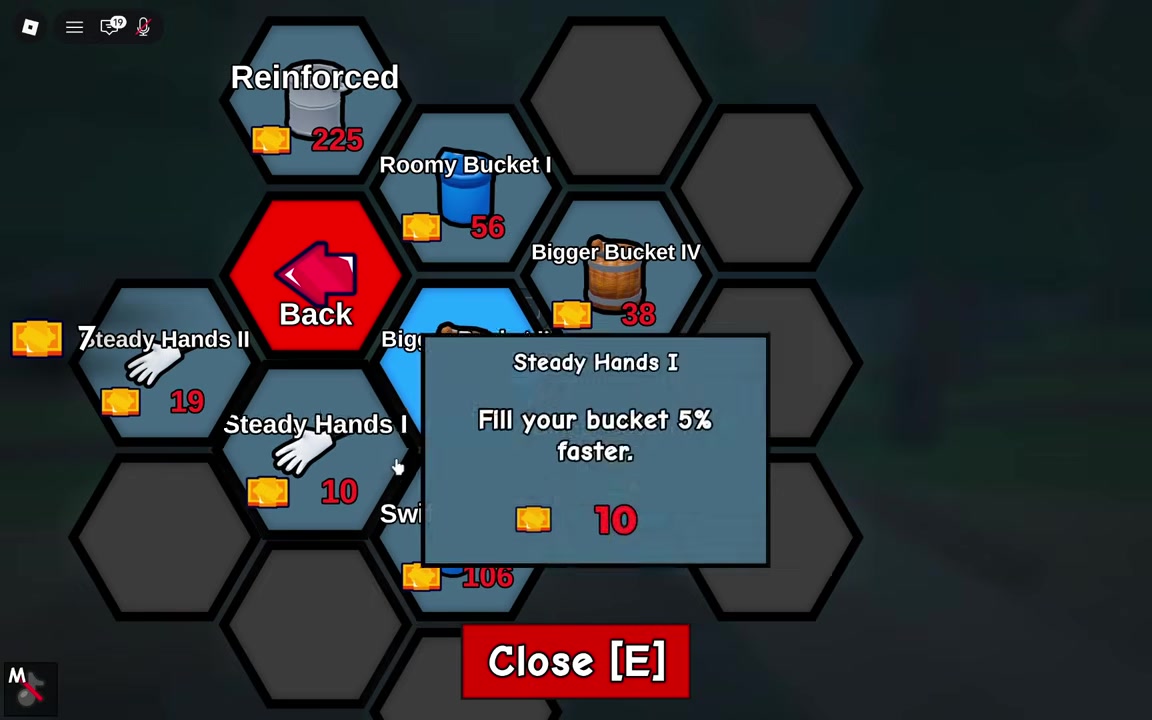
Your early upgrades decide how slow the whole run feels. The biggest mistake is buying whatever looks cool first, then getting stuck with weak earnings and long deposit cycles. Start with money upgrades because higher value per trip makes every future purchase easier.
After that, Quick Drain keeps the machine side of the loop from becoming the bottleneck. A bigger bucket is nice, but if you are waiting too long to turn water and minerals into tokens, your farming rhythm still drags.
Movement speed belongs high in the order because it helps with more than travel. It helps you dodge enemies, avoid lava, fix bad positioning, and survive deeper zones. Then bring bucket capacity up until filling feels comfortable; around the point where the bucket takes roughly 10 clicks or feels smooth for your stage is a good practical target.
Once available, Direct Deposit is a major quality-of-life upgrade for longer runs. Jackpot is better later, after your bucket, drain speed, and payouts are strong enough for doubled bucket value to really matter.
Tokens, gems, badges, and permanent rewards
| Reward source | Reward |
|---|---|
| Plunge | Swim in the lake for 10 gems. |
| Shark Bait | Get caught by the Shark for 20 gems. |
| Lucky Find | Find 10 chests for 40 gems. |
| Sunken Secrets | Reach the Shipwreck Checkpoint for 40 gems. |
| Deep Dive | Reach the Cavern Checkpoint for 60 gems. |
| The Mines | Reach the Mineshaft Checkpoint for 75 gems. |
| Fire Below | Reach the Molten Checkpoint for 90 gems. |
| Ancient Ruins | Reach the Lost City Checkpoint for 110 gems. |
| Into the Abyss | Reach the Abyss Checkpoint for 125 gems. |
| Find My Phone | Unlock the Phone ending for 140 gems. |
| 10 badges | Claim the Ancient Bucket in the lobby. |
Tokens and gems do different jobs. Tokens are mainly your current-run currency: you earn them while draining and spend them on upgrades during that run. Gems are longer-term progress because they stay with you after you return to the lobby.
KEY!That is why badges matter. They are not just achievement pop-ups; many of them pay gems, and those gems help future runs through better buckets and longer-term unlocks. After earning a badge, return to the Badges station in the lobby, talk to the NPC, open the badge list, and click unlocked badges to claim their gems.
Easy early targets include Plunge, Shark Bait, Lucky Find, and checkpoint badges like Sunken Secrets. Bigger goals include Find My Phone, Bottomless Treasure, Fully Trained, and Bucket List. After collecting 10 badges, you can claim the Ancient Bucket from the lobby.
Checkpoint route through the lake
| Area | Watch for |
|---|---|
| Shipwreck | Broken ship parts can be used as safer standing spots; reaching it pays the Sunken Secrets reward. |
| Cavern | More parkour and tighter spaces make falling annoying; reaching it pays the Deep Dive reward. |
| Mineshaft | There are fewer safe standing spots, though fewer huge threats; reaching it pays the The Mines reward. |
| Molten | Lava makes footing matter much more; reaching it pays the Fire Below reward. |
| Lost City | Ruins and lava make positioning awkward; reaching it pays the Ancient Ruins reward. |
| Abyss | This is the final checkpoint before the phone, with less water left and fewer major hazards; reaching it pays the Into the Abyss reward. |
Checkpoints are what keep a deep push from becoming painful. As you drain farther down, look for flag markers; they usually mean you are getting close to a checkpoint area. Reaching those checkpoints also lines up with useful badge gem rewards.
The route toward the bottom runs through Shipwreck, Cavern, Mineshaft, Molten, Lost City, and Abyss. Treat each zone differently instead of rushing in the same way every time. Some areas give you safer platforms, while others punish slow movement and bad footing.
The deeper zones are where movement speed, safer edge filling, and a comfortable bucket start paying off together. You are not only farming faster; you are reducing the number of deaths that send you back through old ground.
Phone ending route
The phone ending is the cleaner bottom-route ending: drain down, follow the final path, and interact with the phone.
STEP 1/4
Keep draining deeper
Push through the checkpoint route until you reach the bottom path near the end of the lake.
STEP 2/4
Follow the bottom route
Move carefully and finish draining the remaining water instead of panicking near the final area.
STEP 3/4
Interact with the phone
Click the phone to trigger the phone ending.
STEP 4/4
Claim the reward
The ending gives the Find My Phone badge and diamond rewards.
The hidden treasure route is the missable one because the phone is right there before it. If you want hidden treasure, do not click the phone. Clicking the phone triggers the phone ending instead.
For hidden treasure, skip the phone, drain the pool beyond it, and use the hidden door route.
STEP 1/6
Walk past the phone
When you reach the phone area, keep going instead of interacting with the phone.
STEP 2/6
Find the small pool
Go to the end of the area where the small water pool is waiting.
STEP 3/6
Drain the pool
Empty the pool while dodging the huge carnivorous fish, which can deal heavy damage.
STEP 4/6
Once the pool is empty, fall into the hidden area with signs and symbols on the ground.
STEP 5/6
Find the huge door
Explore the hidden area until you reach the huge door.
STEP 6/6
Interact with the door
Use the door to unlock the hidden treasure ending, with the first clear giving the hidden treasure badge and around 60 diamonds.
Remember the split: phone ending means click the phone; hidden treasure means walk past the phone. That one decision is the difference between finishing the normal route and reaching the hidden one.
Full-run strategy for long-term progress
The best runs have a goal before they start, whether that goal is gems, badges, a checkpoint, the phone ending, or hidden treasure.
STEP 1/8
Choose the run goal
Decide whether this run is for badge gems, a new checkpoint, better upgrades, the phone ending, or hidden treasure.
STEP 2/8
Fill properly
Aim your cursor at the water and use safer edges whenever the terrain or enemies make direct filling risky.
STEP 3/8
Return efficiently
Use F on PC while in the lake so the drain trip does not eat the whole run.
STEP 4/8
Buy balanced upgrades
Prioritize money, Quick Drain, movement speed, comfortable capacity, Direct Deposit, and later Jackpot.
STEP 5/8
Claim badge gems
Return to the lobby, use the Badges station, and collect rewards from unlocked badges.
STEP 6/8
Spend gems on long-term power
Use gems toward better buckets and permanent progress that makes future runs easier.
STEP 7/8
Push deeper each run
Use checkpoints, safe platforms, and better movement to reach lower zones more consistently.
STEP 8/8
<
p class=”vg-step-title” id=”pick-the-right-ending-route” style=”margin:16px 0 6px”>Pick the right ending route
Click the phone for the phone ending, or walk past it for hidden treasure.
Video help
Frequently Asked Questions
Is there an official list of 15 secrets and glitches in Drain The Lake?
No. The 15 secrets here are a practical run list: shortcuts, hidden methods, upgrade habits, badge rewards, checkpoint routing, and ending routes. Most of them are not software glitches; they are mechanics players miss.
What is the fastest early-game upgrade path?
Start with money upgrades, then get Quick Drain, movement speed, and enough bucket capacity for the loop to feel smooth. Add Direct Deposit once available, then lean into Jackpot later when your payouts are bigger.
What is the difference between tokens and gems?
Tokens are mostly for upgrades inside the current run. Gems stay with you after returning to the lobby and help with longer-term progress, including better buckets.
How do you avoid triggering the phone ending when going for hidden treasure?
When you reach the phone, do not click it. Walk past the phone, find the small pool, drain it while avoiding the dangerous fish, drop into the hidden area, and interact with the huge door.
How do you claim badge gem rewards?
After earning a badge, return to the lobby, go to the Badges station, talk to the NPC, open the badge list, and click unlocked badges to claim their gem rewards.
More questions⤵
How do you unlock the Ancient Bucket?
Collect 10 badges, then claim the Ancient Bucket from the lobby. Badge farming is one of the cleanest ways to build toward it because many badge milestones also pay gems.






Leave a Reply