What to know
- Canva’s Magic Edit feature uses AI to replace parts of an image with other objects without the need for complex editing software or knowledge.
- You can use Magic Edit by opening Canva > launch a design to edit > click the photo you want to replace > Edit Photo > Effects > Magic Edit.
- Magic Edit is available for free on Canva’s web client, desktop apps (Windows and Mac), and mobile apps (iOS and Android).
Canva offers a Magic Edit tool that allows users to replace objects in an image and swap them out for something else. The tool can be used to transform an existing image with some element to have a whole set of other elements by swapping out the unwanted portion with AI-generated content.
In this post, we’ll explain all the ways you can use Magic Edit to edit the contents of an image on Canva.
Related: How to Use Beat Sync in Canva
Requirements
To use Magic Edit on Canva, you need:
- A Canva account [not available for Canva for Education students and accounts based in China]
- An active internet connection
- The Canva app is installed on your desktop/phone or you have a web browser to access the Canva website.
How to replace objects in images on Canva using Magic Edit
The Magic Edit feature on Canva is accessible when you have an image added to your canvas. The process of transforming images with Magic Edit is the same no matter which device you access Canva from. We’ll explain how you can use this feature on Canva.com on a desktop and the Canva app on a phone.
Method 1: Using Canva.com on PC
- To edit images using Magic Edit, launch canva.com on a web browser on your desktop.
- Once you’re on the Canva homepage, you can choose an existing project from where you want to edit images or create a new design where you want to add images and edit them.
- To edit an ongoing project, click on the Projects tab from the left sidebar.
- You can also click on the Create a design button at the top right corner to start on a new project from scratch.

- In this instance, we choose an existing project where an image is ready to be edited. So, inside the Projects page, we’ll now select a project to edit. If you don’t wish to edit an original project but want to create a copy of it to edit instead, you can hover over the desired project and click on the 3-dots icon at its top right portion.

- In the overflow menu that appears next, click on Make a copy.

- When you select an existing project or create a copy, its canvas is loaded on a new tab. To replace objects inside this project, click on the image that you want to edit the contents of. When you select an image, its borders will be highlighted to show what you selected. With the image now selected, click on Edit photo at the top.

- When you do that, you should see a new sidebar appear on the left of the canvas. On this sidebar, make sure you’ve selected the Effects tab at the top and then click on Magic Edit under “Tools”.
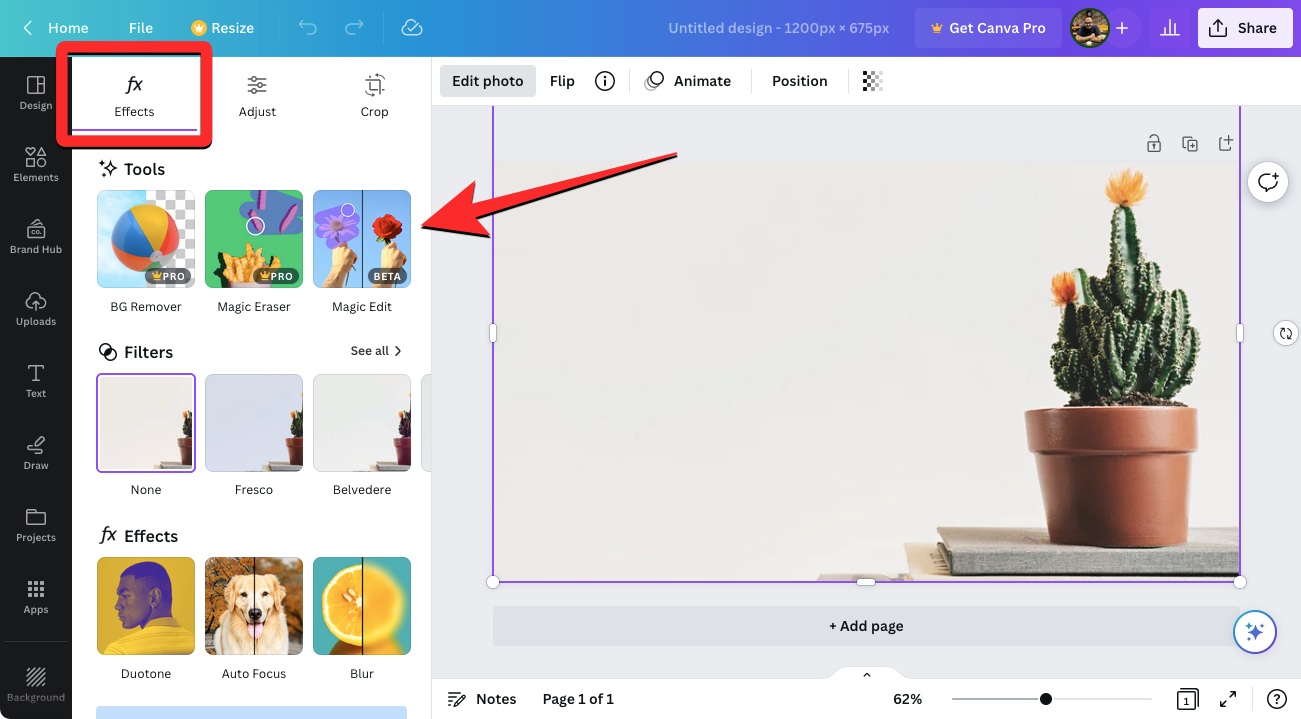
- Once you select this tool, you should enter the Magic Edit screen. The first step here is to brush over parts of the image you want to replace. If there’s an object that you want to remove and place something else over it, then you will have to use the brush tool and drag it around until the whole object has been covered. In this instance, we’ll be replacing the cactus plant with something else, so we’ll brush all over the plant to select it.
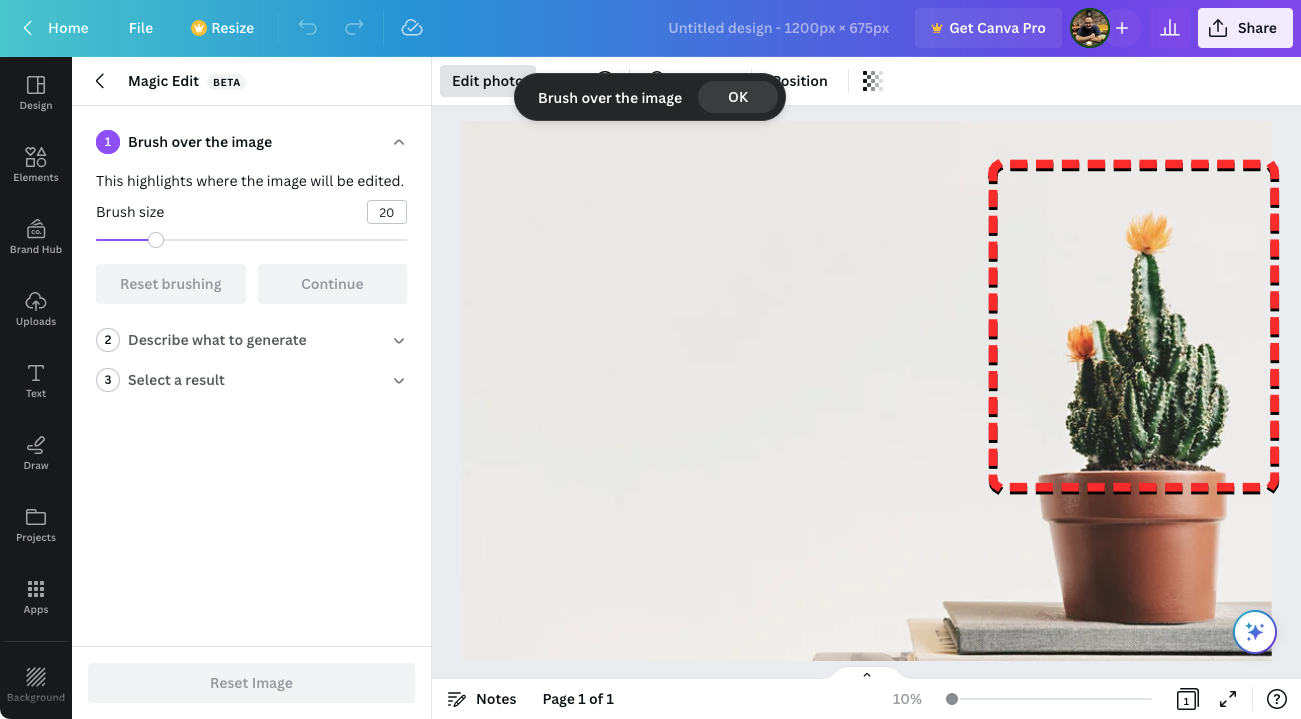
- When you enter the Magic Edit screen, you will see a circle inside the canvas where your cursor is located. This is the brush tool that you will use to drag around the object you want to replace. If the object you want to remove is large, you can increase the brush size by dragging the “Brush size” slider towards the right. Similarly, you can use a smaller brush to cover smaller objects or areas of an image. You can change the brush size at any time during the brushing session.

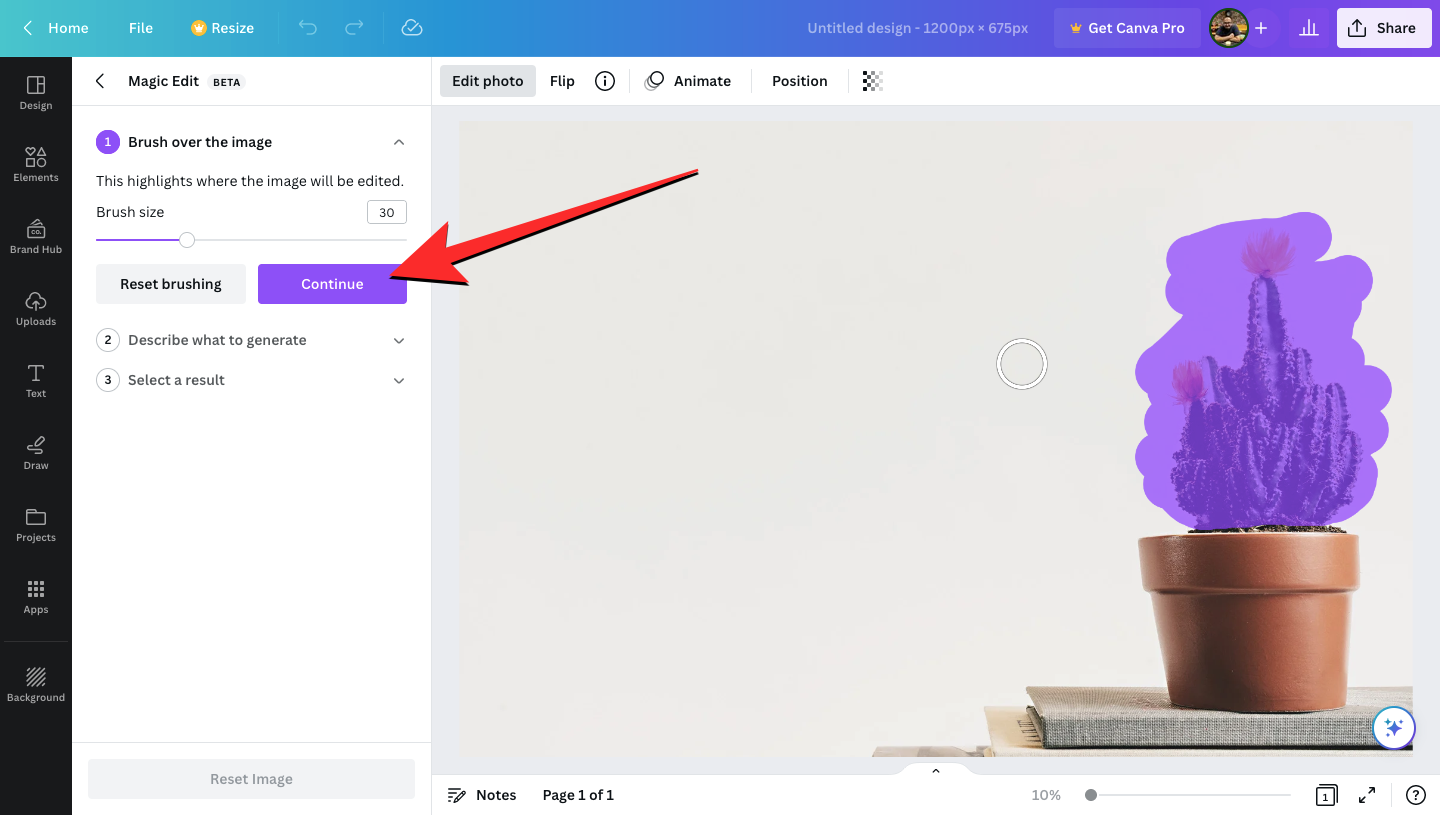
- Once you’ve selected your preferred brush size, you can press the cursor and start brushing over the object you want to replace in an image. When you brush over parts of an image, the brushed portion will be highlighted in purple to help you determine which portions have been brushed over.

- Canvas only requires you to roughly select a portion for the Magic Edit tool to work, so you don’t have to brush over the object with precision; Canva’s AI should be able to distinguish the object from an image by itself. In this instance, we’re only replacing the plant but not the entire port, so we brushed over portions of the image with just the plant. When you’ve successfully brushed over an object in the image, it should appear like in the screenshot below. With the object now selected, click on Continue on the left sidebar.
- When you do that, you should see the “Describe what to generate” text box appear on this sidebar. Inside this text box, write an input that you want Canva to use to generate a new object that you want to use as a replacement inside your image. If you can’t think of what you want to add as a replacement, you can click on any of the suggestions provided by Canva under “Need inspiration”.
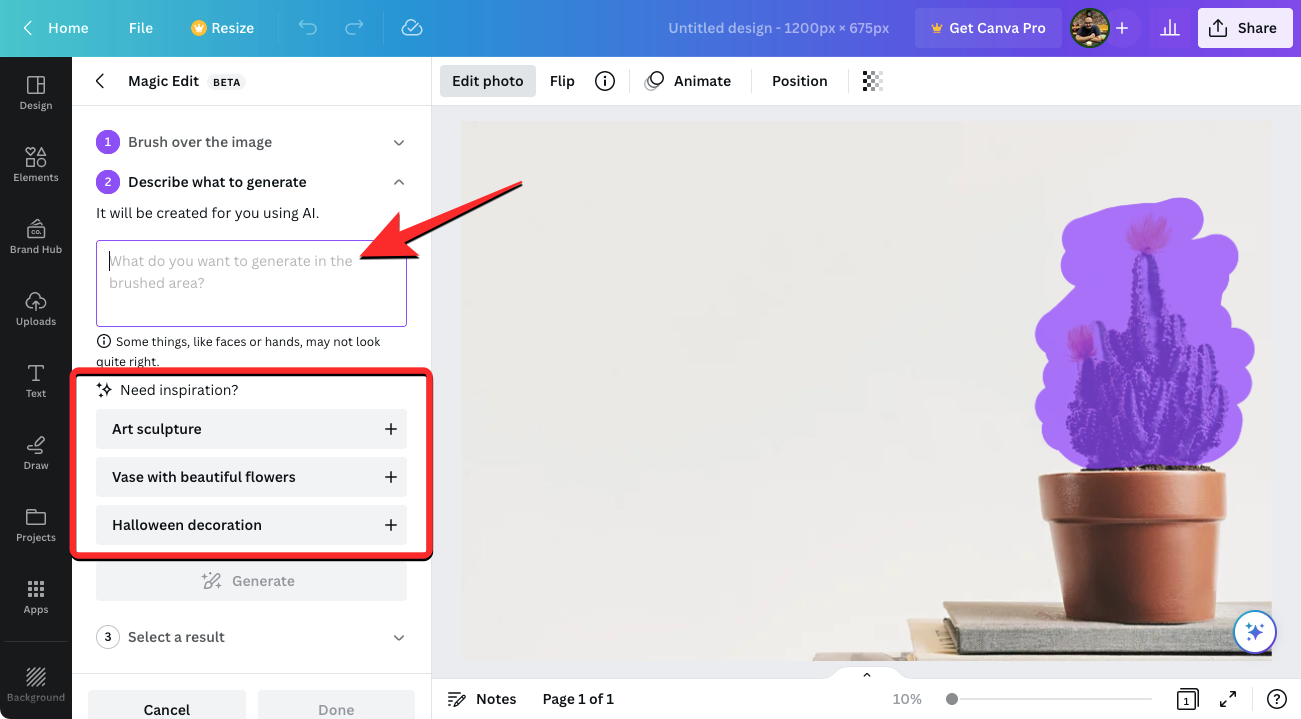
- In our instance, we entered “a potted plant with purple and pink leaves” as our input inside this text box to replace the cactus plant. Once you’ve entered this input, click on Generate on the left sidebar.
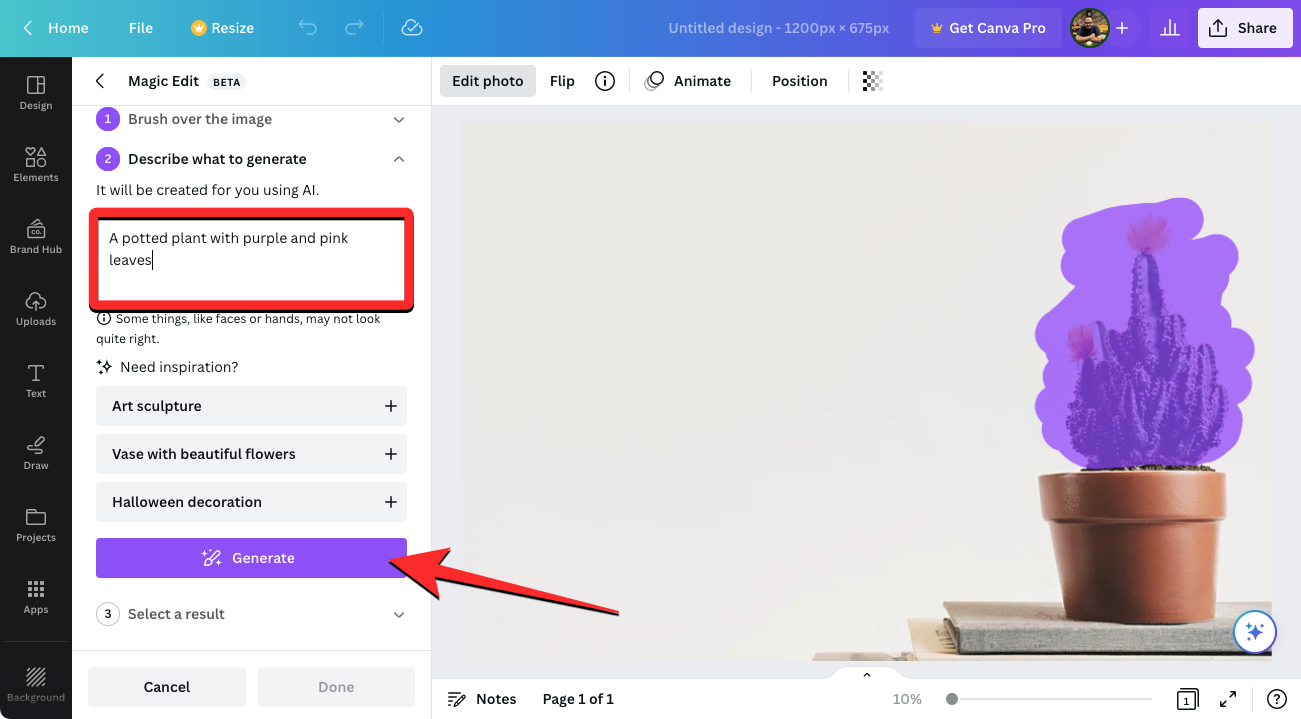
- Canva will now process your request for the selected object with the input you entered.
- Once your request is processed, you should see a set of 4 images with replacement objects for your image. By default, Canva will apply the first of these examples to your image on the right.
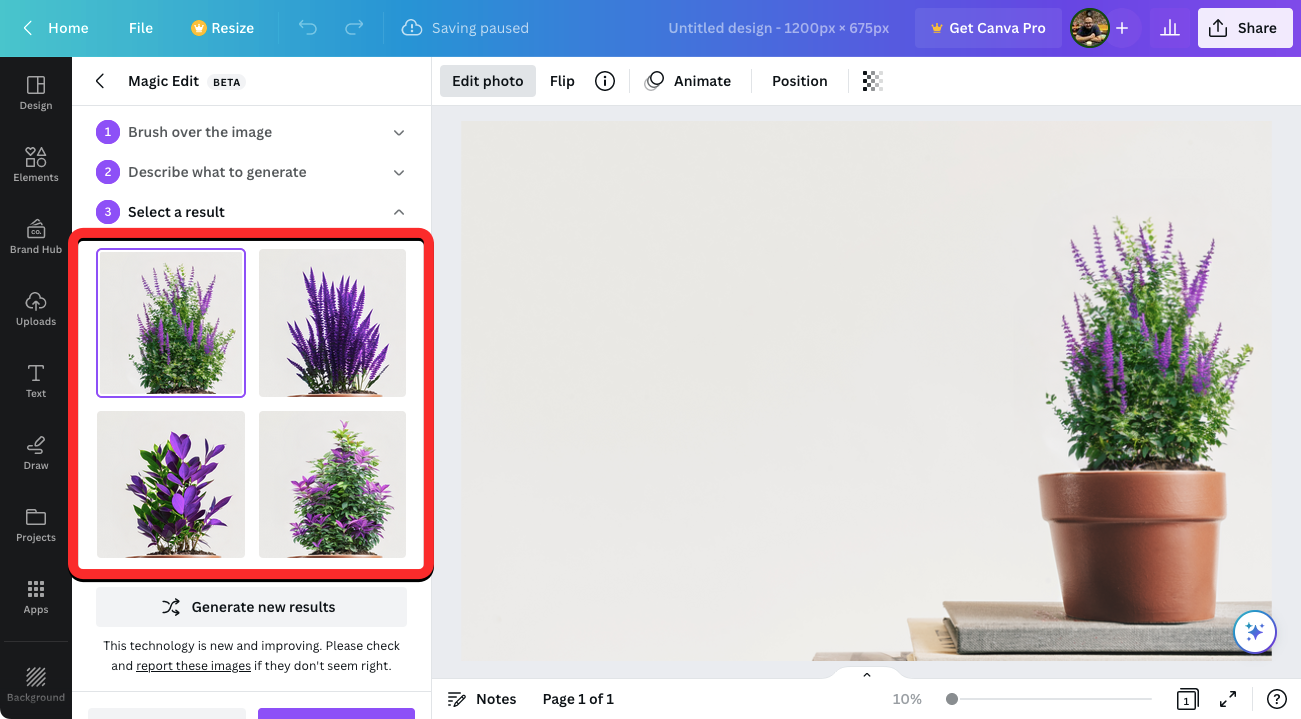
- If you wish to check out the image with other options, click on the thumbnail on the left and the processed image will now show up with the newly selected option.

- If you’re not satisfied with any of these four options, you can click on Generate new results on the Magic Edit sidebar.

- This will replace the existing options with new ones to select from.

- When you finally make up your mind and find an apt alternative to the original object, you can click on its thumbnail to see the whole image and how it looks. Once you’re ready, click on Done on the left sidebar.
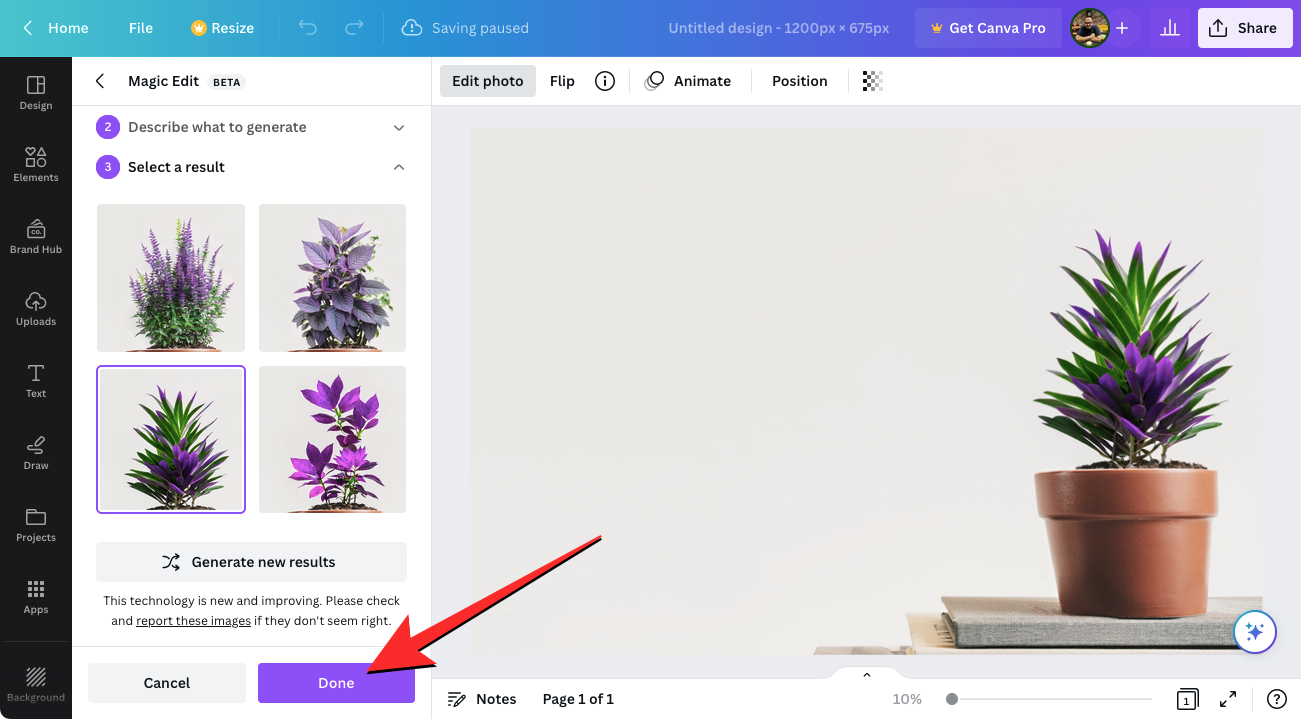
- The selected option will now be applied to your image.

- You can now save this image on your desktop by clicking on Share at the top right corner and selecting Download from the menu that appears. You can also use other options on this menu to share it with others on various platforms.

Method 2: Using the Canva app on phone [iPhone/Android]
To use the Magic Edit feature on your phone, make sure you have the Canva app installed on your iPhone from the Apple Store or on your Android device from the Play Store.
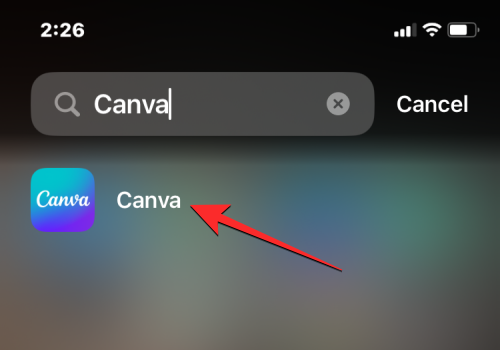
- Open the Canva app on your phone and sign in to your Canva account or create a new account if you’re using Canva for the first time.
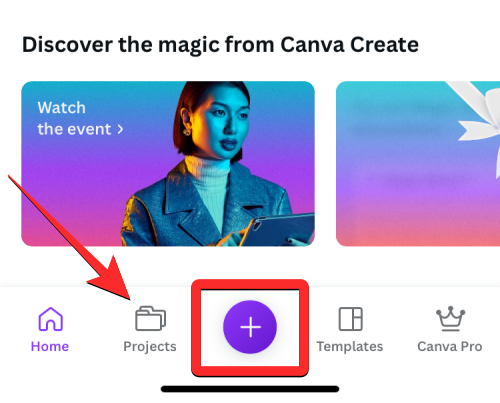
- When the app opens, tap on the Projects tab at the top to select an ongoing project you wish to edit images inside. If you want to use the Magic Edit feature on a new project, tap on the + icon at the bottom center and create a new project with the image you want to edit.
- In this instance, we choose an existing project where an image is ready to be edited. So, inside the Projects screen, we’ll now select a project to edit.

- When you select a project, it will open in full view on the next screen. To edit an image with Magic Edit, tap on the image you want to make changes to.

- This will highlight the borders of the selected image on the screen. When this image is highlighted, tap on Effects from the bottom toolbar.

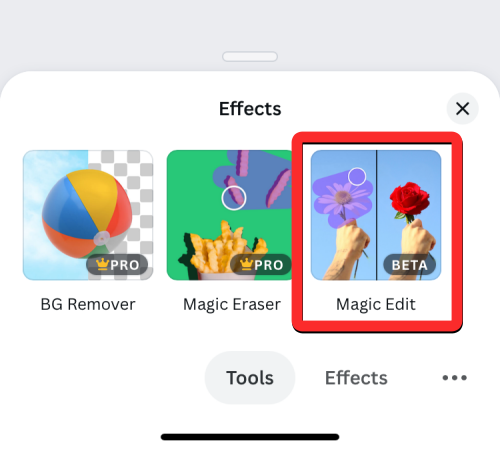
- From the Effect menu that appears at the bottom, select Magic Edit.
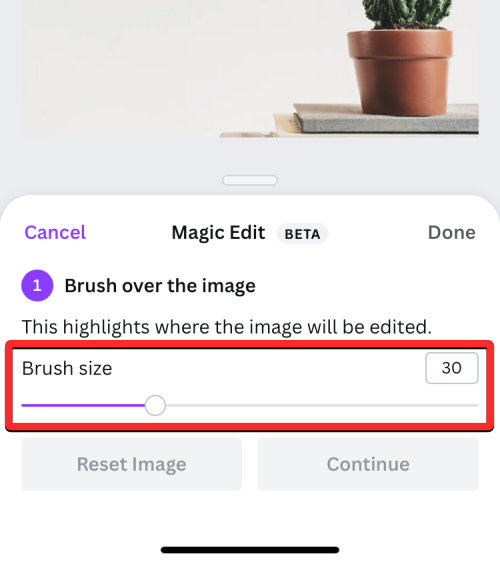
- You will now enter the Magic Edit mode where you’ll be asked to brush over the object you want to select and replace. You can brush over the desired portion of the image by swiping your finger throughout the portion occupied by the object you want to replace.

- To make this easier, you can adjust the size of the brush to cover larger or smaller portions of the image. To adjust this size, drag the Brush size slider at the bottom to your preferred setting.
- When you start brushing over portions of the image, it will be highlighted in purple.
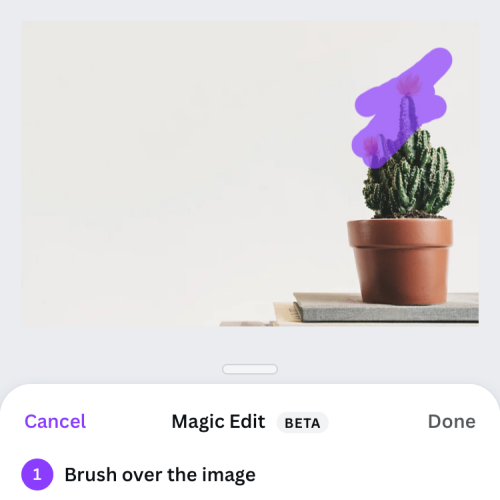
- Once you’re done highlighting the entire object, tap on Continue at the bottom right corner.

- The Canva app will now ask you to enter an input for the object you want to add as a replacement.

- In the Describe what to generate text box, type an idea that you want Canva AI to use for showing you suggestions. In this instance, we entered “A potted plant with small orange and white flowers” as our input. Once you’re entering your input, tap on Generate at the bottom.
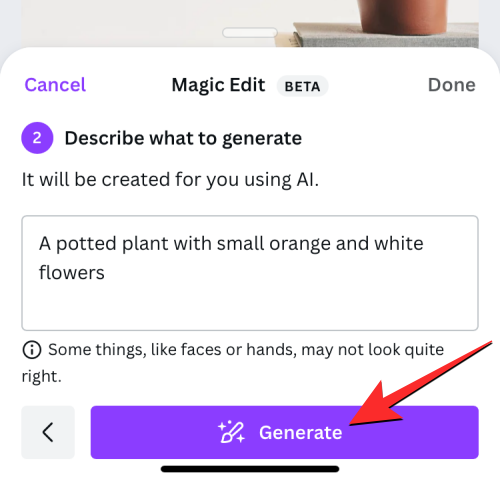
- Canva will now process your request and once that’s done, the app will show you a set of 4 results with replacement objects for your image. By default, Canva will apply the first of these results to your image.

- You can preview other results by tapping on other results and checking their expanded view above.

- If you’re not satisfied with any of these four options, you can tap on Generate new results at the bottom.
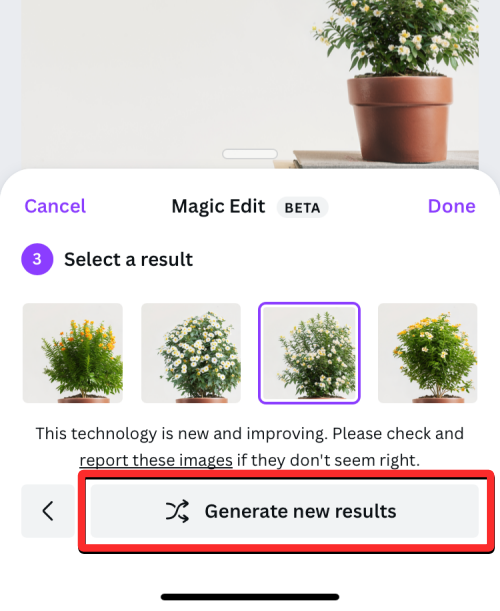
- This will replace the existing options with new ones to select from.
- When you finally make up your mind and find an apt alternative to the original object, you can tap on its thumbnail to see the whole image and how it looks. Once you’re ready, tap on Done at the top right corner of the Magic Edit menu.

- The selected option will now be applied to your image.
- You can now save this image on your phone by tapping on the Download icon at the top right corner. You can also share this image with others by tapping on the Share icon.

That’s all you need to know about using Magic Edit to replace objects inside images on Canva.

