
Shinku is a limited S-rank Cosmos main DPS whose biggest value comes from fast exploration and bursty Ultimate windows, but her best combat results depend heavily on setting up Charge consistently with the right supports.
Shinku is strongest when you play her as an on-field carry, build around Cosmos damage and Crit, then feed her Ultimate window with reliable Charge ticks. She is excellent for overworld movement and strong enough for current endgame, but her first rotation asks for real setup instead of simple swap-in damage.
- Quick Shinku verdict
- Shinku kit mechanics
- How to run Shinku’s opener and Ultimate rotation in Neverness to Everness
- Module setup and stat priority
- Arc rankings for Shinku
- Talent priority for Shinku
- Awakenings that change Shinku
- Team comps for Charge uptime
- Showcase results and execution mistakes
- Pull recommendation for Shinku
- Frequently Asked Questions
Quick Shinku verdict
Pull Shinku if you want a limited S-rank Cosmos DPS who improves both combat and daily exploration. Outside battle, she spends stamina to move extremely fast, can run up vertical walls, and can ride the Draco motorbike if you own it, making her one of the best city traversal characters on an account.
In combat, Shinku is not a plug-and-play off-field unit. Her damage comes from staying active, building and cashing Gaze, setting up Remora plus Blossom for Charge, and then spending a short Ultimate window as cleanly as possible.
The upside is real: her opening nuke, enhanced Skills, and final dash attacks give her strong burst. The downside is also real: the first rotation can feel clunky, especially if you lack Zero or a Blossom support that keeps Charge ticking quickly.
Shinku kit mechanics
Shinku’s defining mechanic is her AFK/Gaze stack system. While she is on field and not attacking, she gains a stack every second, and dodging an enemy attack without dodge-countering can add another stack. At A0, Gaze stacks up to 8, and her next hit consumes the stacks to deal a large nuke while also generating a large amount of Esper cycle gauge. Swapping off removes those stacks at A0, so cash them before leaving the field.
Her regular Basic Attack string and short-cooldown Skill are mostly setup tools until her Ultimate is ready. Her Ultimate puts her into a 13-second transformed state where normal attacks build her enhanced or super Skill, and Charge ticks fill most of that gauge at once. If Charge is active often enough, Shinku can fit up to five super Skills inside a single Ultimate window; without Charge, expect far fewer.
Near the end of the Ultimate, Shinku gains access to up to three Ultimate dash attacks, used with Q or the Ultimate button. These dashes are one of her best DPS pieces, so do not skip them. The window then ends with a large laser finisher, either automatically or by pressing the Ultimate button near the end.
Charge also matters beyond damage. While Shinku is on field, Charge gives energy to the whole team, deals extra damage, and grants her a stacking 5% ATK buff up to 10 stacks for 30 seconds. Her Ultimate costs only 60 energy, but she cannot gain Ultimate energy during the Ultimate itself, so the rotation is about setting up before the burst window, not trying to refill during it. English terms for several parts of her kit may shift between client builds, but the loop is consistent: stack Gaze, cash it, trigger Charge, then spend the Ultimate window aggressively.
What you need first:
How to run Shinku’s opener and Ultimate rotation in Neverness to Everness
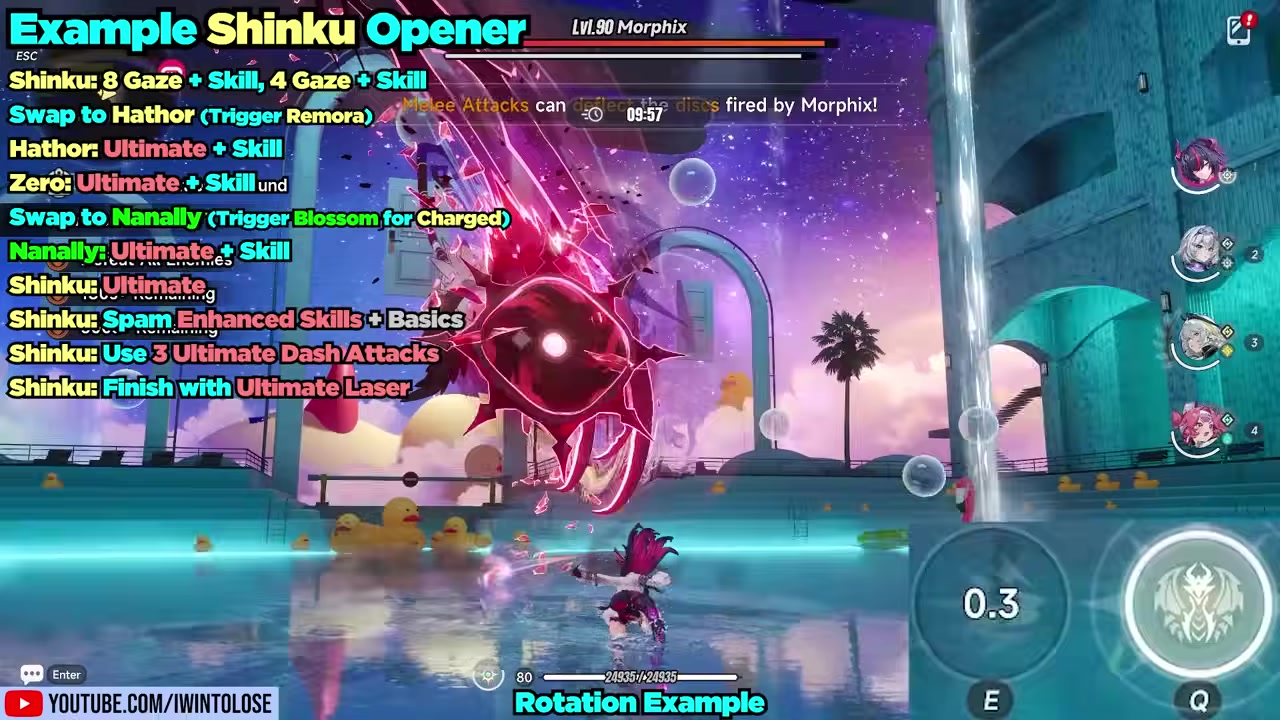
Shinku’s clean opener frontloads Gaze for Esper cycle, sets Charge through the team, then spends every high-value action inside her Ultimate.
STEP 1/13
Pre-stack 8 Gaze

Wait before the fight until Shinku reaches 8 Gaze stacks, because the opening nuke and Esper cycle are worth the delay.
STEP 2/13
Use Skill for the opening nuke
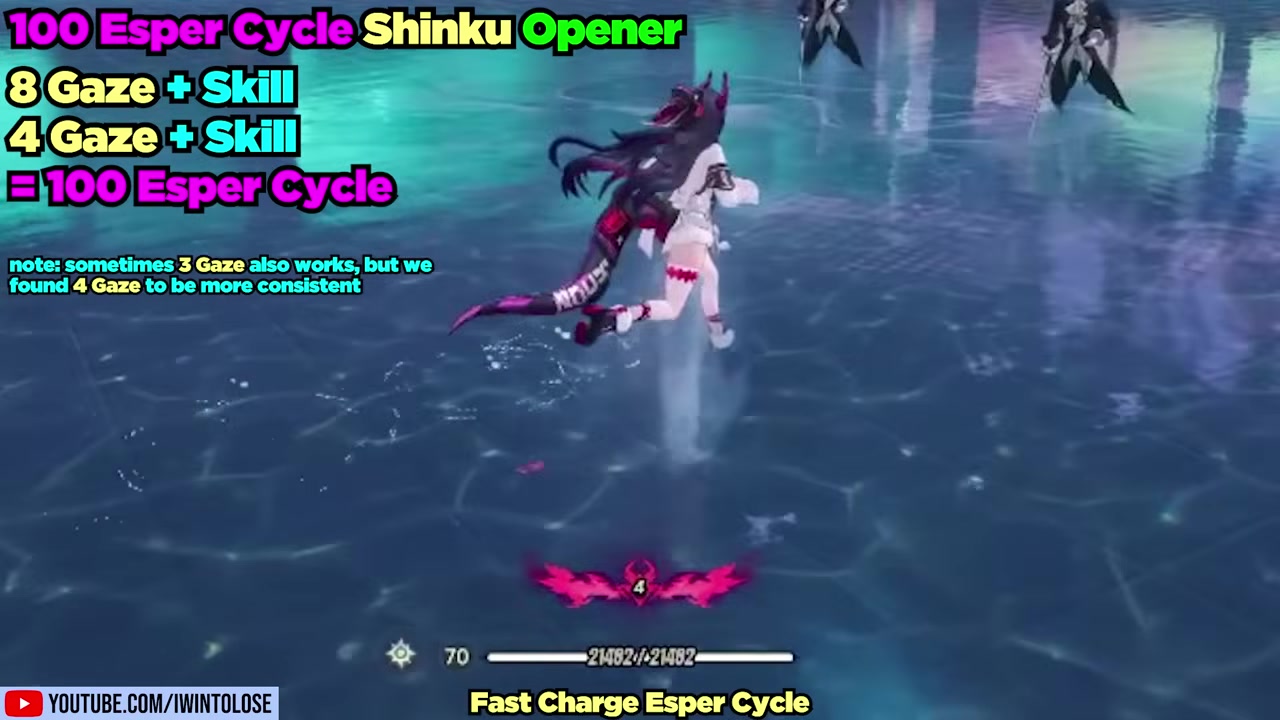
Start the fight by hitting the enemy with Shinku’s Skill to consume the 8 Gaze stacks.
STEP 3/13
Rebuild to 4 Gaze
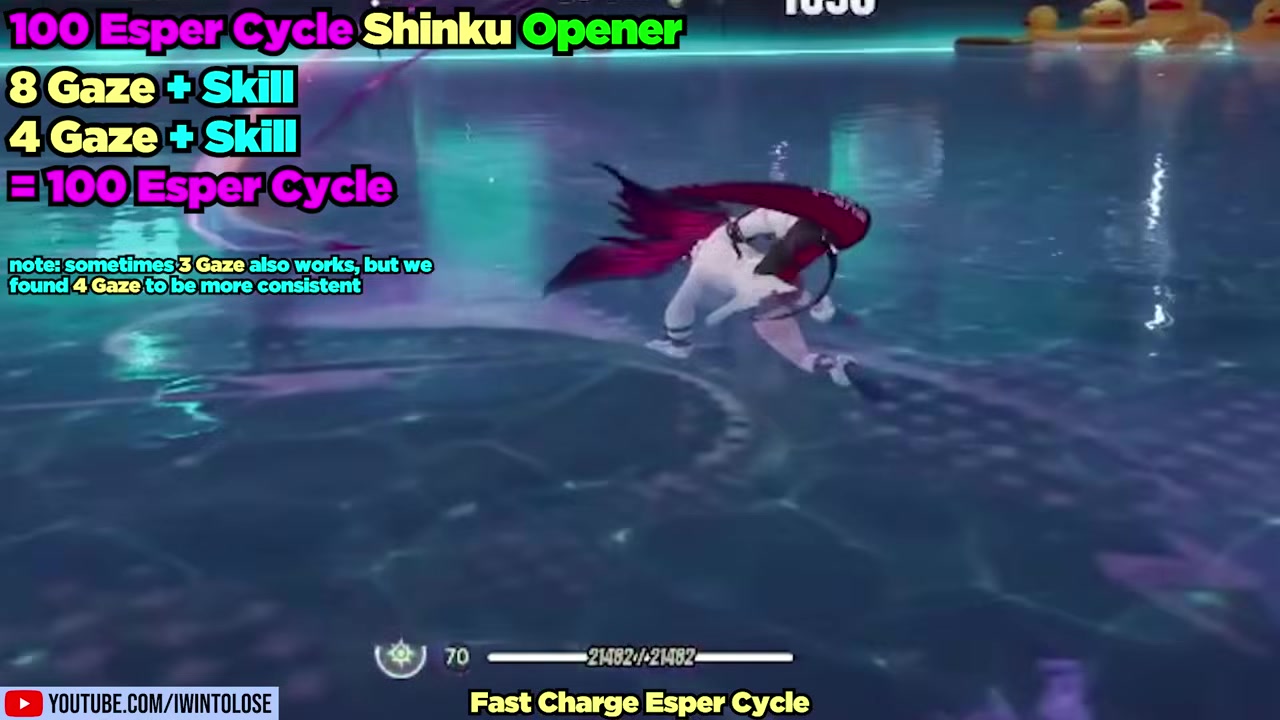
Pause long enough to reach 4 Gaze so Shinku can generate the second chunk of Esper cycle.
STEP 4/13
Skill again for Shinku’s cycle
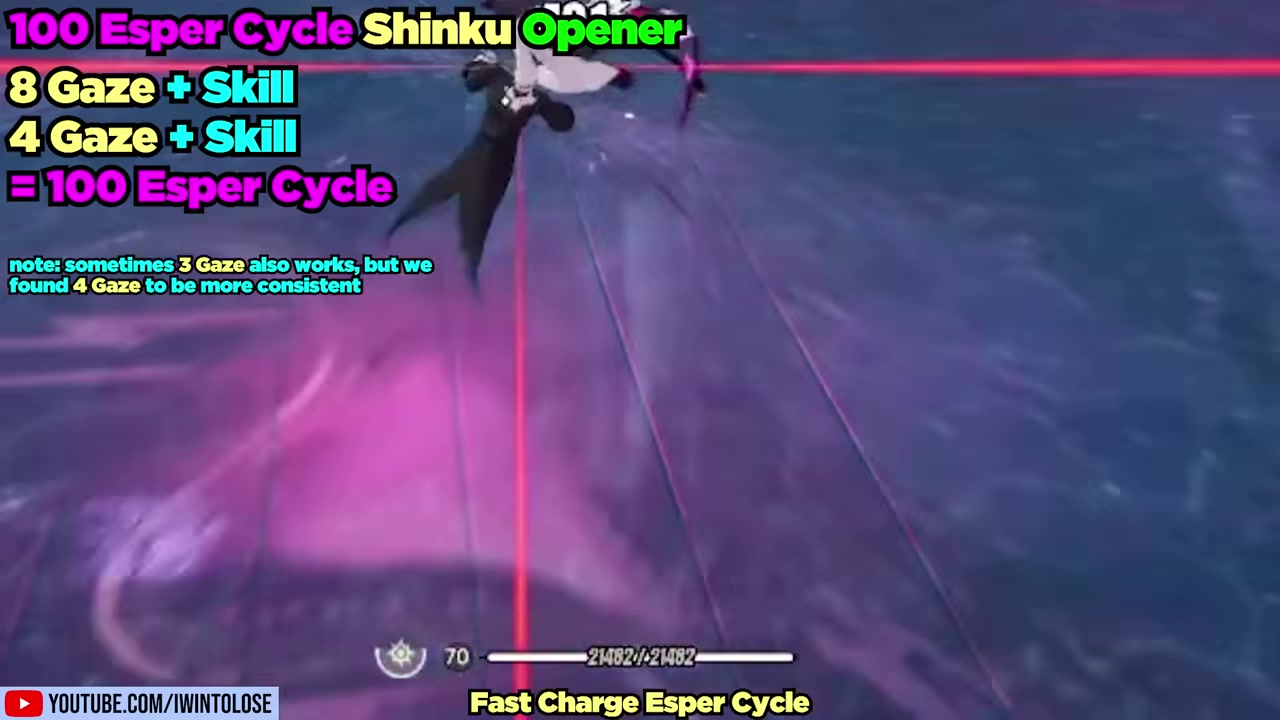
Use Shinku’s Skill again at 4 Gaze to reach a full Esper cycle for the team setup.
STEP 5/13
Use a parry shortcut when available
Against an aggressive enemy, an early parry can replace part of the Gaze-to-cycle setup.
STEP 6/13
Start the Charge setup
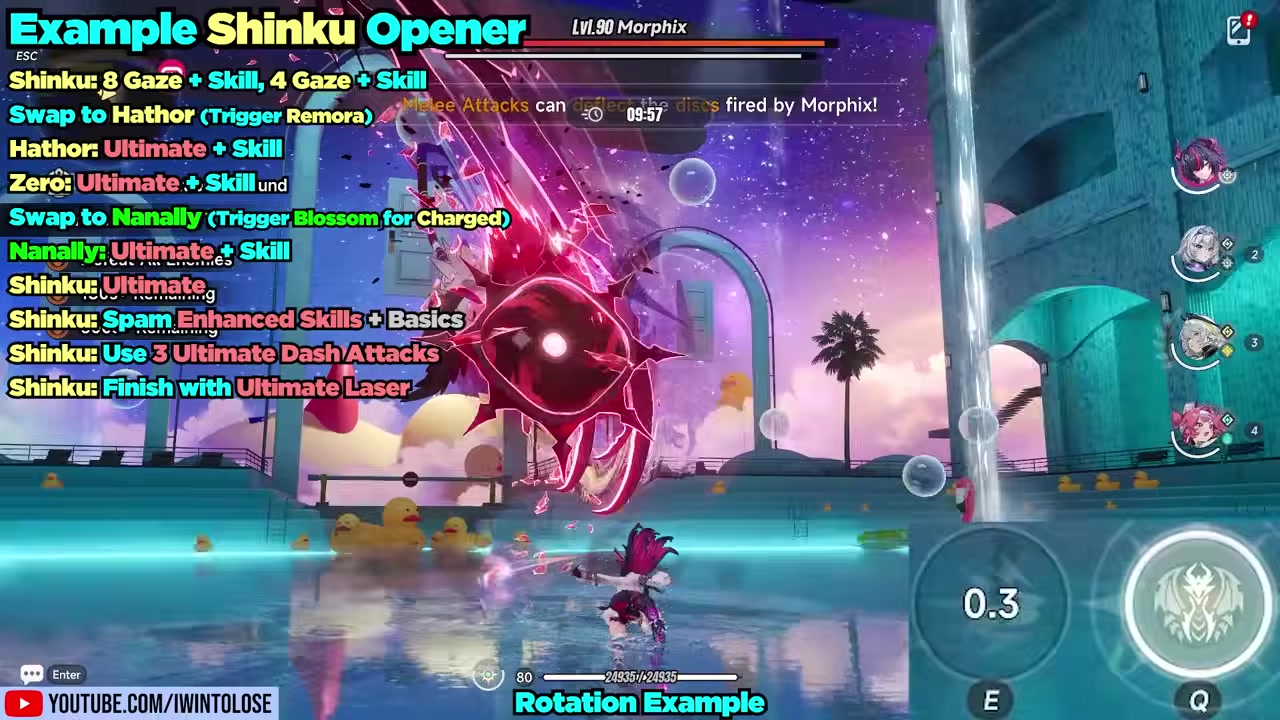
With Shinku’s cycle ready, swap through the team to prepare Remora and Blossom before her Ultimate.
STEP 7/13
Apply Remora with Hathor
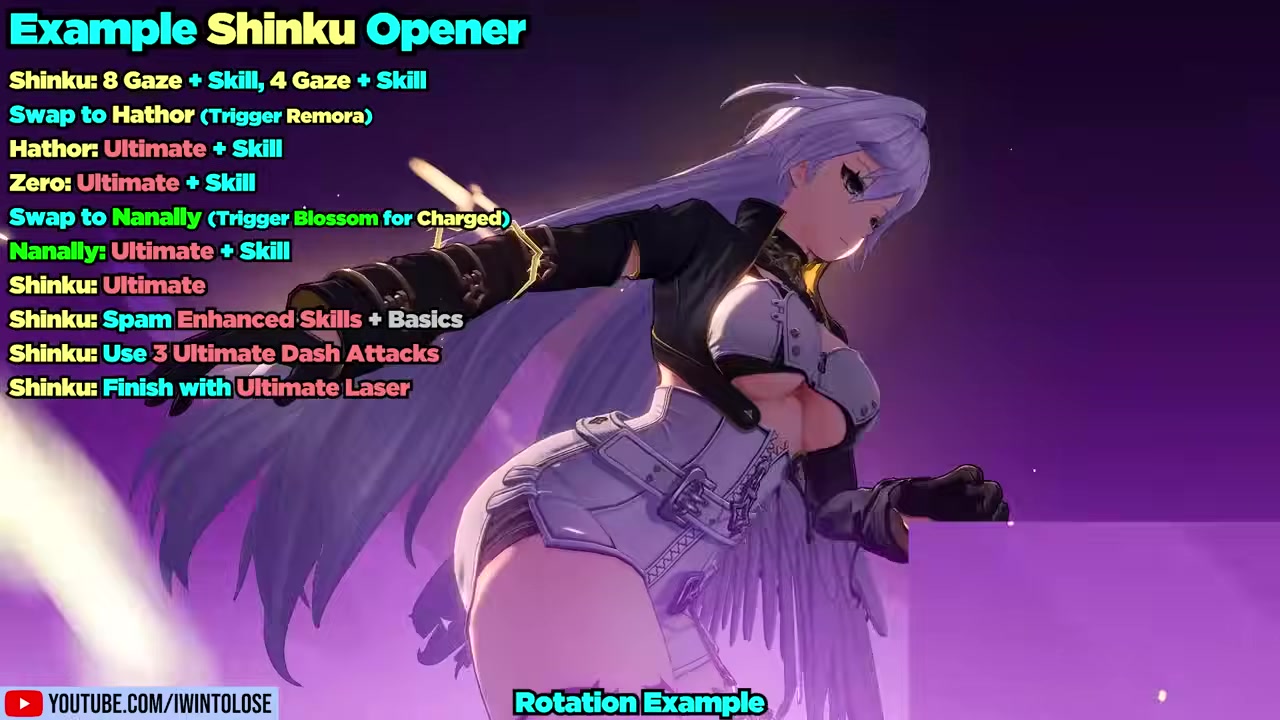
Swap to Hathor, trigger Remora, then use her Ultimate and Skill to keep the enemy marked.
STEP 8/13
Spend Zero’s instant cycle
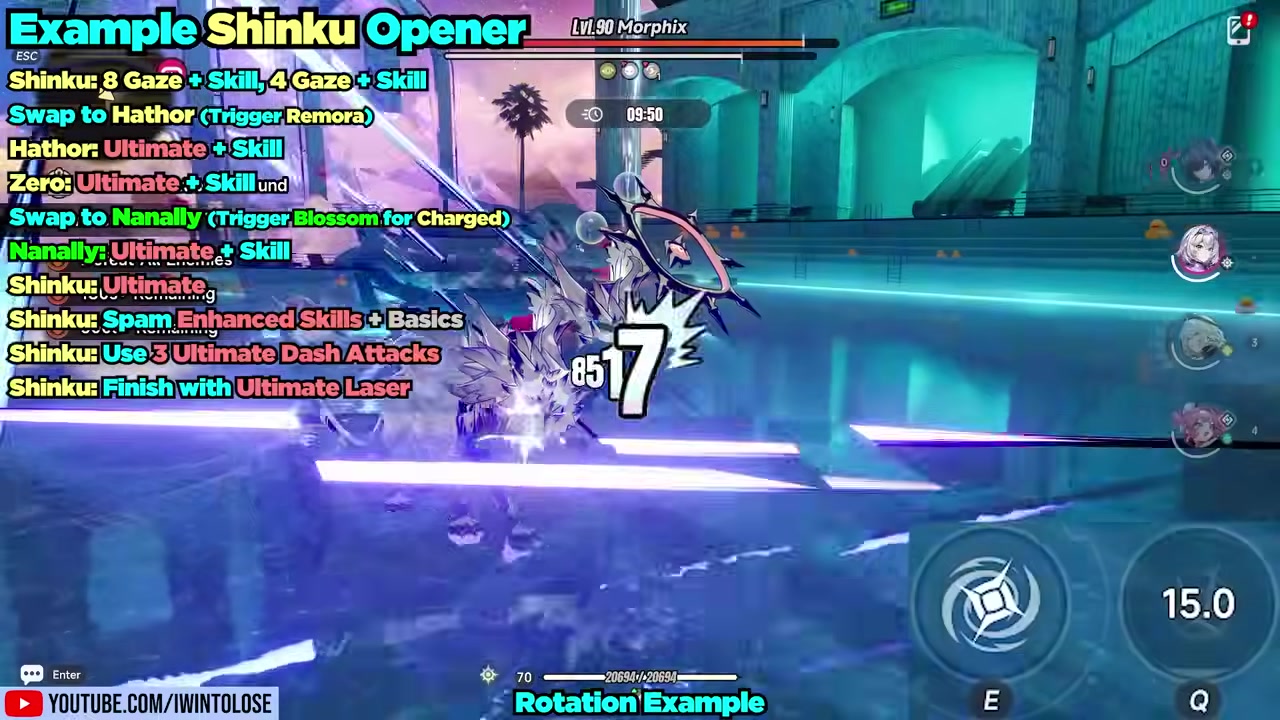
Swap through Zero for Ultimate plus Skill so the rotation has the instant cycle needed for reliable Charge.
STEP 9/13
Trigger Blossom with Nanally

Swap to Nanally to activate Blossom so it hits the Remora-marked enemy and starts Charge.
STEP 10/13
Enter Shinku’s Ultimate

Swap back to Shinku and activate her 13-second Ultimate state while Charge is active.
STEP 11/13
Prioritize enhanced Skills and basics
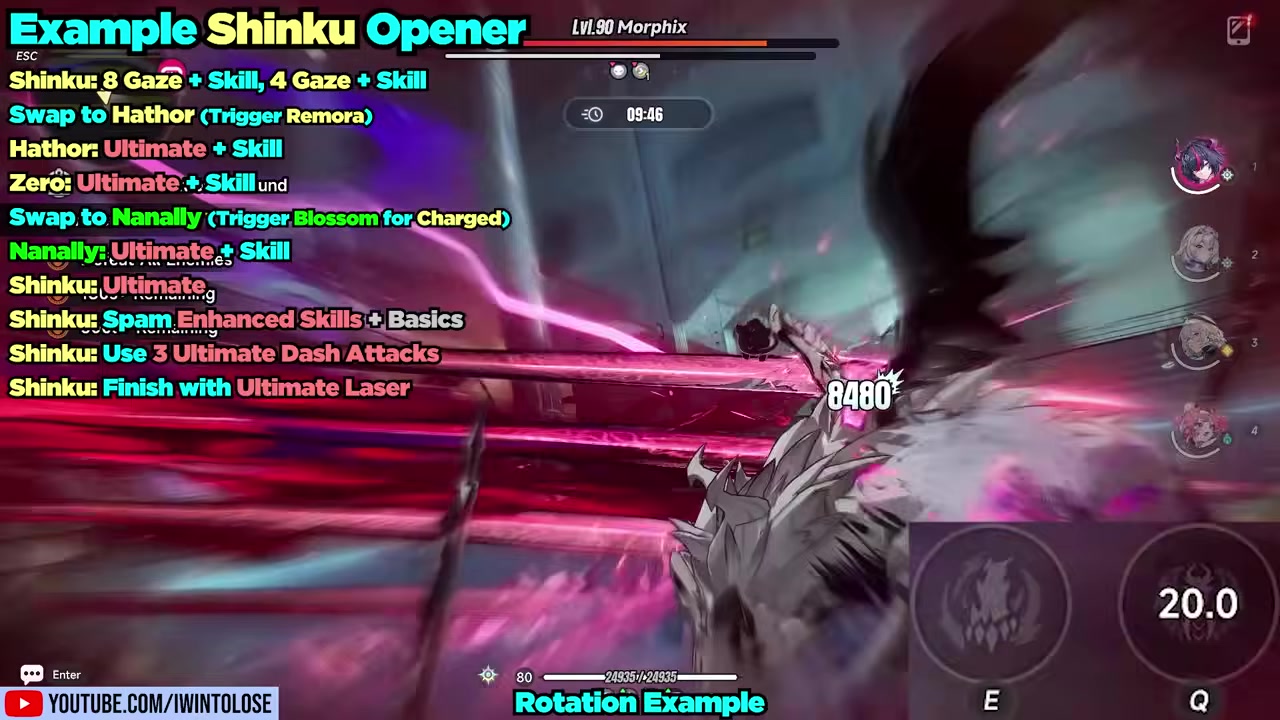
Use as many enhanced Skills as possible, weaving basics to refill the super Skill gauge.
STEP 12/13
Spend all three dash attacks
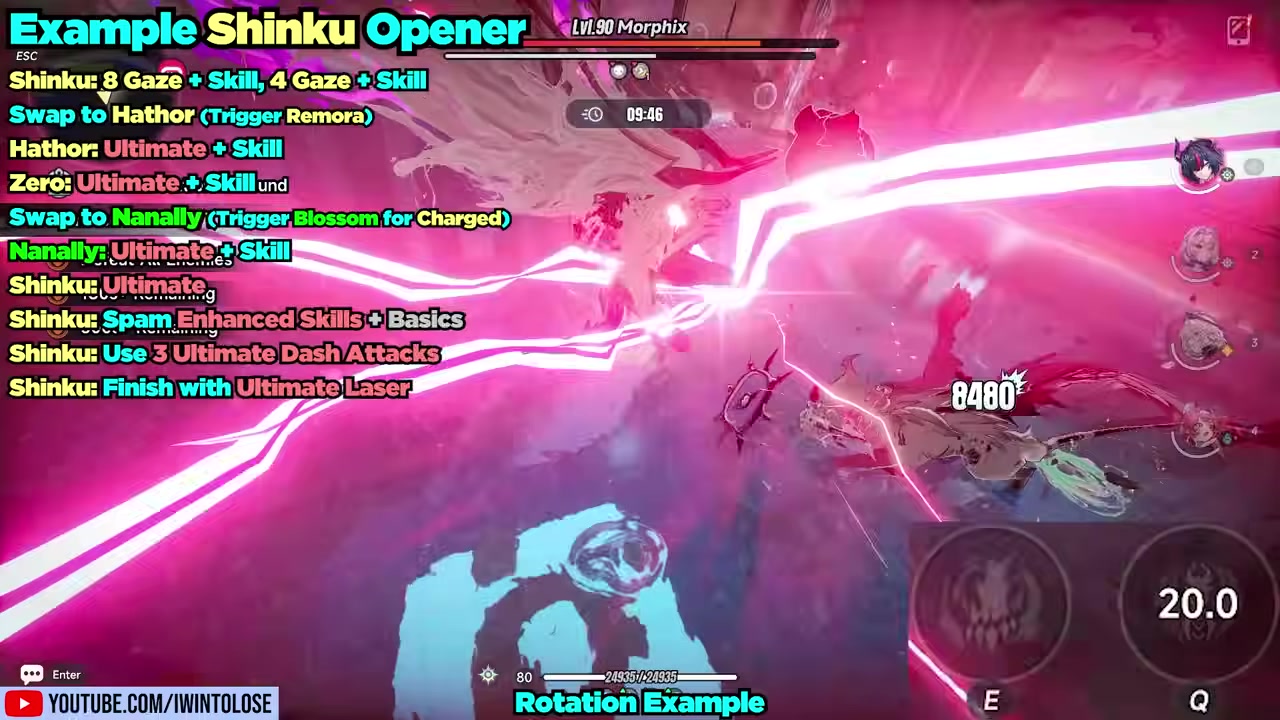
In the last couple seconds, use the three Ultimate dash attacks because they are among her highest-DPS actions.
STEP 13/13
Finish with the laser
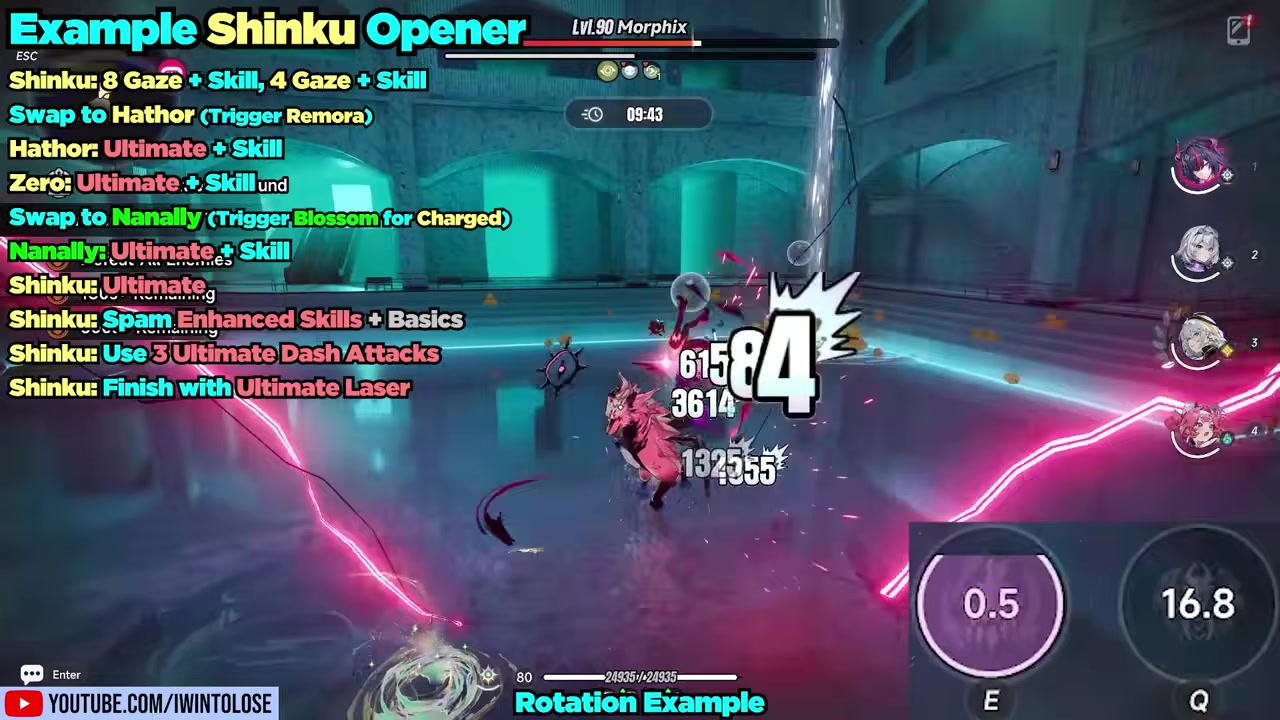
Let the Ultimate finisher fire or press the Ultimate button near the end to close the window with the laser.
Wait for 8 Gaze before starting the fight, then cash it with Shinku’s Skill before setting up Remora, Blossom, and Charge.
Video help
Module setup and stat priority
| Slot | Recommendation |
|---|---|
| Set | Lost Radiance for Cosmos DMG and DEF Ignore after Ultimate. |
| Main stats | Crit Rate, Crit DMG, ATK%, or Cosmos DMG, with the best substat piece winning. |
| Tetris layout | Use two 3-block type-three pieces plus one 2-block piece for the remaining 8 slots. |
| Type-three value | Each type-three piece gives Shinku 16% Crit DMG. |
| Substats | Crit Rate to 100%, Crit DMG, damage%, ATK%, then flat damage. |
| Crit overcap check | Bond 10, signature Arc, full Crit Rate rolls, and Hathor can push her near 103% Crit Rate. |
Lost Radiance is Shinku’s clear module set because it is built for a Cosmos DPS who spends her damage inside Ultimate windows. Its 2-piece effect gives Cosmos DMG, while the 4-piece effect adds DEF Ignore after casting Ultimate, matching the exact part of the rotation where Shinku wants her damage concentrated.
Her main stat choice is flexible because Crit Rate, Crit DMG, ATK%, and Cosmos DMG can all work if the substats are strong. In practice, Crit and damage stats should decide the piece first, while ATK% is the good fallback rather than the main goal.
Arc rankings for Shinku
| Arc | Use |
|---|---|
| Shinku’s signature Arc | Best option; built around Crit Rate, ATK, Cosmos DMG, and DEF Ignore after Ultimate. |
| Fluff of Ferocity | Battle Pass option; around 76% of signature at M1 and about 83% at M5. |
| Chamelli Society | F2P-friendly fallback; usable if you do not have premium Condensate options. |
| A Time Will Come | Four-star F2P option; serviceable, but not a high-end replacement. |
| Raging Tides | Stat-stick alternative if available and not needed by Hathor. |
| What’s Desired | Competitive off-signature option, but awkward if Chaos also wants it. |
Shinku uses Condensate Arcs, and her signature is the premium target if you have the resources. Its English name has appeared as Blushing Mirage, Through the Crimson Mirage, and Lunar Transmutation, so match it in your client by Shinku’s signature portrait and effect instead of relying on a pasted name.
Fluff of Ferocity is the cleanest paid alternative, especially at higher merges. F2P players can use Chamelli Society or A Time Will Come, but those are stopgaps while Shinku waits for stronger Crit and Cosmos scaling from her Arc slot.
Talent priority for Shinku

Level Shinku’s talents in this order: Basic Attack > Ultimate > Skill > Support Skill. The reason Basic Attack leads is that early testing ties her Gaze nuke and Charge-related extra damage to Basic Attack scaling, which makes it more important than it first looks.
There is a real priority split here because Ultimate-first is also a reasonable reading of her kit. For long-term investment, Shinku is a main DPS, so you eventually want most of her kit leveled anyway; the Basic-first path simply gives the best current order for scarce materials.
Awakenings that change Shinku
| Awakening | Effect |
|---|---|
| A1 | Improves damage by ignoring 12% of enemy DEF. |
| A2 | Improves damage by ignoring 10% of enemy resistance. |
| A3 | Gains AFK/Gaze stacks off-field and keeps stacks after swapping. |
| A4 | Raises max AFK/Gaze stacks to 16 and adds a follow-up mini nuke effect. |
| A5 | Adds stronger protection during Ultimate and some self-healing. |
| A6 | Boosts Ultimate-state damage heavily at full investment. |
| Resonance 3 | Adds +1 to normals, Skill, and Ultimate, plus a 30% damage increase. |
| Resonance 6 | Adds 10% Crit Rate and 15% DEF Ignore. |
Shinku works at A0, but her awakenings are designed to smooth out the exact part of her kit that feels awkward. A3 and A4 are the major breakpoints because they improve how she stores Gaze, how she opens fights, and how much frontloaded damage she can carry into the first rotation.
A3 lets her gain AFK/Gaze stacks off-field and prevents her from losing them when she swaps out. A4 raises the stack ceiling to 16 and adds extra impact to the Gaze nuke, making the opener much stronger. At A6, early high-investment numbers put her around double A0 damage in ideal comparisons, but that is not a universal benchmark for every account.
Team comps for Charge uptime
| Team | Use |
|---|---|
| Shinku + Hathor + Zero + Nanally | Recommended Charge team with Remora uptime, instant cycle, fast Blossom ticks, and Shinku on field. |
| Shinku + Hathor + Zero + Jiuyuan | Accessible Blossom setup; strong enough, but Charge usually ticks slower than Nanally. |
| Shinku + Hathor + Zero + Mint | Alternative Blossom slot if you lack Nanally or Jiuyuan. |
| Shinku + Skia + Zero + Blossom support | Hathor substitute; works around Remora extension, with Skia’s passive unlocked. |
| Shinku + Hathor + Chaos + Blossom support | Premium damage variant, but it does not solve Charge comfort by itself. |
| Future Roy or Iroi support slot | Possible future upgrade path for Charge consistency or Blossom utility. |
Shinku’s best teams solve one problem: Charge consistency. Charge triggers when Blossom hits a Remora-marked enemy, and Shinku wants those ticks while she is on field because they refill her super Skill gauge and feed the team energy loop.
The recommended team is Shinku + Hathor + Zero + Nanally. Hathor extends Remora duration to about 12 seconds and adds 10% Crit Rate while Remora is active. Zero gives the instant Esper cycle that makes the first rotation reliable. Nanally is valuable because her Blossom hits can happen every 1 second, letting Shinku reach far more Charge ticks than slower Blossom users.
Jiuyuan and Mint can fill the Blossom slot, but expect fewer Charge ticks. Jiuyuan can create multiple Blossom hits, but they land together often enough that Shinku usually sees roughly one Charge tick every 2 seconds, not every second. That is why Jiuyuan or Mint often means three to four super Skills, while Nanally can push Shinku to the five super Skill cap in one Ultimate.
Skia is the main Hathor substitute if you need one. His passive can extend Remora, and testing has pushed that extension as high as about 17 seconds in some setups, but his passive and signature Arc interaction is the part to check in your own client. You do not need heavy Skia investment to try it; unlocking his first passive is the important part.
Showcase results and execution mistakes
| Mistake | Fix |
|---|---|
| Skipping pre-stacks | Wait for 8 Gaze before the first hit when the chamber allows it. |
| Swapping off before cashing A0 stacks | Use Shinku’s Skill to spend Gaze before leaving the field. |
| Triggering Charge on the wrong character | Make sure Blossom hits a Remora-marked enemy while Shinku is active. |
| Overbuilding ATK | Prioritize Crit Rate, Crit DMG, Cosmos DMG, and damage% first. |
| Expecting Jiuyuan or Mint to tick every second | Plan around three to four super Skills unless using Nanally-style fast ticks. |
| Ignoring the final dash attacks | Save the last couple seconds for all three Ultimate dash attacks before the laser. |
The strongest showcased rotation with Nanally-style Charge ticks reaches five super Skills, all three Ultimate dash attacks, and the laser finisher inside one Shinku Ultimate. That is the clean version of her damage profile: Charge rapidly refills the super Skill gauge, Shinku spends enhanced Skills and basics, then the last seconds are reserved for dash attacks.
The same run also shows why Shinku can feel awkward. Retrying a chamber means waiting around 8 to 10 seconds for the first Gaze stack setup, and the second rotation may start with Shinku’s Ultimate not quite full. The upside is that Shinku’s Charge loop can top up teammate Ultimate energy, so Hathor, Zero, and the Blossom slot are usually ready to help restart the loop.
Pull recommendation for Shinku
Shinku is worth pulling if you value exploration speed and want a strong current endgame Cosmos DPS. She brings daily quality of life, a big opener, and a high ceiling when Charge is set up correctly.
Skia or delay her if you dislike setup-heavy rotations, do not want to wait for Gaze stacks, or lack Zero and reliable Charge supports. She is powerful, but her comfort depends on the team around her.
Frequently Asked Questions
Is Shinku worth pulling in Neverness to Everness?
Yes, Shinku is worth pulling for players who want top-tier exploration comfort and a strong on-field Cosmos DPS. She is less appealing if you prefer simple rotations or lack Charge supports.
What is Shinku’s best module set?
Lost Radiance is Shinku’s best module set. It supports her Cosmos damage and adds DEF Ignore after Ultimate, which lines up with her main burst window.
What is Shinku’s best Arc or weapon?
Shinku’s signature Arc is her best option. Fluff of Ferocity is the best paid alternative, while Chamelli Society and A Time Will Come are usable F2P fallbacks.
Which talent should Shinku level first?
Level Basic Attack first, then Ultimate, then Skill, then Support Skill. Basic Attack is prioritized because her Gaze nuke and Charge-related damage are tied to that scaling in current testing.
Why is Nanally good with Shinku?
Nanally is good with Shinku because her Blossom application can trigger Charge every 1 second. Faster Charge ticks refill Shinku’s super Skill gauge and help her reach up to five super Skills in one Ultimate.
More questions⤵
Can Shinku work without Zero?
Yes, Shinku can work without Zero, but the first rotation becomes much less comfortable. Zero’s instant Esper cycle is what makes Remora plus Blossom setup reliable before Shinku enters Ultimate.
How many super Skills can Shinku use during her Ultimate?
Without Charge, Shinku usually gets one to two super Skills. With Jiuyuan or Mint, she often reaches three to four. With Nanally-style fast Charge ticks, she can reach the cap of five.
Does Shinku need awakenings to be good?
No, Shinku is good at A0, but A3 and A4 make her much smoother by preserving or expanding AFK/Gaze stack play. A6 is a high-spend damage breakpoint, not a requirement.





Leave a Reply