

The best Palworld 1.0 base locations depend on the job: Hill of Beginnings is ideal for merchant farming, Sunlit Isle and Oasis Isle are standout oil bases, Mount Flopie Summit is a strong multi-resource starter, and the Sunreach and Faybreak spots carry the best late-game builds.
There is no single “best” base in Palworld — the right spot changes with what you need that hour, whether that’s a wall of oil nodes, an unraidable perch, or a cherry-blossom showcase to build around. The 1.0 release reshuffled the math too, with wave-based raids and the new Aquatic Construction Kit opening up water builds. Below are 27 locations worth claiming, sorted so you can jump straight to the one that fits your save.
- Every recommended base location at a glance
- How to pick a base spot in Palworld
- Hill of Beginnings for merchant farming
- Sunlit Isle oil farm
- Oasis Isle: the higher-level oil copy
- Mount Flopie Summit multi-resource cluster
- Faybreak Isles for Hexolite Quartz
- Sunreach Isles Soralite base
- Desolate Church early ore base
- Unraidable ore and coal plateau
- Sakurajima cherry blossom mid-game base
- Desert Plateau coal and oil base
- Circle Tower unraidable mid-game base
- Northeastern Sunreach node cluster
- Faybreak multi-biome endgame base
- Jetragon island water base on Sunreach
- Sunreach layered pools scenic base
- Faybreak Shipwreck aesthetic base
- Castle Ruins ancient build base
- World Tree ocean and water builds
- Southwest Sakurajima practical scenic base
- Mount Obsidian Anubis Statue moat base
- Volcanic Coast oil and lava base
- Rayne Tower Plains early base
- Southern Ore Field ingot base
- Western Fortress Plateau production base
- Southern Production Field breeding base
- Moonflower Oil Plateau resource base
- Scouring Eyelet island fortress
- Best bases by purpose
- Build tips for Palworld bases
- Frequently Asked Questions
Every recommended base location at a glance
| Location | Best use | Coordinates |
|---|---|---|
| Hill of Beginnings | Merchant farming | 231, -485 |
| Sunlit Isle | Three-node oil farm | 385, -461 |
| Oasis Isle | Higher-level oil farm | 885, 193 |
| Mount Flopie Summit | Quartz, iron, sulfur | 30, -48 |
| Faybreak Isles | Hexolite Quartz | -1064, -1428 |
| Sunreach Isles (Soralite) | Soralite farming | NE Sunreach island |
| Desolate Church | Early ore base | Windswept Hills |
| Unraidable plateau | Early ore/coal defense | 187, -37 |
| Sakurajima (mid-game) | Aesthetic + oil | 445, 215 |
| Desert Plateau | Coal and oil | 418, 434 |
| Circle Tower | Unraidable mid-game | -81, 194 |
| NE Sunreach cluster | Late-game production | NE Sunreach island |
| Faybreak multi-biome | Endgame quartz base | -1035, -1399 |
| Jetragon island | Scenic water base | NW of Sunreach |
| Sunreach layered pools | Scenic vertical build | -234, -482 |
| Faybreak Shipwreck | Coastal aesthetic | -1390, -1472 |
| Castle Ruins | Ancient-ruin build | -1214, -1355 |
| World Tree water base | Ocean/lake scenic | — |
| Southwest Sakurajima | Flat scenic build | -634, 196 |
| Mount Obsidian (Anubis) | Moat-defended base | -539, -639 |
| Volcanic Coast | Oil + lava aesthetic | -854, -456 |
| Rayne Tower Plains | Early safe ore base | 90, -436 |
| Southern Ore Field | Early ingot farming | 7, -515 |
| Western Fortress Plateau | Main production base | -432, -51 |
| Southern Production Field | Breeding and factories | -198, -702 |
| Moonflower Oil Plateau | Oil, coal, sulfur | -646, 270 |
| Scouring Eyelet | Island fortress | 409, -693 |
Use the table to scan, then drop into any section below for the coordinates, the resources, and the tradeoffs that decide whether a spot is worth relocating for.
How to pick a base spot in Palworld
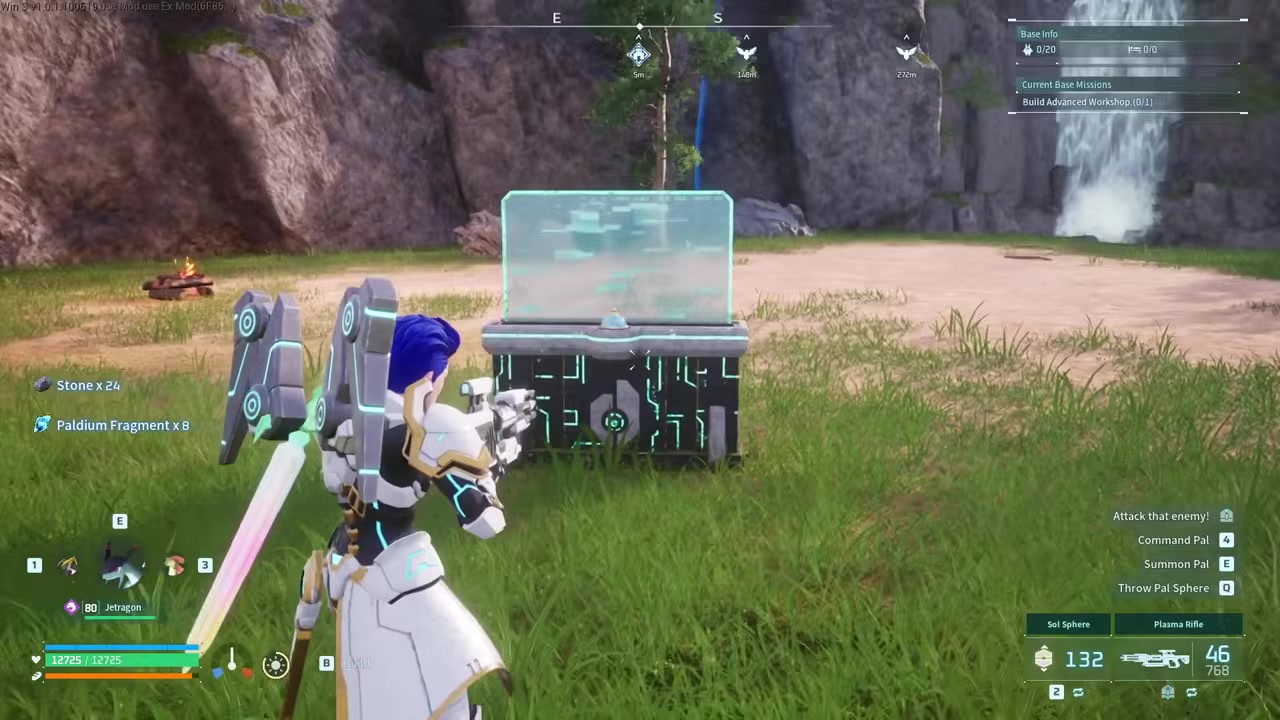
A good location comes down to a handful of factors. The biggest is node coverage: the resource nodes you care about need to sit inside the Palbox radius, so a base is only as good as the ore, oil, or quartz it actually captures. After that comes flat build space, since a steep slope forces a lot of foundation work before you can lay anything down.
Defense matters just as much now that raids are wave-based — high ground and single-approach chokepoints do more for you than raw wall count, and 1.0’s defense structures no longer burn ammo, so a well-placed perch holds itself. Round it out with fast-travel access, sensible progression timing (a starter perch is not an endgame factory), pure aesthetics, and the new water-building options that let you claim coasts and open ocean.
Place the Palbox at the center of the node cluster, not the edge — the capture radius is fixed, so centering it is the difference between catching six nodes and catching three.
Hill of Beginnings for merchant farming

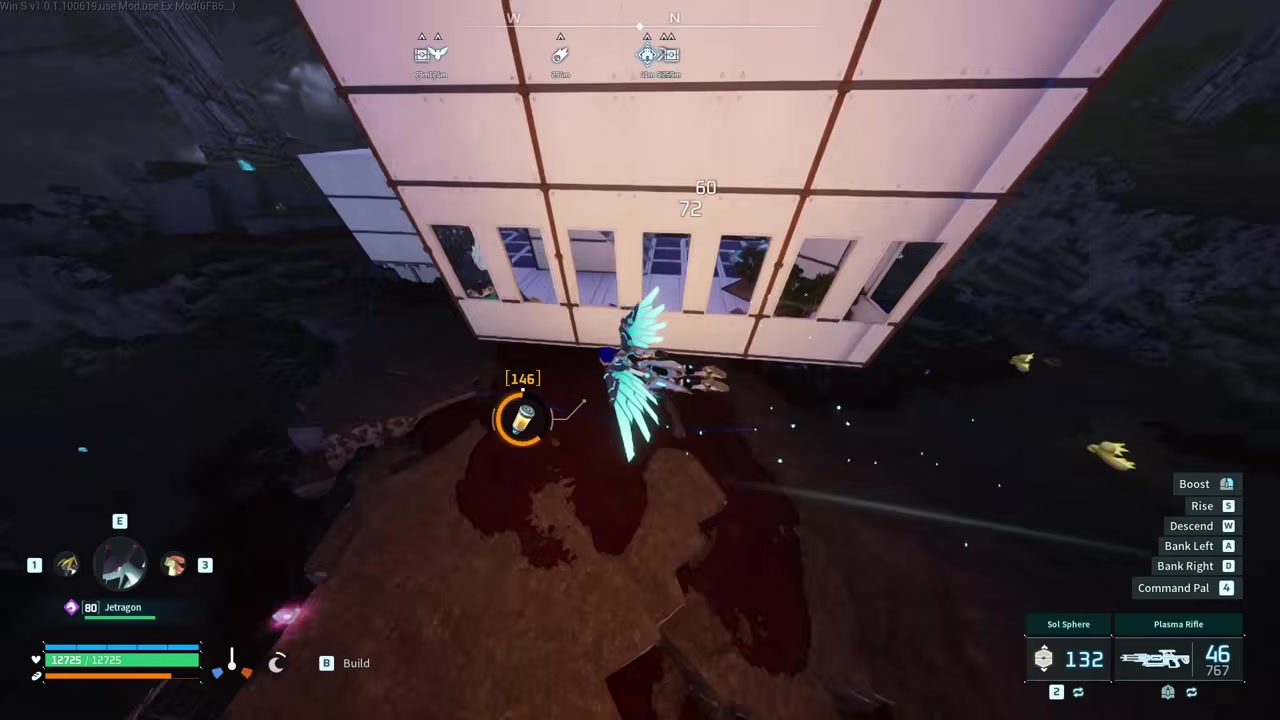
Sitting at 231, -485 on the southeastern tip of the main landmass, the Hill of Beginnings is the go-to spot for one very specific job: farming wandering merchants. Delete and replace the Palbox here and the base regenerates, which triggers a fresh visitor roughly every five minutes — and the ones you want are the legendary-tier merchants.
What makes this exact hill work is the terrain. There’s a flat shelf to build a viewing area, and the merchants spawn up the slope and come running down a clean lane toward you, so you can farm them almost endlessly without chasing anyone across broken ground. It’s a purpose base, not a home, but for merchant grinding nothing beats it.
Sunlit Isle oil farm
The Sunlit Isle at 385, -461 is one of the best oil farms in the game because it packs three oil nodes into a single base radius. Only a few spots in the world offer that, and these oasis-style islands are the cleanest of them.
It’s also genuinely nice to live on. The tropical-island setting reads well from either the higher or the lower shelf, so you can pick the elevation you prefer without giving up the oil. Function and scenery in one waypoint is a rare combo, which is why this island stays popular.
Oasis Isle: the higher-level oil copy
Out by the desert at 885, 193, Oasis Isle is effectively a carbon copy of Sunlit Isle — same three-oil-node layout, same purpose — just dropped into a higher-level region. If you’re already operating out that way and want your oil farm closer to endgame territory, this is the pick. It doesn’t do anything Sunlit Isle doesn’t; it just does it in a tougher neighborhood.
Mount Flopie Summit multi-resource cluster
| Resource | Build note |
|---|---|
| Quartz | Dense nodes just NE of the fast-travel point |
| Iron / ore | Same radius, feeds early smelting |
| Sulfur | In the cluster for gunpowder needs |
| Coal | Found around the wider summit |
Right beside the Mount Flopie Summit fast-travel point, the spot to build is just northeast of the waypoint at 30, -48. It’s an unusually dense pile of mixed nodes — the kind of cluster that lets one base cover several early needs at once, which is why it’s such a strong starter.
The catch is defense. There’s no high ground here, so raiders reach you easily, and the slope makes laying a clean base slightly awkward. Neither is a dealbreaker for an early production hub, but plan for foundation work and expect to fight for it.
Faybreak Isles for Hexolite Quartz
Southwest at the Faybreak Isles, on the tip of the cold, icy region, there’s a high-ground shelf at -1064, -1428 built around three Hexolite Quartz nodes. That’s the whole reason to be here — Hexolite Quartz is a key late-tier material, and having three nodes clustered under one Palbox turns it into a steady farm.
The elevation is a bonus, and the position touches three different biomes at once, so beyond the quartz you get easy access to the wider Faybreak region’s resources. It’s a serious spot for anyone deep enough to need Hexolite Quartz in volume.
Sunreach Isles Soralite base

Over on the Sunreach Isles, Soralite is almost impossible to get wrong — the material is scattered generously across the whole chain, with rich clusters at the northwestern point and along the island roads. If you’d rather mine on foot, running the loops here nets an absurd amount without even placing a base.
Desolate Church early ore base
The Desolate Church is a classic starter for good reason. You get the Zoe side quest here, a reliable medal merchant just inside, and a genuinely cool structure to build alongside if you want to match the vibe. Fast travel sits right next door.
The build itself goes around the back, centered in a ring of ore nodes. It’s a little tight — a cliff edge and cliff wall pinch the corridor space — so most players clear some trees, lay a few foundations on the open side, and lean the base against the church or the rock face for a bit of built-in defense. It’s open ground overall, but for early metal it’s hard to argue with.
Unraidable ore and coal plateau
For pure early-game safety, the plateau at 187, -37 is tough to beat. It sits very high up on a steep rise, so nothing can climb up to reach you — the closest thing to unraidable you’ll find this early. There’s also a neat detail: two kinds of nodes pile up here, roughly nine or ten of each, conveniently split apart.
The downsides are physical. The surface isn’t flat, so you’ll be laying foundations to build anything level, and just getting up there to establish the base in the early game is a chore. Do it once, though, and you have a defensible, resource-rich home that raids simply can’t touch.
Sakurajima cherry blossom mid-game base
Heading west, Sakurajima around 445, 215 is a mid-game pick — think roughly level 50 to 60 — that leads with looks. The whole area is wrapped in Sakura cherry-blossom trees, and it’s easy, welcoming ground to build on.
It’s not the optimal resource spot, but it isn’t just a pretty face either: there’s usable oil and a few valuable materials nearby, plus it makes a natural connecting point for the island. Any of the flat clearings here works as a base pad, so you can chase the view without giving up function.
Desert Plateau coal and oil base
Northeast in the desert, the waypoint is the Sand Dunes Entrance, but the build sits up on the plateau above it around 418, 434. It’s a relatively flat, very high perch — a little setup required, but worth it — loaded with coal, making it one of the better coal farms around, with some oil on top.
There are hardwood trees up here too, and because you’re on top of a mountain plateau the whole thing is naturally hard to raid. Good defense, good mid-game materials, and a couple of points of interest nearby make this a well-rounded mid-game claim.
Circle Tower unraidable mid-game base
If unraidable is the only thing you care about in the mid game, the Circle Tower near the Icy Weasel Hill Watchtower (just west of the desert biome, by the Abandoned Ruins) is the answer, sitting around -81, 194. Nothing is getting to you up here. The top is a flat circular platform that’s dead simple to build on — tight, so you won’t sprawl, but a circle is all you need.
The bonus is the four chest spawns on the platform, which give you a steady trickle of chest loot, plus the ring itself acts as a permanent, built-in light source. Players share striking vertical builds of this spot on Reddit, and the tight footprint actually rewards going up rather than out.
Northeastern Sunreach node cluster

For a full late-game production base, the northeastern island of Sunreach is the pick. There are strong options across the chain — the Jetragon island and a huge southern cluster both tempt — but this one wins for the same reasons its Soralite sibling does: a massive node cluster on flat, circular terrain that’s effortless to build on.
It’s the kind of spot you settle into as a main endgame base and never really leave: everything’s clustered, everything’s reachable, and the ground fights you on nothing.
Faybreak multi-biome endgame base
The alternative endgame home ties back to that Hexolite Quartz shelf on Faybreak, around -1035, -1399. It’s tucked between three Faybreak biomes at once, with the quartz sitting right there as the centerpiece and the reason to build. Well connected to the wider Faybreak region, it’s a genuine daily-driver base rather than a niche farm — pick this or the Sunreach cluster depending on which endgame biome you’d rather live in.
Jetragon island water base on Sunreach
Just northwest of Sunreach is the well-known little island with the Jetragon spawn. It’s short on practical need but long on looks, and it’s the poster child for water building: unlock and craft the Aquatic Construction Kit and you can lay foundations right out over the water anywhere along the shore. Ocean and lake bases open up from here, and this is one of the most visually stunning places to try one.
Sunreach layered pools scenic base
Elsewhere on Sunreach, around -234, -482, sit the layered pools — a run of tiered basins climbing to a waterfall that steps up and up into a final pool ringed with cherry blossom trees, all set against Sunreach’s signature light-blue water. It’s one of the prettiest spots in the game.
It’s also a challenge. The terrain is tight and broken, and building on the water here takes real effort, so the trick is to anchor your Palbox on the water and expand vertically around it rather than fighting for horizontal space. Plenty of players have made this exact spot sing, with jaw-dropping examples floating around Reddit.
Faybreak Shipwreck aesthetic base

Back at Faybreak’s southwestern blue coast, the Faybreak Shipwreck waypoint at -1390, -1472 is all about atmosphere. The coastline is dotted with multiple shipwrecks, there’s a bounty right by it and an enemy base nearby to farm, and the best build spot nestles between two wrecks under a quartz node. The blue-purple palette, the cherry blossoms, and the broken hulls make one of the coolest-looking coastal builds you can claim.
Castle Ruins ancient build base
The Castle Ruins at -1214, -1355 hand you a base structure that already exists. You’re not here for resources — you’re here to build inside and around genuine ruin walls, with a few chest spawns scattered about. The standout is a tall tower you can climb on top of and build vertically from, or use as a corner anchor for your layout.
Perched on high ground just outside the cold region, the existing walls give you real defensive value with almost no effort. If ancient-castle aesthetics are the goal, this is the spot.
World Tree ocean and water builds
The bigger idea behind the World Tree is water building in general. With the Aquatic Construction Kit you can lay foundations across pools, lakes, or the open ocean, treating water as flat, buildable ground. A base staged in front of the World Tree entrance frames one of the best backdrops in the game, and the same trick powers everything from sectioned-off floating platforms to full boat and yacht builds people are showing off across Reddit. It’s as much a scenic staging base for endgame runs as it is a showpiece.
Southwest Sakurajima practical scenic base
Sakurajima’s southwestern corner at -634, 196 is the sweet spot between looks and practicality. There’s already a structure by the tower here, and right beside it sits a flat open pad with cherry blossoms around it and the tower in the background — a clean, well-connected build site with nothing in the way of just laying foundations. If you want a base that photographs beautifully but still functions, this is arguably the best of the aesthetic-first picks.
Mount Obsidian Anubis Statue moat base
On the volcanic island’s south side, tucked into the desert stretch, Mount Obsidian at the Anubis Statue (-539, -639) is a defensive gem dressed up as a scenic one. There’s just enough room for a base on a flat circle, and the whole thing is ringed by water with a single bridge as the only approach — effectively a natural moat.
That one-entrance layout makes it very practical to defend, and the backdrop is unreal: the Anubis statue, four sandstone pillars fading to a darker stone, and a volcano behind it all. It delivers on both visuals and function in equal measure.
Volcanic Coast oil and lava base
On the west side of the volcanic island at -854, -456, the Volcanic Coast mixes a lava-and-skeletons aesthetic with real utility: three oil nodes make it a genuinely strong oil farm, not just a mood piece. Clear ocean sits right behind it with a few fishing spawns, and there’s fast access to a nearby barrier tower and dungeon spawns. Lean into the lava for a dark-tower build or just run it as an oil base — it’s a popular claim either way.
Rayne Tower Plains early base
Around 90, -436, the Rayne Tower Plains make a safe early home near both ore and a fast-travel point. It’s the kind of low-friction starter you can settle quickly while you find your feet, with enough ore on hand to keep early smelting fed.
Southern Ore Field ingot base
The Southern Ore Field at 7, -515 is a focused early pick built around one thing: dense ore. If your bottleneck in the opening hours is ingots, plant a base in this cluster and let the nodes do the work while you push progression elsewhere.
Western Fortress Plateau production base
For a big, defensible main base, the Western Fortress Plateau around -432, -51 gives you space and safety in one plot. Its size makes it a strong home for a full production setup, and the plateau shape does a lot of the defensive heavy lifting on its own.
Southern Production Field breeding base
If you want room for breeding pens, farm plots, and factory lines all in one place, the Southern Production Field around -198, -702 offers the open, flat footprint to spread out. It’s less about a single resource and more about having the space to run several production systems side by side.
Moonflower Oil Plateau resource base
The Moonflower Oil Plateau around -646, 270 bundles three high-value materials in one radius: crude oil, coal, and sulfur. That mix makes it a tidy resource hub if you’d rather consolidate those three into a single farming base than run separate stops for each.
Scouring Eyelet island fortress
Out at 409, -693, the Scouring Eyelet is an island fortress pick — the appeal is controlled approaches that funnel any threat, making it both a showcase build and a naturally defensible one. If the fantasy is a sea-cut stronghold with limited ways in, this is the spot to claim.
Best bases by purpose
| Need | Best pick |
|---|---|
| First base | Mount Flopie Summit |
| Ore and coal | 187, -37 |
| Oil | Sunlit Isle |
| Hexolite Quartz | Faybreak Isles (-1064, -1428) |
| Soralite | Northeastern Sunreach Isles |
| Unraidable defense | Circle Tower |
| Scenic water base | Jetragon island / World Tree |
| Main production | Western Fortress Plateau |
If you don’t want to read all 27, here’s the short version — the fastest match for the need you actually have right now.
Build tips for Palworld bases

Wherever you settle, a few habits make the base pay off. Before you commit, drop the Palbox and test Pal pathing — walk a worker through the layout, because a Pal that can’t reach a node or a workbench quietly kills your production. On any slope, lay foundations first to get a level surface instead of fighting the terrain later.
For defense, plan around the wave-based raids: elevation and a single chokepoint approach do more than stacking walls, since attackers path toward the easiest ground entry. And when you’re building over coasts or open ocean, the Aquatic Construction Kit is the unlock that makes it possible — craft it before you pick a water spot, not after.
Related guides
Frequently Asked Questions
What is the best first base location in Palworld?
What is the best oil base location in Palworld?
Where should I build for Quartz or Hexolite Quartz?
What is the most raid-safe base location?
Can you build a base on water in Palworld?
More questions⤵
Do chest spawns stay after placing a Palbox at the Circle Tower?
Video help






Leave a Reply