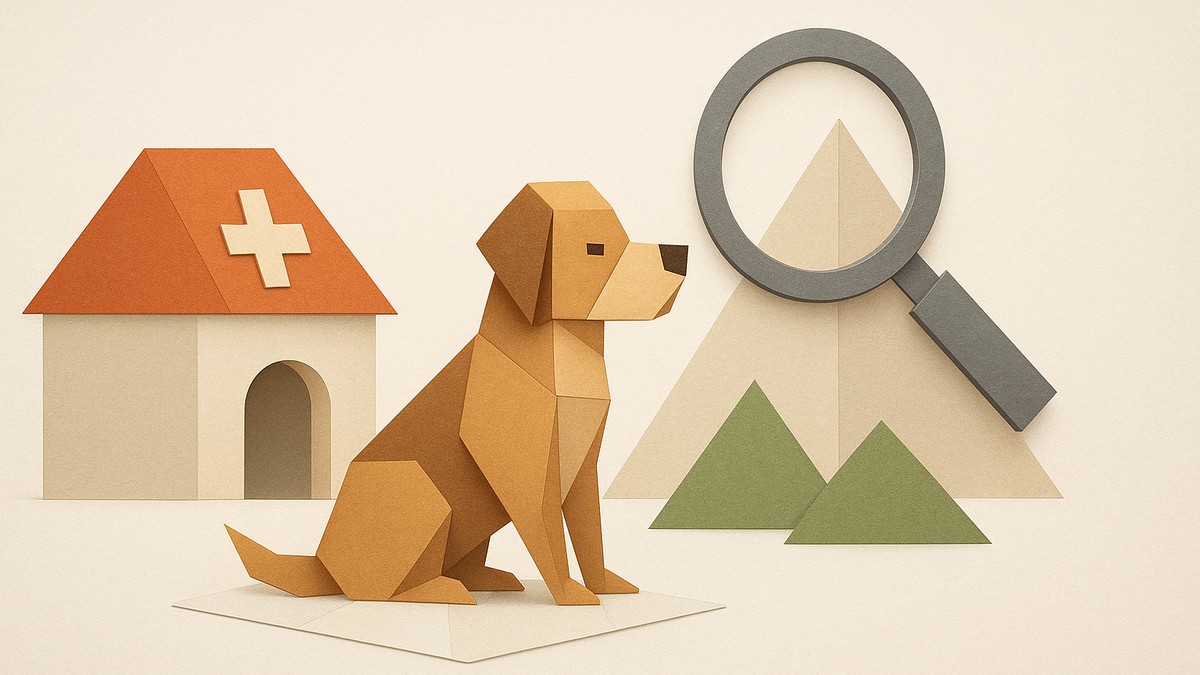
Animal Hospital has no official separate “Secret Anomalies” category, so treat the term as covering the hidden out-of-map anomaly assets seen through glitches plus the harder-to-spot patient and hazard anomalies you catch through photos, CCTV, and hospital events.
When players hunt for “secret” anomalies in Animal Hospital, they are usually chasing two very different things at once: a stash of finished-but-unused anomaly models sitting outside the playable map, and the genuinely tricky in-game anomalies that only give themselves away on a developed photo or a CCTV feed. This guide splits those apart so you know which ones you can actually act on during a night shift and which are just curiosities glimpsed through a glitch. Everything below is grouped by where you’ll run into it — behind the walls, at the reception desk, or roaming the wards.
What “secret anomalies” actually means here

There is no confirmed in-game tab or tag called “Secret Anomalies” — the phrase is community shorthand, not an official category. Players attach it to two groups. The first is the pile of hidden models you can only reach by glitching outside the map, most of which never appear in a normal round. The second is the subset of real, playable anomalies that count as “secret” only because they’re subtle: the tells hide inside a photo or a camera feed instead of showing up as an obvious extra limb.
So when someone asks for “all the secret anomalies,” the honest answer is that you’re really looking at hidden out-of-map assets, plus the quieter patient and hazard anomalies that trip people up. The rest of this guide covers all three.
| Hidden find | Location | What appears |
|---|---|---|
| Anomaly Dr. Harlow | Lobby hospital window | A corrupted Dr. Harlow that turns its head and tracks wherever your camera points |
| Character and class staging area | Out-of-map holding zone | Rows of anomalies and classes — secret agent, security, intern, paramedic — that teleport in when you select them |
| Broken baby doll button | Out-of-map | A button that fires an extremely loud jumpscare sound when pressed |
| Slime monster | Out-of-map | An unused slime creature not seen in normal play |
| Padded-wall anomaly | Sealed padded room | A scary figure inside a padded cell |
| Smiley and TV-image wall | Far side of the map | A smiley face and what look like pictures of a TV edge |
| Clown anomaly | Out-of-map | A standalone clown figure |
| Rat Two and Rattina entities | Out-of-map | Two rat-like entities tied to the Ratthew/Rattina lore |
| Animal coin logo decals | Out-of-map | Template decals matching the shop’s animal coin logo |
| Jumpscare masks | Out-of-map staging | A set of jumpscare masks |
| Floating newspaper | Out-of-map | A single unreadable newspaper hanging in the air |
| Hospital tower interior | Inside the tower and roof | A room of chairs and a “HOSPITAL” roof sign, otherwise empty |
You can clip outside the map, and once you’re through the wall there’s a surprising amount of finished content staged out there. Most of it looks fully built but isn’t part of a normal shift — it may be unused, cut, or held back for a future update, and the game gives no confirmation either way, so don’t read any of it as a promised release. Treat this section as a sightseeing list, not a set of mechanics you can trigger in a real round.
A few notes on the odd ones. The class staging area is just the machinery behind the class picker — choose paramedic or secret agent and that model teleports into the slot, which is why it looks like a lineup of “secret classes.” The animal coin decals match the logo you see in the shop, so they read as leftover template art rather than anomalies. And two of the caption-based names here — the padded-wall figure and Rat Two — come from rough audio and may not be their real in-game names, so don’t take that exact spelling as official.
Patient anomalies that hide in photos and CCTV
| Anomaly | How to spot it |
|---|---|
| Three Eyes | An extra eye on the patient at the desk |
| Hollow Face / Hollow Eyes | Empty or missing facial features |
| Human Teeth | Human teeth inside an animal patient |
| Sharp Teeth / distorted jaw | Jagged teeth or a warped jawline |
| Twitching / limb spasms | Jerky, unnatural twitching at reception |
| Limb stretching / Unnatural Body | Overextended or wrongly proportioned limbs, often clearest on camera |
| Different Ears | Ears that don’t match the animal |
| Different Eyes | Mismatched or wrong eyes |
| Incorrect Photo | The developed photo doesn’t match the animal in front of you |
| Static Photo | The photo develops as static or noise |
| Censored / JPEG Eyes | Pixelated or censored eyes that are easy to miss |
| Camera Watcher / Staring at the Camera | The patient stares straight into the CCTV |
| Shadow / Void patient | The patient shows up as a shadow or void body on CCTV |
| Skinwalker at reception | The “patient” at the desk is a Skinwalker |
| Photo Evidence mismatch | Looks completely normal in person but corrupted in the photo |
These are the ones players call secret because a single glance won’t catch them. Group your checks by where the tell shows up. Direct-visual anomalies — Three Eyes, Hollow Face, Human Teeth, Sharp Teeth, twitching — you catch by actually looking at the patient before you stamp them. CCTV-only anomalies — Camera Watcher, Void bodies, Unnatural Body, a patient turning to shadow, a Skinwalker — hide until you pull up the Lobby/Check-In cameras while the photo develops. And photo-only anomalies — Incorrect Photo, Static Photo, Censored Eyes, and any broad Photo Evidence mismatch — only surface once the picture finishes developing.
The trap is trusting one view. A Photo Evidence patient will look totally fine at the desk and only betray itself in the developed shot, so never admit a patient off their in-person model alone. Run all three checks — eyes on the patient, eyes on the camera, eyes on the photo — before you decide.
Restock your taser and coffee at reception every time they recharge — both drop out of your inventory after use and must be manually added back, and being caught empty-handed is what gets players killed by roaming threats like Skinwalkers.
Roaming hazard anomalies that hunt you
| Hazard | What to do |
|---|---|
| Camera Anomaly / Camera Figure | The camera breaks and zooms toward a monster — press Exit in time, then fix the camera |
| Skinwalker | Tasers it; keep your taser restocked so you’re never caught empty |
| Flesh Ceiling | Stay clear of the affected room and keep moving |
| Transluscent Man | Break line of sight and hold distance |
| Monster Under the Bed / Bed Monster | Don’t linger near the bed |
| The Stalker | Keep moving and avoid getting cornered |
| Demon cat jumpscare | Brace for the scare and keep your composure |
| Death Ritual | Leave the area rather than staying to watch |
| Head Knocker / Head Banger | Move away from the source of the noise |
| Tendril Surgery / Surgery Monster | Stay out of the surgery room while it’s active |
| Hiders | Search them out carefully |
| Mass of Eyes | Break off and keep your distance |
| Slime | Avoid contact |
| Fire | Steer clear |
Hazard anomalies are a separate problem from the patients you screen at the desk. These aren’t people to admit or reject — they’re threats that appear in wards, corridors, and treatment rooms and can kill you or an animal if you ignore them. Your core tools are the same across most of them: the taser to fend them off (tasing an anomaly also nudges your sanity back up) and coffee to move fast enough to respond. A few have a specific response worth knowing.
The Camera Anomaly is the one with the cleanest counter: when a feed starts breaking up and creeping toward something, exit it before the zoom finishes to avoid the sanity hit, then repair the camera. For most of the rest, the priority is simple — don’t get cornered, keep the taser handy, and don’t let a threat sit unhandled while you deal with the front desk.
Staying alive while anomaly hunting
Two resources decide most runs: your gear and your sanity. Both your taser and your coffee have to be manually re-added to your inventory after they recharge — they don’t come back on their own, and forgetting is the single most common way players get caught flat-footed. Make restocking at reception a reflex between patients.
Watcher your sanity closely, because hitting 0 is the fail condition. A big drain comes from anomalous photos: looking at one has a chance to take 10 sanity off anyone who sees it, though simply leaving the photo face-up on the counter won’t lower it. Tasing an anomaly gives back +2 sanity, so staying aggressive with threats also keeps you sane. Exact cooldown times, item prices, damage values, and spawn timers aren’t pinned down and can shift between updates, so treat those as approximate.
Two mistakes to avoid: never leave a patient you suspect is anomalous sitting unresolved, and if you think you’ve treated everyone but the shift summary won’t appear, don’t assume the round is bugged — that’s usually the game telling you one remaining patient is an anomaly you haven’t dealt with.
Where to go next in Animal Hospital
If you’re building a run around all this, a few neighboring topics tend to come up next. A best classes tier list helps you pick a role that suits how you play the night shift, and there’s a dedicated method for getting rid of the ghost when it shows. On the lore side, the Ratthew, Rattina, and the Key events tie together the rat-related content you saw staged out of bounds. And for the long game, look into AFK farming currency safely and sharpening your camera-anomaly recognition for the harder nights.
Frequently Asked Questions
Does Animal Hospital have official Secret Anomalies?
No — there’s no separate official category called “Secret Anomalies.” It’s a community label players use for two things: the hidden out-of-map models you reach through a glitch, and the subtler in-game anomalies that only reveal themselves on a photo or CCTV feed rather than as an obvious body change.
How do you reject an anomalous patient?
Once you’ve confirmed an anomaly, press the reception desk Shutters button to reject them — do not check them in or treat them. Confirm first using the patient’s model, the CCTV feed, and the developed photo, since some anomalies only appear in one of those three views.
Do the out-of-map anomaly models mean a future update is confirmed?
Not necessarily. The out-of-map assets — the baby doll, slime monster, padded-wall figure, clown, and the rat-like entities — look fully built, but there’s no confirmation of whether they’re unused, removed, or planned for a future update. Enjoy them as curiosities and don’t treat their existence as a promised release.
Why is the shift summary not appearing after treating patients?
If you think every patient is handled but the shift summary won’t show, the round almost certainly isn’t bugged — one remaining patient is likely an anomaly you haven’t rejected yet. Go back through your intake and re-check anyone you admitted quickly.
What happens when sanity reaches 0?
Sanity hitting 0 is the fail condition for the shift. Anomalous photos can knock off 10 sanity from anyone who looks at one, while tasing an anomaly restores +2, so managing threats and avoiding unnecessary looks at bad photos both keep you in the game.
More questions⤵
Are Ratthew, Rat Two, and Rattina part of the same lore?
Eyes — Rattina is tied to the same rat-themed storyline as Ratthew and the Key events, and the two rat-like entities staged outside the map belong to that thread. Note that “Rat Two” comes from rough audio and may be an imperfect rendering of a related name, so treat that exact spelling loosely.
Video help


Leave a Reply