Communication has been the key driving force behind almost all forms of technology we’ve built and evolved over the years. From putting satellites into space for global connectivity, to create mobile devices that are capable of weaving the entire social media network, it is more than just the power of texting that keeps us connected to each other. Google has been a large part of this, and when it developed Gboard for mobile devices with more than 100 languages, it was a real breakthrough.
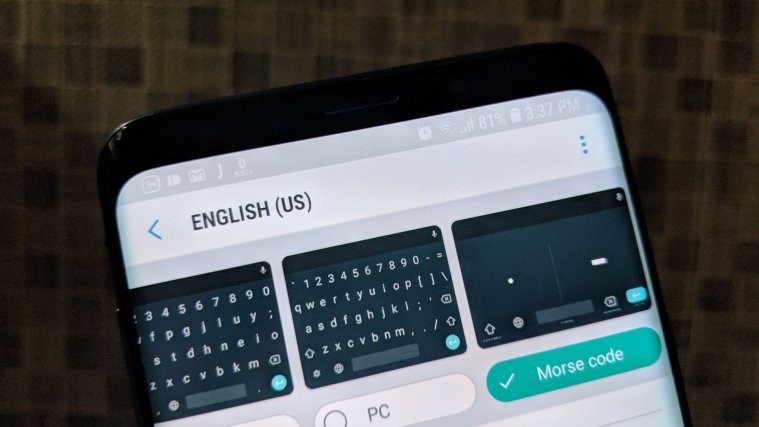
However, now the tech company is going back to the roots of communication, reviving a form of communication that has been outdated for decades now. Based on the latest beta version of the Gboard app — one of the best Android keyboard apps — you now get the Morse Code keyboard built in, which is designed to help people with special needs communicate is newer ways.
The feature is inspired by developer Tania Finlayson, who created a way to type in Morse Code using head movement. Whether you know someone who could actually use Morse Code to communicate better, or simply want to learn how to do it yourself, you can do it right now!
Related: 7 Best Keyboard apps for Android that every texting addict needs
Step 1: Sign up for the beta program
Although Google has already announced that Morse Code will be a part of Gboard in the upcoming updates, there feature isn’t readily available yet. To enable Morse Code keyboard on your Android device with Gboard, you first need to enroll in the beta program.

- Head over to the Google Play Store app on your Android device.
- Use the Search menu to find Gboard – the Google Keyboard.
- Scroll all the way down to find the card that reads “Become a beta tester”.
- Press the I’m In button and then confirm your action by pressing Join.
- It should take a couple of minutes for the process to complete, after which you will see an Update available for the Gboard app, so go ahead and install it.
Step 2: Enabling Morse Code from the Settings
Now that you have the Gboard beta app installed and running, you will be able to see the Morse Code keyboard in the Settings. However, we had to reboot the device once before being able to see the Morse Code keyboard feature pop up, so we recommend you do the same.

- Head over to the Settings app on your Android device.
- Scroll down to find Languages & Input and then tap on the Virtual keyboard
- Select Gboard – Languages and then tap on the default language you have set, which in our case is English (US).
- On the top, scroll towards the right side of the screen until you see Morse code and then select it.
- Press the Done button to confirm your action and successfully add the Mode Code keyboard.
Step 3: Using the Morse Code Keyboard
Once you have the Morse Code keyboard selected and enabled, you will be able to make it pop up just as you would be able to use a secondary language keyboard.

- Open any field where you’d like to type to bring up the Gboard keyboard.
- Press the “Globe” icon to make the Morse Code keyboard appear.
- Using the “dashes” the “spaces” and the “dots”, begin typing the letters you want.
Albeit you’ll need some form of practice to start writing in Morse Code, but Google’s predictive typing helps not only find words but also highlights how you can write them in Morse Code. There’s a lot more you can do with Morse Code on Android, and Google has created an entire Hello Morse experiment to help you find out more.
Are you using Google’s Gboard Morse Code keyboard just for the fun of learning, or are you actually putting it to good use in helping someone communicate better? We’d be glad to know in the comments section down below.


I’ve been using a Morse code app as the only means of text entry on my android devices for several years. As an amateur radio operator I do this to maintain my code skills. Good to see a native app now available from Google. It should be a great help especially for those who are challenged physically.