What to know
- To add custom instructions when using the desktop web version of ChatGPT, click the 3-dot(
) icon beside your email id > Custom instructions > OK. You can then add your custom instructions in the dedicated text box at the top.
- You can also use ‘custom instructions’ in the ChatGPT app for iPhone. To do so, head to the 3-dot(
) icon > Settings > Custom Instructions. You can then type in your custom instructions in the dedicated text box.
- These instructions apply across sessions and chats, serving as ChatGPT’s memory and, dare we say, a personality that informs and colors its responses.
- ChatGPT’s response style can be molded with custom instructions to be whatever you wish.
Everyone uses ChatGPT differently. So why should ChatGPT not address you or conform to your preferences across all its chats with you? Well, starting now, it will.
Thanks to a new feature called ‘custom instructions’, users will get better control over how ChatGPT responds to them across conversations, remembers who they are, and why they’re using ChatGPT. Here’s everything you need to know to set custom instructions to ChatGPT.
What are ‘custom instructions’ on ChatGPT?
‘Custom instructions’ is a new feature that’s available to all ChatGPT users. If the feature isn’t available for you yet, we recommend you wait a day or two. ChatGPt is still rolling out this feature to everyone, and it could be that the feature is yet to be released in your region.
Earlier, if ChatGPT was given a set of instructions on how to behave or reply, even when the prompt was detailed and clear, it seemed to reset after a few minutes so that one had to remind it to ‘stay in character’ again, which was a frustrating but expected limit of GPT-3. The instructions also never carried over to a new chat.
But now, users can, by sharing a bit of information that they think ChatGPT should know about them, and how it should respond to their prompts, they don’t just unlock a memory but also a style.
Designed to save time and effort, these custom instructions are applied across all future chats, so you don’t have to give ChatGPT the same instructions over and over again, such as “Explain to me like I’m in 10th grade” if you’re a 10th-grade student, say, or tell it about your work so it can help you with that.
With custom instructions, ChatGPT will not only ‘stay in character’ throughout your chat and your sessions and save time but also converse with you depending on how you want it to reply. This is an important step towards making ChatGPT a truly personal AI chatbot.
How to set custom instructions on ChatGPT
You can enable and use custom instructions whether using the desktop web version of ChatGPT or the iOS app. Follow either section below, depending on your current device, to help you along with the process.
On iOS
Here’s how you can add custom instructions on the ChatGPT iPhone app.
Open the ChatGPT app on your iPhone using the app icon.
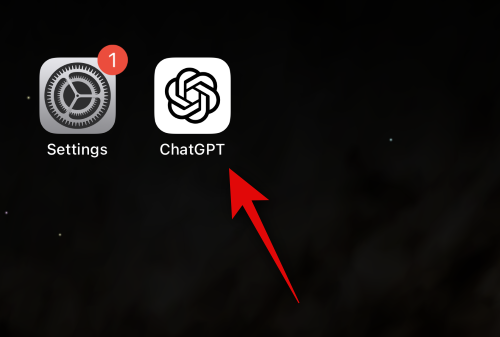
Now tap the 3-dot() icon in the top right corner.
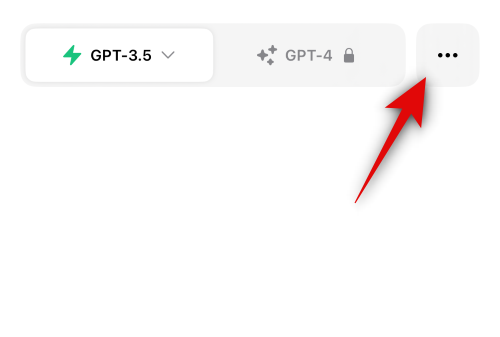
Tap Settings.

Now tap Custom Instructions.

Ensure the toggle for Custom Instructions is enabled at the top.
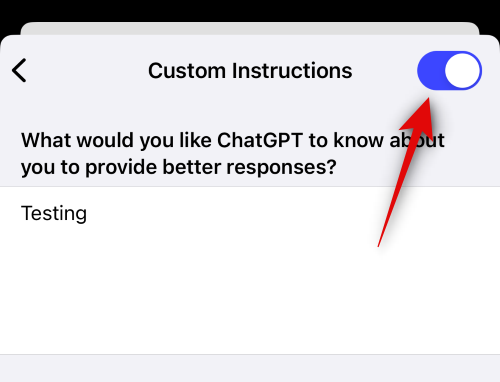
You can now add your custom instructions. Start by entering your preferred prompt for What would you like ChatGPT to know about you to provide better responses? Here you should add details about yourself, your work timings, work scenario, job, and more to help ChatGPT better understand your requirements and respond to your future prompts accordingly. Tap on the text box under, What would you like ChatGPT to know about you to provide better responses? to enter your preferred prompt.

Now type in the preferred information you wish to provide in the dedicated text box.

If you’re struggling, you can tap Show tips at the bottom of the text box or above your keyboard to view a few tips to help you along with the process.

Tap Save in the top right corner once you’re done.
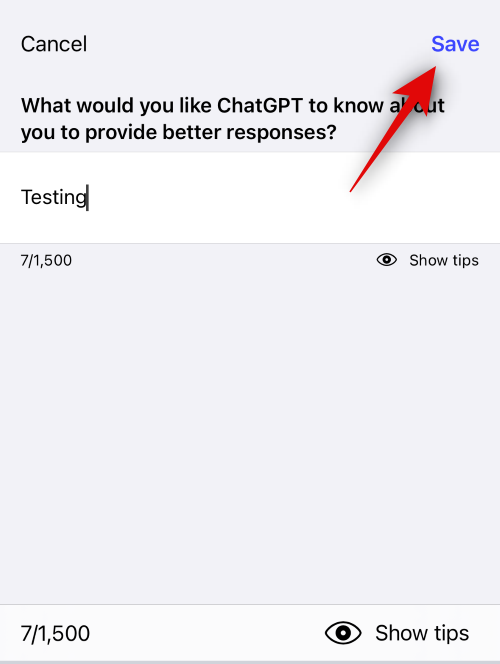
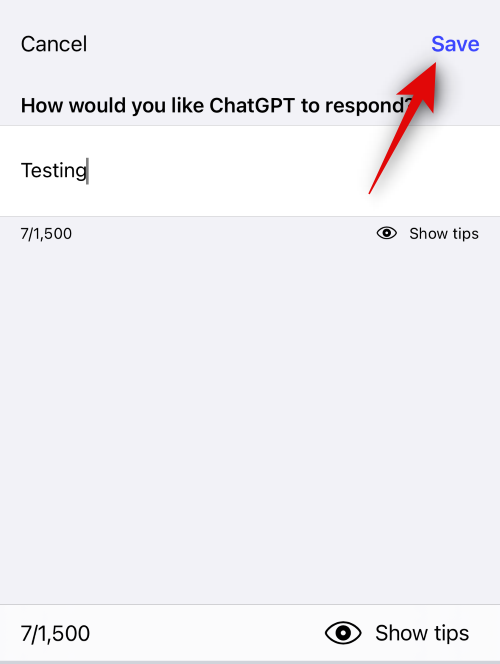
Next, we can add your preferred prompt for How would you like ChatGPT to respond? Here you should add your prompt response requirements for ChatGPT. This can be things like language to be used, length of responses, how complicated the responses should be, the tone you prefer, and more. Tap the text box under How would you like ChatGPT to respond? to add your preferred requirements.

Tap the text box and type in your preferred requirements.

You can tap Show tips if you need some help adding your requirements.

Once you’re done, tap Save.
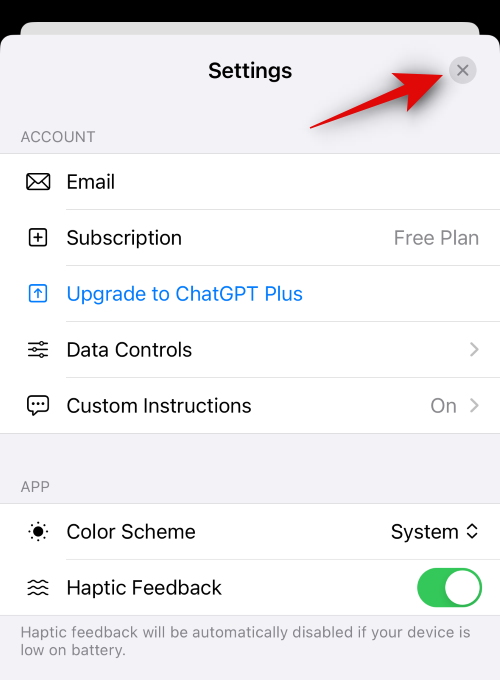
Tap the < icon in the top left corner.

Tap the X to close ChatGPT settings.
You can now use a random prompt to test your custom instructions. All future responses should align with your custom instructions without any issues.

And that’s how you can add and use custom instructions in the ChatGPT iOS app.
On PC (on ChatGPT website)
Visit chat.openai.com and make sure you are logged in. Next, click on the 3-dot() icon in the bottom left corner next to your username.
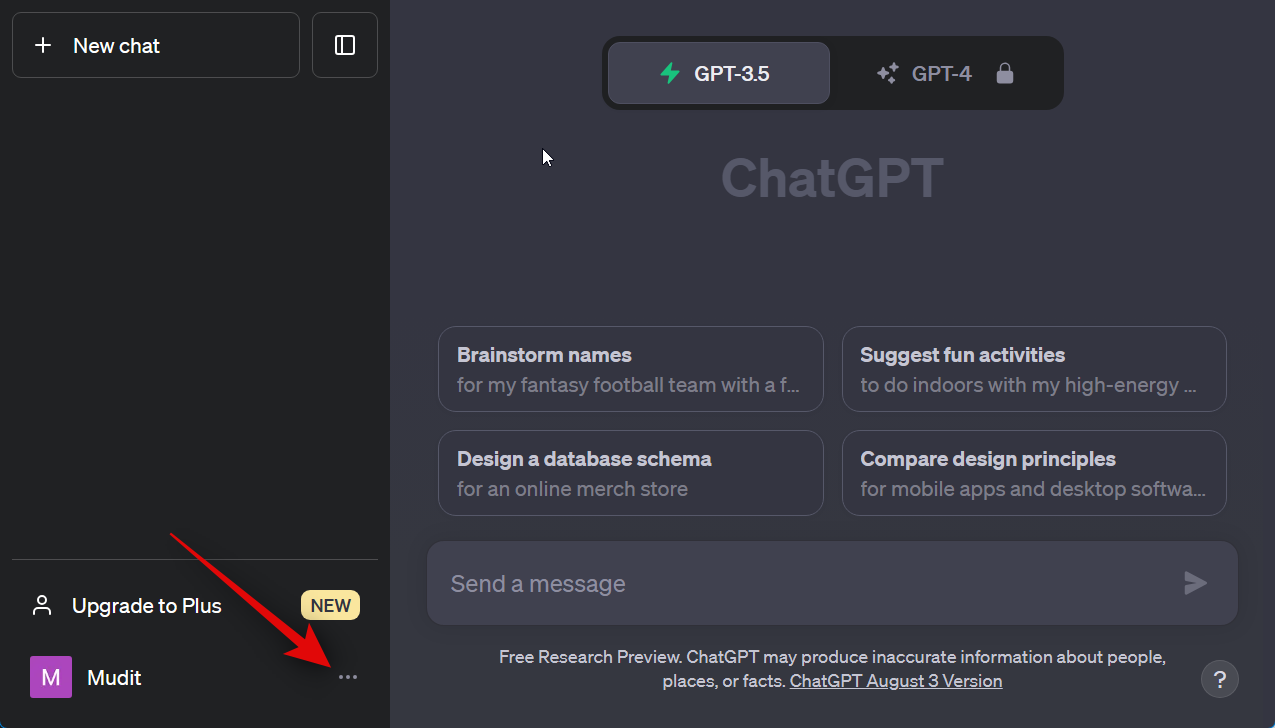
Select Custom Instructions.
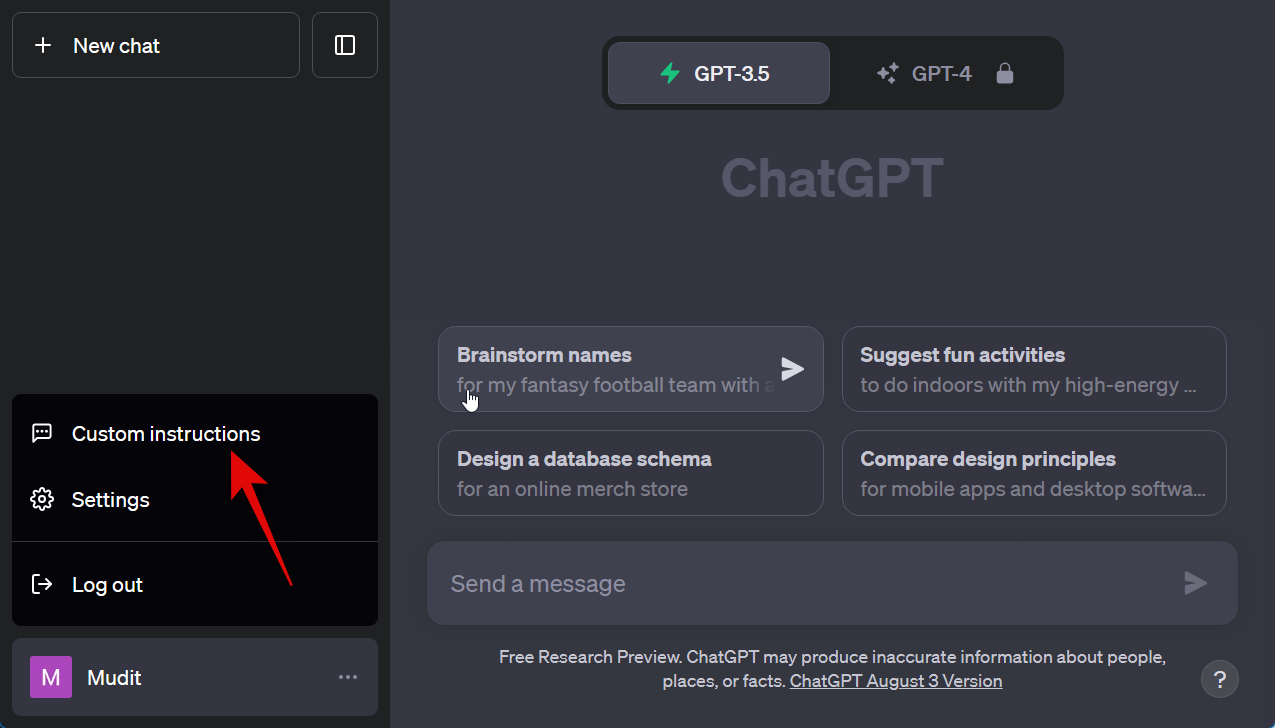
Next, click OK.

Here, you will see two question boxes. In the first one, you are asked to provide information about yourself, such as where you are based, your work, hobbies, passions, etc.
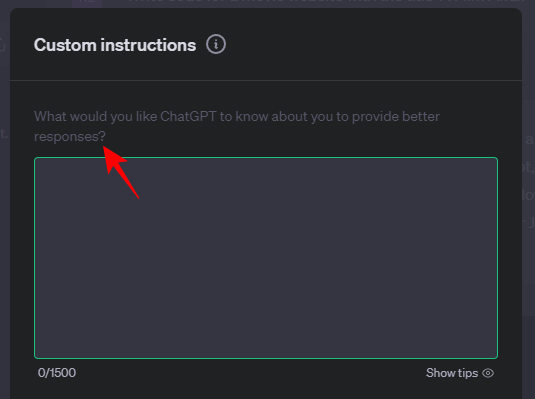
If you’re unsure where to begin, click the Show tips button at the bottom right of the box.

Take these suggestions into consideration when thinking about what to share.
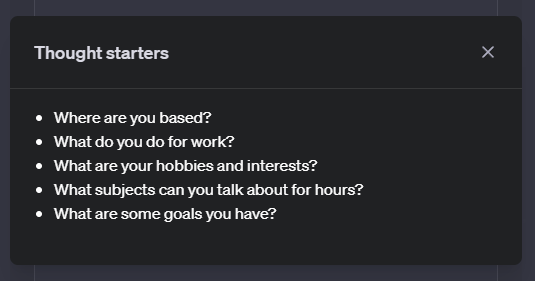
And then give it some basic information about yourself.

In the second box, provide instructions to ChatGPT on how it should respond to you, what the style and the length should be, etc.

Click on the ‘Show tips’ button to get some ideas.

Here are some questions you can start to answer.

Then type the kind of responses you want from ChatGPT.

Once done, click on Save.

Custom instructions work with both GPT-3.5 as well as GPT-4. For this guide, let’s take a look at GPT-4.
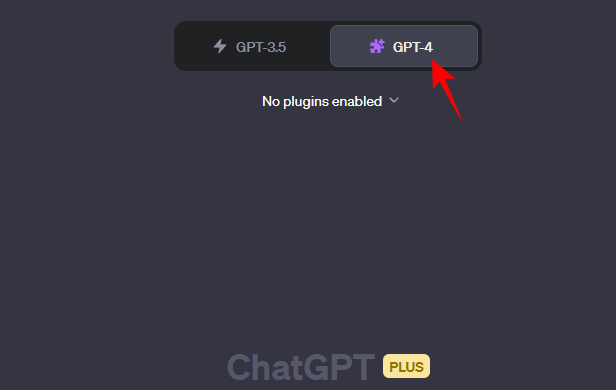
You’re now ready to start chatting with ChatGPT using your custom instructions. You should see the difference right away.

You can try changing the custom instructions by selecting ‘Custom instructions’ from the menu at the bottom left and playing around with them till you find the exact way you want to mold its responses.

Personalize ChatGPT with custom instructions: What can you do with it?
As shown above, these custom instructions can be as creative or uncanny as you want, and that will serve as ChatGPT’s tone of response and style. Depending on the details of your instructions, there are a number of conversation styles that can be experimented with.
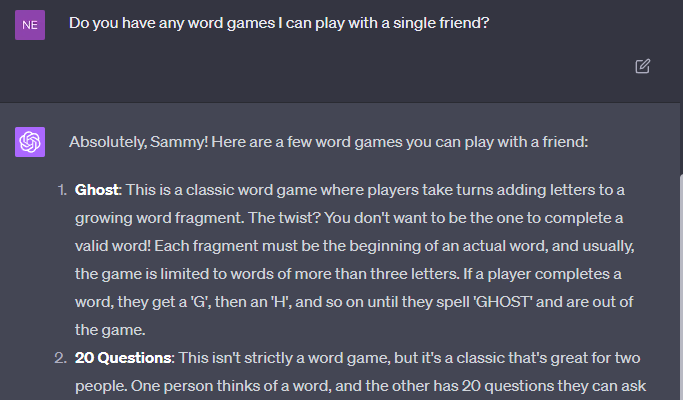
Regardless of one’s field of work or interest, this personalization is bound to come in handy. Anyone can curate instructions based on how they want ChatGPT to sound, and sharing those bits of knowledge with ChatGPT will help it to ‘stay in character’.

For coders, especially, specifying the programming languages they’re interested in so ChatGPT generates code only in those languages without having to add that in the prompt is an easy sell. Or, one could simply turn ChatGPT into a childhood friend to hang out with and have a light-hearted chat.
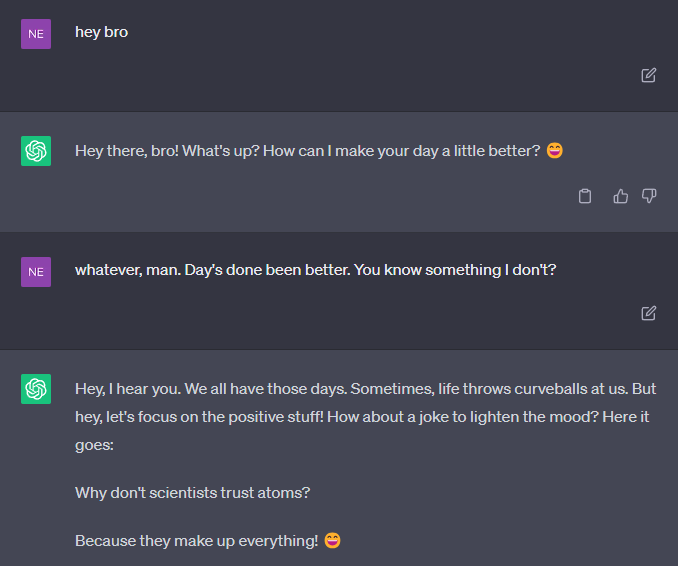
The more information you provide about the things that interest you (and for which reason you use ChatGPT), like coding, cooking, music, learning, etc., the more you’ll be giving ChatGPT fodder for what topics it will interact with you. And the more instructions you give to form its responses, the more precise you can be with how you want to personalize your chatbot.
Is your data safe with ChatGPT?
All this also means that OpenAI will use the information that you provide to improve the model further, as always. If you’re not comfortable with your data being used by OpenAI, don’t provide any sensitive information that can get you in trouble or compromise your security in any other way. But if you don’t mind sharing a little bit of yourself to customize and personalize ChatGPT, then go ahead and create for yourself your very own personalized AI chatbot.
Providing your own set of instructional memory to ChatGPT not only saves a good chunk of time but is also a great step ahead for the control it now gives users to make ChatGPT whatever they wish of it. We hope this guide helped you with the same. Until next time!


