What to know
- Windows Terminal (Canary) lets you access ChatGPT and other AI services directly within the app.
- Click on the down arrow next to the new tab option, select Terminal Chat and “Set up AI provider”. Select the AI provider, enter the API key, click Store, and Save.
- Terminal Chat is context-aware so you can get assistance for coding and terminal commands. It also lets you copy recommended commands and export the message history as a text file.
AI integration into Windows has taken another a huge leap forward. With the latest version of the Terminal app (Canary build), Microsoft now lets you chat with AI chatbots directly from the terminal environment.
The new feature of the Terminal app lets you leverage one of three AI providers – OpenAI, GitHub Copilot, and Azure OpenAI – with an API. Once set, you can then access the chatbot and get context-specific assistance for things like coding and terminal-related commands.
Here’s everything you need to know to get started with using AI chatbots in the Windows Terminal app.
How to access ChatGPT, GitHub Copilot, or Azure OpenAI from Windows Terminal
Take note of the pre-requisites before diving into the guide.
Pre-requisites
Firstly, Terminal Chat is an experimental feature that is currently only available on the Terminal app’s latest Canary version. To access it, download and install it from its GitHub page.
Secondly, you will need the API key for the AI service provider you’re intending to use.
- For OpenAI, you can create an API from here.
- For Azure OpenAI, create an API from here.
- For GitHub Copilot, you’ll need an active GitHub Copilot subscription that you can get from here.
Guide
- Once you’ve installed the Terminal (Canary) app, launch it.
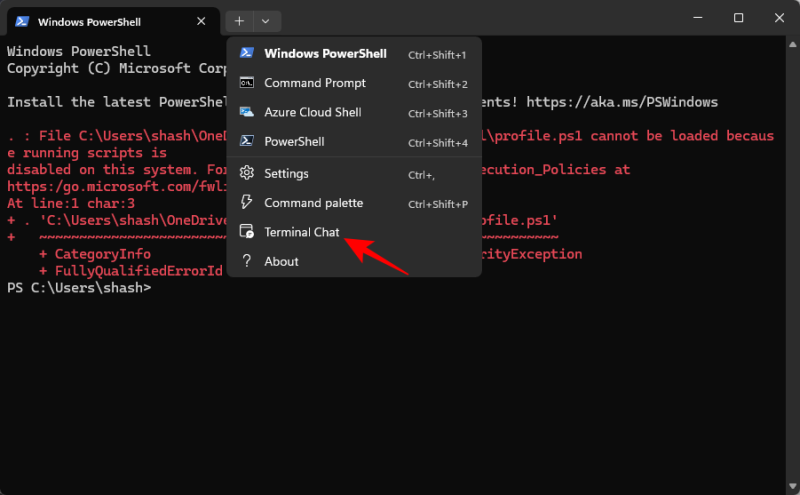
- Click on the down arrow next to the + in the window bar and select Terminal Chat.

- Select Set up AI provider.
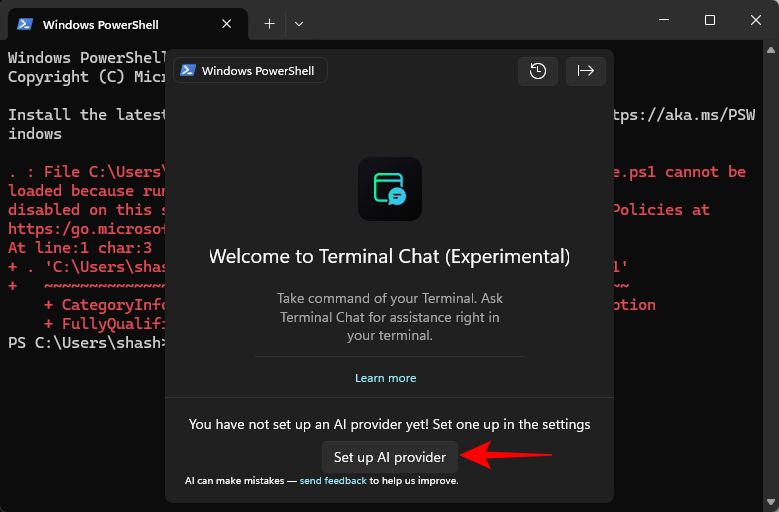
- Alternatively, select Settings.
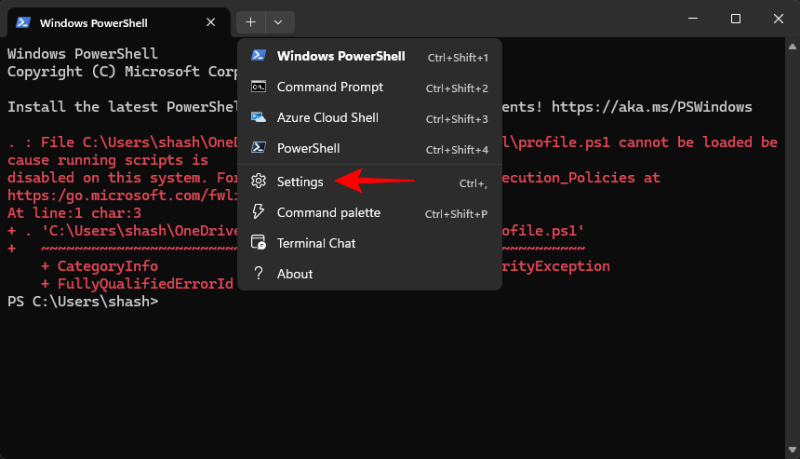
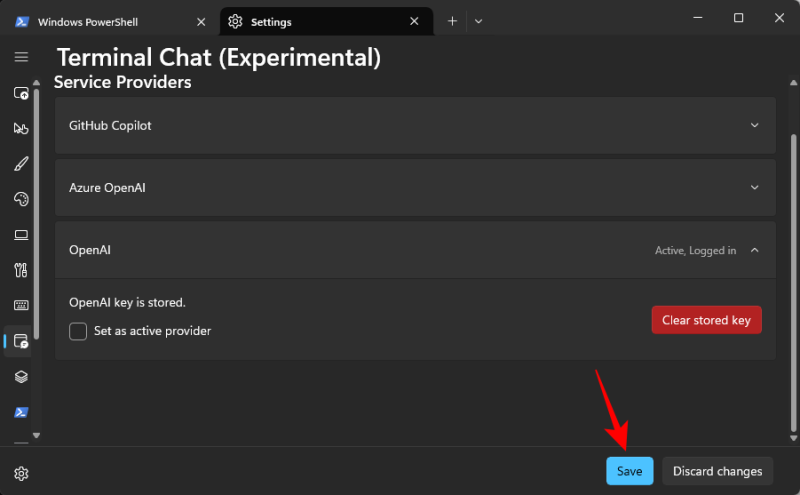
- Then select Terminal Chat (Experimental) from the side pane.
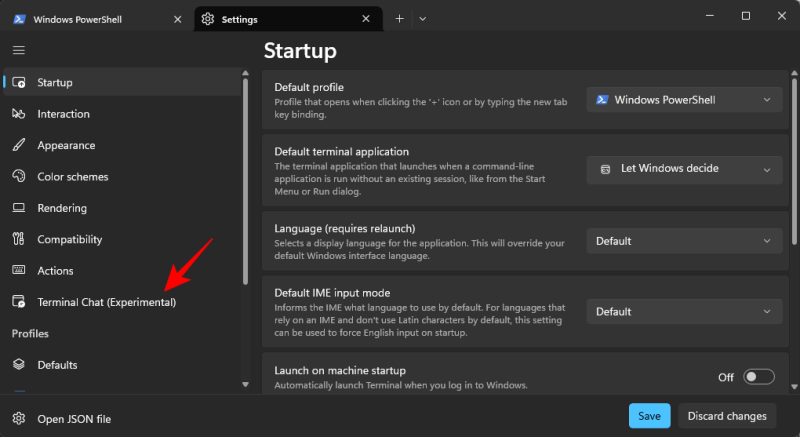
- Here, click to expand the service provider you want to use.

- For OpenAI, enter the API in the Secret key field. Click Store.
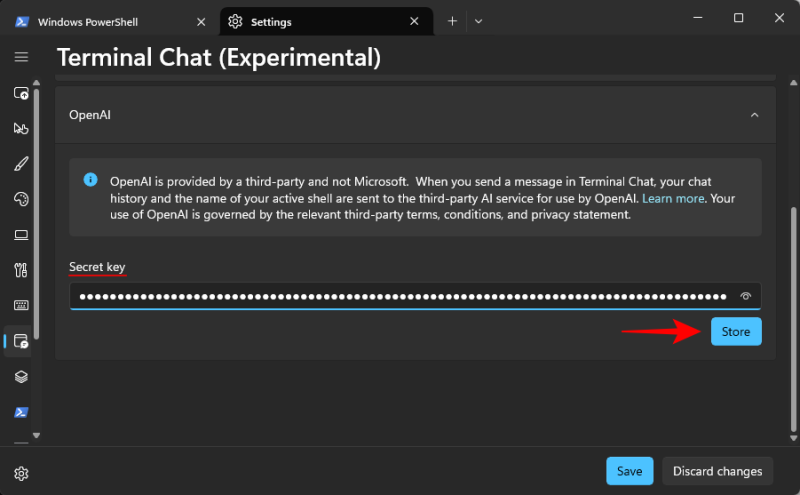
- If you have multiple service providers, you can place a check next to Set as active provider to make it the default.
- Click Save.
- Now click on the down arrow again and select Terminal Chat.
- And that’s it! You can now start chatting with the AI from your chosen service provider right within the terminal app.
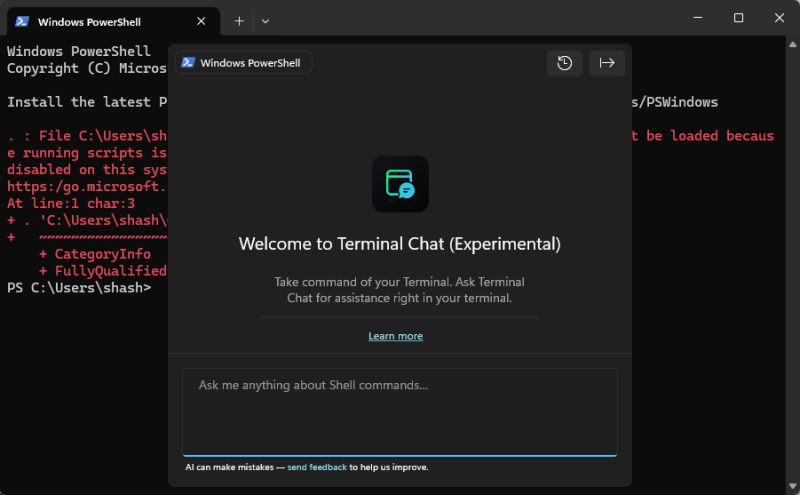
The terminal chat interface is similar to what you generally get with AI chatbots. It’s a little on the compact side of things to make it convenient for terminal use. Because of this, the features are also fewer. But there is a “Clear history” button to start a fresh chat as well as an “Export” button that exports the chat history as a text file. When it recommends a command, you’ll also see a handy copy button next to it.
However, there is no keyboard shortcut to quickly open Terminal chat. So you’ll have to open it from the down arrow only.






Discussion