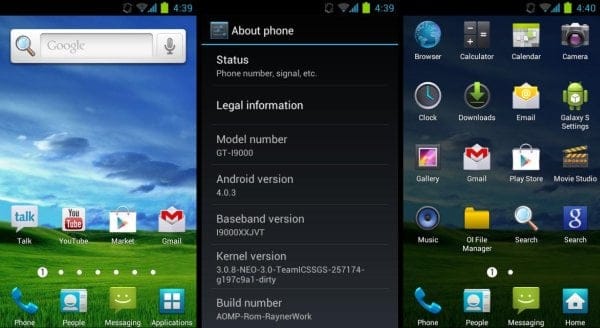
The Galaxy S i9000 is surely one of the most active devices in the custom ROMs world, with new ROMs each day keeping the original Galaxy flagship on its toes. There are quite a lot of Ice Cream Sandwich (ICS) Android 4.0 based custom ROMs available for it. The newest one to join the list is AOMP ROM, based on Onecosmic’s ICS ROM, but with Samsung’s TouchWiz 4 UI integrated into the ROM for all the TouchWiz lovers out there.
Read on to find out how you can install AOMP ROM on your Galaxy S i9000.
Compatibility
This ROM and the guide below is compatible only and only with the Galaxy S, model number I9000. It’s not compatible with any other device and may render an incompatible device unusable. Check your device model in Settings » About phone.
Warning!
The methods and procedures discussed here are considered risky and you should not attempt anything if you don’t know exactly what you are doing. If any damage occurs to your device, we won’t be held liable.
ROM Info
Developers → mOh19973, ghalyoum, Rayner1234
Pre-Installation Requirements
- This procedure will wipe all your apps, data and settings (but it will NOT touch your SD cards, so don’t worry about those). Backup your Apps and important data — bookmarks, contacts, SMS, APNs (internet settings), etc. This Android backup guide would help you.
- Sufficiently charged battery, at least 50% is recommended.
How to Install AOMP ROM on Galaxy S i9000
Important Note: If you are on CM7, MIUI or any ICS (Android 4) based custom ROM, you can skip steps 2 and 3 below. If unsure of what ROM you are on, follow all the steps.
- Remove sim card lock, if you have set it earlier. Go here: Settings » Location and Security » Sim card lock » checkbox should be clear (not selected).
- Flash the stock XXJVU firmware by using → this guide.
- Root XXJVU to obtain Clockworkmod recovery (CWM) by using → this guide.
- Download the latest version of the ROM from the original development page.
- Transfer the downloaded zip file to the internal SD card on the phone (not micro SD).
- Turn off your Galaxy S and wait for complete shutdown (wait for vibration and check capacitive button lights).
- Then, boot into CWM recovery. To do so, press and hold these 3 buttons together: Volume Up, Home, and the Power button till the screen turns on, then let go of the buttons. In recovery, use Volume keys to scroll up and down and power key to select an option.
- Select wipe data/factory reset, then select Yes on next screen to confirm (will not touch SD cards data). Wait a while till the data wipe is complete.
- Now select install zip from sdcard, then select choose zip from sdcard. Scroll to the ROM file on the sdcard and select it.
- Confirm installation by selecting Yes – Install _____.zip on the next screen. The ROM will start installing.
- The phone might reboot into recovery in the middle of installation and then continue installing the ROM. However, if it simply reboots but doesn’t continue installation, repeat steps 9 and 10.
- After the installation is complete, select go back and then select reboot system now to reboot your phone.
AOMP ROM, with TouchWiz 4 UI running on Ice Cream Sandwich Android 4.0 is now installed on your Galaxy S. Visit the original development page to get more info and to get the latest updates on the ROM. Share your thoughts on the ROM in the comments below.


Discussion