
Now that Android 4.2.1 has been pushed out to the Nexus 4, and the December bug has been quashed well in time before the month starts, it’s time for Android 4.2.1 based custom ROMs. But hey, why would one want to use anything other than stock Android on a Nexus device, and that too on the latest and the greatest – the LG Nexus 4?
Most Android enthusiasts would agree that there is nothing better than the stock Android experience, and XDA member Geo411m seems to agree. Geo411m has shared a pre-rooted an deodexed ROM based on stock Android 4.2.1 for the Nexus 4, for all to download and enjoy without having to go through the motions of having to root separately after updating to Android 4.2.1.
The stock 4.2.1 ROM, as mentioned earlier is pre-rooted, deodexed and zipaligned, and also includes busybox. So you don’t need to go around hunting for that either. Pure stock Android 4.2.1 experience with root — can’t get better than that. Read on to know how you can install it on your Nexus 4.
Compatibility
This ROM and the guide below are compatible only and only with the LG Nexus 4 smartphone. It’s not compatible with any other device. Check your device model in Settings » About phone.
Warning!
The methods and procedures discussed here are considered risky and you should not attempt anything if you don’t know completely what it is. If any damage occurs to your device, we won’t be held liable.
How to Update LG Nexus 4 to Stock Rooted and De-odexed Android 4.2.1
- This procedure will wipe all your apps, data and settings. This Android backup guide should help you back up all of your important stuff easily.
- You would need to have an unlocked bootloader to be able to flash this ROM. If you haven’t unlocked your bootloader yet, you can use this handy Nexus 4 toolkit to do so.
- You would also need to install a custom recovery like TWRP, for flashing this ROM. You can use this handy guide to install the latest version of TWRP on your Nexus 4.
- Download the latest version of the Android 4.2.1 ROM from the official source page.
Filename : mako_4.2.1_Deodexed.zip Size : 301 MB - Connect your phone to the PC and transfer the downloaded ROM zip file to the SD card
- Turn off the Nexus 4. Then, boot into recovery. To do so, press and hold the Volume Up + Volume Down + Power buttons together till you see a green android on its back and the letters Start at the top right. Press the volume up key twice to highlight the Recovery Mode option, and use the Power key to select it and boot into TWRP.
- First thing to do in recovery, before flashing any ROM is to take a full Nandroid backup of your existing ROM. That way, you have a fallback option in case things get messy with the new ROM. To do this, tap on Backup, make sure the System, Data and Boot boxes are checked, and slide the blue circle button at the bottom to the right to start backing up your current ROM. After backup is complete, go back to the main menu by clicking the home button at the bottom left of the screen.
- Next from the Main menu, Tap Wipe, then select Factory Reset and confirm wipe on the next screen. Now Tap Cache from the Wipe menu and confirm wipe on the next screen. Once done, Tap Dalvik Cache and again confirm wipe on the next screen. Once done, press the back button to go back to the main menu.
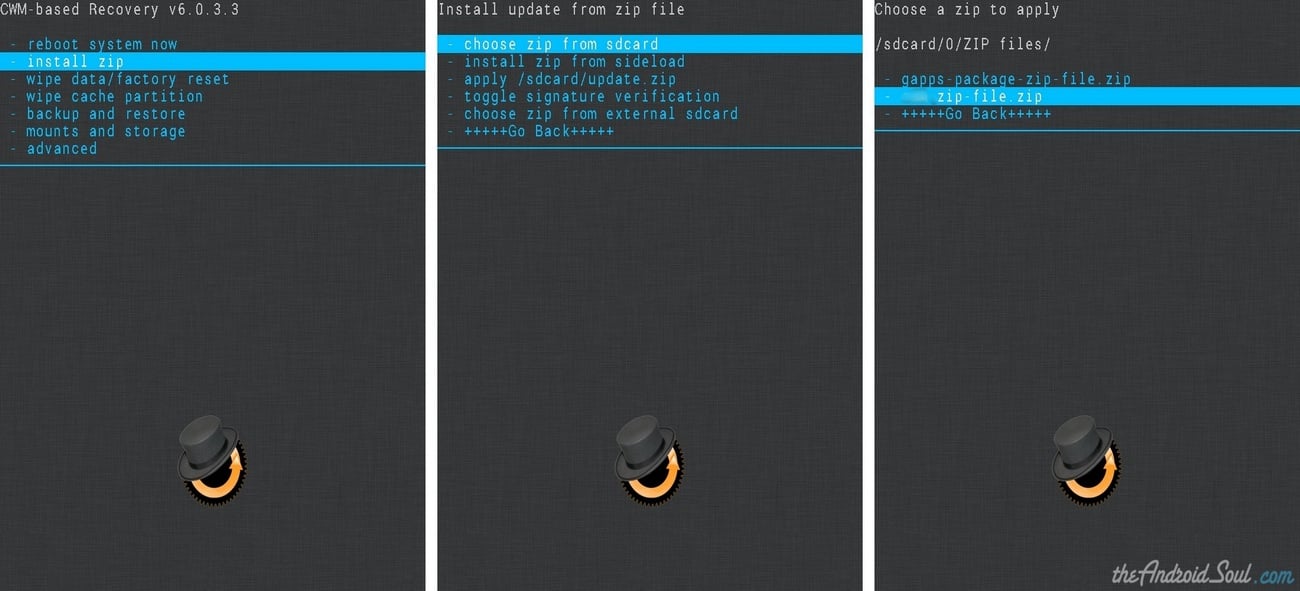
- Now from the main menu, tap Install, and on the next screen navigate to the mako_4.2.1_Deodexed.zip file you transferred to your phone in Step 5, and select it. Slide the blue circle on the next screen to start the installation.
- The Stock Rooted Android 4.2.1 ROM will now start getting installed. Wait till the installation is complete, and then tap the Reboot button on the TWRP main menu, and then Tap System to reboot your Nexus 4 into the OS
- First boot might take a while, so be patient while the OS is updated and your phone boots up completely.

![Nexus 4 TWRP Recovery v2.8 with MTP support [One Click Installer]](https://nerdschalk.com/wp-content/uploads/2014/01/Authorize-computer-for-USB-Debugging.png)
![[Download] Nexus 4 Android L developer preview port is finally here!!](https://nerdschalk.com/wp-content/uploads/2013/11/How-to-Flash-File-in-CWM-Recovery1.jpg)