We earlier saw a one-click root method come out for the Nexus 10, Google’s high resolution display-toting 10-inch tablet, and while it did the job amicably, it did require one to manually unlock the bootloader on the tablet, which didn’t make it as simple as a one-click method should be. Enter CF-Auto-Root, a root tool that lets you root your Nexus 10 with a few simple clicks and also automatically unlocks the bootloader.
Keep in mind that while the procedure is completely safe, it will wipe all data on your Nexus 7 due to the bootloader getting unlocked, so you will need to backup all your important files and apps. The guide below will walk you through the entire procedure though, so that you have a rooted Nexus 10 in no time.
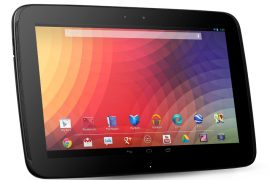
So get your Nexus 10 out and let’s see how it can be rooted using CF-Auto-Root.
Compatibility
This guide is applicable only for the Samsung/Google Nexus 10. Do not try this on any other device.
Warning!
The methods and procedures discussed here are considered risky and you should not attempt anything if you don’t know completely what it is. If any damage occurs to your device, we won’t be held liable.
How to Root Nexus 10 with CF-Auto-Root
- Rooting your Nexus 10 will unlock its bootloader, which will wipe all the data from your tablet, including personal files on the storage, so you should back them up before proceeding. First, backup installed apps and personal data such as contacts, messages, bookmarks, etc, by referring to our Android Backup Guide for help. Then, copy everything from the SD card to your computer, which will also include the apps and data you backed up.
NOTE: If your tablet’s bootloader is already unlocked, no data will be wiped and you can skip backup of data. - Download and install the Android SDK → from here. This will install the necessary drivers for the tablet on your computer. Remember that even though your Nexus 10′s storage shows up on the computer when you connect it, the Android SDK drivers are separate and are required for the rooting process.
- Download the CF-Auto-Root package from the source page.
- Extract the contents of the CF-Auto-Root file to a convenient location on your computer.
- Turn off your Nexus 10. Then, boot into fastboot mode by holding down the Volume Up + Volume Down + Power buttons together till the screen turns on and shows “Start” written in big green letters.
- Then, connect your Nexus 10 to the computer with your USB cable, then wait for Windows to finish installing the drivers (drivers will be installed only the first time). For reliability, ensure that you use a USB port at the back if you are using a desktop computer, as the front panel ports can be loose and cause problems.
- Head to the folder where you extracted the CF-Auto-Root files, then double-click on the “root-windows” file to start up the root program.
- Before proceeding, make sure you took a backup as explained in step 1. Then, press any key to start the rooting procedure.
- At one point, the tablet will reboot and show a red Android logo while it is being rooted. Once the procedure is complete, the tablet will boot up normally and if you didn’t have an unlocked bootloader before rooting, all data would have been wiped.
- NOTE: After rooting, check in your tablet whether an app named “SuperSU” is installed, which is the app that allows you to grant root access to any app that asks for root. If the app isn’t visible in your device’s apps list, then it was probably not installed during the rooting procedure. In that case, simply install SuperSU from the Play Store yourself.
Your Nexus 10 is now rooted. Any app that requires root access, such as file managers, ad blockers, etc can now be used on your tablet.


2 responses to “Root Nexus 10 with CF-Auto-Root by Chainfire!”
I rooted my nexus 10
updated and now it’s not root anymore!
what should I do exactly?
I rooted my nexus 10
updated and now it’s not root anymore!
what should I do exactly?