Blending Modes are a critical component to using Photoshop for anything and everything. Whether it’s graphic design, photo-editing, or illustration, knowing how to harness the immense power of the 27 blending modes is a necessity for improving your workflow and efficiency. But it can be intimidating for a lot of beginner artists and newer designers. There’s a lot to unpack and a seeming mountain of technical information to understand and many tend to delay a comprehensive understanding in lieu of learning piecemeal — which is unfortunate, considering how important a tool the blending modes are.
Thus, our practical guide to Photoshop blending modes, simplified to give you an actionable understanding of what you need to know about each one.
What are Blending Modes in Photoshop?
Blending Modes are special layer properties that determine how the pixels on that layer affect the pixels of the layer below it. Using Blending modes in Photoshop allows artists and designers to mix the hues, values and other properties of layers in ways that can create unique effects, increase efficiency, and allow you to work non-destructively.
Learning how to use blending modes in Photoshop is a critical early skill for the aspiring digital artist or graphic designer, and something you can’t get away with skipping — even those looking to make the jump from traditional art should understand what blending modes are and how to use them even if they choose to later on exclude them as part of their process.
How Blending Modes Work in Photoshop
When it comes to understanding how blending modes work in Photoshop, it’s important to keep in mind the properties of an image. Down below we’ll run through the major components of a “color” that Blending modes manipulate to create new effects.
Keep in mind that the exact mechanics of color modeling quickly become complicated once you start digging into the science of color theory, computer graphics, and human perception, but we’ll keep it simple here for the purposes of understanding blending modes.
What is Color?
Put simply, any one color is a combination of hue, saturation, and value/lightness — commonly known as HSV and HSL. Put together, these components determine the color and how distinct it is from the colors around it.
Hue
Hue is, in simple terms, the pure and unadulterated “pigment” behind the color. To analogize hue, it’s the paint right out of the tube, untinted and unshaded by white or black.
Saturation
Saturation essentially determines how much of the “pigment” is inside the color, ranging from 0 (colorless) to 100 (the pure hue). To condense saturation into traditional painting terms, Saturation is analogous to how much white has been added to the pigment to create a “tint.” For example, mixing a pure red pigment with white reduces how much “red” is in the mixture, resulting in some level of pink.
Value
Value, in dead simple terms, is how much black exists inside the color, ranging from 0 (pure hue) to 100 (pure black). Everything in between 0 and 100 are “shades” in which the hue is mixed with some level of black to darken it accordingly. Value is what creates contrast between hues of the same saturation — allowing for darkness/lightness to come through in an image.
Photoshop Blending Modes Explained
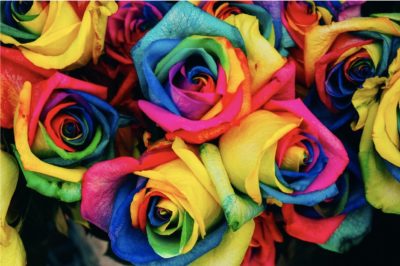
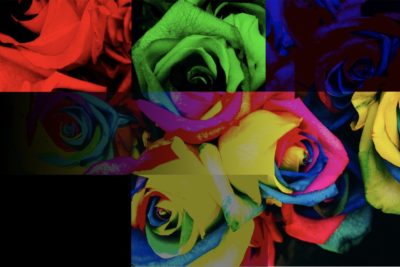
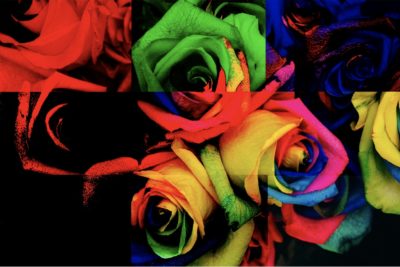
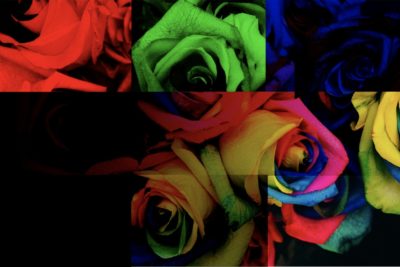
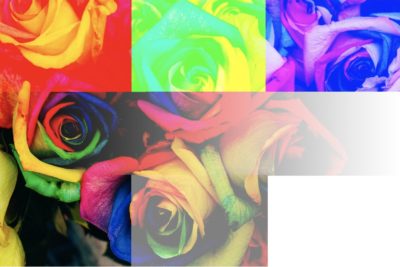
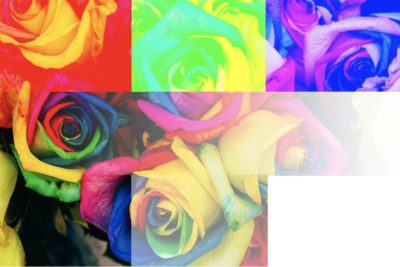
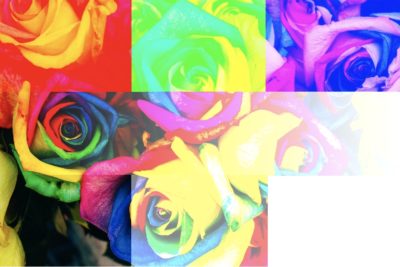
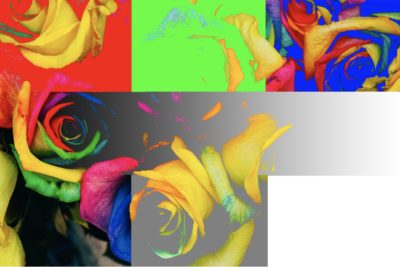
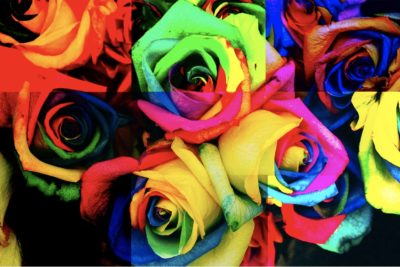
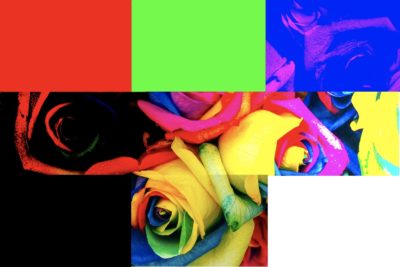
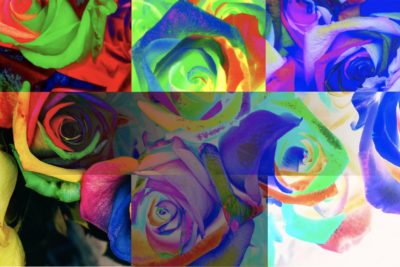
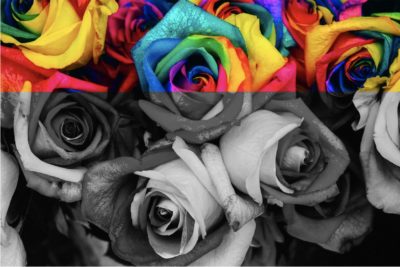
There are currently 27 blending modes in Photoshop, each of which provides its own unique effect based on the information in the base layer. Down below, we’ll run you through each of the different modes with an example of their effects. For the purposes of demonstration, our base layer will be set to normal using this (oversaturated) stock photo of dyed roses:
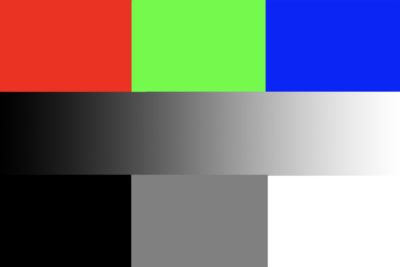
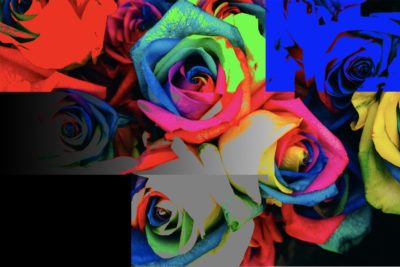
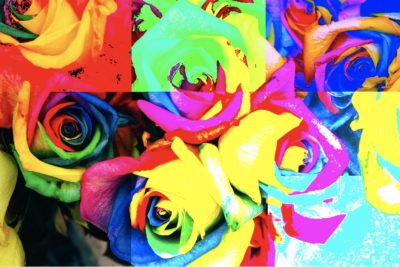
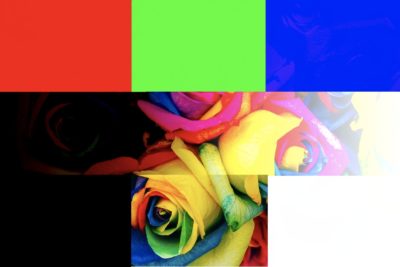
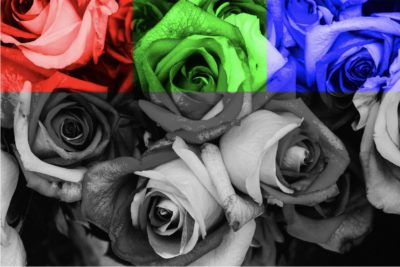
With the below image on top of it as our Blend Layer.
Normal Blending Modes
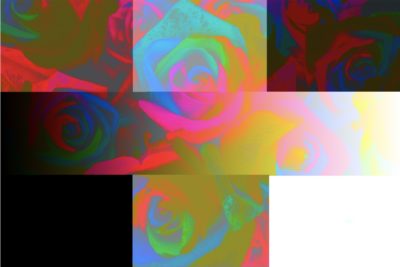
Normal
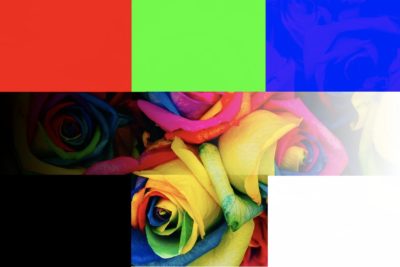
The Normal blending mode is Photoshop’s default, where the color information of pixels is unaffected by any other effects. At full opacity, the gradient and swatches block out the underlying photo completely.
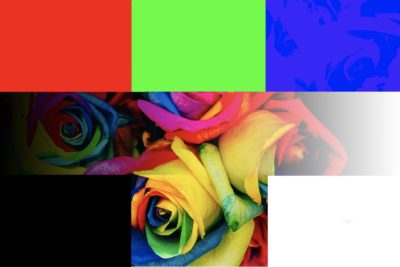
Dissolve
At full opacity, the Dissolve blending mode looks like the Normal blending mode. However, once you start reducing the opacity, the number of pixels displayed is cleared at random, creating the familiar dissolving effect that leaves the remaining pixels unadulterated by any extra effects.
Darken Blending Modes
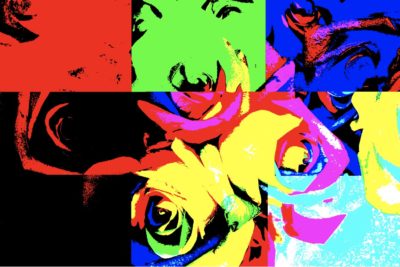
Darken
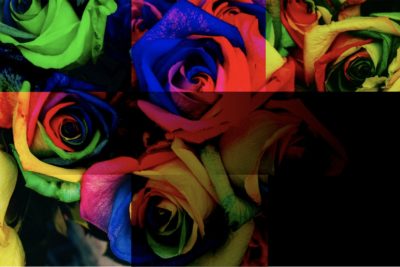
The Darken blending mode compares the colors of the base layer with the blending layer, replacing any pixels lighter than the blend layer’s with those of the latter; any colors that are darker on the base layer will remain unaffected.
Multiply

Multiply, as the name suggests, takes the numerical data of the color in the base layer and multiplies it with the blending layer, resulting in darker versions of the same color palette. Multiplying with black always results in black, however, as can be seen in the lower lefthand swatch while multiplying with white has no effect — as shown in the lower righthand swatch. Because, when used with darker colors, multiply allows you to preserve a similar color palette as the original base layer while simultaneously darkening it, multiply is one of the favored tools for digital artists looking to quickly render forms or iterate lighting scenarios.
Color Burn
Color Burn darkens the image by increasing the contrast between the base layer and the blend layer. This noticeably brings out the lower-range halftones of an image, while exerting a minimal effect at higher values.
Linear Burn
Linear Burn darkens by reducing the brightness of an image according to the value of the blend layer. This reduces the increased saturation effect exhibited by Color Burn and shows a more steady progression towards black inside the value gradient.
Darker Color
Darker Color goes pixel by pixel, choosing the darker color of either of the two layers similar to Darken, but takes a more mathematically comprehensive look at the RGB channels — which you don’t need to know about just yet if you’re just dipping your toes into blending modes in Photoshop. Suffice to say it’s similar to Darken.
This results in a hybrid of both layers which is darker overall without creating any new colors. This is best demonstrated in the grayscale swatches below where none of the pixels of the base layer are displayed in the lower lefthand corner nor any of the blend layer in the white swatch on the lower righthand while the 50% gray in the center is a relatively even mix of the two layers.
Lighten Blending Modes
Lighten
Lighten is the inverse of Darken in that it compares the RGB channel of each pixel and displays the darker of the two layers — resulting in an overall lighter image
Screen
Screen multiplies the inverse of the colors on the base and blend layers, creating a brighter version of the image but maintaining a similar color palette. Like multiply, this makes it one of the blending modes especially useful to digital artists and illustrators looking to add quick lighting to an image and insert highlights.
Color Dodge
Color Dodge is another popular blending mode and counterpart to the Color Burn blending mode. Color Dodge increases brightness by decreasing the contrast between the color of both layers, resulting in the same increased saturation in the halftone-range as Color Burn but canceling itself out when blending with black. Illustrators and digital artists, in particular, should be careful not to use too much color dodge, for though it can bring energy and interest to specific elements it can quickly throw a composition out of balance.
Linear Dodge (Add)
Linear Dodge, or Add as it’s often called in other software like Procreate, is a simple tool that brightens the base layer according to the blending layer. Linear Dodge, as seen in the example, is a much more powerful brightening tool than the other blending modes and can be used, in moderation, to add highlights and manually increase contrast in parts of your image.
Lighter Color
Lighter Color is the counterpart to Darker Color, using the same process of comparison across all color channels in both layers to choose the lighter alternative to display. Lighter Color produces less aggressive change than Lighten by working with only the color palette on-screen
Contrast Blending Modes
Overlay
Overlay is an extraordinarily useful tool for introducing natural lighting into an image quickly and efficiently. Overlay will either multiply or screen the colors on the base layer depending on their brightness or darkness while mixing the colors of the two layers, resulting in a third while preserving the value composition of the blending layer. This is especially useful for showing the effects of colored light on a surface already rendered with local color — for example, in the case of red light washing over a blue form, the shadows and highlights on the blue form will remain in place while shifting the overall hue towards violet or purple.
Soft Light
Colors on the base layer lighter than 50% gray are dodged by the blending layer, while colors darker than 50% are burned over. Both the dodge and burn effects are weaker than if directly applied, resulting in a softer, less harsh contrast between the darks and lights that is more immediately pleasing to the eye. Blending with black and white will darken/lighten accordingly but not result in pure black or white. As you can see here in the image, Soft Light helps bring out the vibrancy of half-tones without kicking down the door with a shotgun blast of contrast.
Hard Light
Hard Light operates in much the same way as Overlay, albeit to a much, much higher degree. Depending on the brightness of the blending layer, colors will either be multiplied or screened. Hard Light, as seen above, exerts an incredibly intense effect on the image and should be used at varying levels of opacity to produce the best results.
Vivid Light
The way Soft Light simultaneously applies Burn and Dodge, so does Vivid Light with Darken and Lighten — darkening portions where the blend color is darker than 50% gray by increasing contrast, and lightening portions where the blend color is lighter than 50% gray by decreasing contrast. Like Hard Light, it’s easy to overdo Vivid Light.
Linear Light
Linear Light is pretty straightforward: it compares the lightness of the base color with the blend color and applies linear dodge or linear burn accordingly. Like the rest of the Contrast blending modes, the threshold is an even 50% gray — anything above it will be lightened, anything below it darkened. This is another of the powerful contrast tools that, as you can see, exerts a relatively extreme effect on the overall image, quickly turning to near-black and near-white even on the ends of the halftones-range.
Pin Light
 Pin Light applies Lighten and Darken simultaneously, but in a two-step process that’s a little more complicated under the hood than the other contrast modes. While 50% gray remains the effect threshold, what Pin Light does is first compare the lightness of the blend color and base color. If the blend color is lighter than 50% gray, it replaces all of the base colors darker than the blend color while leaving those lighter than the blend color in place. If the blend color applied is darker than 50% gray, it replaces all of the base colors that are lighter than the blend color while leaving darker colors in place. 50% is essentially the threshold at which Pin Light choose to apply either Lighten or Darken, but may have no effect or an enormous one depending on the lightness of the colores therein.
Hard Mix
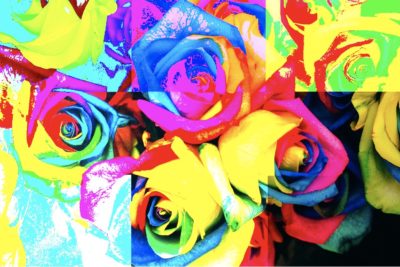
Hard Mix is a wacky blending mode that essentially adds all of the RGB values of the base layer onto the Blend Layer, transforming everything into white, black, or one of the six primary hues of the color wheel at full saturation.
Inversion Blending Modes
Difference
Difference is an incredibly useful blending mode that looks at which of the two colors is brighter and subtracts the individual channel values from the other layer — pushing the darks away from the lights on the color wheel. Difference can be used as a starting step to add color to grayscale images while preserving the values by adding a blanket color across the image as a Difference layer and reducing opacity. This leaves the image awash in a new tone that can then be painted over.
Exclusion

Exclusion operates similarly to Difference, as shown above, but noticeably loses potency as the value of the blend layer approaches 50% gray.
Subtract
Subtract is an interesting tool that can be used to darken the brighter parts of an image. As shown above, blending with white results in pure black, while blending with black has no effect on the image. This is because Photoshop subtracts the value of the blend layer from the base layer, resulting in darker lights and unaffected darks.
Divide
While it might be counterintuitive, Divide is the functional opposite of Subtract (not Add); Divide takes the value of each color channel in the blend layer from the base layer. This results in lighter darks and unaffected lights, as shown above.
Component Blending Modes
Hue
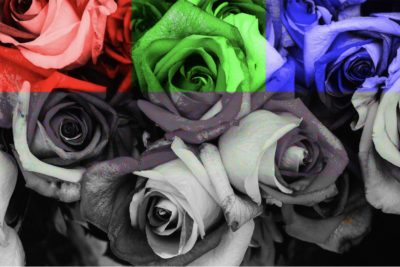
Hue is a useful tool for forcing a recolor of the base layer by preserving the value and saturation of the base layer and replacing it with only the hue of the blend layer — i.e. it keeps the darks dark and the lights light while replacing only the local hue, as demonstrated in the upper color swatches on the image.
Saturation
Saturation exerts the same effect as Hue, except with, well, saturation. The luminance, value and hue of the base layer are maintained while the saturation is replaced with that of the blend color. The flowers in the example above are already highly saturated, reducing the visibility of the effect.
Color
Color operates similarly to Hue except that it preserves only the luminance of the base color while adding the hue and saturation of the blend color.
Luminosity
Essentially the inverse of Color, Luminosity maintains the hue and saturation of the base color while replacing its luminosity with that of the blend color. A useful tool for examining the importance of strong values in an image.
That’s our practical Photoshop Blending Modes guide. There’s a lot more going on under the hood, but for all intents and purposes, the Blending Modes operate in a pretty clear-cut way once you’ve got the basic handle on them. The best way to learn the tools at your disposal is, and will always be, to experiment yourself until your choice of blending mode becomes intuitive.