
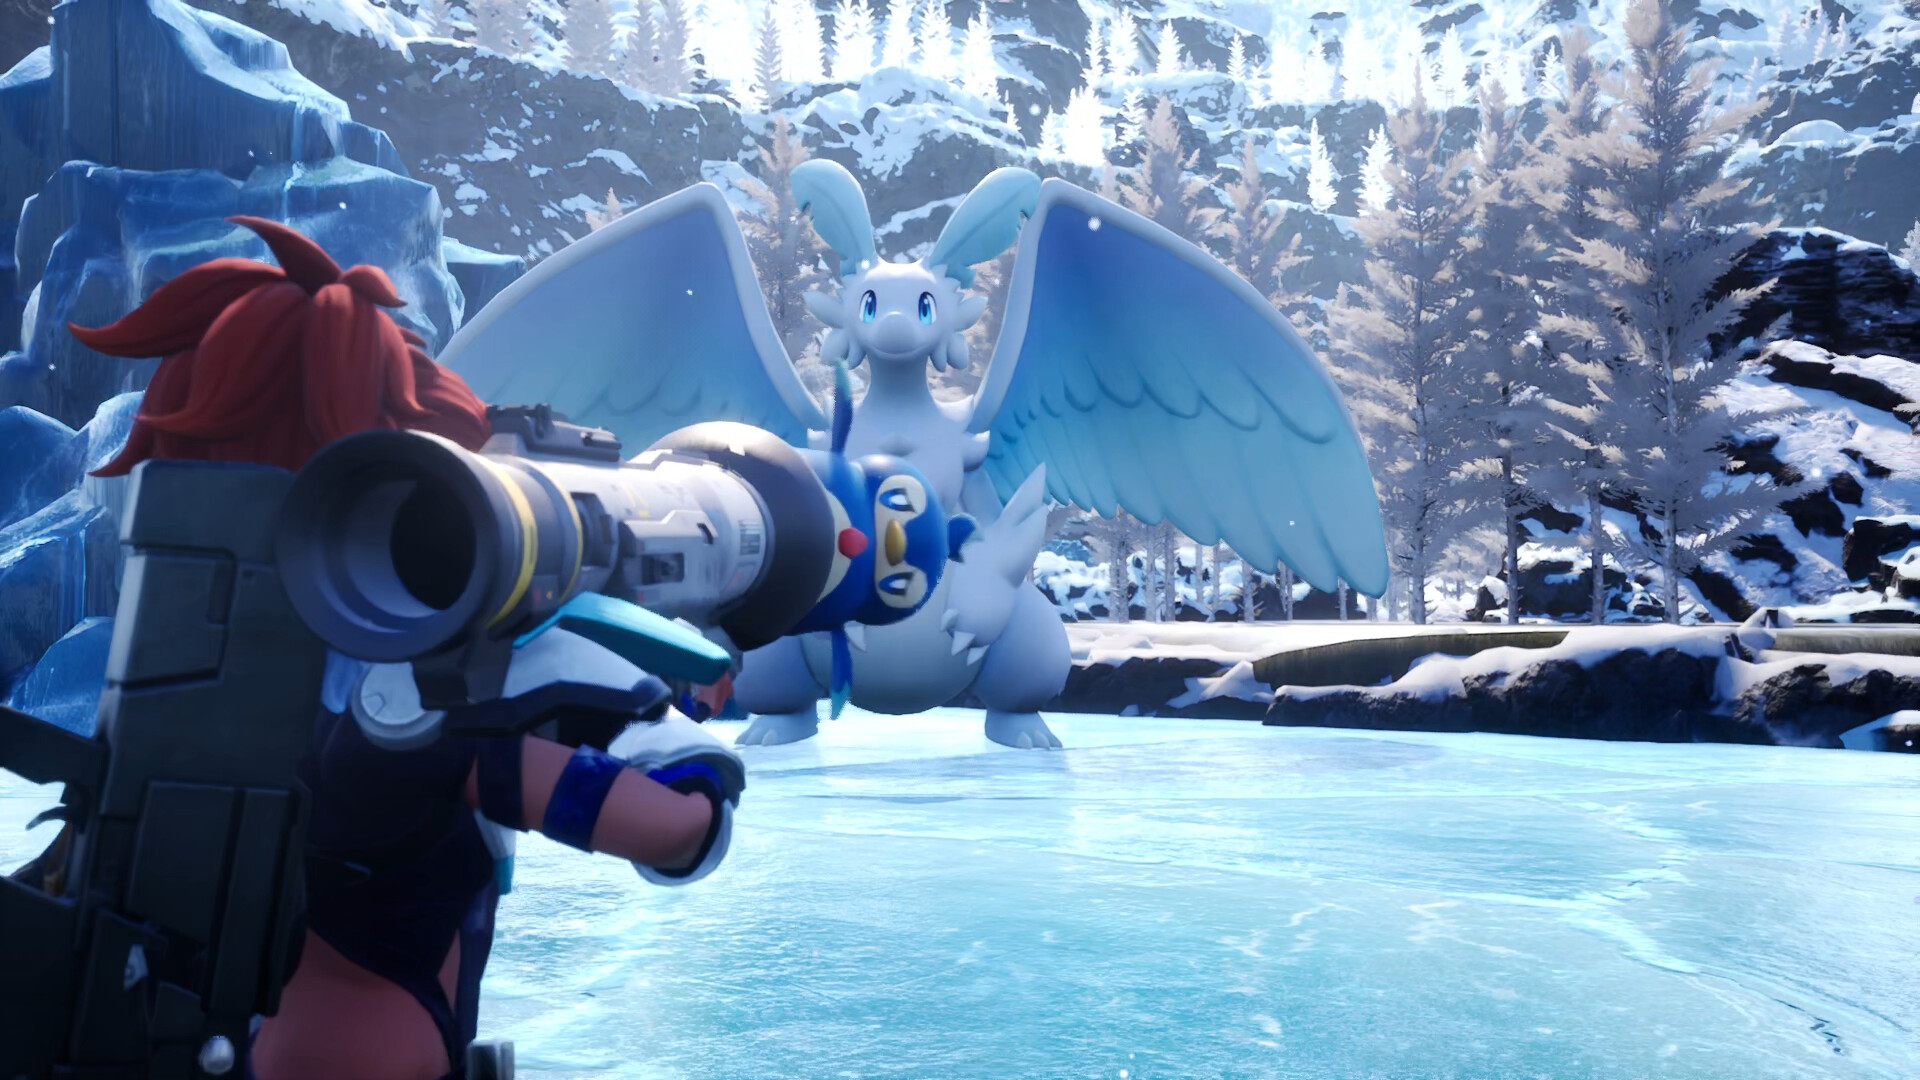
The best Palworld fishing setup pairs Gloopie for catch forgiveness, Wumpo and Wumpo Ignis for faster reels, Jelliette for extra loot, and Surfent Terra plus Surfent Terra Lux when you are hunting rare passives or high-quality catches.
Fishing arrived with the Tides of Terraria update and quietly became one of the fastest ways to pull strong Pals — rare passives included — surprisingly early in a run. Which support Pals you slot in decides whether you land a difficult Lunker or watch it slip, and whether a spot coughs up real loot or just a fish. Here’s the setup by goal, the minigame itself, and where to grab every Pal that matters.
- Best fishing setups by goal
- Before your first cast
- How to catch fish in Palworld
- Fishing spots, refreshes, and difficulty tiers
- Every fishing support Pal at a glance
- Where to get each fishing Pal
- How rods and bait affect fishing
- Catching the best fish and Lunkers
- Building your best fishing party
- Frequently Asked Questions
Best fishing setups by goal
| Goal | Party setup |
|---|---|
| More loot | Gloopie, Wumpo, Wumpo Ignis, Jelliette, plus a fast mount (Jetragon) |
| Rare passives | Gloopie, Wumpo, Wumpo Ignis, Surfent Terra, Surfent Terra Lux |
| Difficult Lunkers | Gloopie for forgiveness with Wumpo and Wumpo Ignis for reel speed |
| Fast spot rotation | Any of the above with Jetragon (or a movement-boosted swimming mount) in the fifth slot |
Every one of these leans on the same handful of Pals doing three jobs — landing fish, boosting loot, or improving the passives you catch — so you’re really just swapping one or two slots depending on what you’re farming that session. The sections below break down each role, but if you only remember one thing, it’s that Gloopie belongs in almost every fishing party.
Before your first cast
How to catch fish in Palworld
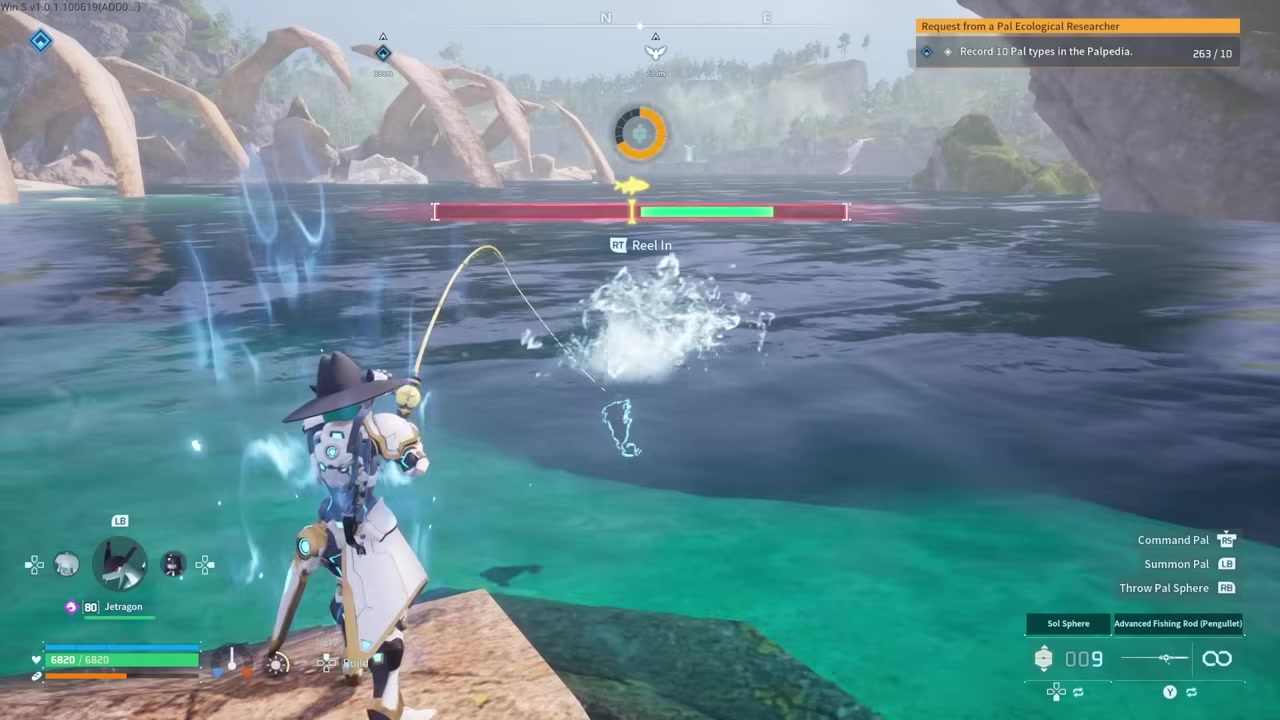
The fishing minigame is all about keeping your bar on the fish long enough to fill the capture sphere, so here’s the full loop from spotting a shadow to landing the catch.
STEP 1/5
Spot the fish shadows
Look for dark fish shadows moving in the water — any of them marks a castable fishing spot.
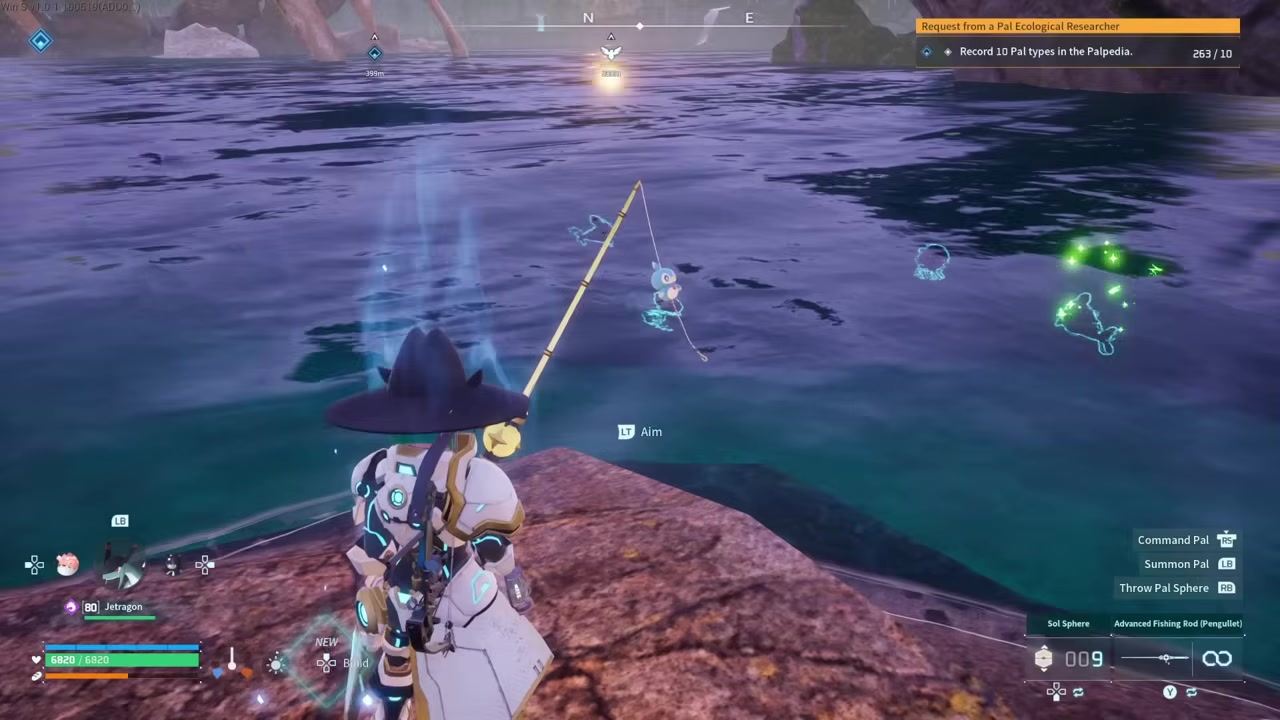
STEP 2/5
Cast your line
With your rod out and bait equipped, aim at the shadow and cast in for a faster, better bite.
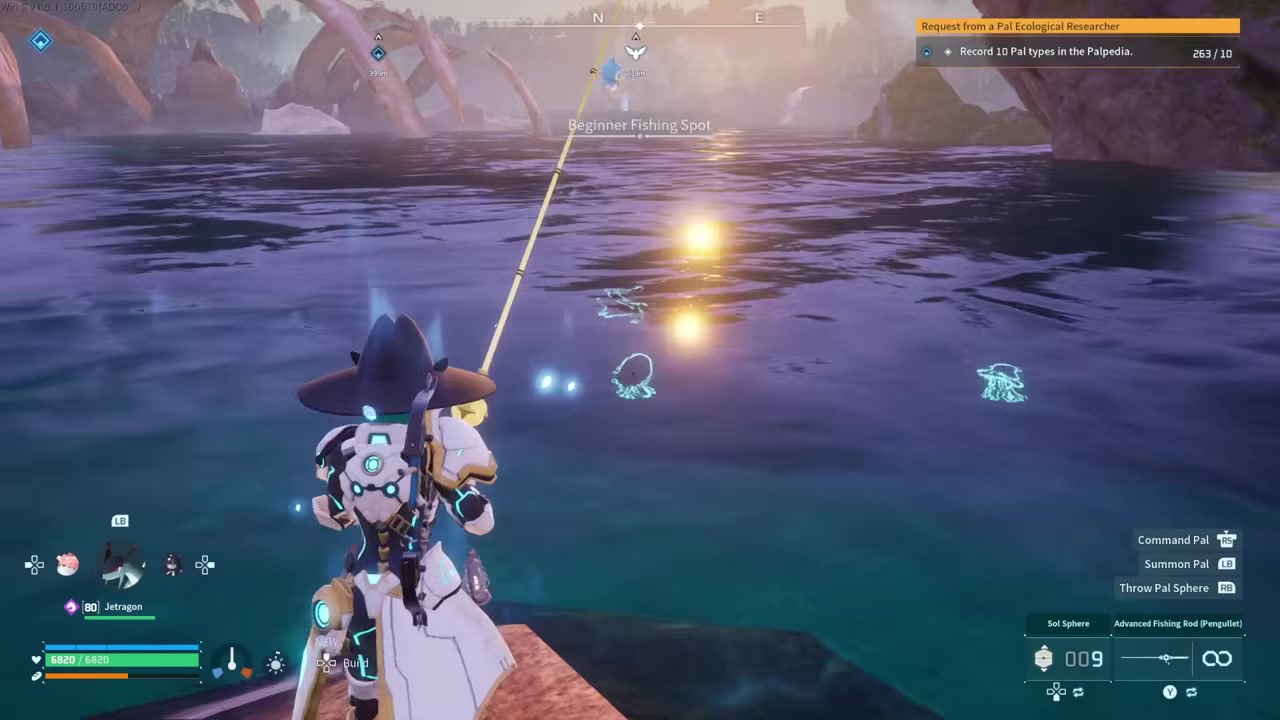
STEP 3/5
Hook it on the prompt
When the exclamation marks flash, press the button shown to set the hook.
STEP 4/5
Fill the capture sphere
Keep the green bar over the fish’s marker; the sphere at the top only fills while they overlap and drains the moment they don’t.
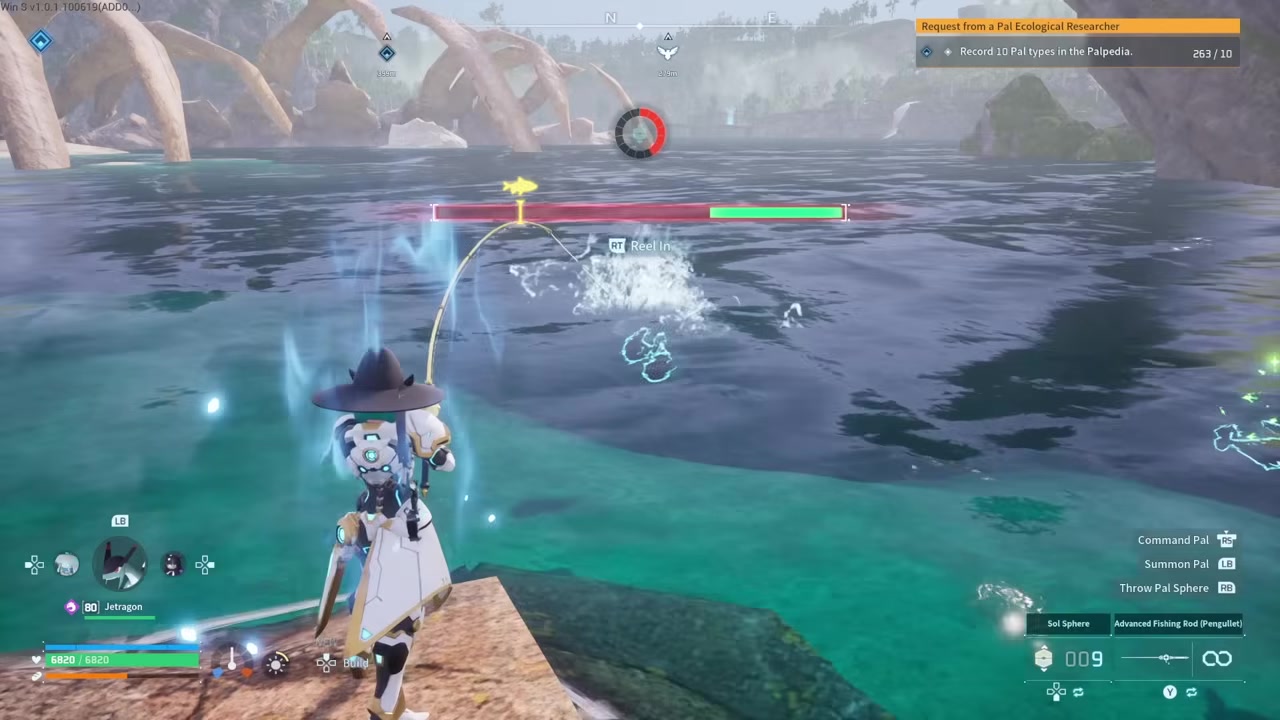
STEP 5/5
Time your reel taps
Hold reel-in to slide the bar right and release to let it drift left, tapping it to keep the line centered on the fish until the sphere is full.
Video help
Fishing spots, refreshes, and difficulty tiers
Fishing spots sit in fixed locations and refresh once every in-game day or night cycle — about every 30 minutes on default settings. Each refresh re-rolls the effect on the fish, so the same spot can hold a Lunker one cycle and nothing special the next. Those effects are the glowing cues around a fish, and they tell you exactly what you’re casting at.
| Visual | Meaning |
|---|---|
| No sparkles | Ordinary fish, no bonus |
| Purple sparkles | Alpha fish |
| Green sparkles | Guaranteed at least one rainbow passive |
| Purple beam | Lunker — an Alpha with the Lunker rainbow passive, and the hardest to catch |
Spots also come in six difficulty tiers — beginner, intermediate, advanced, expert, master, and grandmaster — and the tier sets both how hard the fish fight and what drops from them. Two regions at the same tier can still hold different Pals and different loot, and the level of the region you’re standing in decides which spot tiers you’ll find there at all.
Every fishing support Pal at a glance
| Pal | Role |
|---|---|
| Gloopie | Catch forgiveness — the capture gauge drains slower when your bar is off the fish |
| Wumpo | Catch speed — higher starting gauge and faster capture while overlapping |
| Wumpo Ignis | Catch speed — a stronger Wumpo that stacks with the base version |
| Jelliette | Extra loot — more items from every catch |
| Surfent Terra | Better catches — boosts passives and talents on the Pals you reel in |
| Surfent Terra Lux | Better catches — variant that stacks with Surfent Terra |
| Jetragon | Mobility — no fishing bonus, just fast travel between spots |
These split into three jobs: making fish easier to land, pulling more loot, and improving the passives and talents of the Pals you catch — with a mount tacked on for getting between spots quickly. None of their partner skills do anything unless the Pal is sitting in your active party. A few of these names are still settling in the community, but the roles and locations below are the part that actually matters.
Where to get each fishing Pal
Gloopie
Head to Eastern Wild Island at (549, -103) and go just southeast to the shipwreck and small island, where Gloopie spawns. You’ll also find them on the beaches near Fake Break Island. Uncondensed, it slows the capture-gauge drain by 12%, and fully condensed by 35% — roughly a third of the usual loss, which is exactly what makes high-level Lunkers landable.
Wumpo and Wumpo Ignis
Wumpo floats around the glacier northwest of Frozen Dune Cape at (255, 544). Breed one with a Chillet Ignis — those come from Sakurajima — to get Wumpo Ignis, or catch Wumpo Ignis directly at World Tree spawns. Wumpo gives +5% starting gauge and +5% capture speed uncondensed, up to 14% condensed; Wumpo Ignis runs from +7% to +17%.
Jelliette
You can fish Jelliette straight out of fishing spots, or find them on the glacier south of Seabreeze Archipelago Castaway Beach at (-98, -712). Uncondensed it gives +55% more items from fishing, and fully condensed, +95%.
Surfent Terra and Surfent Terra Lux
Surfent Terra spawns near the water at the Azure Tapestry, (-478, -1381). For Surfent Terra Lux, breed a Surfent Terra with a Relaxaurus caught on the island to the east — or catch Surfent Terra Lux throughout the World Tree.
How rods and bait affect fishing
| Gear | Effect |
|---|---|
| Higher-tier rod | More durability and a bigger fishing bar |
| Alternate rod blueprints | Rare drops from sea-base golden chests or magnet fishing; sidegrades only |
| Simple bait | No special effect |
| High-quality bait | Fish bite faster |
| Deluxe bait | Fishing bar fills faster |
| Alluring bait | Fills the bar faster and increases the items you catch |
The thing to get straight is that rods don’t change what you catch. A better rod is purely more durability and a wider bar, which makes the reel more forgiving but never touches fish quality or loot. There’s one alternate blueprint for each rod tier — they drop from the golden treasure chests inside sea bases, and a few like the Depresso schematic turn up from magnet fishing at tier-two salvage spots, the junk piles out in the ocean. Bait is where the small real advantages live, climbing from no effect on the simple tier up to alluring, which both speeds the bar and pads your haul.
Catching the best fish and Lunkers
When you’re deciding what to cast at, the effect around a fish tells you whether it’s worth your time. Green sparkles are the play for rare passives — every green-sparkle fish comes up with at least one rainbow passive — and a purple beam marks a Lunker, which always carries the Lunker passive, a rainbow passive that’s excellent on water types. Lunkers are also the single hardest fish to reel, so save them for when your support team is actually ready.
The practical version is short: run a stronger rod for the bigger bar, switch to alluring bait on loot runs, and don’t touch a high-level Lunker without Gloopie and the Wumpo pair backing you up. Higher-tier spots raise both the difficulty and the quality of the drop table, so once you can handle them, that’s where the best fish and loot come from.
Bring Gloopie before you touch a Lunker — fully condensed it cuts capture-gauge drain by about a third, which is often the whole difference between landing a high-level Lunker and losing it at the last second.
Building your best fishing party
| Goal | Recommended team |
|---|---|
| Loot farming | Gloopie, Wumpo, Wumpo Ignis, Jelliette, and Jetragon |
| Passive hunting | Gloopie, Wumpo, Wumpo Ignis, Surfent Terra Lux, and Jetragon |
| Passives maxed (no mount) | Gloopie, Wumpo, Wumpo Ignis, Surfent Terra, and Surfent Terra Lux |
| Passives, practical | Gloopie, Wumpo Ignis, Surfent Terra, Surfent Terra Lux, and Jetragon |
The loot team is the default: three catch helpers, Jelliette for the item boost, and Jetragon in the last slot so you can hop between refreshed spots fast. When you switch to hunting passives, you drop Jelliette for Surfent Terra Lux. You can max it out by running both Surfent variants at once, but that means giving up your mount, which isn’t really worth the lost mobility — so the practical middle keeps Jetragon and runs one fewer catch-speed Pal instead.
The reason both Surfents (or both Wumpos) earn their slots is stacking. The partner-skill text reads does not stack, but in play two different variants of the same line do stack their effect — it’s only two of the exact same species that won’t. So Wumpo alongside Wumpo Ignis, or Surfent Terra alongside Surfent Terra Lux, gives you the combined bonus.
Frequently Asked Questions
Do better fishing rods give better fish or more loot?
No. A higher-tier rod only adds durability and a wider bar, which makes the reel easier but never touches fish quality or the loot. The advanced fishing rod is the practical stopping point — the rare alternate blueprints are sidegrades, not upgrades worth farming.
How often do fishing spots refresh in Palworld?
Once per in-game day or night cycle, which works out to roughly every 30 minutes on default settings. Because it’s tied to the cycle, lengthening or shortening the day in your world settings shifts that interval to match.
What do green sparkles, purple sparkles, and purple beams mean?
Purple sparkles mark an Alpha, green sparkles guarantee at least one rainbow passive, and a purple beam is a Lunker. Lunkers are the ones worth the extra effort: on top of always being an Alpha with the Lunker passive, they tend to roll high, with green IVs typically landing between 70 and 100.
Which bait should I use for the most loot?
Alluring bait. It’s the only bait that raises your item rewards — every other tier just changes bite speed or how fast the bar fills — so keep alluring on for dedicated loot runs and save the cheaper baits for casual casting.
Do fishing Pal partner skills stack?
Yes, as long as they’re different variants of the same line, like Wumpo with Wumpo Ignis or Surfent Terra with Surfent Terra Lux, even though the skill text says otherwise; only two of the exact same species fail to stack. And none of it counts unless the Pal is in your active party with a crafted saddle if it can be ridden — without the saddle, the skill does nothing.
More questions⤵
Where do grandmaster fishing spots appear?
Grandmaster spots are up in the World Tree, because the region’s level gates which spot tiers can appear there. That’s also why beginner spots cluster around the starting area — low-level regions only hold low-tier spots.






Leave a Reply