The OnePlus 7 has been constantly overshadowed by the OnePlus 7 Pro since it was launched last month. At £499, this phone is also considered to be the successor of the OnePlus 6T which came out last year. While it does not have the 90Hz refresh rate and completely notch-less screen like the OnePlus 7 Pro, the performance and competitive price point make this phone an excellent bet.
So yes, once you focus past the glamour of the OnePlus 7 Pro, you will discover a great phone that carries the best of both OnePlus 6T and OnePlus 7 Pro without the skepticism that surrounded them (and still surrounds the OnePlus 7 Pro for its mechanical camera) when they first came out.
OnePlus is committed to offering the best possible Android experience with the OnePlus 7 series. This Snapdragon 855 powered phone that comes with a 48MP camera and 6.42-inch optic AMOLED display accommodates the custom ROM of your choice if you want a more refined and customized Android experience.
The bootloader of the OnePlus 7 can be unlocked fairly easily and you will not face any major resistance or issues when you decide to root this phone. You can check out how to root the OnePlus 7 here.
How to root OnePlus 7 with TWRP
Let’s discuss how to install TWRP recovery first and then use it to root the device. Even if you don’t want to root the device, you will need to install DM Verity disabler file in order to restart the device alright without the bootloop problem. If you don’t flash either of root package (Magisk) or DM verity disabler, then the system will remove TWRP when you to reboot the device and it gets stuck in bootloop, getting stuck at logo screen each time.
TWRP recovery download
- TWRP 3.3.1-0
- .IMG file – twrp-3.3.1-0-guacamoleb.img
- .ZIP file – twrp-installer-3.3.1-0-guacamoleb.zip
Note: Check out the official TWRP recovery page for the OnePlus 7 for the latest version available at the moment > here.
How to install TWRP recovery
We have covered this as part of the root guide because you need to root the device right away to keep TWRP. If you don’t wish to root the device, you need to install the DM Verity disabler file instead of Magisk roto package. See the guide in the section called ‘OnePlus 7 Root’ below to install TWRP.
OnePlus 7 Root
Let’s see how to install TWRP first, and then root the OnePlus 7.
Warning!
Do not try anything given on this page if you do not know completely what you are doing. In case any damage occurs, we won’t be held responsible.
Compatibility
The download files and the process for installing TWRP and rooting given on this page are compatible only with the OnePlus 7. Do not try this on any other device as you might end up damaging your device and permanently brick it.
Here’s how you can install TWRP recovery on your OnePlus 7 first, and then root the device (or install DM Verity disabler if you don’t want root).
- Make sure you have unlocked the bootloader of your OnePlus 7.
- Download the required files:
- TWRP recovery from above
- Magisk root package zip → Magisk 19.3
- DM Verity disabler
- Make sure you have enabled USB Debugging on your OnePlus 7 device. You may need to re-do it after unlocking the bootloader.
- Connect your OnePlus 7 device to PC using the USB cable that came with it.
- Transfer these files to your OnePlus 7:
- TWRP installer ZIP file
- Magisk file (if you want to root)
- DM Verity disabler (if you don’t want to root)
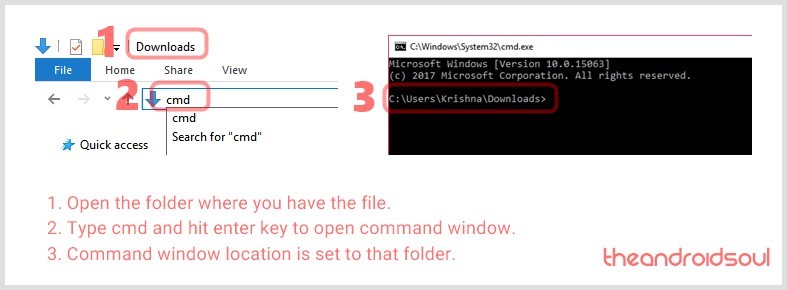
- Now open a command window inside the folder where you have the TWRP file from above. Do this:
- Connect your OnePlus 7 device to the PC.
- Run the following command into the command window we opened above to boot your device into bootloader/fastboot mode:
adb reboot bootloader
└ If you get a permission dialogue on your OnePlus 7 to “Allow USB debugging”, tap OK.
- Install TWRP recovery on your OnePlus 7 on a temporary basis:
- Once your OnePlus 7 boots into bootloader mode, run the command below to install TWRP temporarily and access it right away.
fastboot boot <name of twrp file here>.img
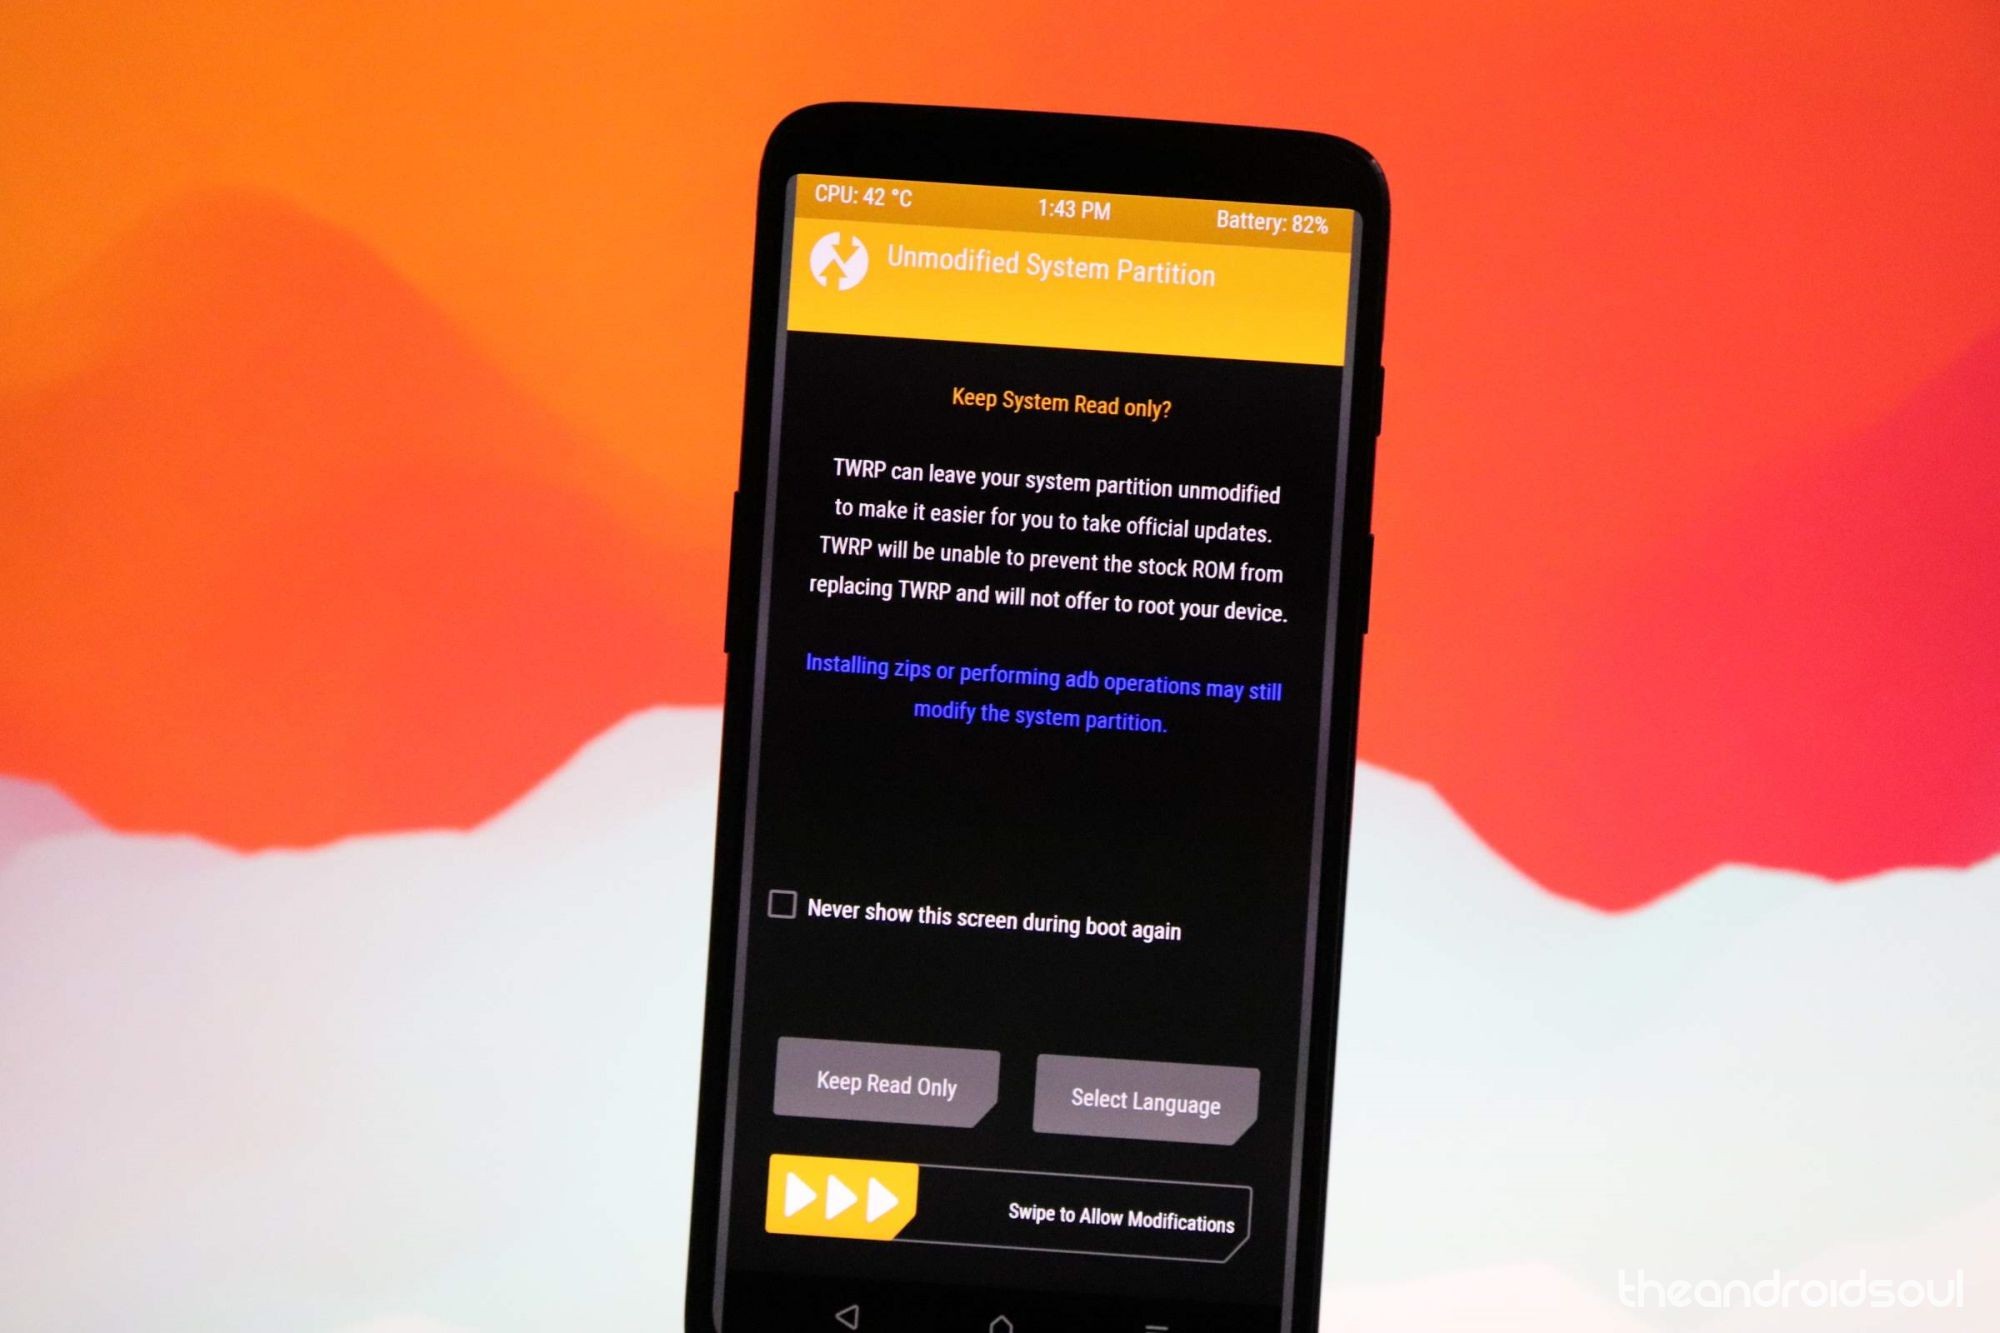
- The device will reboot to recovery mode and you will see TWRP recovery right there. Tap on the ‘Keep Read Only’ button now to not allow system modifications.

- Once your OnePlus 7 boots into bootloader mode, run the command below to install TWRP temporarily and access it right away.
- Install TWRP recovery on your OnePlus 7 permanently. If you are sure that TWRP is working well, you can now install the TWRP recovery permanently. Here’s how:
- On the device, tap on the Install button.
- Select the TWRP ZIP file you transferred right above.
- Perform the Swipe action to confirm and install the TWRP recovery permanently.
- [Careful!] Now, reboot back to TWRP again. Tap on the home button, then on the Reboot button, and then on the Recovery button to restart the device into TWRP.
- Wait, don’t reboot the device yet. You still need to root the device using Magisk, or install a DM Verity disabler file, to not let the system remove TWRP when you restart the device. Yes, to keep TWRP, you need to install either Magisk file or DM Verity disabler file. See the next step for that.
- Root your OnePlus 7. But if you don’t want to root the device, simply install DM Verity disabler file in place of Magisk root file.
- Go back to the home screen of TWRP.
- Tap on Install.
- Browse and select the Magisk root package file (or the DM Verity disabler file).
- Perform the Swipe action to confirm the installation on the next screen.
- Tap on Reboot system button to restart your OnePlus 7 to Android. If you installed Magisk, you can verify root access on your OnePlus 7 using a root checker app. (Without root or DM Verity disabler, the device will get stuck in the bootloop at the logo screen.)
So, that was all about installing root using TWRP recovery. If you don’t want to install TWRP but wish to root right away, that’s possible too. See the method below for that. Be sure to select the correct patched boot image file as per the software version currently installed on your device at the moment.
How to root OnePlus 7 without TWRP
The root method above used TWRP recovery, installing which is tiresome these days as you need to take care of decryption, DM verity check, auto removal, etc. stuff.
This would come handy then that you can actually root your OnePlus 7 without using TWRP recovery as you will us patched boot image file, which depends on the software version currently installed on your phone.
So, when you update your OnePlus 7, you need to use the new software version’s patched boot image file.
Anyway, here’s how you can root your OnePlus 7 without using TWRP. It’s way easy.
- Make sure you have unlocked the bootloader of your OnePlus 7. And that you have USB debugging enabled, and fastboot and adb driver installed, all of which is part of the bootloader unlock guide too.
- Download required patched boot image file:
- Connect your OnePlus 7 device to PC using the USB cable that came with it.
- Now open a command window inside the folder where you have the patched boot image file from above. For this, go that folder, and then type cmd in the address bar of that folder’s window, and then hit the enter key. A command window will open up, and its location will be that folder.

- Connect your OnePlus 7 device to the PC.
- Run the following command into the command window we opened above to boot the OnePlus 7 into bootloader/fastboot mode:
adb reboot bootloader
└ If you get a permission dialogue on your OnePlus 7 to “Allow USB debugging”, tap OK.
- Once your OnePlus 7 boots into fastboot mode, run the command below to install patched boot image file.
fastboot flash boot <name of patched boot file here>.img
- Now, restart your OnePlus 7 by issuing the following command:
fastboot reboot
- Once you are in Android OS, do the below to root your OnePlus 7 (don’t restart before completing the steps below):
- Open Magisk app.
- Tap on Install.
- Tap on Install Magisk.
- Tap on Direct Install.
- Restart the device now. Your OnePlus 7 is now rooted. (The root will be retained even if you reboot the device now.)
That’s all.
Do let us know if you need any help regarding getting root access on the OnePlus 7.


