The Android L developer preview is here finally after the official announcement of Android L earlier yesterday at Google I/O 2014. the latest and greatest Android version, the “L” release hasn’t been given a proper name yet. Google will release the final build of Android L by the end of this year, most probably with the launch of a new Nexus phone.
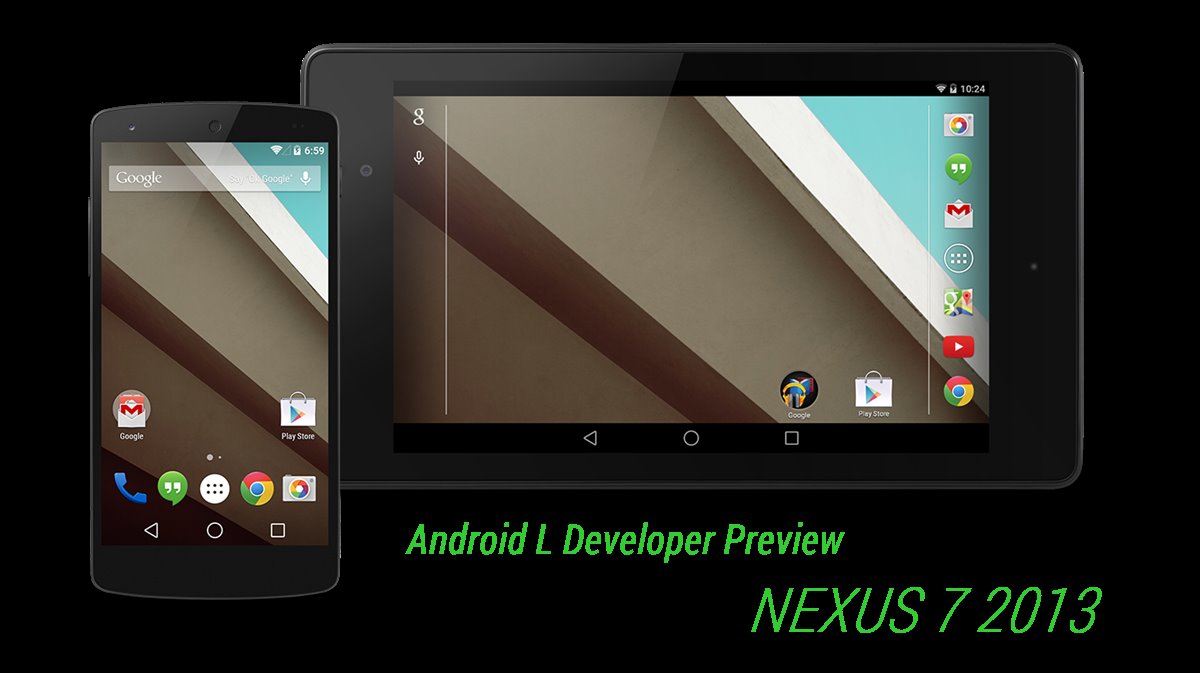
The Android L dev preview has only released for the Nexus 5 and Nexus 7 2013. Other Nexus devices won’t be getting the Android L as dev release, but there’s hardly anything worry about since we know it’ll only take a couple of days (maybe less) for developers to port Android L dev release to other Nexus 4 and other Nexus devices.
The Android L release comes with a major UI redesign which goes by the name ‘Material design’. It’s mostly neat, flat and uses soothing colors, plus most importantly, the material design animates every action on the phone. You’ll notice butter smooth animations in all interactions on your Android L running Nexus 7 2013.
See also: Download Android L Ringtones, Alarms, Notification sounds and Boot animation
There’s a lot to talk about new features in Android L, but I guess you already know it if you’re here and installing the dev release of it. So without further ado, let’s proceed to installing Android L on your Nexus 7 2013.
Downloads
Download the ADB+Fastboot files and the Android L factory image from the download links provided below.
ADB + Fastboot file → download link.
Nexus 7 2013 Android L Factory Image LPV79 → download link.
Instructions for installing Android L on Nexus 7 2013:
NOTE: Your phone will be completely wiped (formatted). If you’ve any important data like photos, music or any other file, make sure to backup it up first or else don’t follow the instructions below.
- Download the necessary files for your device and cross verify them for the build number. It should be LPV79.
- Extract the ADB+Fastboot files to a folder on your computer (avoid extracting to your desktop, there might be problem when you have a user name which has space in between like xxx yyy ) and install the USB drivers in case you are on Windows PC.
- Extract the Factory image you downloaded to the same folder where you extracted ADB+Fastboot files, the factory image will give you a file containing the codename of your device, two files with the name flash-all but with different extensions, and a bootloader image file.
- Make sure all the extracted contents of the factory image are in the same folder as the ADB and Fastboot files, otherwise you will get a file not found error.
- Put your Nexus 7 2013 in fastboot mode:
- First switch off your phone
- Press and keep holding the “Volume UP + Volume Down + Power” buttons together until you see the bootloader screen (aka Fastboot mode)
- Connect your Nexus 7 2013 to your PC and make sure the device shows up in device manager.
└ If you don’t have correct drivers installed, head on here → Nexus 7 2013 drivers installation guide. - Now click on the flash-all.bat if you’re on Windows PC or flash-all.sh if you’re on Linux, now the flashing starts.
- Wait until the flashing is completed and then simply reboot your device.
The first boot may take a tad longer, as the device builds the cache for the first time after the Update. So be patient for a while and be extremely curious for the update Nexus 7 2013.


