Windows itself is a very user-friendly platform that allows the user to make a quick switch between work and play. Quite popular among gamers, Microsoft Windows supports a massive number of thrilling games. With most of them accessible through the Microsft Store, users can easily install them and start on an exciting journey into a world of imagination and mystery.
But as convenient as it is for the gamers, the Microsoft store often becomes a headache with its long list of error codes. One of the most common errors, Error 0x803f8001 often causes issues when installing new games. And recently, it has made gaming difficult for Minecrafter gamers, so we gave some time to it, and compiled a list of solutions to fix it for you.
What is Error 0x803f8001?
One of the numerous Windows Error codes, Error 0x803f8001 is an error that may appear when a user tries to install an app from the Microsoft Store. It is mostly a software-related error, where you have a hard time installing apps from the Microsft Store, often forcing you to use the official or third-party websites instead. Using an official website is okay, but the same cannot be said for third-party websites.
Here’s how you can resolve the error 0x803f8001 when installing Minecraft from Microsoft Store.
What causes Error 0x803f8001 in Minecraft Launcher Installer?
Error 0x803f8001 is a very common and low-level error that can be caused due to various big and small factors, but the most common of them are:
- Outdated Windows Operating system
- Unavailability of the respective app in the user’s region
- Issues with the app itself
- An issue with the Microsoft store
Although it is less likely, the issue could sometimes also be caused due to a virus attack on your computer, or the interference of your Antivirus program.
How to fix Minecraft Error 0x803f8001
Follow the steps mentioned below to fix the Error 0x803f8001 in Minecraft Launcher Installer.
Method #01: Update Windows
The most likely reason to have caused the error can be an outdated operating system, so let’s just try to fix that first. But if you want to try other fixes first, you can do that, surely.
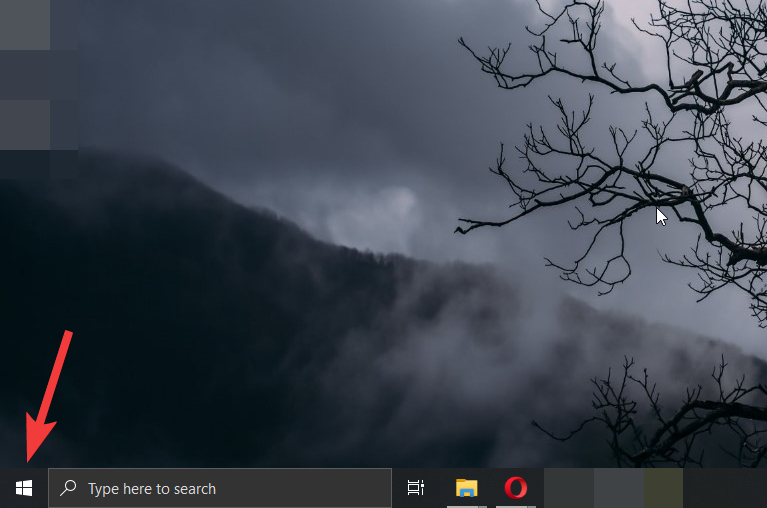
Head to the desktop, and launch the start menu by clicking the Windows icon on the bottom left corner of the screen.
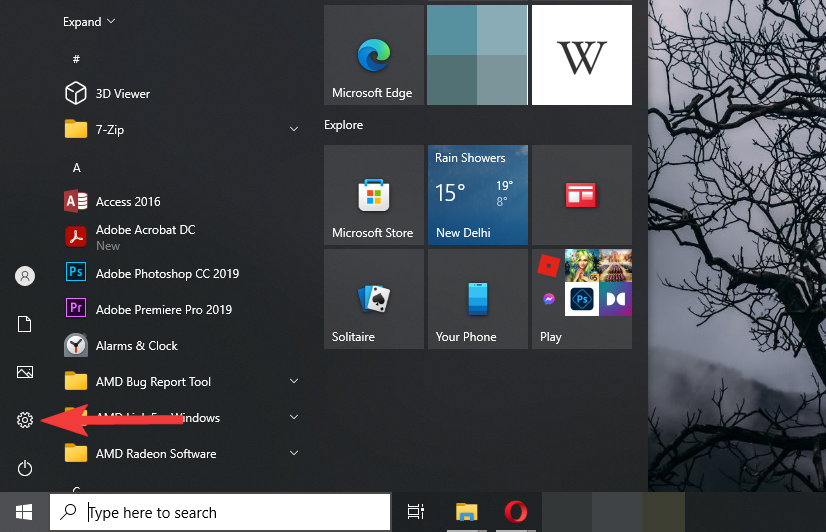
Proceed to the settings menu by clicking Settings.
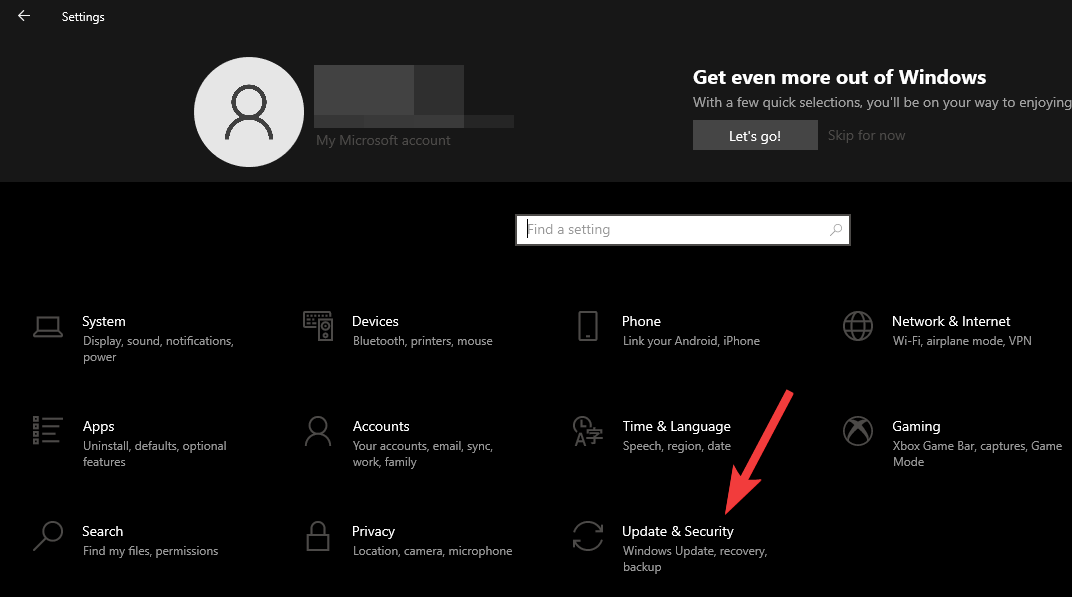
Launch the Update menu by clicking Updates & Security.
Let Windows check for the available updates by clicking Check for updates.
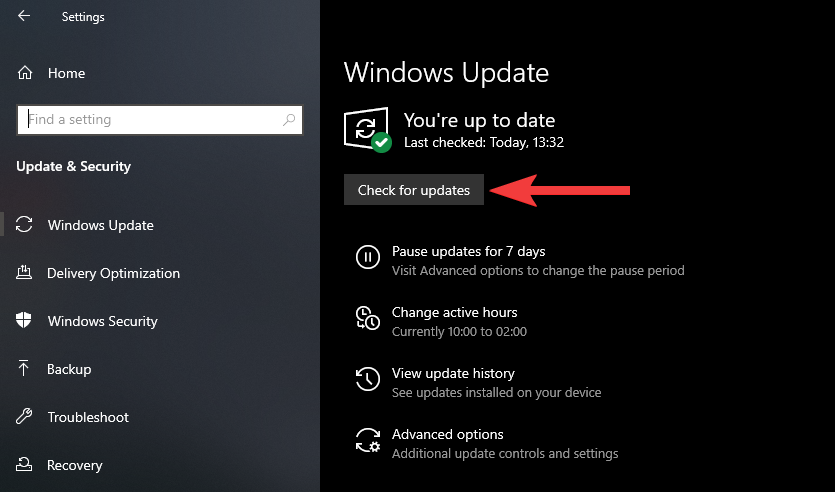
Any updates are available for your operating system will start downloading and installing on their own, but you may need to click on the Download and install button under some additional updates. Once the updates are installed, you may be prompted to restart your PC for the updates to complete, so restart your PC to complete the update.
Method #02: Reset Microsoft Store cache
Launch the Run menu by pressing the Windows+R key combination.
Type the command given below in the field.
wsreset.exe
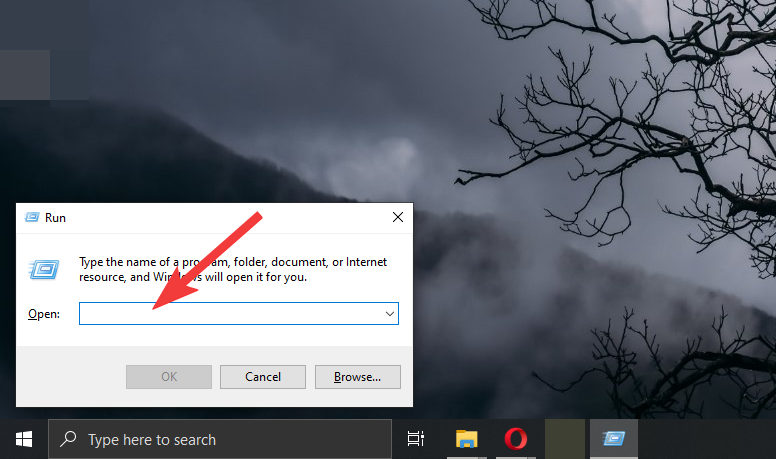
Execute the command by clicking Ok.
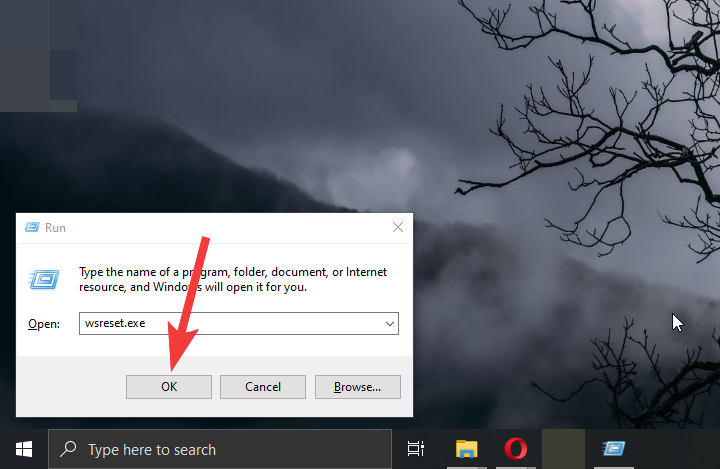
This will launch a command prompt that will reset the Microsoft Store cache and launch the store, but you will need to restart your computer for the best results.
Method #03: Change your region to the US
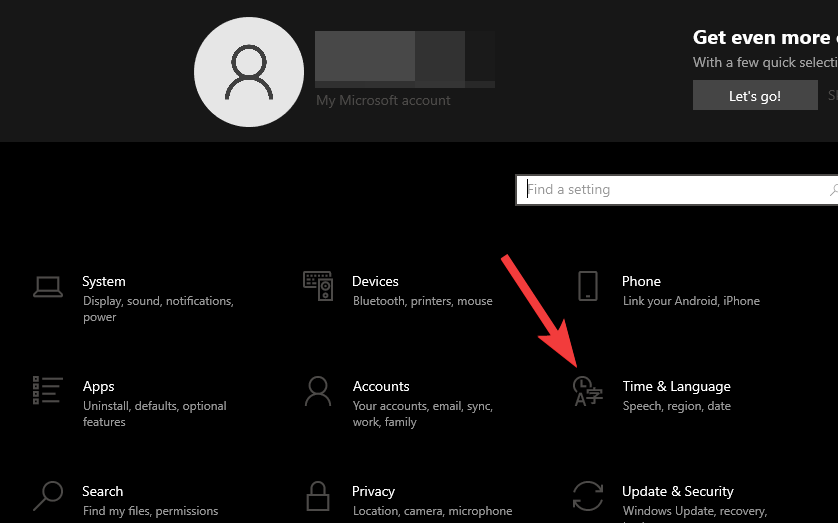
Proceed to the time & language settings menu by clicking Time & Language on the settings page.
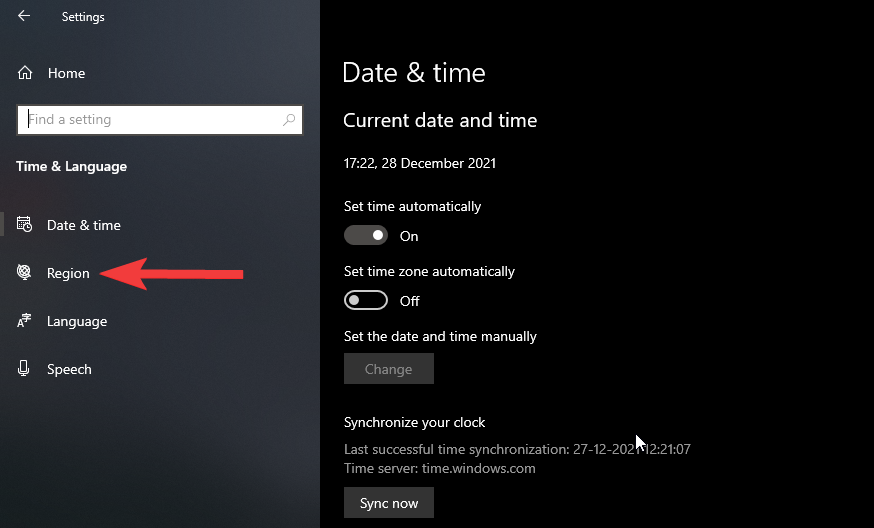
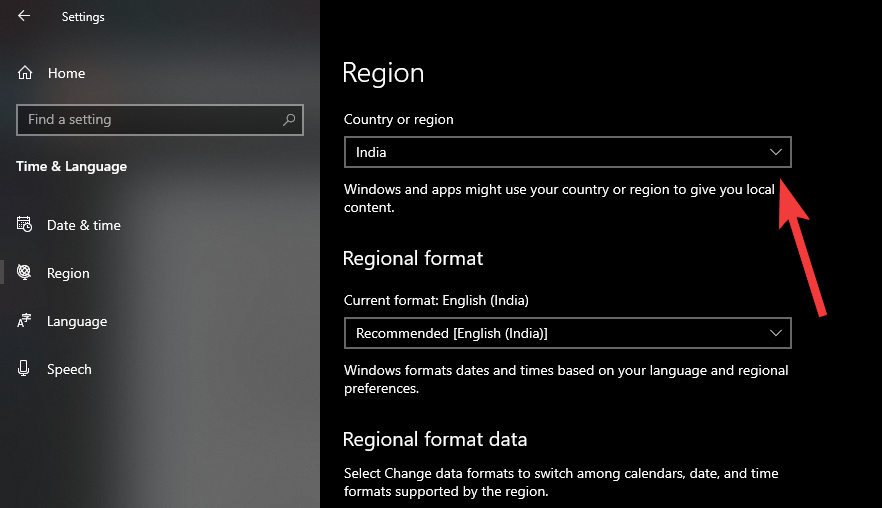
Head to the region settings by clicking Region under the date & time option.
Proceed to select the new region by clicking the drop-down menu under Country or region.
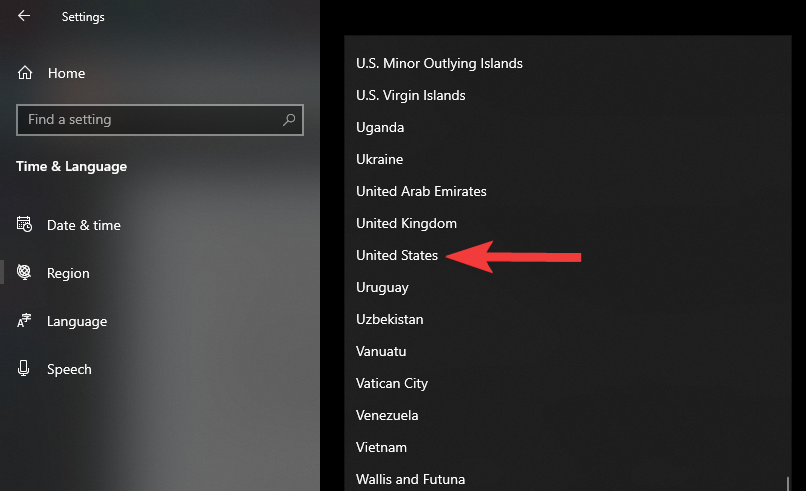
Choose the United States from the options to change your region to the United States.
Method #04: Install the old launcher
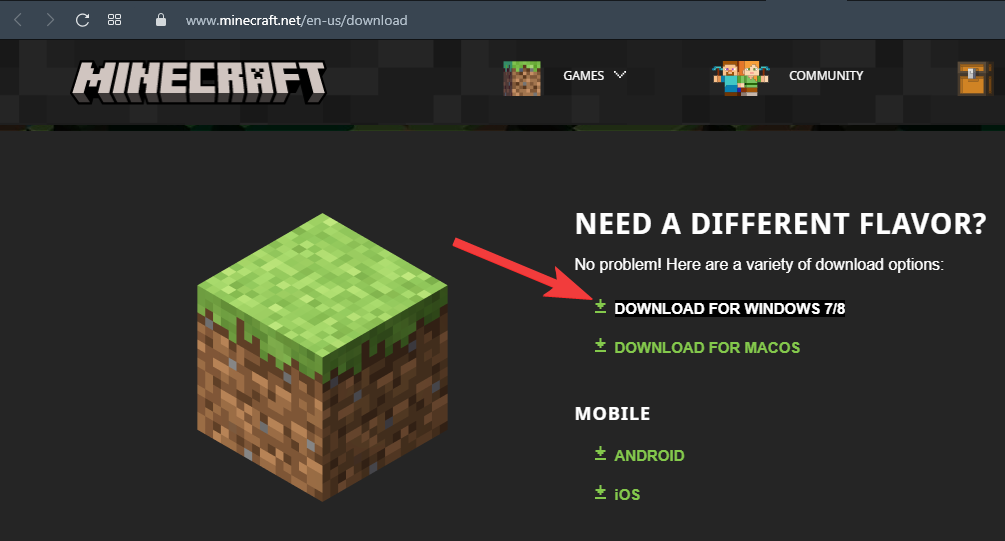
Follow the link to visit the Minecraft launcher download page, and launch the download by clicking Download for Windows 7/8.
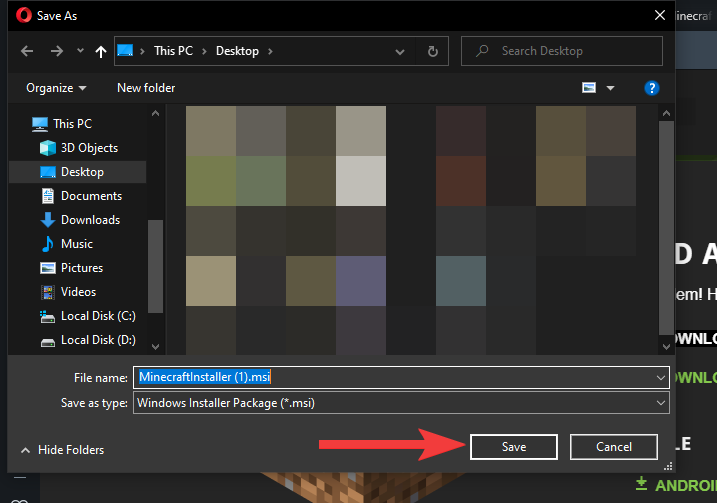
Save the installer file to a location of your choice by clicking Save.
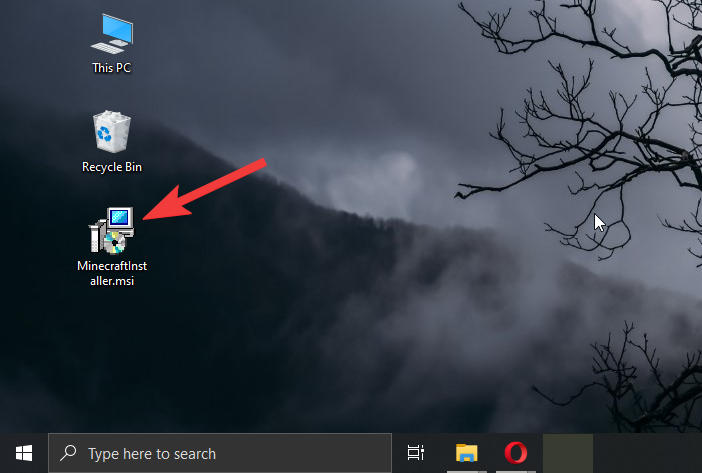
Launch the installer by double-clicking the Minecraft launcher installer file.
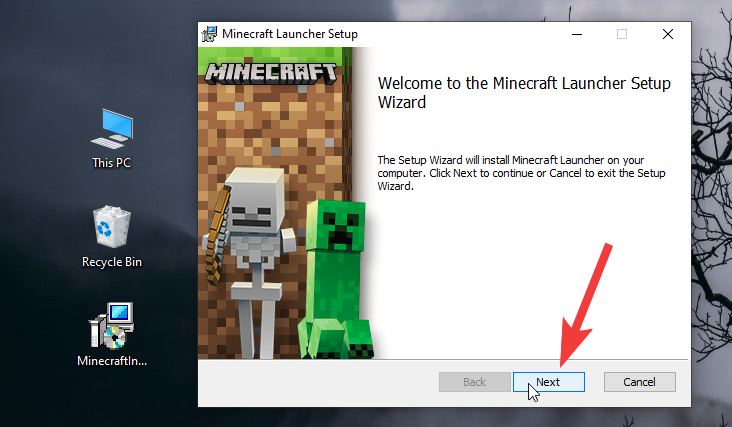
Proceed by clicking Next.
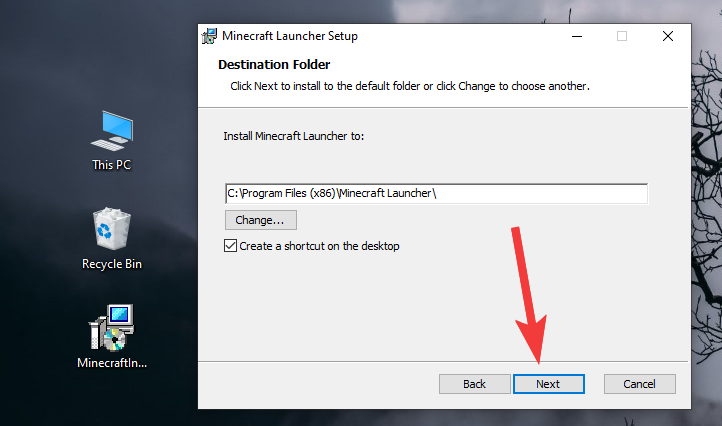
Change the install location, or simply click Next to proceed to the installation.
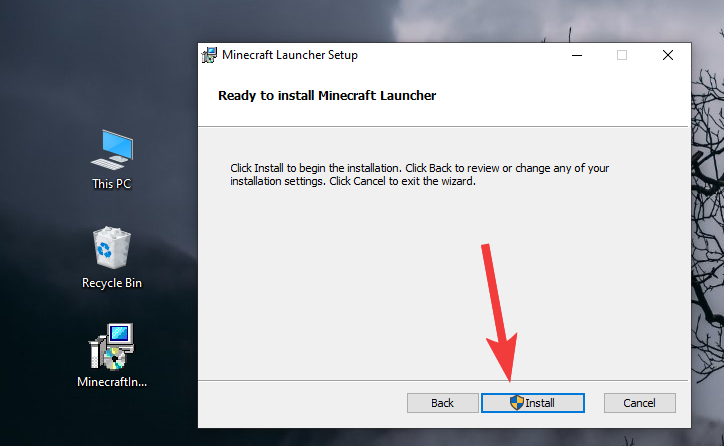
Start the installation by clicking Install and allow permission by clicking Yes on the permission screen.
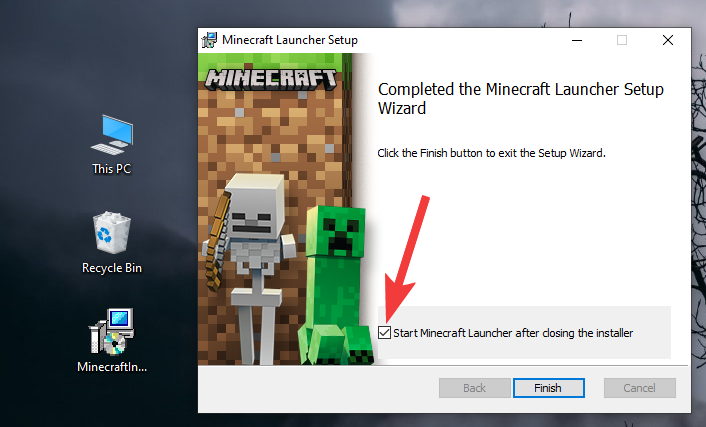
Uncheck the box for launching Minecraft by clicking the box next to it.
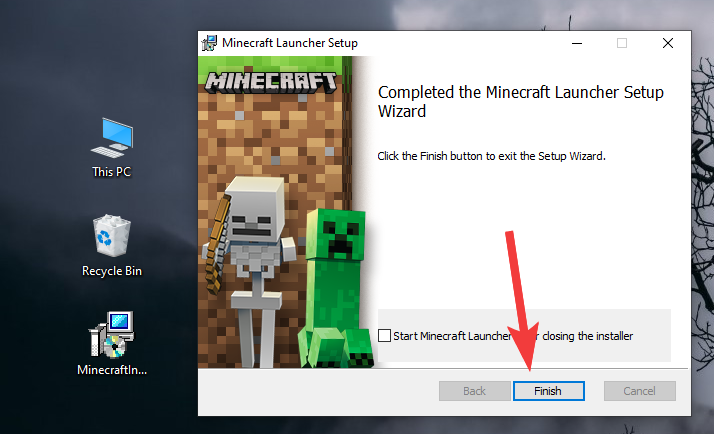
Close the launcher by clicking Finish.
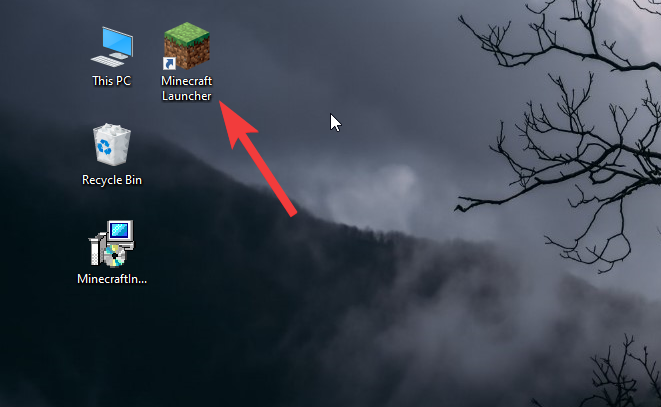
Run compatibility fixes for the old launcher:
The old launcher is built for Windows 7 and 8, so it may cause issues wit Windows 10 and 11, so we will run compatibility fixes to make it compatible.
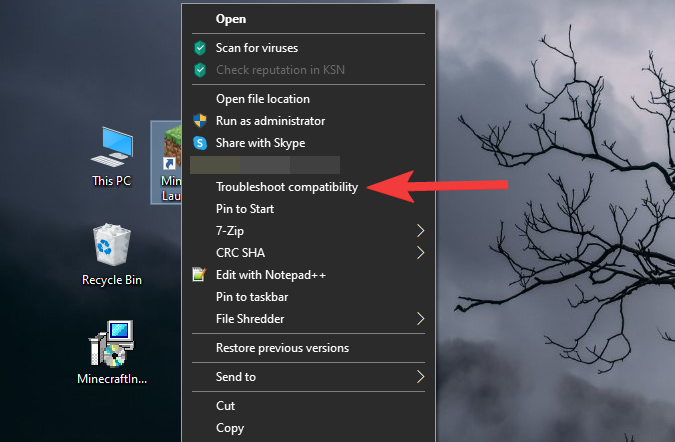
Make a right-click on the Minecraft Launcher shortcut to open a context menu.
Head to compatibility fixes by clicking Troubleshoot Compatibility.
Open the manual troubleshooting options by clicking Troubleshoot program.
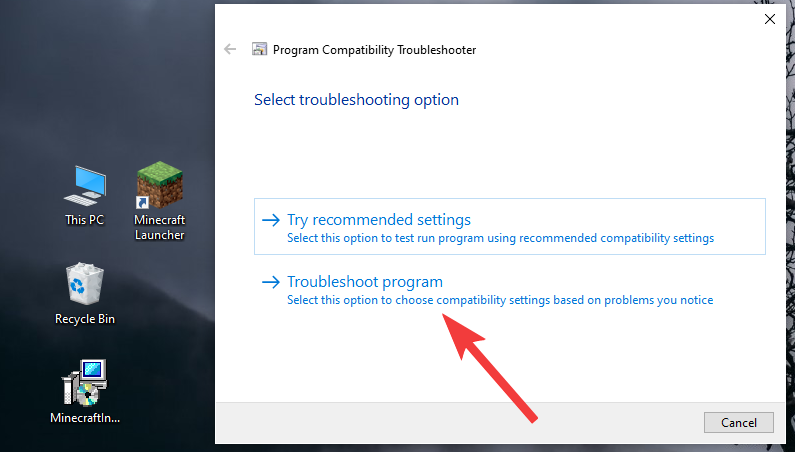
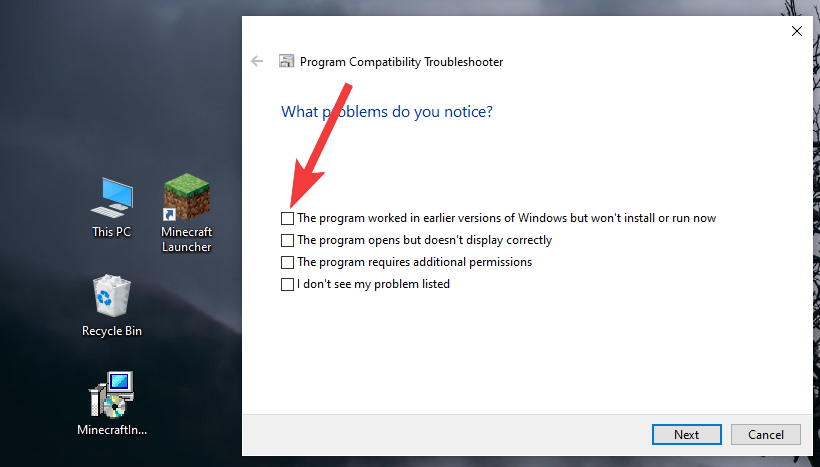
Check the box next to the first option The program worked in an earlier version of Windows by clicking the box associated with it.
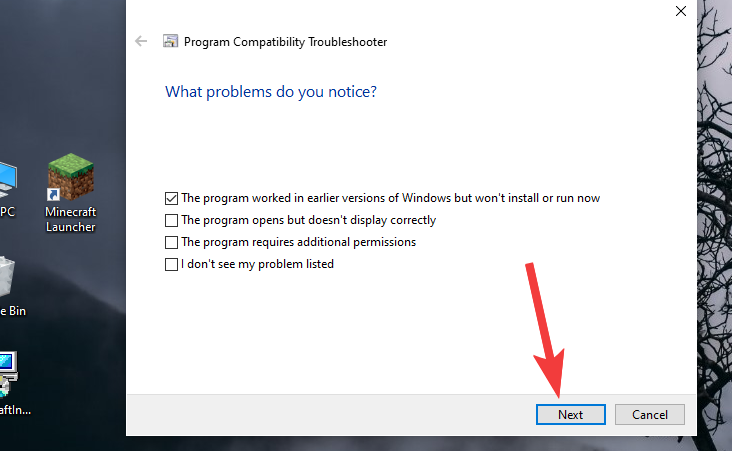
Head to the next step by clicking Next.
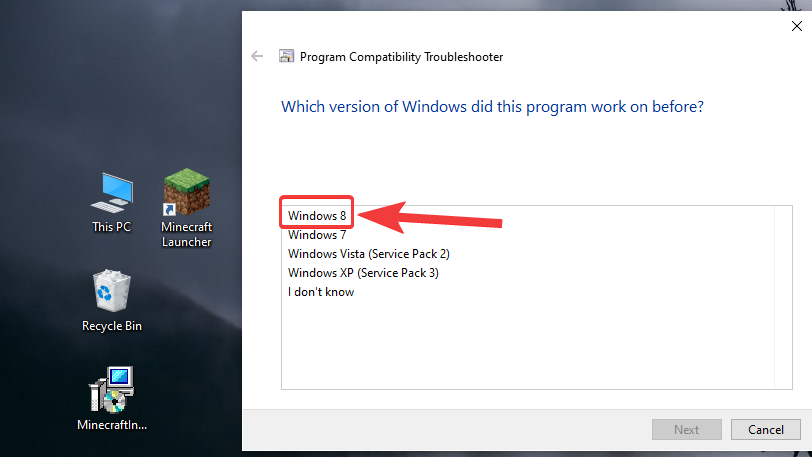
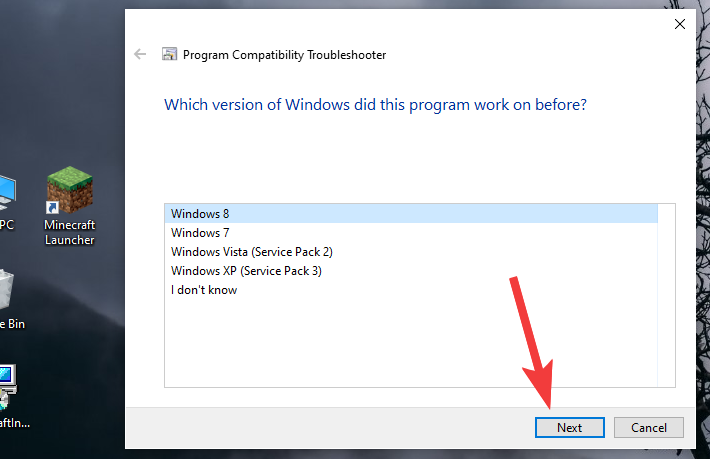
Proceed by clicking Windows 8.
Let Windows apply the required compatibility settings by clicking Next.
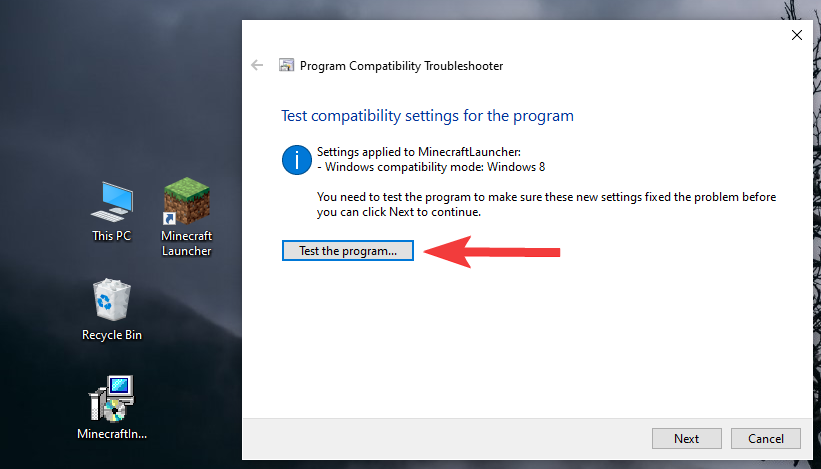
Proceed by clicking Test the program. This will start the Minecraft launcher, simply close it or leave it in the background.
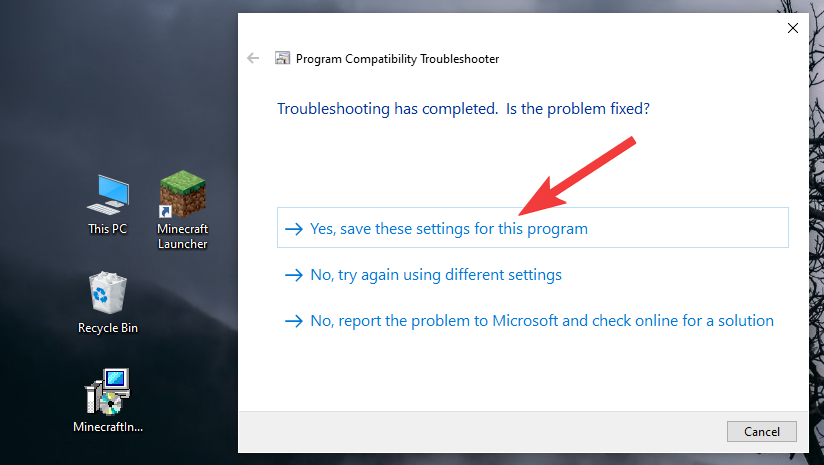
Save the changes by clicking Yes, save these settings for this program.
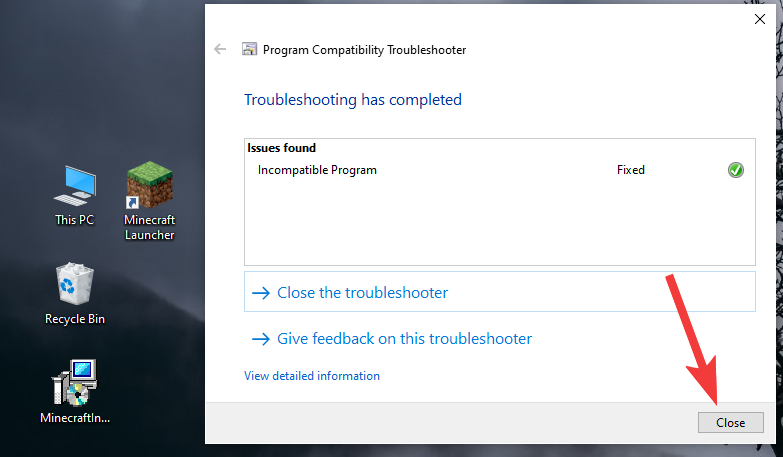
Finally, close the troubleshooter by clicking Close.
You can now easily launch Minecraft from the launcher and play it without any issues like earlier.
More Tips:
- It may not be necessary, but you can try running a full PC scan with your antivirus to eliminate the chances of any virus causing the issue.
- Once you have installed the launcher and have tested it, you can revert back to your original region settings by following the same steps.
- You are advised not to install the Minecraft launcher from Microsoft Store, always download it from the Minecraft website.
FAQs:
Minecraft launcher installer in Microsft store does not work. What to do?
You can download the older launcher from the Minecraft website to see if it fixes the issue for you. The issue is mostly because of the launcher, but depending on your computer there could be another issue. So, try following the steps mentioned above to fix your Minecraft launcher installer and enjoy Minecraft once again.
Do I always need to keep my region settings to the US to be able to play Minecraft properly?
No, you don’t always need to keep your region settings to the US to be able to play Minecraft properly. Once you have installed Minecraft, you can revert back to your original region settings. The problem occurs before the installation, so it won’t matter much if your region settings don’t match after the installation has been already completed.
Did my upgrade to Windows 11 cause the Error 0x803f8001 in Minecraft?
No, your upgrade to Windows 11 did not cause the Error 0x803f8001 in Minecraft. It is very less likely for the error to be caused by your upgrade, but if you have not updated your Windows 11 after upgrading then it could possibly be an issue. The actual issue is mostly caused by the said improved launcher, and your operating system has very little role to play in it.
Hopefully, the above-mentioned steps will fix the error for you and you would once again be able to enjoy playing Minecraft. If anything else comes up, just tell us in the comments and we will be happy to help.
RELATED





Discussion