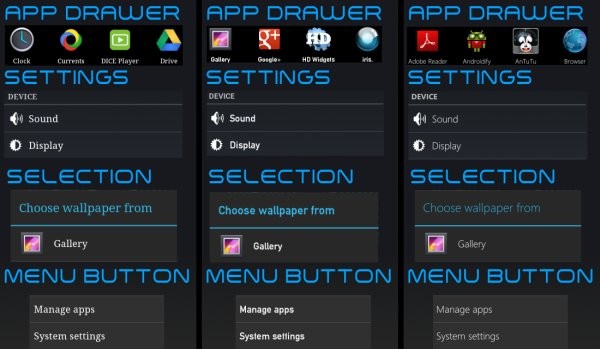
LC Font Changer is a recovery-based font changer and installer by XDA Forum Member leventccc, that lets you choose from a variety of included fonts and install them through recovery on any Android phone running on Ice Cream Sandwich Android 4.0. It features the Aroma Installer that lets you use a graphical interface in recovery for selecting and installing the fonts, as well as providing you with previews of the fonts before installing them.
LC Font Changer includes the following font packages:
- Android Logo
- Gingerbread Stock
- MeeGo
- Nokia PureView 808
- Ubuntu
- Windows Phone 7
- Sony Xperia S
Keep in mind that on some phones or ROMs, the fonts may fail to change, but it should work on most devices. However, even if it doesn’t work, nothing bad will happen, so do give it a try.
Let’s take a look at how you can use LC Font Changer on your Android device.
How to Use LC Font Changer
- First and foremost, make sure you have an Android 4.0 ROM and a custom recovery like ClockworkMod recovery installed on your phone. This guide will assume you have ClockworkMod recovery, so some steps may vary a little for other recoveries, but the main procedure is the same.
- Download the latest version of the LC Font Changer from the official development page.
- Copy the downloaded .zip file to the SD card on your phone.
- Turn off the phone and boot into recovery.
- Select install zip from sdcard, then select choose zip from sdcard. Scroll to the LC Font Changer zip file on the sdcard and select it. Confirm by selecting Yes on the next screen.
- After a few seconds, the LC Font Changer app will start up. Here, select Next by pressing the power/home button.
- On the font installation screen, navigate between different options using the volume buttons.
- To preview a font, highlight it using the volume buttons, then press the power/home button to select it, then highlight the Next button and select it. A preview screen of the selected font will come up for a few seconds, then you will get a prompt asking you whether you want to install the selected font. Select No to preview other fonts.
- If you do want to install the selected font, select Yes. If you select Yes, the font will be installed. After installation is complete, select Next using the power/home button.
- You will now be back in recovery. Here, select go back then select reboot system now to reboot the phone.
NOTE: If you find that your status bar/notification bar is messed up after installing a font, reboot to recovery, use the wipe cache option to wipe the phone’s cache, then reboot the phone.
Your phone’s font is now successfully changed. You can change to different fonts by repeating the procedure above in recovery. Let us know how it works for you, in the comments below.


