What to know
- Windows 10 users can use the Flyby11 tool to bypass checks while upgrading to Windows 11, allowing PCs with unsupported hardware to upgrade to Windows 11 easily.
- Download, extract, and run Flyby11. Select Method 1: Inplace Upgrade via Server setup and click Start.
- Once the Windows 11 ISO is downloaded, select it to mount, and continue with the upgrade.
With Microsoft ending support for Windows 10 soon, it’s only fair that developers have come up with ways to bypass the requirements for upgrading to Windows 11 24H2. Recently Rufus, a popular third-party tool for installing and updating Windows, released its version 4.62 beta to that effect. But that isn’t the only way to get around the stringent Win 11 requirements.
There’s another recently released tool called Flyby11 that works as an alternative to Rufus. Here’s everything you need to know to upgrade to Windows 11 using Flyby11.
What is Flyby11?
As per its GitHub page, “Flyby11 is a simple patcher that removes the annoying restrictions preventing you from installing Windows 11 (24H2) on unsupported hardware.”
Some of the restrictions that Flyby11 bypasses includes TPM check, Secure Boot, and unsupported processor checks. Created by Belim, Flyby11 provides a quick solution to Windows 10 users who are being blocked
by Microsoft from upgrading to Windows 11. It’s also super easy to use.
How to Use Flyby11 to upgrade an incompatible Windows 10 PC to Windows 11
You can use Flyby11 whether or not you have the Windows 11 ISO file downloaded as the tool takes care of that too. Here’s how to go about the whole process.
Part 1. Download and run Flyby11
Step 1: First up, go to the FlyBy11’s GitHub release page and download the flyyscript.zip.

Step 2: Once downloaded, extract the contents.
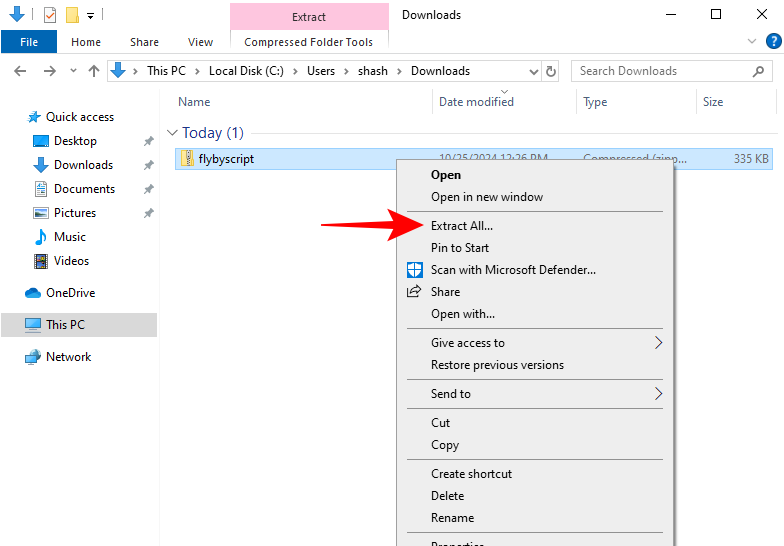
Step 3: Then simply run Flyby11.
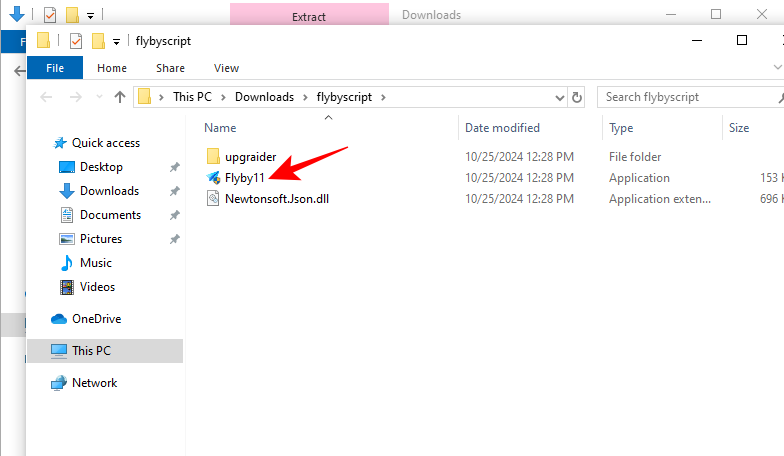
2. Get Windows 11 ISO
Flyby11 provides a few options for you to get going. The ideal option is an in-place upgrade.
Step 1: On the Flyby11 window, select Method 1: Inplace Upgrade via Server Setup (as highlighted in the screenshot below).
You will need the Windows 11 ISO for it. But if you don’t have it yet, fret not. Flyby11 will take care of that too.
Step 2: Then click Start.
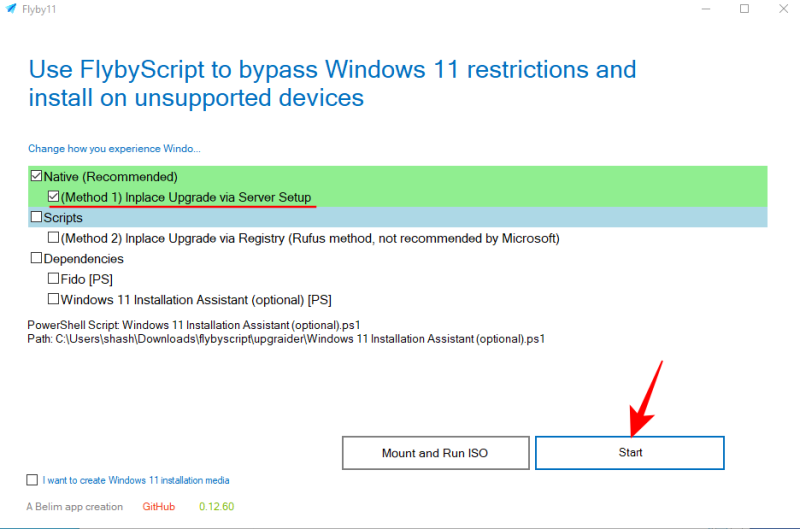
Step 3: In the ‘Fido’ window, click Continue to select the version, release, edition, language, and architecture.
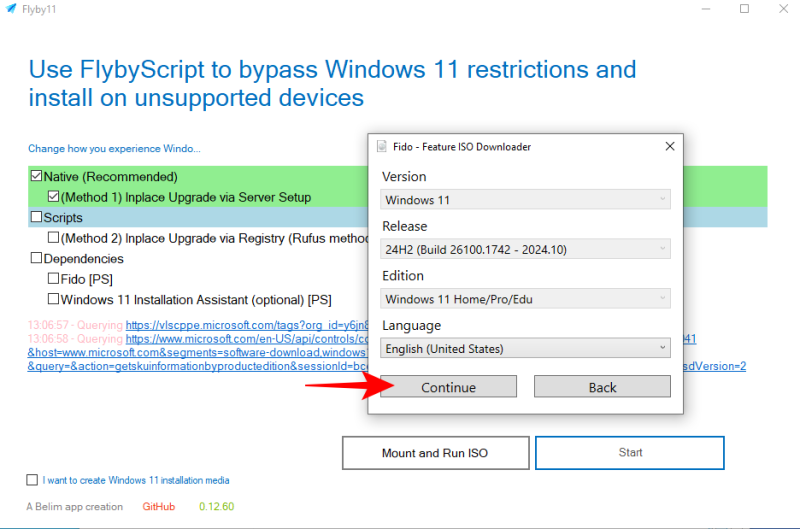
Step 4: Finally, click Download.
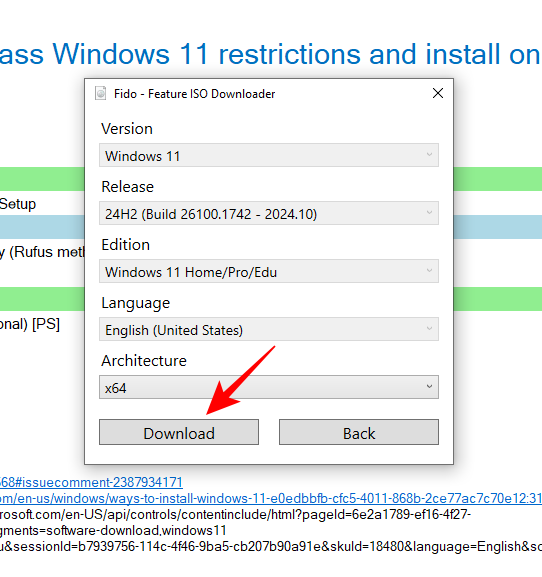
This will start the download.
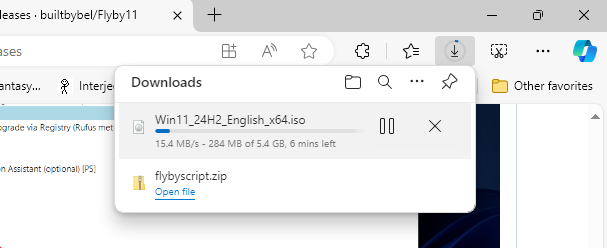
Wait for the ISO to finish downloading.

3. Mount and run Windows 11 ISO with Flyby11
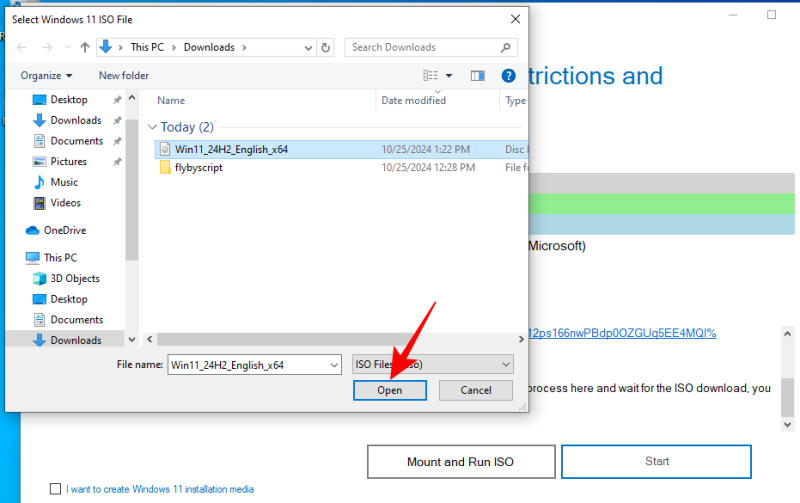
Once the ISO is downloaded, you’ll be prompted to select the ISO file to mount.
Step 1: So select the Win 11 ISO file and click Open.
Step 2: Then just go about the installation process as usual.
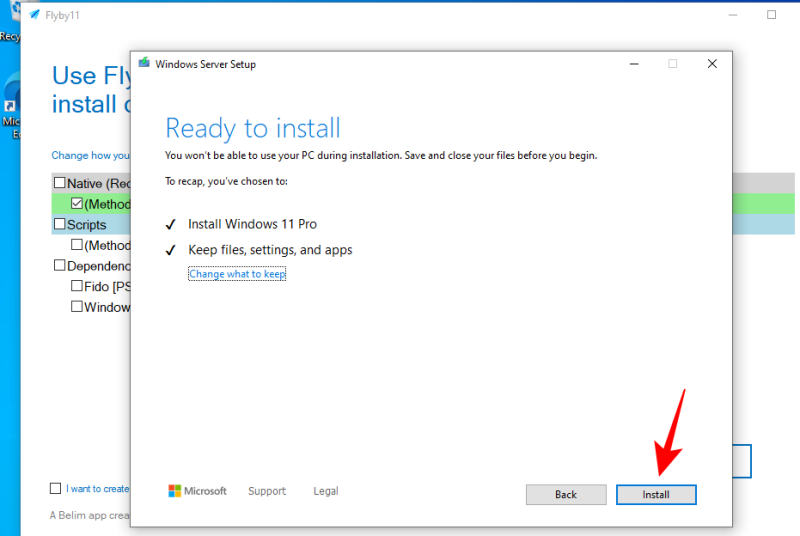
Step 3: And just like that, your unsupported Windows 10 PC will have upgraded to Windows 11.

As the developer mentioned, the tool was first created for their friend and is intended to be a quick solution to bypass all the checks that Microsoft forces upon Windows 10 users before they can upgrade to Windows 11. And a quick and easy solution it is.


Discussion