Ever had annoying system apps that you wish to get rid of? Ever had your Android device filled with OEM bloatware that you can’t get rid of? If you have ever been in these situations then you might know that achieving these tasks requires your phone to be rooted.
However, unlocking and rooting your device comes with its own security risks and not to mention the risk of bricking your device. So isn’t there any other way to achieve these tasks? Well, there is, let me introduce you to ADB commands for Android devices.
What is ADB?
ADB is a comprehensive command-line tool for all Android devices released by Google. ADB or Android Debug Bridge allows you to communicate with your device using commands from a compatible system that can run Terminal over a USB connection. This shell requires you to activate USB debugging on your device for it to work properly.
ADB can then be used to perform virtually every task imaginable on your Android device. This can be quite useful, especially if you wish to uninstall or install apps, create backups or just use your phone when your touch is not working.
How to use ADB Shell
Here’s everything you need to set up ADB and then start using ADB shell on your PC to get things done on your Android device.
Step 1: Set up ADB
Setting up ADB is a pretty simple process depending on your requirements. You can set it up for temporary access from a particular location, or set it up to be accessible for all users across your Windows or macOS installation. We have a comprehensive setup guide at this link that can help you setup ADB based on your preferences. You can set up ADB on your PC or Mac using this guide and then follow the guide below to execute ADB commands to your liking.
Guide: How to Install ADB and Fastboot on Windows: Step-by-step guide with pictures
Step 2: Make sure ADB is working
(Please first make sure you have set up ADB as given above.)
Open CMD in the Platform Tools folder to access ADB. If you wish to open a temporary instance, navigate to the Platform Tools folder, type in CMD in the address bar, and press ‘Enter’ on your keyboard.

Now connect your device to your system using a USB cable. Once connected, type the following command in your CMD window and press ‘Enter’.
adb devices

You should now get a list of ADB-compatible devices connected to your PC. Your phone should be listed in this section.

However, if your phone does not show up, unlock your device and you should have a request to access USB debugging on your device. Tap on ‘Allow’ to grant the permission.

Execute the command above again and your device should now show up in the list.
Step 3: Use ADB Shell
Now type the following command and press enter again.
adb shell

You will now be in your phone’s debugging directory and the same should be denoted by the development name for your device. We can now execute all the ADB commands we wish.
For this example, let’s uninstall an app (umm, let’s take the native clock app by Google), which would otherwise be impossible from your device. Execute the command below to remove the native Google Clock app from your device.
pm uninstall -k com.google.android.deskclock

And that’s it! The app will now be permanently removed from your device, for all users (if there were multiple users, that is).
If you have multiple users set up on your device and want to remove it for one user only, then you can use the user parameter. The commend below uses ‘user 0’ which means the app with be disable for user 0 only, usually the first user on the device.
pm uninstall -k --user 0 com.google.android.deskclock

You should keep in mind that it is not recommended to uninstall system apps for all users. Sometimes these apps can be hardcoded in your system which can break other functions.
In the case of the Clock app, you could lose the ability to source time within all apps that were tied in with the Clock app. This includes widgets, weather apps, and more.
Hence, we recommend you only uninstall system apps for selected users. This way, you will have the option to restore them in the future if ever needed. You can use the command below to reinstall any uninstalled system app.
adb shell cmd package install-existing com.google.android.deskclock

‘com.google.android.deskclock’ is the package name for the native Google Clock application. This can be replaced with the package name of your desire to remove any system app.
How to source package names for use in ADB Shell
So now that you can uninstall system apps, you might want to source package names for all of them. There are a couple of ways to do so, but the easiest one seems to be using the Play Store on your desktop.
Simply visit the Play Store page for any system app and you will find its package name in the address bar as shown below.

However, if you can not find the system app in the Play Store, then you can use the ADB command below to get a list of all installed apps on your device.
pm list packages -f

You will now get a list of all the apps however, you will need to cross-reference them to find out which package name belongs to which app.
Popular ADB commands
Now that you can execute ADB commands easily, here are some vital ADB commands that you can use to your advantage especially in sticky situations. The mirror screen command is exceptionally useful as it can allow you to access and operate devices that have a dead screen. Let’s take a look at some popular ADB commands.
Remove system apps
You’re already familiar with this one but here is the command to uninstall any app from your device, be it system or third party.
pm uninstall -k --user 0 <package name>
If you wish to completely remove the app from your device for all users, then you can use the command given below instead.
Note: Not recommended
pm uninstall -k <package name>
Create a backup of all your data
You can also create backups using ADB commands to prevent you from losing your data. This is especially handy if you have a faulty installation on your device or in case your device is stuck in a boot loop. These commands can also be used to source your data from devices with dead screens and other hardware defects that prevent you from accessing your storage.
To back up settings and apps
This command will backup all your android settings and apps including system apps.
adb backup -apk -all -f backup.ab

To back up settings, apps, and shared storage
If you use shared storage on your device then you can use this command instead. It will backup your shared storage as well including apps and settings.
adb backup -apk -shared -all -f backup.ab

To back up only user-installed apps
If you only wish to backup your apps then you can use this command instead. This will exclude Android settings and system apps from your backup.
adb backup -apk -nosystem -all -f backup.ab

Restore a previous backup
Apart from creating a backup, you can also restore a previous backup to your Android device using ADB. Use the command below to restore a previously created backup. This doesn’t have to be an ADB backup, it can be a backup from any source, as long as it uses the .ab extension and you can source the path to it on your local storage.
adb restore <backup path>

Note: Ensure you include the extension in your backup name for this command to work as intended.
Mirror your device screen to your PC
You can also mirror your Android device screen to your PC using ADB commands. This can be useful if for some reason you are unable to view the screen on your Android device. This can happen due to multiple reasons like failed hardware, failed touch screen, permanent lock, faulty lock button, and more. Use the guide below to mirror your device’s screen to your PC.
Install ffmpeg
Required
- ffmpeg for Windows 10 | Download Link
- ffmpeg set as an environment variable on your Windows installation
Guide
Download the latest available version of ffmpeg using the link above. You will get a .zip or .7z file. Extract it to a convenient location. Once extracted, open the folder for ffmpeg and then open the ‘bin’ folder. Now copy the path in your folder’s address bar to your clipboard.

Right-click on the Start icon and then select ‘System’.

Now scroll down in the right tab and click on ‘Advanced System Settings’.

You will now be taken to the ‘Advanced’ tab of your system settings. Click and select ‘Environment variables’ at the bottom.

Now scroll the system section and click on ‘Path’. Click on ‘Edit’.

A new window will now open. Click on ‘New’ on your right side. 
Now paste the path to the ffmpeg folder your copied earlier and press ‘Enter’ on your keyboard.

Click on ‘Ok’ at the bottom of your screen.

And that’s it! ffmpeg is now set up on your system and we can now access it using command-line tools.
Mirror your screen
Required
- ADB set up on your Windows system.
Guide
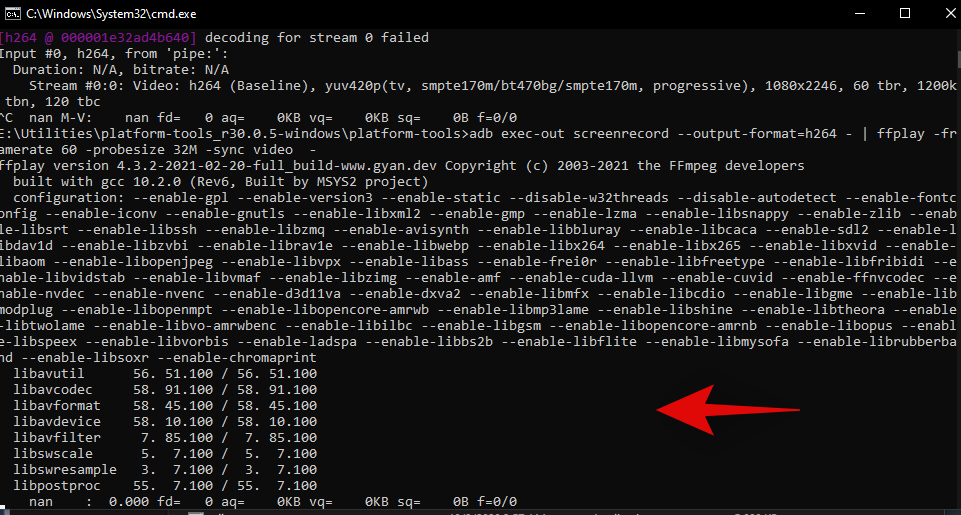
I will now open a temporary instance of CMD in my platform-tools folder for this example. However, if you have ADB set up across Windows then you can execute this command from any CMD window. Once open, enter the following command and hit enter.
adb exec-out screenrecord --output-format=h264 - | ffplay -framerate 60 -probesize 42M -sync video -

Note: The probesize is 42MB as this should be enough for all modern-day smartphones running a resolution an HD resolution. However, if you have a smartphone with a 4K display then you might have to increase the probe size to a suitable size. We recommend using increments of 20 MB till you find the sweet spot for your device.
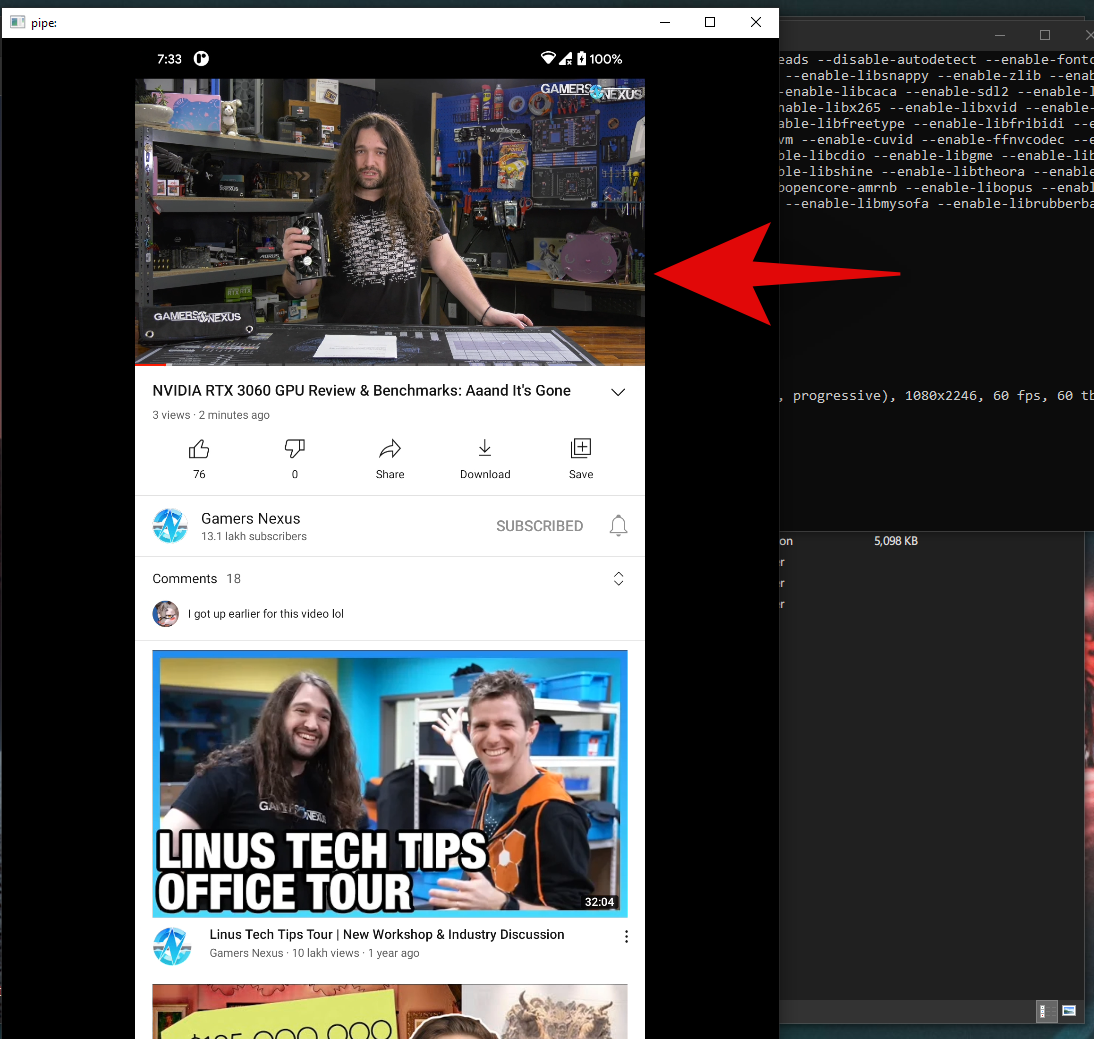
Once executed, wait for a few seconds. ffmpeg will automatically launch a Window that should display your screen. However, if the screen appears to be black, unlock your device and open up an app or two. There will be a slight delay but your screen should start mirroring to your PC within the next few seconds.
Remove screen lock
Forgotten your screen lock? Fear not, ADB is here to your rescue. You will, however, need to boot your device to recovery mode for this setting to work. Follow the guide below to get started.
Note: Sadly this only works for Rooted devices with USB debugging enabled. There is no way to remove the screen lock using ADB for non-rooted devices. Additionally, this method is sometimes known to conflict with OEM skews of Android as well as Custom ROMS. The functionality of this command is not guaranteed for all devices.
Enter Recovery mode
Hold the Power button and Volume down button until your phone restarts. If you are unrooted, use the volume keys to navigate your bootloader and highlight ‘Recovery mode’. Once highlighted, use the power key to select and boot into recovery mode.
If you are rooted, decrypt your device in TWRP and then tap on ‘Recovery mode’.
And that’s it! Once you have entered the recovery mode, you can now remove the screen lock from your device.
Use ADB to remove screen lock
Open a CMD window and enter an ADB instance. We will be using a temporary instance in the platform-tools folder for this example.
Connect your device to your system using a USB cable, and then execute the following command to make sure your device is recognized.
adb devices

Note: Make sure USB debugging is enabled on your Android device.
Once your device shows up, execute the following command to remove your screen lock.
adb shell rm /data/system/gesture.key

And that’s it! This command will now remove the screen lock from your device. You can now reboot your device to get back into Android OS. Although you will be prompted to unlock your device, any combination/pattern will work at this point as the screen lock has been removed.
Spoof battery levels and status
Why would you want to do this? Why not! You can change or spoof your battery level as well as its current status using ADB commands. Use one of the commands below depending on what you wish to achieve.
Change battery charge level
Use this command to spoof your current battery levels. Replace ‘<n>’ with the value of your choice to set it as your current battery charge level.
adb shell dumpsys battery set level <n>

Change battery status
You can also change your battery status to various values like ‘unknown’, ‘charging’, ‘discharging’, or ‘not charging’. You can even use this command to set the value to ‘Full’. Use the command below to make the necessary changes.
adb shell dumpsys battery set status <n>

The <n> will need to be replaced with a number that corresponds to the respective battery status. Use the guide below to choose the constant value that best suits your needs.
- Charging: 2
- Discharging: 3
- Battery Full: 5
- Battery not charging: 4
- Battery status unknown: 1
And that’s it! Using this, you can spoof your battery status to the desired value.
Reset battery spoofing
Of course, once you have meddled with your battery level and status, there will come a time you will want to revert your changes. Once you spoof values related to your battery, Android will stop sourcing its current status from the actual hardware on your device. To revert these changes, use the ADB command below.
adb shell dumpsys battery reset

Take screenshots
You can also take screenshots using ADB commands. This can come in handy if some apps don’t allow screenshots or if you wish to capture screenshots on a device suffering from hardware failure. Use the command below to easily capture screenshots using ADB commands.
adb shell screencap -p /<path>/<filename>.png

Replace <path> with the path of the directory where you wish to store your captured screenshot. Similarly, replace <filename> with the name of your choice for the current screenshot.
Note: You will need to change the name each time if you are taking multiple screenshots otherwise they will keep replacing each other.
Initiate screen recordings
Lastly, you can also use ADB commands to capture your screen and store the video file directly on your system. Use the command below to initiate a screen recording for your device.
adb shell screenrecord --time-limt <time> --bit-rate <bitrate value> /<path>/<filename>.mp4

By default, this ADB command will record your screen for 3 minutes. If that is enough for you, you can remove the “–time-limit <time>” variable from the command. If you wish to record more than that, then you can replace <time> with your desired duration in seconds.
Similarly, you can change your bit rate value by replacing <bitrate value> with your desired value. However, if you wish to use the default bitrate, you can remove the following variable from your command: “–bit-rate <bitrate value>”.
Lastly, if you wish to stop the recording before the set time limit, press ‘Ctrl + C’ on your keyboard to stop the recording when the CMD window is active on your desktop.
We hope that you were able to easily set up and use ADB on your device using the guide above. If you face any issues or have any questions for us, feel free to reach out using the comments section below.