What to know
- Apple now lets you transfer your playlists from Apple Music to YouTube Music.
- Go to Apple’s Data and Privacy page, select ‘Request to transfer a copy of your data’, select Apple Music playlists, and follow the on-screen instructions.
- The transferred playlists will be available in your YouTube Music library.
Transferring saved songs and playlists is perhaps the biggest hurdle when one is considering switching music streaming services. You could do it manually, sure. But if you have hundreds of songs to transfer, it can feel like donkey work that no one should have to endure.
The problem arises out of the fact that most music streaming services don’t talk to each other. Fortunately for Apple Music subscribers thinking about jumping ship to YouTube Music, Apple has finally made the task simpler.
As per a new Apple support document, you can now transfer all your Apple Music playlists to YouTube Music in a matter of minutes. Here’s how to go about it.
Requirements
Before you begin, make sure you have both an active Apple Music subscription and an active YouTube Music account.
Additionally, note that, you can only transfer the playlists that you’ve created or collaborative playlists that you own. Anything else, including music files, folders, saved podcasts and audio books aren’t transferred.
Note also that your playlists can only include songs available on YouTube Music. Songs not available on YouTube Music won’t be transferred.
So, with that in mind, let’s get started with the transfer.
Guide
- Add all the Apple Music songs that you want to transfer in a playlist.
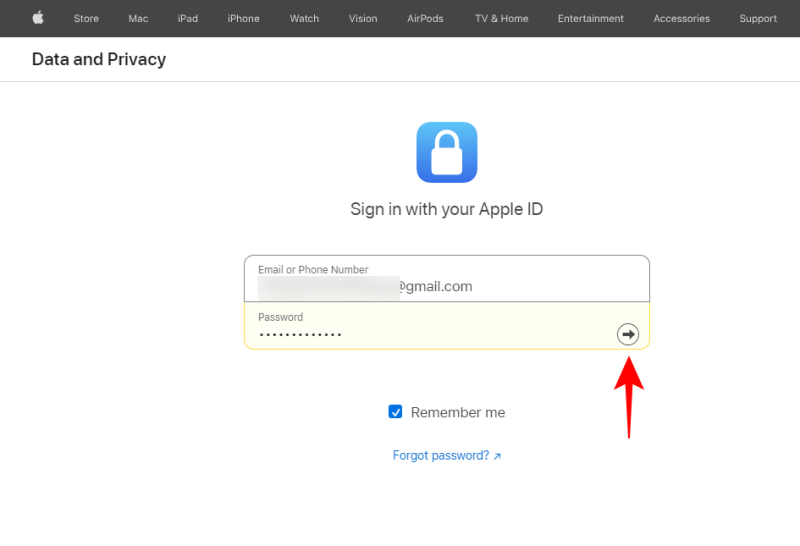
- Once you’re ready, open Apple’s Data and Privacy page and sign in with your Apple Account.
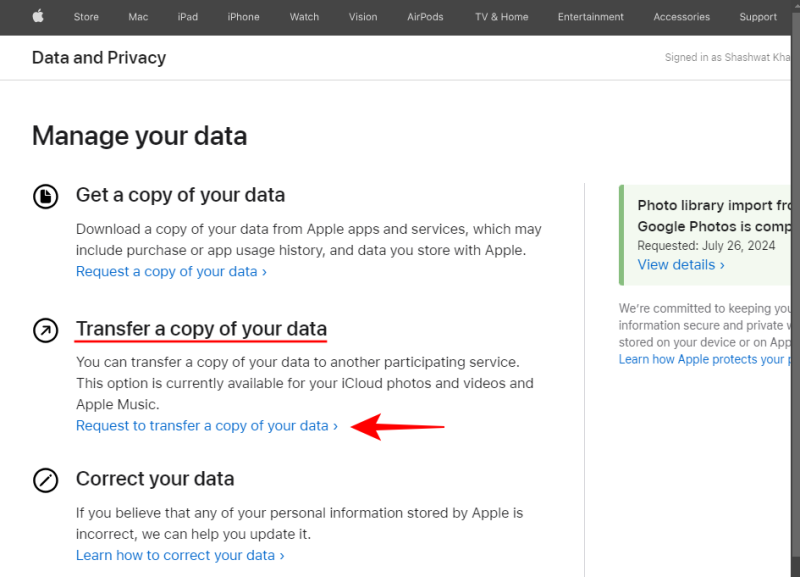
- Under ‘Transfer a copy of your data’, select Request to transfer a copy of your data.
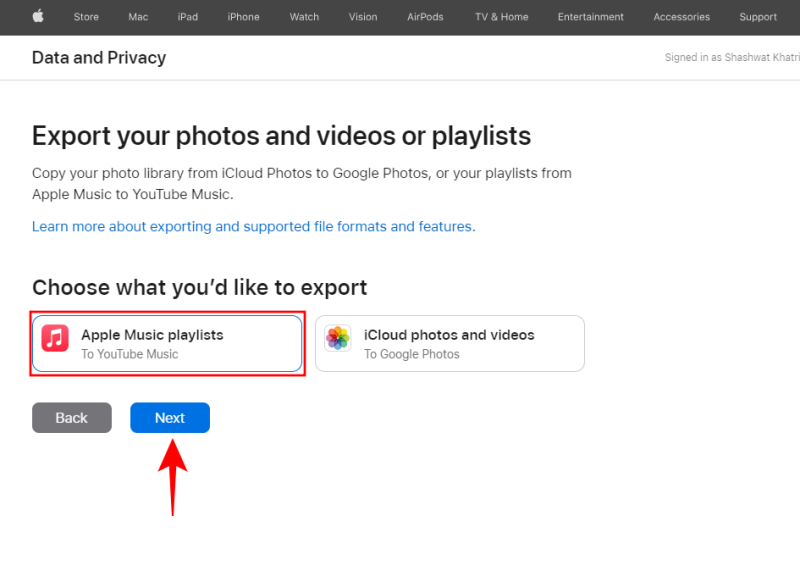
- Select Apple Music playlists (To YouTube Music) and click Next.
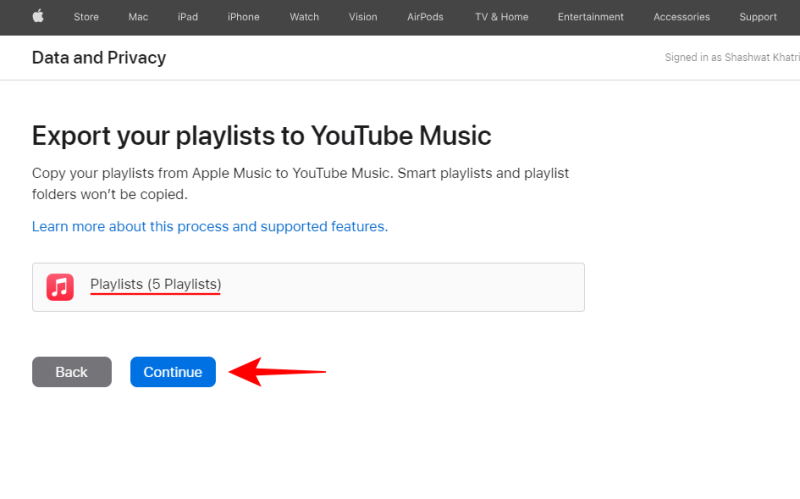
- You will see how many Playlists are being transferred. Click Continue.
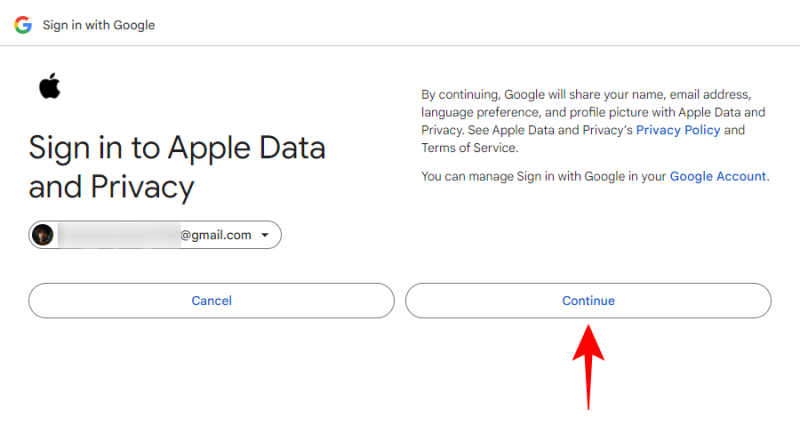
- Select the Google account associated with your YouTube Music account.

- Click Continue.
- Make sure to select View and manage your YouTube Music data. Then click Continue.
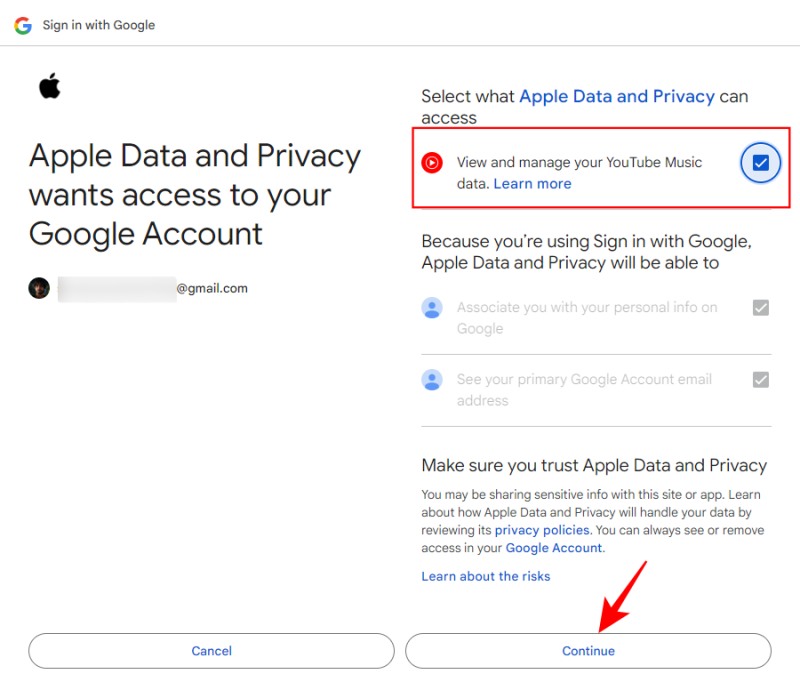
- Finally, click Confirm Export.

- Depending on how many playlists you’re transferring, this could take some time.

- When the transfer begins, you’ll receive an email from Apple telling you about it.

- Once the transfer is complete, you’ll receive another confirmation email from Apple.

- You’ll find the transferred playlists in the ‘Library’ tab of YouTube Music.

Using Google Takeout, you can transfer playlists from YouTube Music to Apple Music as well, which is the official way to transfer playlists in the other direction.
RELATED: How to Transfer Google Photos to iCloud
RELATED: How to Transfer Songs Between Two Spotify Accounts


