As a text editor, Google Docs may very well be the easiest to use. You don’t need a dedicated desktop application to run it. And all of its goodness can be harnessed for free, granted you already are a part of the Google ecosystem. You get a good selection of features to play around with right off the bat, and there’s the option to add much more if you feel the need, through add-ons.
Today’s topic, however, doesn’t ask you to look for a third-party add-on, as the feature is available natively inside the app. So, without further ado, let’s check out how you could track changes on Google Docs desktop and mobile.
Related: How to Number Pages on Google Docs
- What does ‘Track Changes’ mean?
- Is the ‘Suggesting’ mode the same as ‘Track Changes?’
- What is the benefit of tracking changes?
- How to track changes in Google Docs
- How to track changes using Version History (Revision)
-
Track changes on Google Docs: 7 tips to know
- #1: How to accept a suggestion
- #2: How to add notes to a suggestion
- #3: How to track changes on someone else’s document
- #4: How to share your document for suggestions
- #5: How to save suggestions in Google Docs
- #6: How to print suggestions in Google Docs
- #7: Can you import Google Docs suggestions to Microsoft Word?
What does ‘Track Changes’ mean?
The phrase ‘Track Changes’ was first coined in Microsoft Word, as part of the Microsoft Office ecosystem. It simply granted users the option to make necessary edits to a document without actually committing to them. For example, if you find a better synonym of a word that you used earlier, you could write the alternative word as a suggestion instead of deleting the previous word. That way, you get more control over your document when you’ve got your editing cap on.
Unlike Microsoft’s solutions, Google Docs doesn’t like to give you the option to track changes. It gives you the option to suggest, instead.
Is the ‘Suggesting’ mode the same as ‘Track Changes?’
Yes, Google Docs’ suggestion mode is the same as the change tracking option you find on Microsoft tools. It allows you to offer suggestions to other writers or even keep little tokens of insights for yourself. Triggering this mode is a little different from what you might be accustomed to with Microsoft Words, but that doesn’t make it any more complex. You can reply to suggestions as usual and accept or discard them depending on their merit.
What is the benefit of tracking changes?
By tracking the changes you make to a document, you make the whole editing process a lot more transparent and easier to collaborate on. The sentences or words you find redundant could make more sense on a second viewing or to other writers/editors. Additionally, since you’re not committing the changes right away, the process is a lot more reversible than traditional editing. Yes, making too many changes to the document can make it look a bit cumbersome, but that’s a small price to pay for the efficiency we get.
How to track changes in Google Docs
Over the course of the three sections above, we’ve seen what tracking changes mean and how beneficial the tool can be. Now, let’s take a look at implementing it on desktop and mobile devices.
On PC
Since Google Docs doesn’t have a dedicated desktop application, you’ll need to go to the Google Docs website to get started. Once you’ve logged in, open the document you want to edit. Now, on the top-right corner of your screen, under the big blue ‘Share’ button, you’ll find a dropdown menu with the word ‘Editing’ written on top. This simply means that you’re currently in editing mode and all the changes you make to a document would be committed immediately. Now, click on ‘Editing’ to expand the dropdown menu and select ‘Suggesting.’
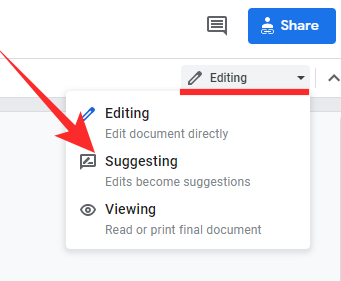
When the suggestion mode is selected, every edit you make would be added as a suggestion and not an edit. So, if you choose to delete a phrase or word, you will have the provision of offering an explanation. And it would be upon the writer to either accept or reject your suggestion. The same happens when you add something to the document you’re editing and want to review your thoughts later.
On mobile
The Google Docs app on Android and iOS may have some limitations, but they are quite potent in their own right. And in this particular scenario — tracking changes or adding suggestions — they shine through. First, launch the Google Docs app on your mobile and tap on the vertical ellipsis button at the top-right corner of your screen.
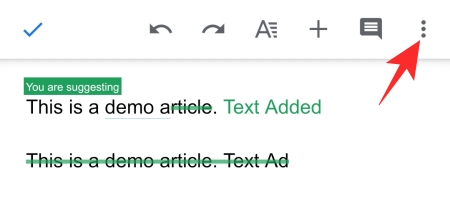
Now, simply toggle on ‘Suggest changes.’

Google Docs would tell you that you’re only suggesting changing, not making them.
How to track changes using Version History (Revision)
Google Docs, or any other leading word editor for that matter, comes gives you the option to track every little edit that was made to the document. And more importantly, it even allows you to restore any of your preferred versions and pick up where you left off. This feature doesn’t require you to go into Suggesting mode, as it is available for every Docs user by default.
To access version history, first, click on ‘File’ on the menu bar.
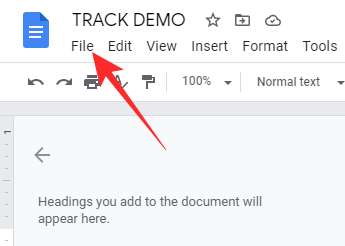
Now, expand the ‘Version history’ tab. Finally, click on ‘Version history’ to check out all the revisions.

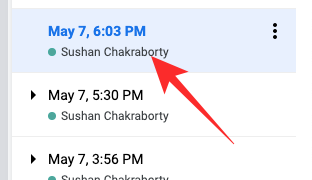
On your right, you’ll see all the changes that were made, alongside the timestamp. Simply pick one of the versions.
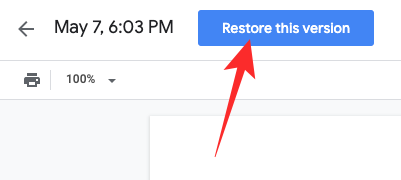
Next, hit the ‘Restore this version’ at the top of the screen.
Finally, click on ‘Restore’ on the confirmation screen to take the document to an older version.

Version history is not shared with viewers of your document. Only the editors have access to version history and can restore old revisions.
Track changes on Google Docs: 7 tips to know
Here are the 7 tips to help you make the most of the Suggesting feature in Google Docs.
#1: How to accept a suggestion
In the previous section, we’ve checked out how you could suggest edits. Here, we’ll check out how you could accept suggestions, both from a computer and mobile device.
On PC
First, go to Docs.Google.com and go to the document that’s up for review. If there have been some edits to your document, you’ll be able to see them on the right-hand side of your screen. If you come across one that makes sense, all you have to do is click on the tick button at the top-right corner of the suggestion box.
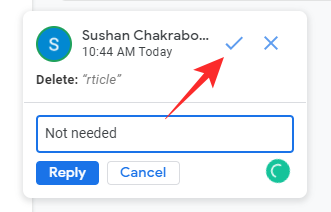
The suggestion would be accepted immediately.
On mobile
On mobile devices do not have the luxury of fitting everything, at once, on the screen. So, Google Docs has gotten a little crafty with edit suggestions as well. The suggestions appear as green text inside the app, giving you the option to tap on them and checking out the suggested edits. After tapping on the green text, hit ‘View Suggestion.’

If you come across anything valuable, you can simply tap on the tick button and accept the suggestion.
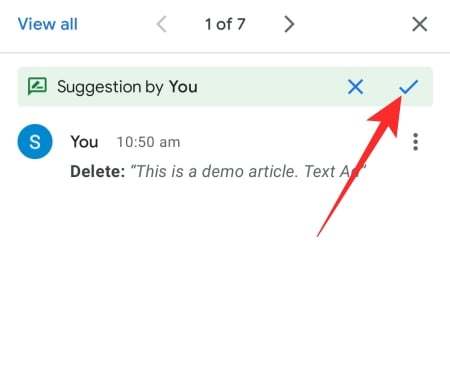
Else, go ahead and hit the cross button. It will discard the edit suggestion immediately.
#2: How to add notes to a suggestion
If you’re on editing duty, it’s probably the best idea to give your writers some feedback. That way, they can work on their shortcomings and hopefully present a better copy next time around.
On PC
Go to Docs.Google.com and go to the document you have to edit. Now, click on the writing mode tweaker at the top-right corner of your screen. Change the mode from ‘Editing’ to ‘Suggesting.’ Now, make the necessary edits. While you’re making them, you’ll see a text field with the option of replying. Click on it and add notes for the writer.
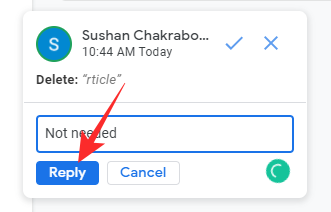
While evaluating, the writer would be able to see your notes and even give their reasoning behind the creative choices they made. Interestingly, your conversation about a particular edit is kept in one place, meaning they won’t interfere with the other suggestions you might have for the same article.
On mobile
Even if you’re tracking changes from a mobile device, you can pretty easily add notes to your suggestions or reply to them if needed. Unlike the web client, you won’t be able to see the reply text field when you’re making a suggestion, but the option is still available, only a couple of taps away.
First, tap on the text encapsulated by a green marker. When the overflow menu pops out, tap on ‘View suggestion.’

This would show you the suggestions you proposed and give the option to add a reply. Tap on ‘Add a reply’ to add a comment.
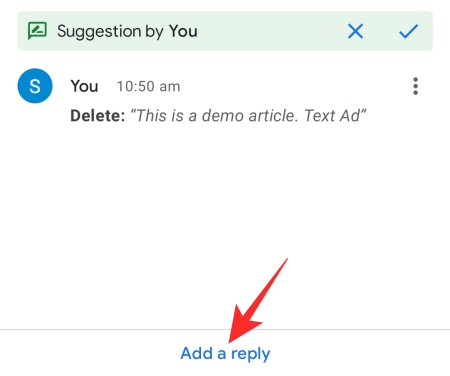
Jot down your opinion in the text field.
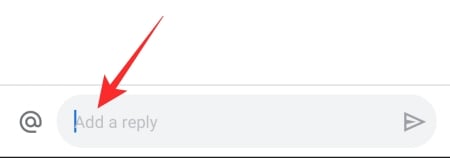
Similarly, if you wish to have a discussion with the editor of your piece, you could tap on the suggestions and ask for an explanation.
#3: How to track changes on someone else’s document
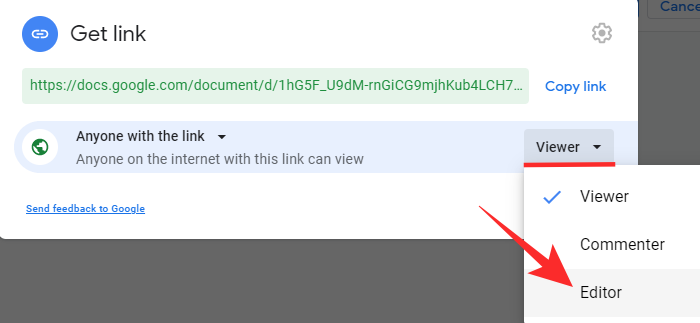
To offer suggestions, you need to have edit access to someone’s document. So, before trying to edit, make sure to ask for it from the author. They’ll need to click on the ‘Share’ button and generate the shareable link. Additionally, they’ll have to change your role to ‘Editor’ instead of ‘Viewer.’
On PC
Once you get the edit access, click on the link to open the document. Now, click on the pen icon at the top-right corner and change it to ‘Suggesting.’

Then, make the necessary changes and add notes if you see fit. The author of the document would be able to see your edits in real-time.
On mobile
Just like the web client, click on the shareable link to open the document inside Google Docs. Now, hit the vertical ellipsis button at the top-right corner of the screen and toggle on ‘Suggest changes.’

Make the necessary changes and add comments. The author will have the option to either accept or reject your suggestions.
If you wish for others to offer you valuable feedback, you’ll have to make your Google Docs documents editable. That way, others would be able to go into ‘Suggestion’ mode and offer you valuable insights. Here’s how you could make your documents open for editing.
On PC
Go to Docs.Google.com and open the file you wish for others to edit. Now, click on the blue ‘Share’ button at the top-right corner of your screen.
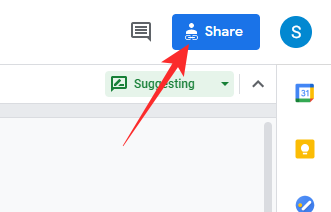
Now, focus on the ‘Get Link’ section. If you haven’t shared your file with anyone, it would be in ‘Restricted’ mode. Click on ‘Change to anyone with the link.’ Else, click on ‘Change.’
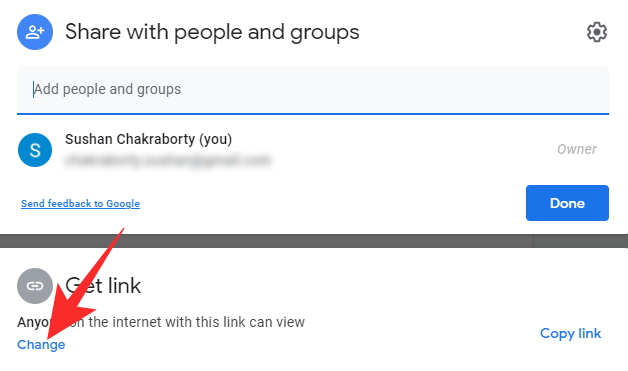
This would make the Docs file available to anyone who has the link. Now, on the right-hand side, you’ll see a dropdown menu with the label ‘Viewer.’ This simply means that everyone with the link would be able to view your document but not edit it. You’ll need to click on the menu and select ‘Editor’ to change that.

Alternatively, if you want to grant editing access to a chosen few, you can add their names at the top, and make them ‘Editors.’

On mobile
Sharing is pretty straightforward through the Google Docs mobile app. After you launch the app, tap on the vertical ellipsis button at the top-right corner of the screen.

Now, tap on ‘Share & export.’
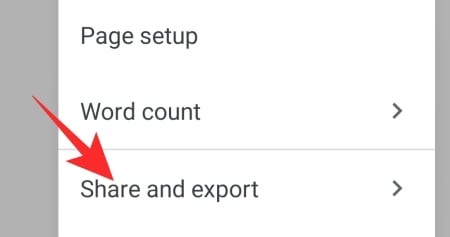
Here, you will find the option to manage people and links: share a link, copy it, and more.
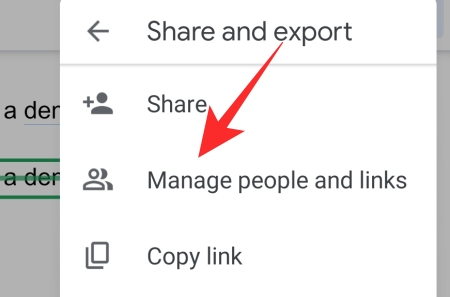
At the top, you can add the names of the people you want to share your document with and give them editing rights. If you want to create a shareable link, tap on the green link icon underneath the ‘Link settings’ banner.
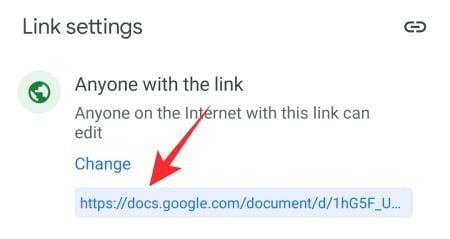
On the next page, give editing access to anyone who gets their hands on the link.
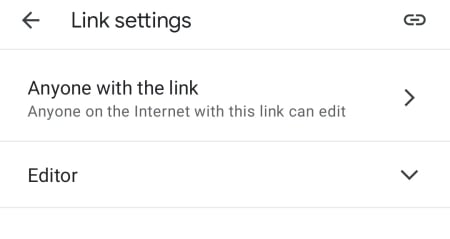
It would make it easier for you to share your document and ask for suggestions.
#5: How to save suggestions in Google Docs
If you receive a couple of suggestions, it’s best to evaluate the proposed changes and make changes if needed. The best course of action is to save the suggestions you’ve received, which saves you a bunch of extra keystrokes.
Saving a suggestion is nothing but accepting it — which we covered in length a few sections above. All you have to do is click/tap on the tick button when the option appears and the proposed changes would be applied automatically.

It works similarly for mobile devices as well. Just tap on ‘View suggestion’ and hit the accept button at the top.

#6: How to print suggestions in Google Docs
Want to take a printout with all the suggestions in place? Google Docs has got you covered.
On PC
First, open the document you want to print and switch to ‘Suggesting’ mode.

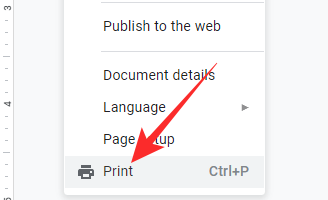
Now, click on ‘File’ on the menu bar and go to ‘Print.’
Suggested additions would be shown in green text, while the deletions would have a green strikethrough.
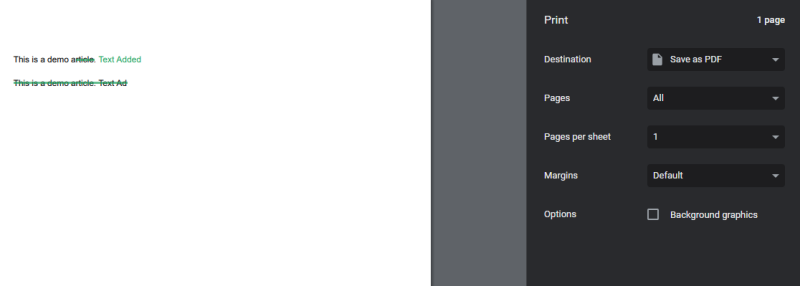
Take a printout as usual.
On mobile
Launch the Google Docs app, open the document you want to print, and hit the vertical ellipsis button at the top-right corner of the screen. Now, toggle on ‘Suggest changes.’ Now, take a screenshot of the page.

Go to your gallery to view the screenshot and hit print.
Printing from the Google Docs app doesn’t show the suggested changes. You’ll either have to print the screenshot or use your desktop to get a printout.
#7: Can you import Google Docs suggestions to Microsoft Word?
Microsoft Word is the most prestigious text editor around. It has decades’ worth of experience under its belt and is surely not shy to implement new features. As a matter of fact, the ability to track changes was first introduced by Microsoft Word itself, which changed the way we looked at document edits. Google Docs implements the same system in the form of ‘Suggestions’ and has made sure to make it compatible with Microsoft Word’s iteration.
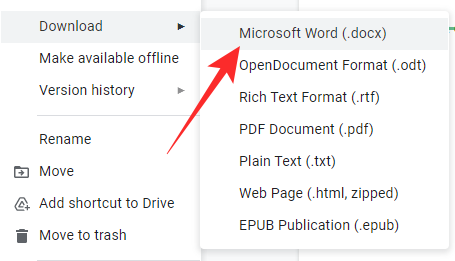
So, if you want to import the Google Docs suggestions to Microsoft Teams, with the comments and everything, all you have to do is download the Docs file in Microsoft Word format and the changes would be there to track. To download in Word format, first, click on the ‘File’ menu at the top-left corner.

Now, go to ‘Download,’ expand it, and click on ‘Microsoft Word (.docx).
Finally, double click the file to open in Microsoft Word. The tracked changes would be shown in red. Below is the side-by-side view of the two editors.

That’s all.
RELATED
- How to Alphabetize in Microsoft Word: Everything You Need To Know
- How to Alphabetize in Google Docs on PC and On mobile App in 2021
- Using Google Docs Word Count on PC and Phone: Everything You Need To Know
- How To Draw on Google Docs: Step-by-step Guide
- Google Docs: How To Subscript and Superscript Both at the Same Time
- How To Use Comments and Actions in Google Docs


