It’s not an exaggeration to say that there is no perfect note-taking app. In fact, unless you’re the type of person who requires the kind of segregation that is offered by specific, third-parties, you will find that your note-taking requirements can be fulfilled by applications like Gmail, WhatsApp, Facebook, Signal, and Pinterest.
So, if you want to reduce your dependency on Google Keep and Apple Notes or simply optimize your favorite Social Media apps to become more productive, there are ways to do that effectively. So here’s everything you need to know about how to use social media platforms, messengers, and email apps to take notes for you.
Note-taking in non-note-taking apps
So, on this page, we discuss how we can use the non-note-taking apps that we commonly use, like Gmail, Facebook, Instagram, even Signal and Pinterest, for the added purpose of note-taking. And we shall also discuss how this can be expected to work.
Related: Google Keep: 14 features you should be using already!
Group #1: Social media apps
The nature of note-taking on Social Media platforms
Note-taking is not the primary function of Social Media platforms and you will definitely not find an Evernote-like feature on any of these platforms. What you will find, however, is that certain features on the Social Media platforms function as note-keepers/takers and you can optimize them to function accordingly if your needs are extensive enough to warrant such note-taking. It’s important to note that while it is possible to use these platforms for textual notes, their features are actually meant for post/content creation as well as curation for posting/uploading.
In this tutorial, we have covered the major social media platforms which include Facebook, Instagram and Twitter. Here’s everything you need to know.
How to take notes on Facebook
Up until October 2020, Facebook had a specific section assigned to notes where you could write down whatever you needed. But things have changed since then and while this feature has been removed, there are roundabout hacks that you can employ. Here’s how you can take notes on Facebook.
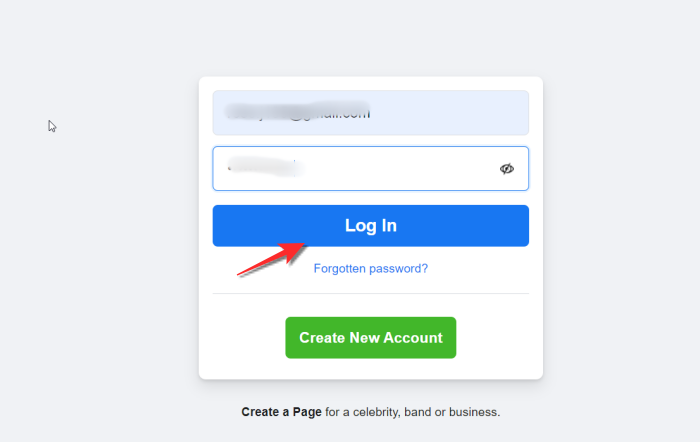
Log in to your Facebook account from the browser of your choice.
Once you do you will find yourself in the News Feed section.
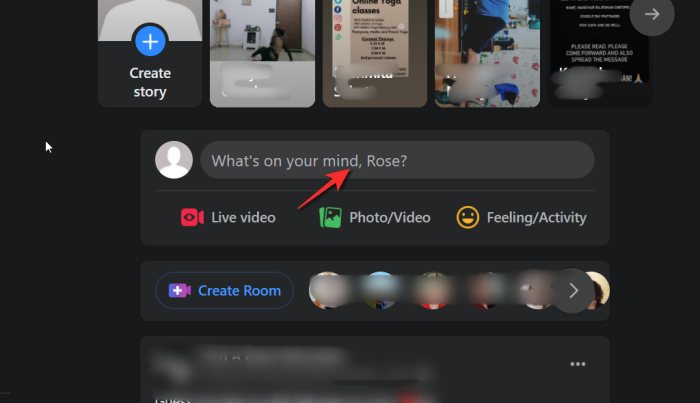
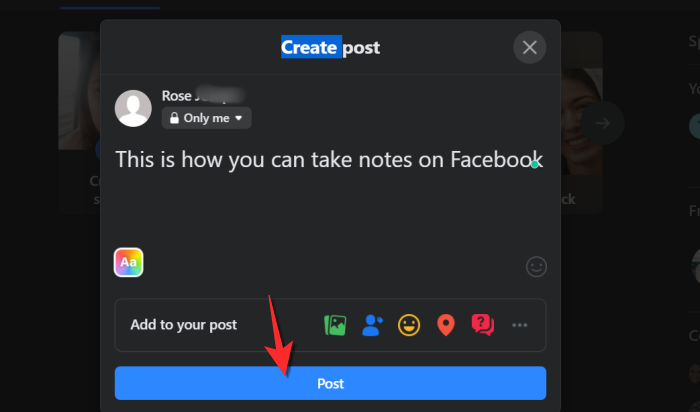
Now type the note that you want in the create post section. Keep in mind that you can also add an image or additional form of content to the note.
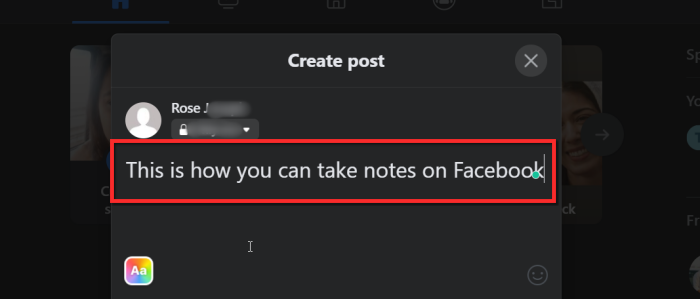
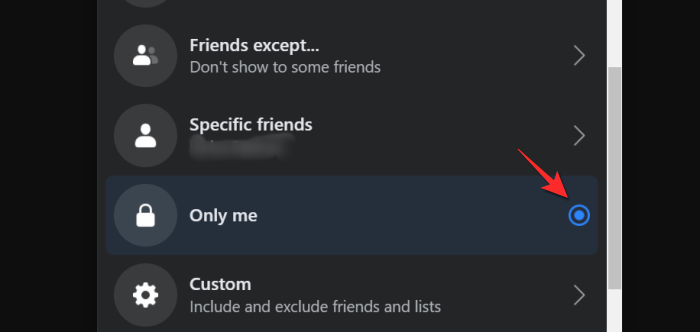
Your post audience will be set to Public, this audience setting needs to be changed to Only Me.
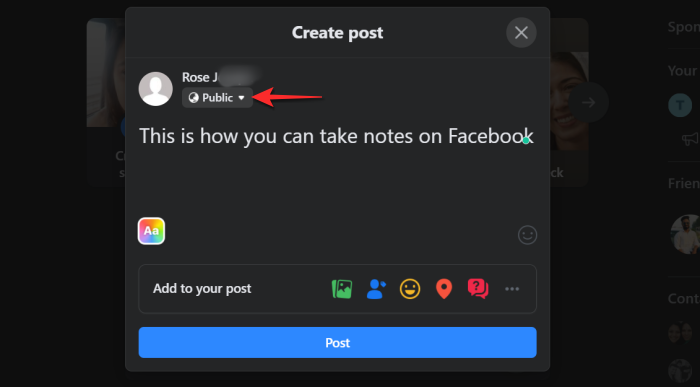
Click the dropdown arrow and then select the Only Me option.
Click the Post button once the post has been created.
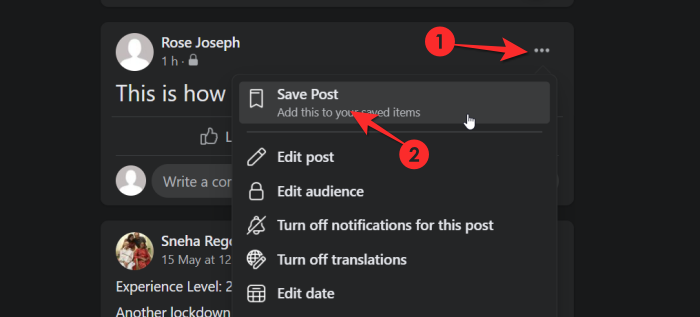
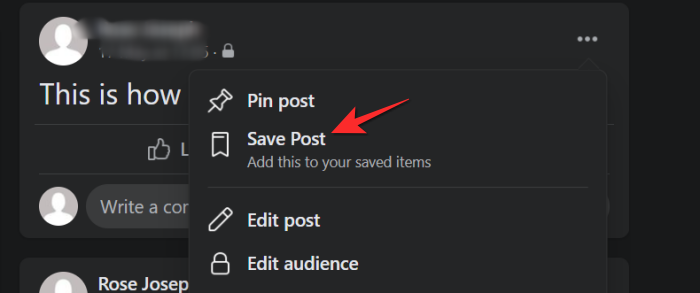
Once the post has gone live (only for you), it will appear on your News Feed along with a horizontal three-dot menu on the top right part of the screen. Click the three-dot menu. Click the first option in the menu, i.e Save Post.
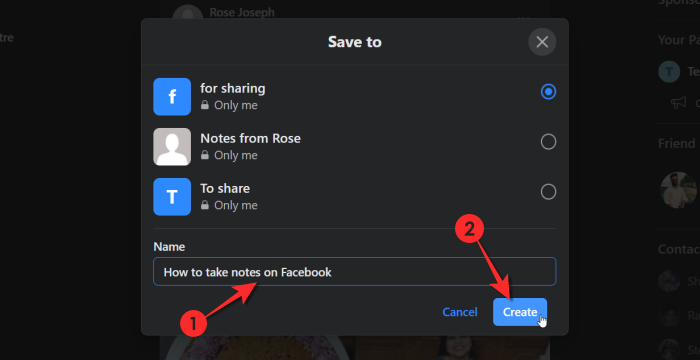
An additional Save To window will open asking you to choose the collection in which the post must be saved. There will also be a text box at the end of the window with the option to create a new collection. Type the name of the note collection and click the Create button.
Go back to the Save Post option from the three-dot menu after creating the collection by clicking it.
Now click the collection that you just created and then click Done.
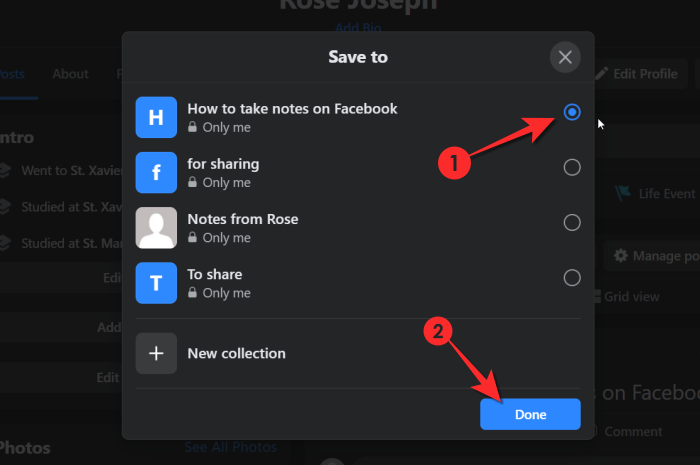
The post will effectively become a note that you can now access from the Collection.
How to access your notes on Facebook
You will find all your notes in the Saved section of Facebook, specifically in the Collection that you created.
The Saved section is located in the left panel of your Facebook Feed. Click the Saved section.
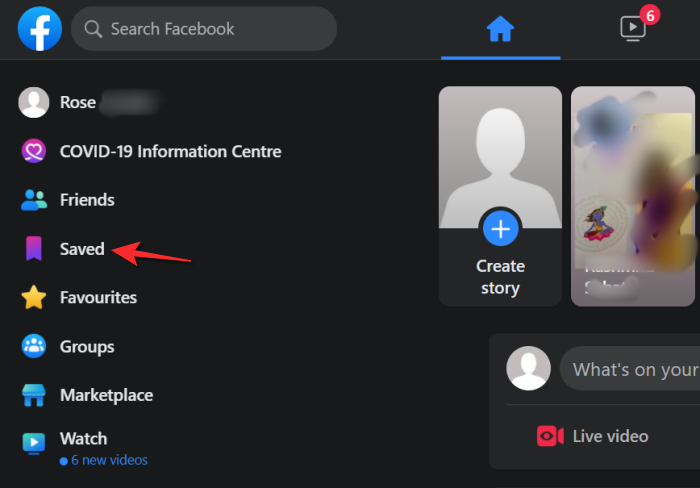
Once in the Saved section, locate the collection in which you’ve saved the note from the My Collections and click it.
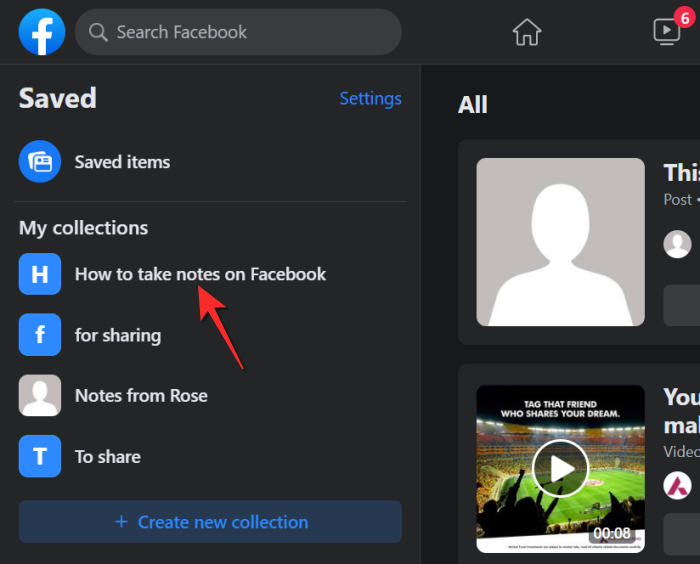
All the notes that you’ve saved will be present in the Collection.
How to take notes on a Facebook page
Note: You need to be an admin of a Facebook page for this.
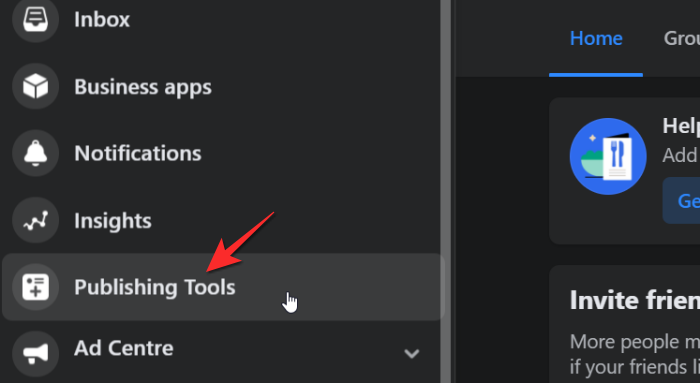
Go to the page that you are managing. From the left menu panel of the page, go to the Publishing Tools section.
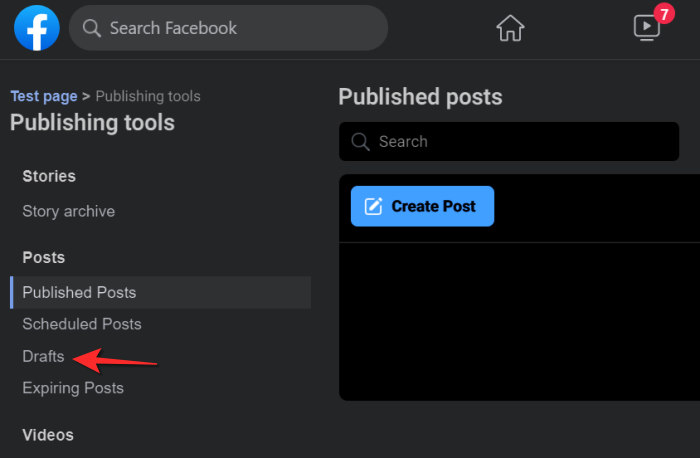
Once you’re in Publishing Tools, a separate menu panel will be available on the left side. From the Post section of this panel, click on Drafts.
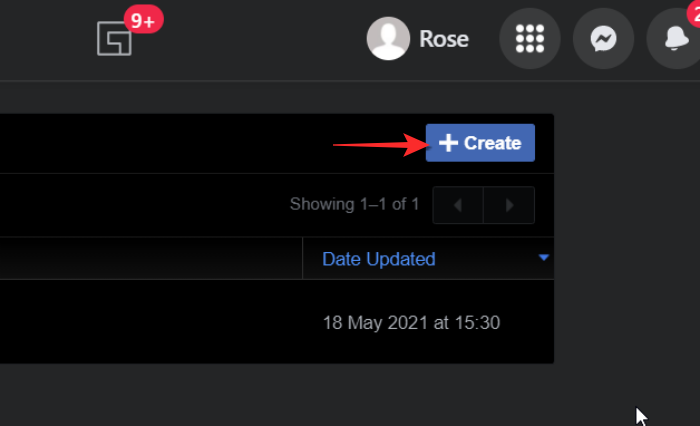
Now click the Create button that is present on the top-right section of the screen.
Now type your note in the textbox provided in the Draft section. Once the note is done, go ahead and click the Save as Draft button.

The note will now be saved in your Draft section.

Related: How to Take Meeting Notes on Microsoft Teams
How to take notes on Instagram
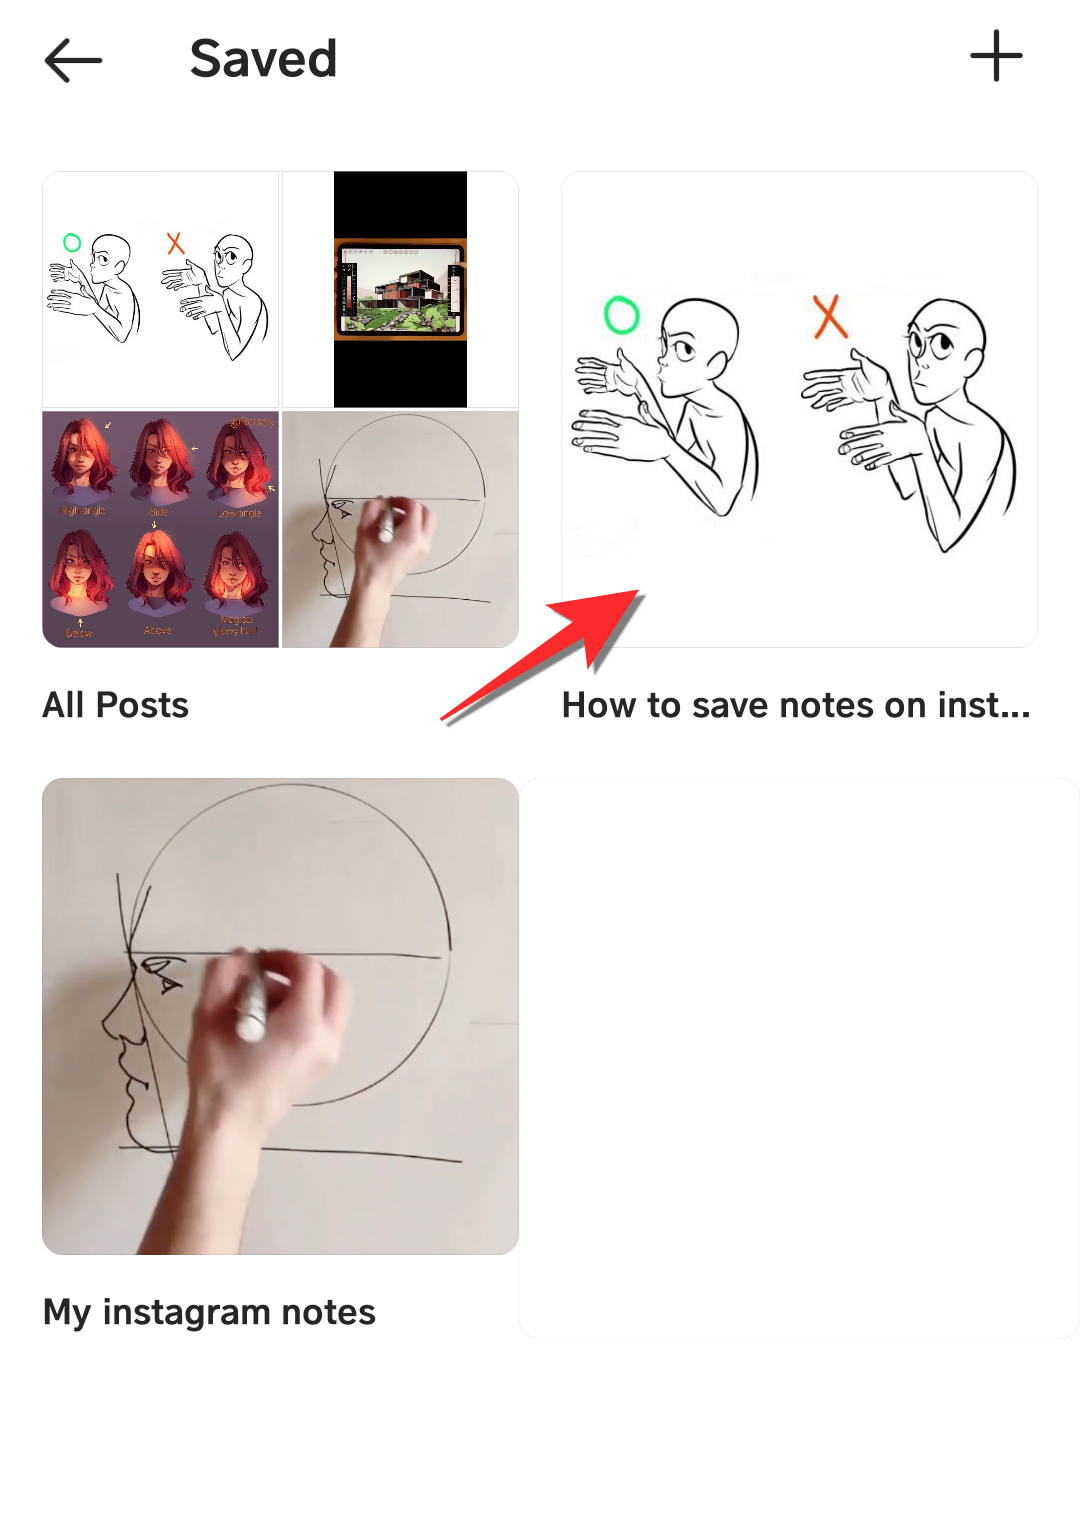
In the case of Instagram, you cannot take textual notes, however, you can maintain a collection of Instagram posts that you want to view later or use as a visual note for any of your own projects of content. Here’s how it’s done.
Open the Instagram app on your phone and scroll to the post that you want to save.
You will see an icon under the image of the post on the right. Tap it.

Instagram will now tell you that the post has been saved. Additionally, a separate link will appear in the band called Save to Collection. Tap the Save to collection link.
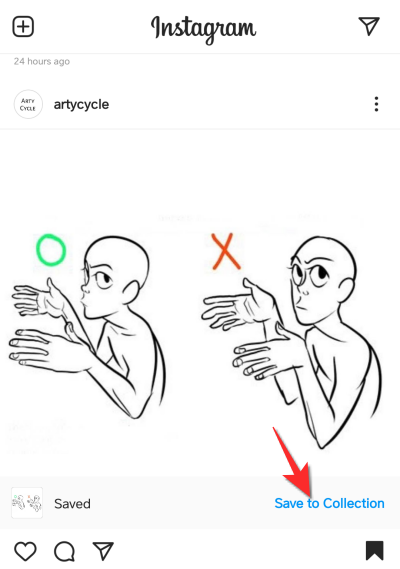
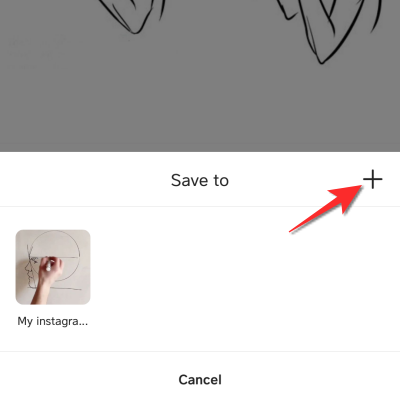
Now create a collection where you can curate the posts for reference. Tap the plus (+) icon that appears on the right of the additional window.
Type the name of the collection where you want to save the post in the allocated text box. The post will be saved to your collection.
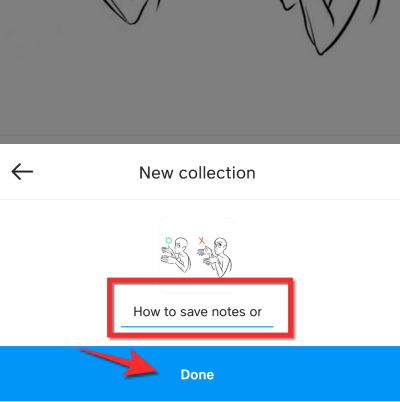
The post reference has now been saved.
How to access your notes on Instagram
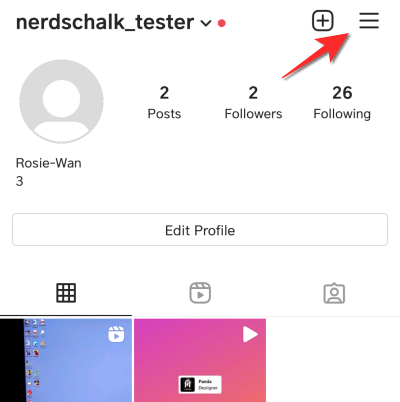
Go to your Instagram Profile and tap the hamburger menu icon on the top right of the screen.
From the menu, tap the Saved option.
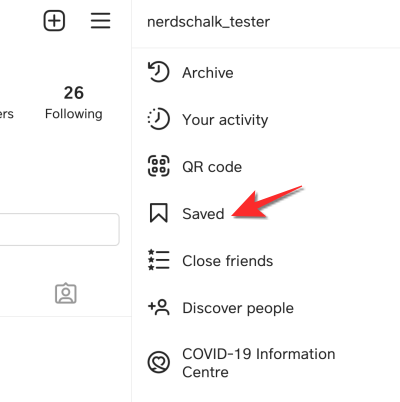
You will find your saved posts in the collection.
How to take notes on Twitter
While Twitter is not as accommodating as Facebook, the platform at least has some scope for note-taking, unlike Instagram. There is one hack that can be used to take notes. Similar to Facebook, you can create a Tweet Draft that you can access/copy-paste later. Here’s how it works.
Click the compose icon on the bottom-left section of the screen.

After writing your note, click the close (x) button that’s present on the top-left side of the tweet. Keep in mind that you can also add images or other types of content that generally make for a Tweet.
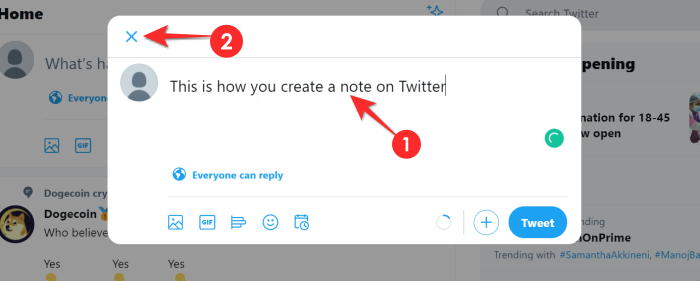
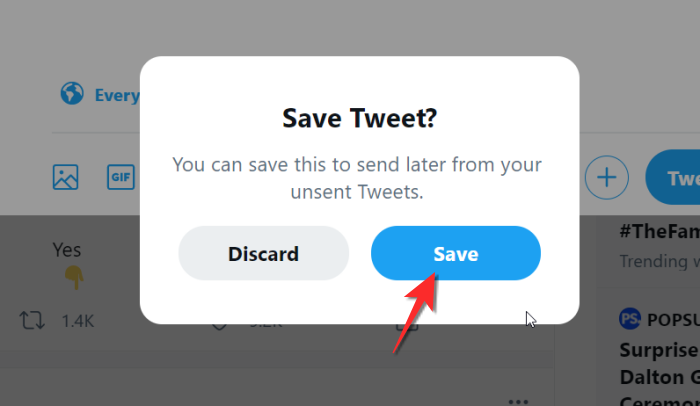
An additional dialog box will open and Twitter will ask you whether you wish to save this Tweet with other unsaved Tweet. Click the Save button to make sure that your Tweet is saved as a draft.
How to access your notes on Twitter
After saving the unpublished Tweet, close the original Tweet and click the Compose button again.

On the top-right area of the Compose Textbox, you will see a link for Unsent Tweets, click on it.

Select the Tweet/Note from the Drafts section by clicking the Tweet.
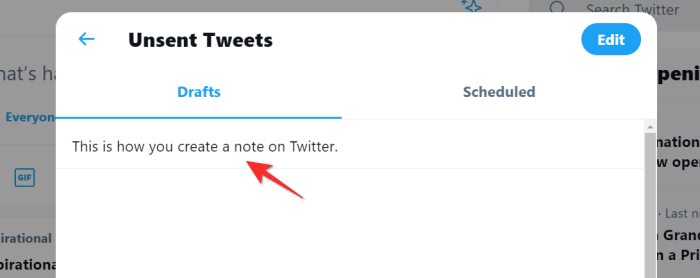
The Tweet will go back to the Compose stage from where you can either copy/paste the tweet or fine-tune it before actually tweeting it.
Group #2: Messenger apps
The nature of note-taking on messenger platforms
Like in the case of Facebook, Twitter and Instagram, Social Media messenger platforms don’t come with an in-built note-taking mechanism. There are hacks that can be used to optimize these apps for note-taking. The Signal App comes with a Note To Self feature and WhatsApp can be used to create a group with oneself. Using these methods, one can take notes via these Social Media apps.
How to take notes on Signal App
The Signal App comes with a cool Note to Self feature that allows the user to send notes to themself. We have covered everything you need to know about how to take notes on the Signal app in this article.
On phone
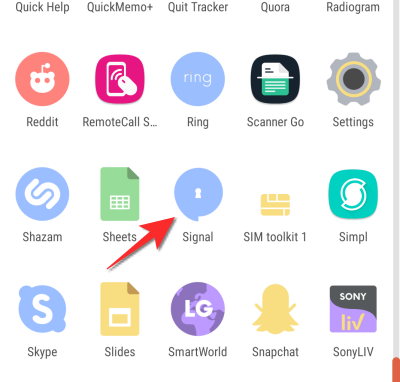
Make sure that you have the Signal App downloaded on your phone. Once the app has been downloaded, open it on your phone.
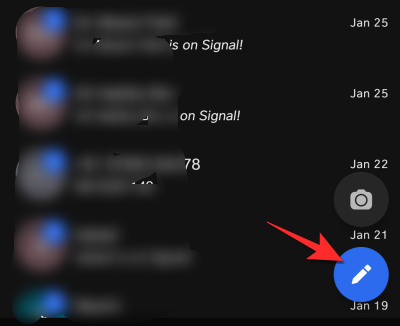
For iPhone, the pencil icon is located on the top and for Android devices, the icon is located at the bottom-right of the screen. Tap this icon.
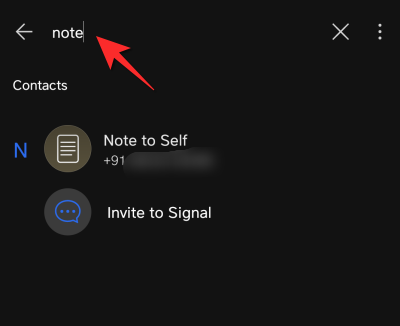
The search bar will appear on the top. Here, type the ‘Note to Self’ and your contact number will appear with the name of Note to Self. Tap the contact for Note to self.
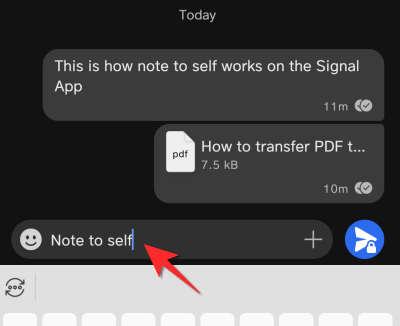
Now the chat will open and it will have the same format as a chat with another Signal contact. You can type any notes, upload documents or even record whatever voice notes that you want in the text box.
On computer
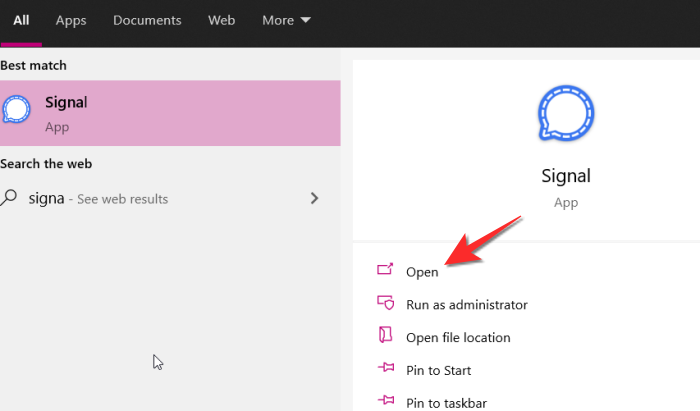
Launch the Signal app from the Start menu on your computer. Type Signal in the search bar and then click open with the option appear.
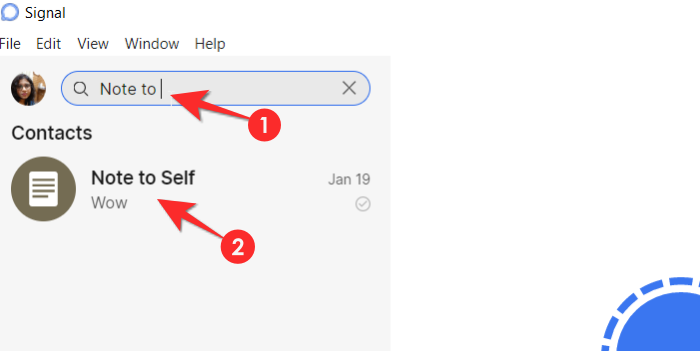
Now type Note to Self in the search bar till the contact appears in your Search list.
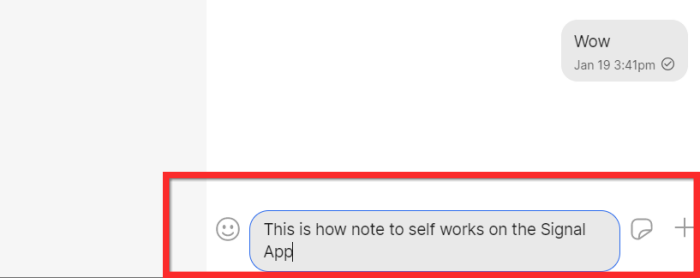
You can add notes from the text box and even upload documents to Notes to Self.
That’s all.
How to take notes on WhatsApp
Method 1: Using wa.me ‘Click to Chat’ link on PC
WhatsApp has a Click to Chat feature which lets you start a chat with someone without having their phone number saved in your address book. What many don’t know is that you can create a chat thread for your own phone number through the link and use it to send and receive files between your PC and mobile device. To get this done, follow the steps given below.
Step 1: Sign in to WhatsApp on your PC through the web or through the app for your device.
- Web: Log on to web.whatsapp.com on your web browser and sign in by following the instructions on the screen.
- WhatsApp for PC app: Download and install the WhatsApp app for PC and sign in using your phone number.
Step 2: Create your Click to Chat link by following the format below:
wa.me/(country code without '+'sign)(your phone number)
For instance, if your phone number is 1234567890 and you are from India (country code +91), your Click to Chat link will be: wa.me/911234567890
Step 3: Enter this link in the address bar in the web browser and press the Enter key.
This will load a page that reads “Message <your number> on WhatsApp”. There will also be a prompt asking you to open WhatsApp.
Step 4: Tap Open WhatsApp to load WhatsApp on the web or the WhatsApp app on your PC.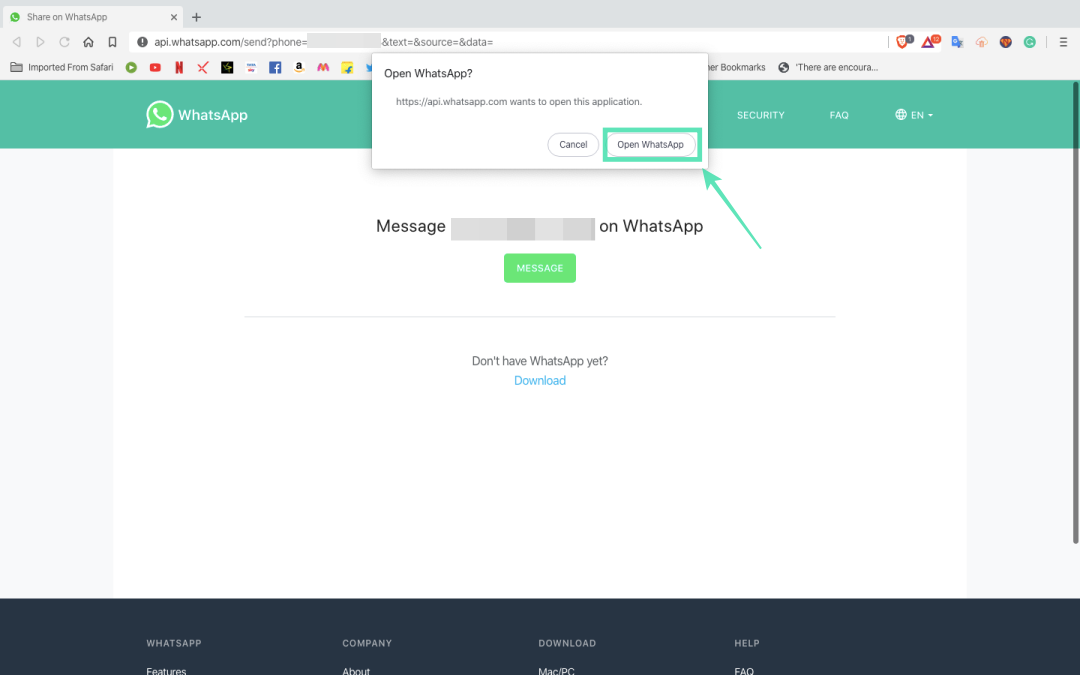
When WhatsApp loads up, a thread will be created to converse with your phone number. This thread will show your phone number as the contact name.
Step 5: Type a message or upload a file from the PC to start the thread.
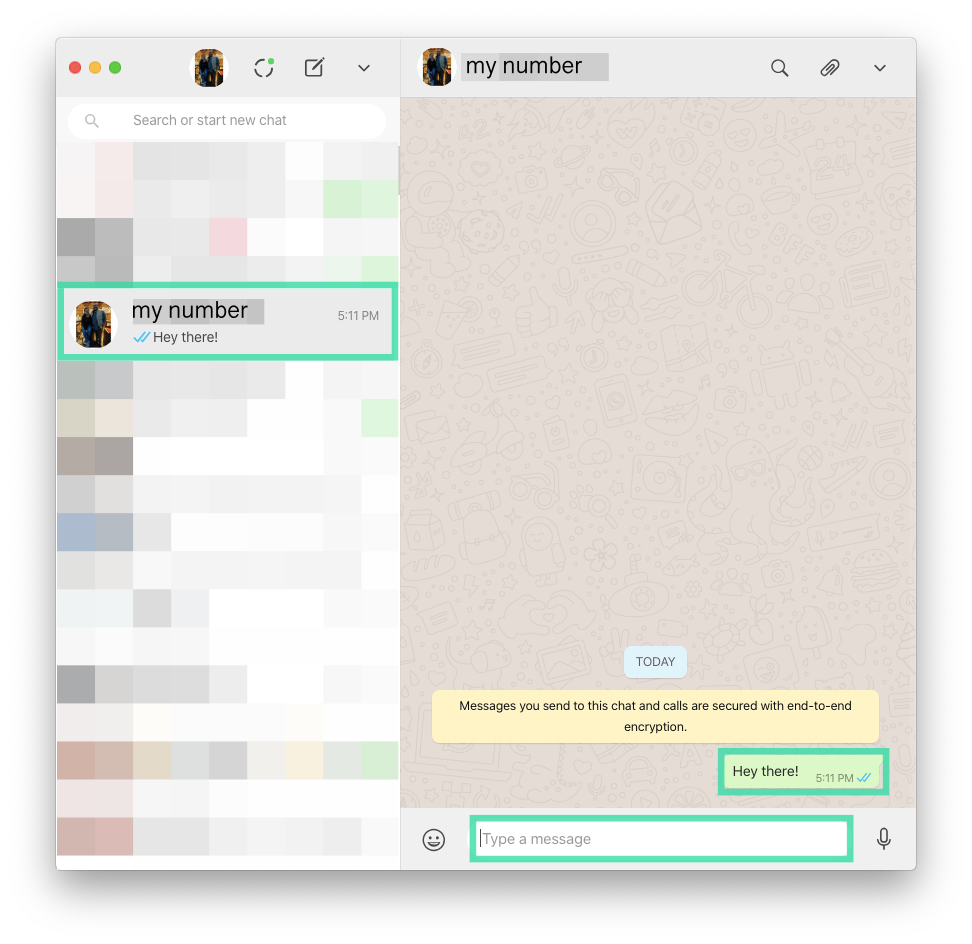
The WhatsApp app on your phone will also show this text.
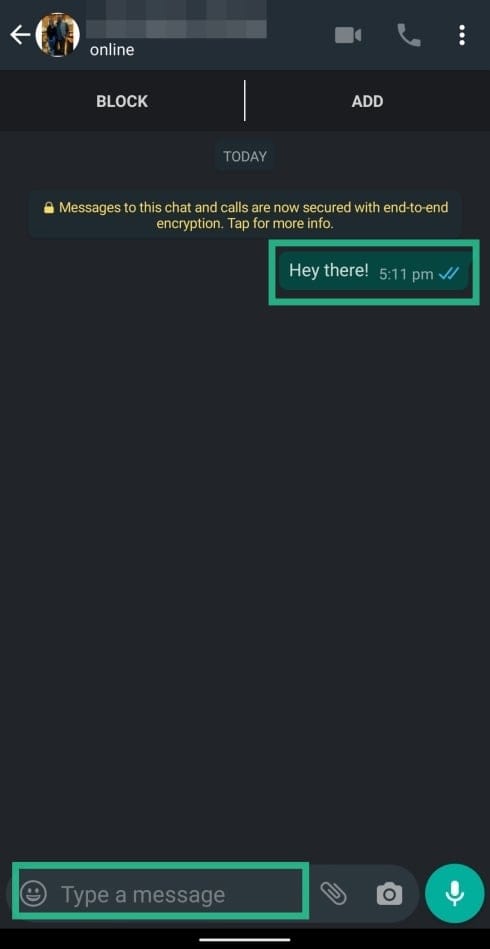
Once this is done, a WhatsApp thread where only you can view and send messages and files is created. You can create this thread for your own usage and can pin it every time you want to look at your to-do list and reminders.
You can pin this thread by long-pressing the thread and tapping the pin icon at the top on WhatsApp.

That’s all. If you want to create more groups for yourself, well, then follow method #02 given here.
Once you have made a chat or group chats with you as the only member, simply add your notes as messages in that chat. You only need to type the note as a message and send it on your personal chat. Or share links, images and videos, and anything else WhatsApp supports, including locations. Pretty handy, eh!
How to take notes on Telegram App
Telegram was the original Signal app, especially considering the kind of prioritization that it gave to privacy. It is still incredibly popular with millions of users and continues to be used as an alternative for WhatsApp. Telegram has an integrated feature in its menu that allows the user to view their messages or messages from others in the form of notes. Here’s how it works.
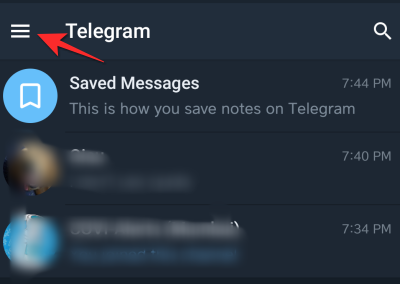
Open the Telegram App on your phone and tap the hamburger menu on the top-left portion of the screen.
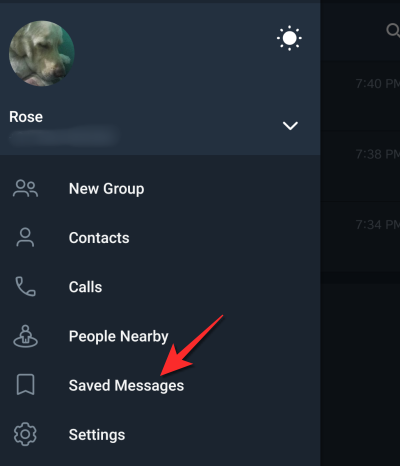
Now select the Saved Messages section from the menu.
In the text box provided at the bottom, type your Note and then tap the right arrow button.
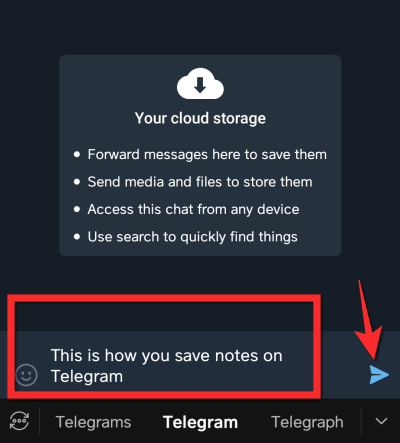
The Note will now be saved in your Saved Messages.
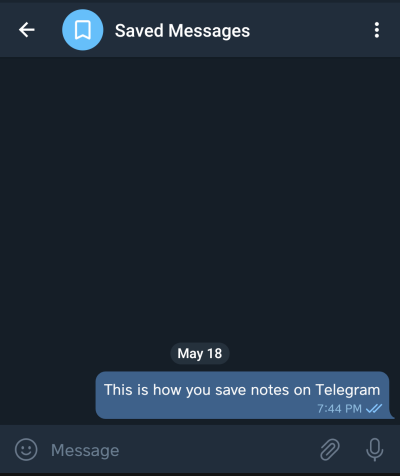
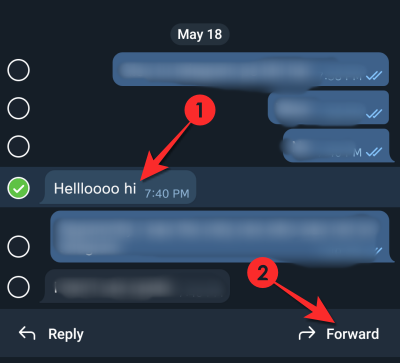
You can also save toy our notes what other people shared in any chat on Telegram.
Open the chat and scroll to the message that you want to save. Long press the message and then tap the Forward button.
Telegram will now show you the Saved Messages option, tap it.
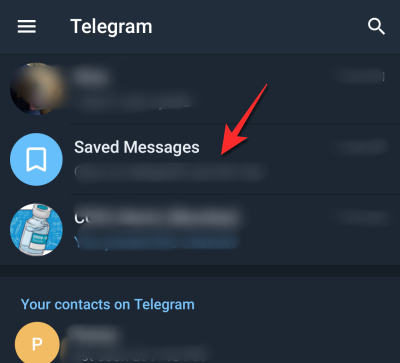
The message will now be saved in Telegram’s Saved messages.
How to take notes on iMessage
If you use the Messages app on your phone quite often, you can use it to take notes using this app. To do that, open the Messages app on your iPhone and tap on the New message button (indicated by a square and pen icon).
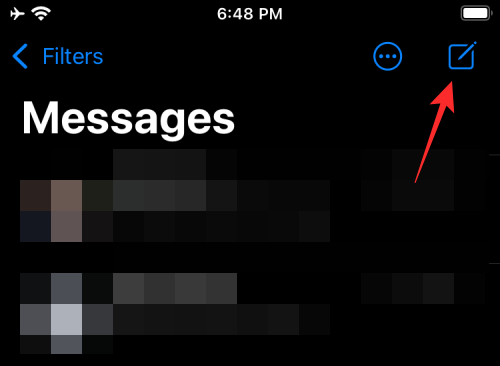
This will open the ‘New Message’ screen on your device.
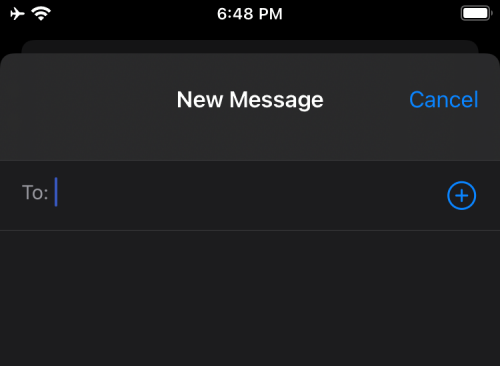
On this screen, tap on the text field next to ‘To:’ and enter your @iCloud.com address that you use primarily on your iPhone. This way your messages will remain saved onto your iCloud and will be accessible from both mobile and PC.
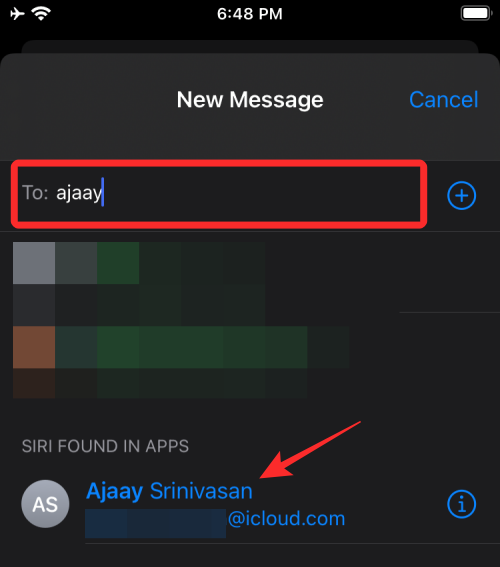
Once you’ve selected your iCloud address, you can start typing your notes inside the ‘iMessage’ text below at the bottom.
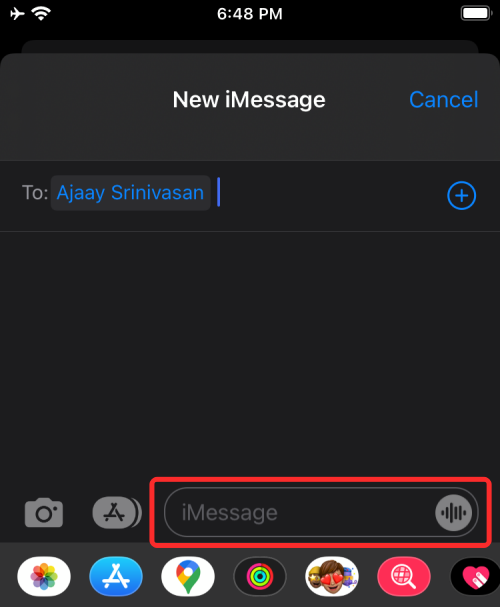
After you’ve typed a note, you can tap on the Up arrow on the right side of the text box.
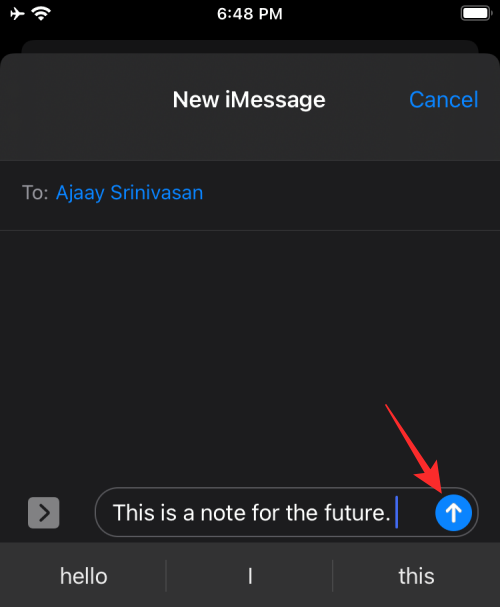
The note will now be saved in a new thread that only you can access.
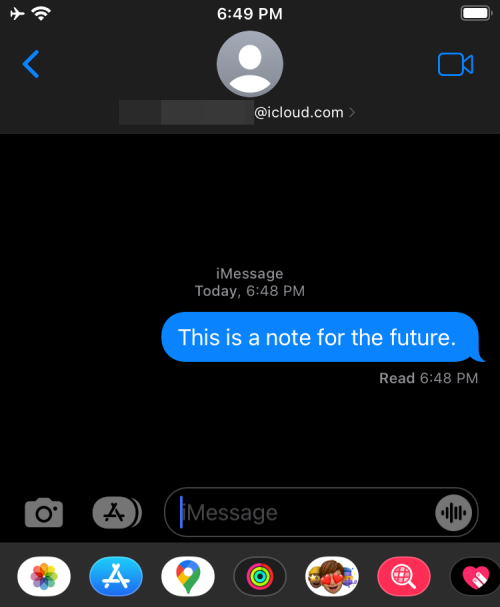
You can now type more notes in this thread to save it here. This method, however, has a caveat. Notes you send as messages to yourself will be duplicated every time you send one, which can be a little annoying to look at. This is how it will look like.

Group #3: Email apps
The nature of note-taking on email apps
Email applications like Gmail, Microsoft Outlook, and Apple Mail are actually thoroughly equipped to meet all our note-taking needs. Unlike the previous applications on this list, mailing applications come with specific accommodations to ensure that you will have no difficulty in taking notes. So whether you need to take notes for work or for personal reasons, your email application will have you covered. Here’s how you can take advantage of these applications.
How to take notes on Gmail
There are two methods available on Gmail for note-taking. The first and most convenient method is by using the Keep Notes app which is available within the Gmail interface. For the second method, you need to create a specific label that can then be used to archive emails that are supposed to act as notes or references for you.
Method #01: How to take notes on Gmail by applying the label tag
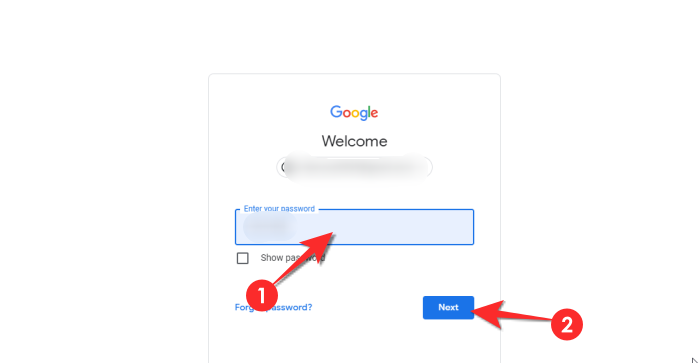
Log in to your Gmail account from the browser of your choice.
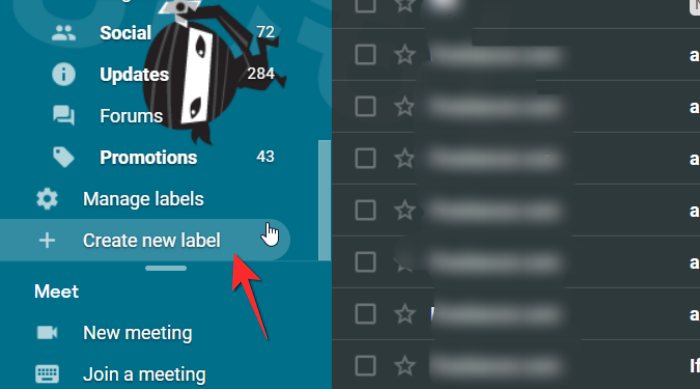
Now scroll down till you arrive at the Create new label option on the left menu panel and click on it.
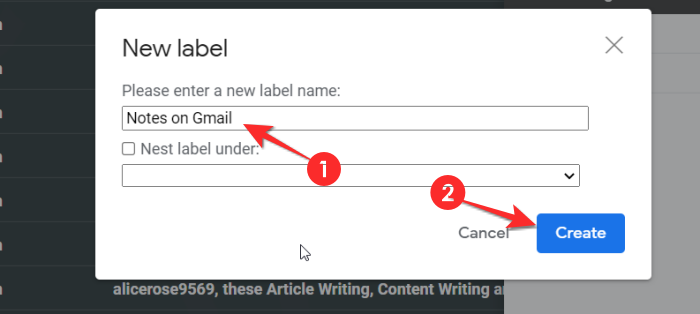
A new window will open with a text box. Type the name of the label in the textbox and then click the Create button.
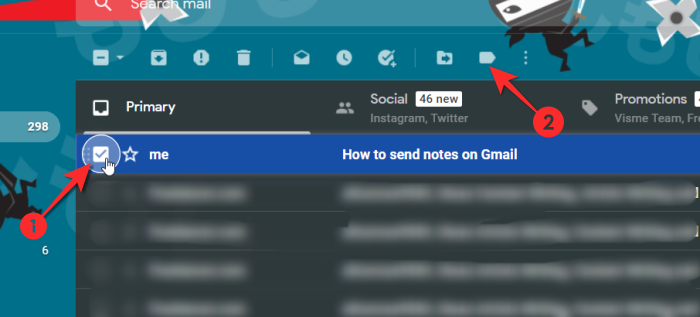
Now locate the mail that you want to add to your Gmail notes. Don’t open the mail. Click the checkbox that appears before it and then click the labels icon that appears in the ribbon over it.
Tick mark the label name for the label that you just created and then click on Apply.
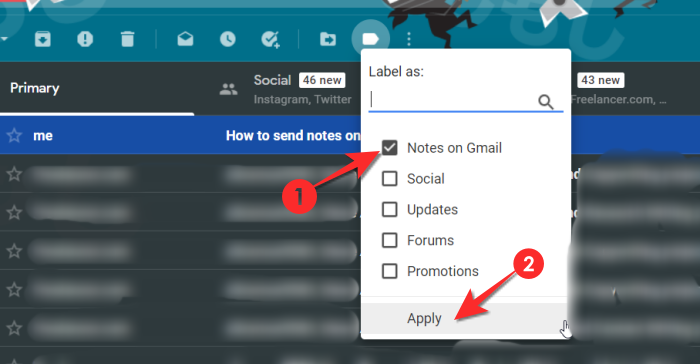
The mail has now been marked and saved as per the label.
Method #02: How to take notes on Gmail by using Keep
Gmail provides Keep Notes which is an extremely efficient method to take notes. The best part about Keep is that you can use the app version and everything that’s on your phone will be automatically updated everywhere else. Here’s how you activate and use Keep Notes on Gmail.
Log in to your Gmail account from the browser of your choice.

On the right side of the Gmail interface, you will notice four colorful icons. Click the second one which is yellow in color. That is the Keep icon.
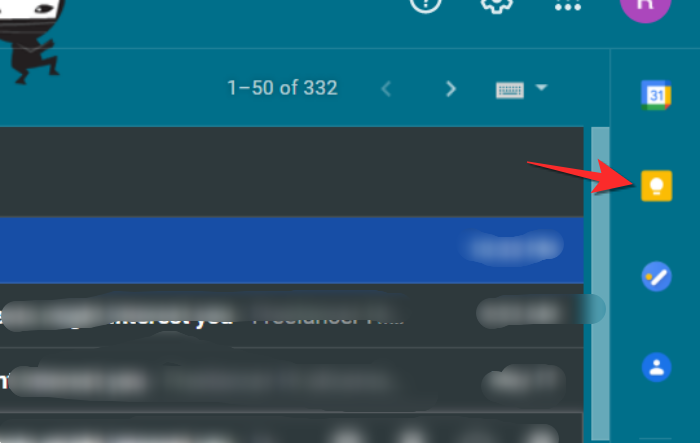
The Keep panel will open on the right side of the screen once you click it. From the panel, click the Take a note option.
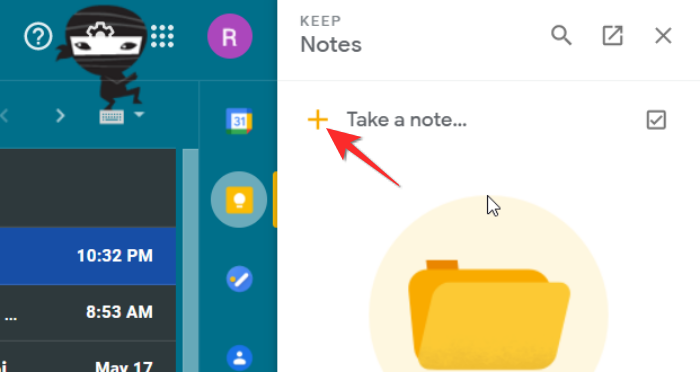
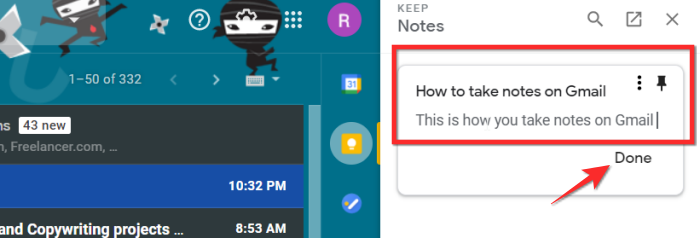
A small post-it will appear with a text box for the title of the note and a separate one for the contents, add the content as per your desire by typing it into the allocated textboxes. After writing the text, click the Done button.
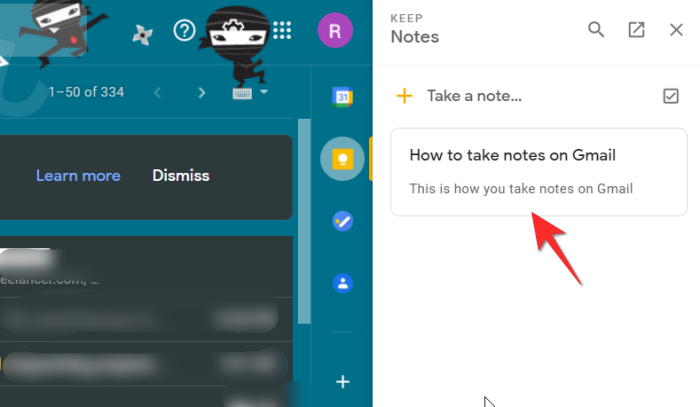
Your note will now appear neatly in the Keep section.
How to take notes on Microsoft Outlook
Outlook comes with a Notes section without any specific branding, it’s fairly easy to locate the
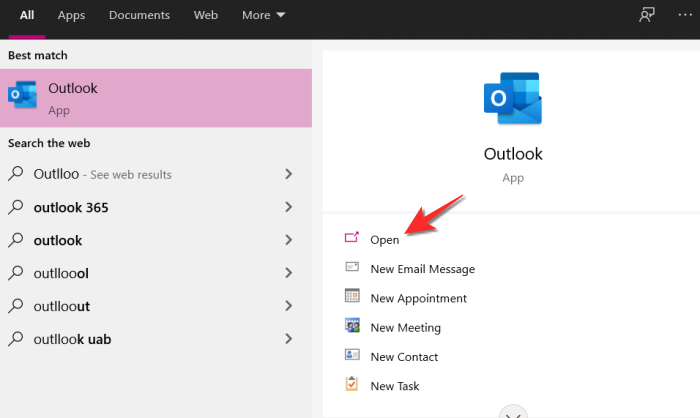
Launch Outlook from the Start Menu on your computer. Click on open once the app name appears in the list.
Once Outlook is open, you will find yourself in the Home tab. In the left panel, move your mouse towards the bottom where you will be able to see three icons. The last icon will be a three-dot menu icon, click the icon.
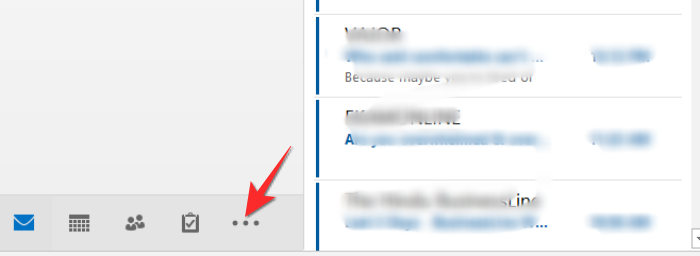
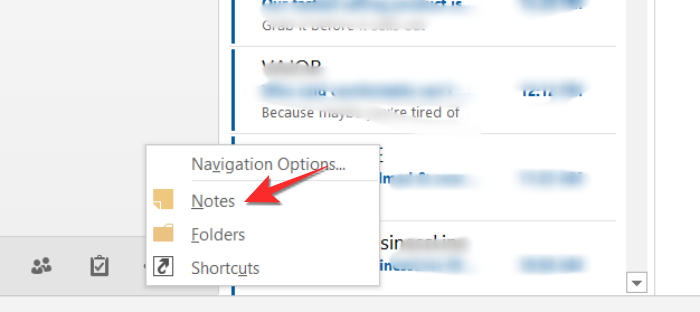
From the three-dot icon menu, click the Notes option.
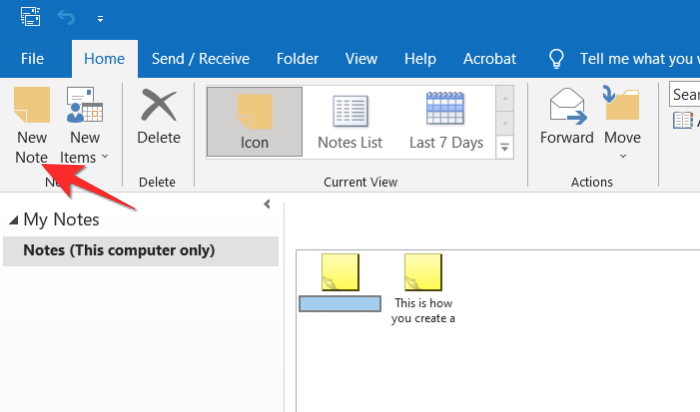
The notes section will now open on your Outlook. From the ribbon that will appear on top, click the New Note option.
A Post-It note will now open in an additional window. Write down your note here and close the note. You won’t find an option to save as whatever you write will be automatically saved.
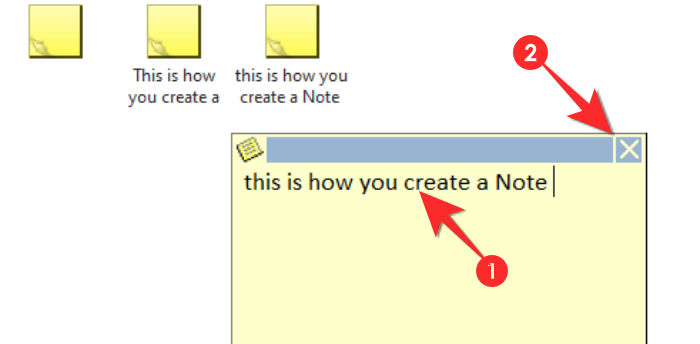
You can view your note in the Notes window after closing the Note.
How to take notes on Apple Mail
Apple’s native Mail app doesn’t have a dedicated note-taking feature but there are still ways to get things done if you wish to use the Mail app.
Take Notes on Apple Mail
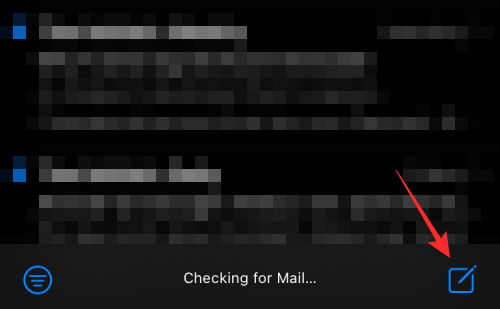
To start taking notes using the Mail app, open it and tap on the New note option indicated by a square and pen icon.
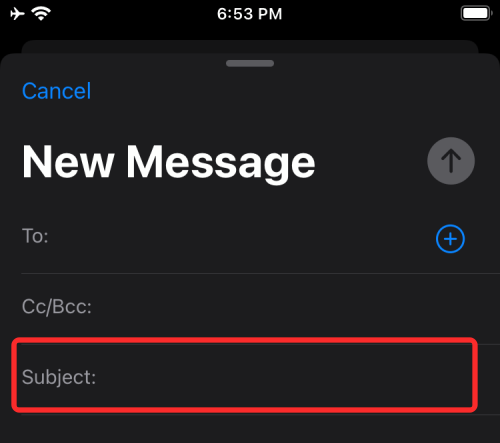
When you do that, the ‘New Message’ screen will appear. Here, Enter the title of your notes in the Subject section.
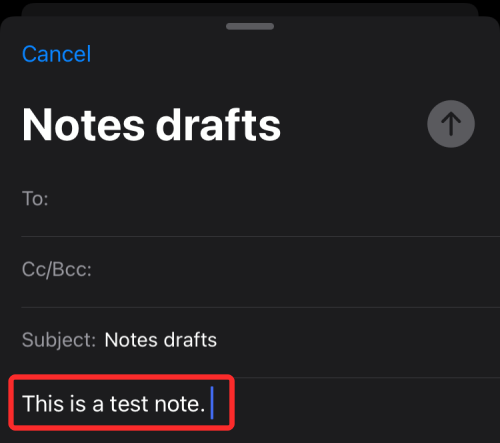
In the text field under it, start typing the notes you wish to save inside Apple Mail.
Once done, swipe down from the top of this screen to go to the Mail app’s main screen. When you do that, the info you added to the email will be saved and the email will be saved as a draft inside Apple Mail. Drafts created here can be accessed on your iPhone as well as on Mac.
Access Notes created on Apple Mail
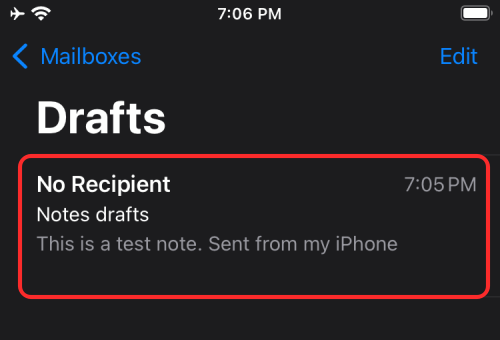
You can access all your notes by accessing your Apple Mail’s Drafts folder. For this, open the Mail app and tap on the ‘Mailboxes’ option at the top left corner of the screen.
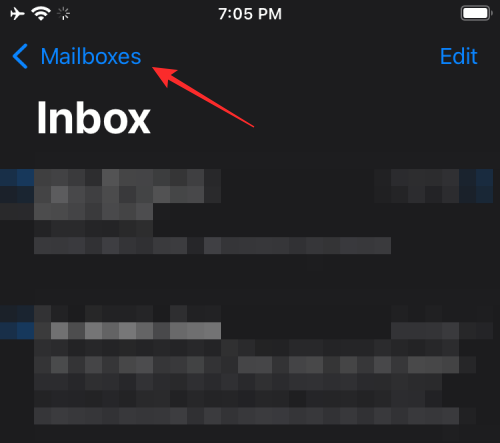
Inside the ‘Mailboxes’ screen, tap on the ‘Drafts’ option under ‘iCloud’.
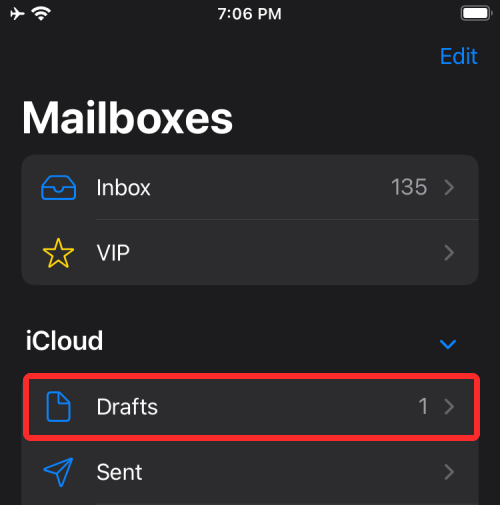
You should now be able to see the notes you have saved using the Mail app.
We hope you found this article helpful. Do let us know in the comments in case of queries and questions. Take care and stay safe!
RELATED












Discussion