-
How to restore old pictures using Photoshop
- Requirements
- Step 1: Scan and import your photo into Photoshop
- Step 2: Crop and Straighten your photo
- Step 3: Apply the Photo Restoration Neural Filter
- Step 4: Fix damaged areas with the Spot Healing Brush Tool
- Step 5: Fix unwanted marks with the Clone Stamp Tool
- Step 6: Apply the Colorize filter
- Step 7: Review your image
- Step 8: Export image
- Before and After examples of Photo Restoration with Photoshop
- Tips and tricks when using Photoshop to restore old photos
- FAQ
What to know
- To restore old pictures, first scan and import digital copies of your old photos to Photoshop. Crop and straighten your photos using the Crop tool and apply the ‘Photo Restoration Neural Filter’ from Filters > Neural Filters. Adjust the sliders to further customize the strength of the filter.
- Use the Spot Healing Brush Tool and the Clone Stamp Tool from the left toolbar to remove blemishes, specks, spots, and creases.
- Add color to your black-and-white photos from Filters > Neural Filters > Colorize.
Old photos and pictures are the gateway to the past. There’s nothing better than flipping through old photo albums at a family gathering or spending an afternoon browsing through photos of family and friends to reconnect us with our roots. But our photos, like our memories, need an upkeep too.
The following guide will take you through the steps to restore old and worn-out pictures using Adobe Photoshop, remove creases, spots, and damages, colorize them, and restore them in a digital form so you can look back on those fond memories with a clear eye.
How to restore old pictures using Photoshop
Nowadays, you can easily scan and keep a digital copy of your photos on your device or on the cloud and access your memories long after the actual photos are lost to time. But transferring your memories to the digital realm is never enough. They are bound to have all the blemishes and creases of the original photos at the time of scanning. Fortunately, this is where a tool like Adobe Photoshop can help restore your old photos.
Requirements
Before we begin, you will need to have the following things at the ready to begin restoring your old photographs:
- An active subscription (or the trial version) of Adobe Photoshop.
- Adobe Creative Cloud app downloaded and installed on your PC.
- The Photoshop app installed from Adobe Creative Cloud > All Apps > Photoshop > Install.

Step 1: Scan and import your photo into Photoshop
Firstly, get your old photos scanned and transferred to your PC. For this purpose, you can use any simple photo scanner. If you don’t have a scanner at home, you can also simply take a photo using a camera, or use a scanner app for smartphones and scan the photos with it. The goal is to get a high-quality copy of your photos on your desktop.
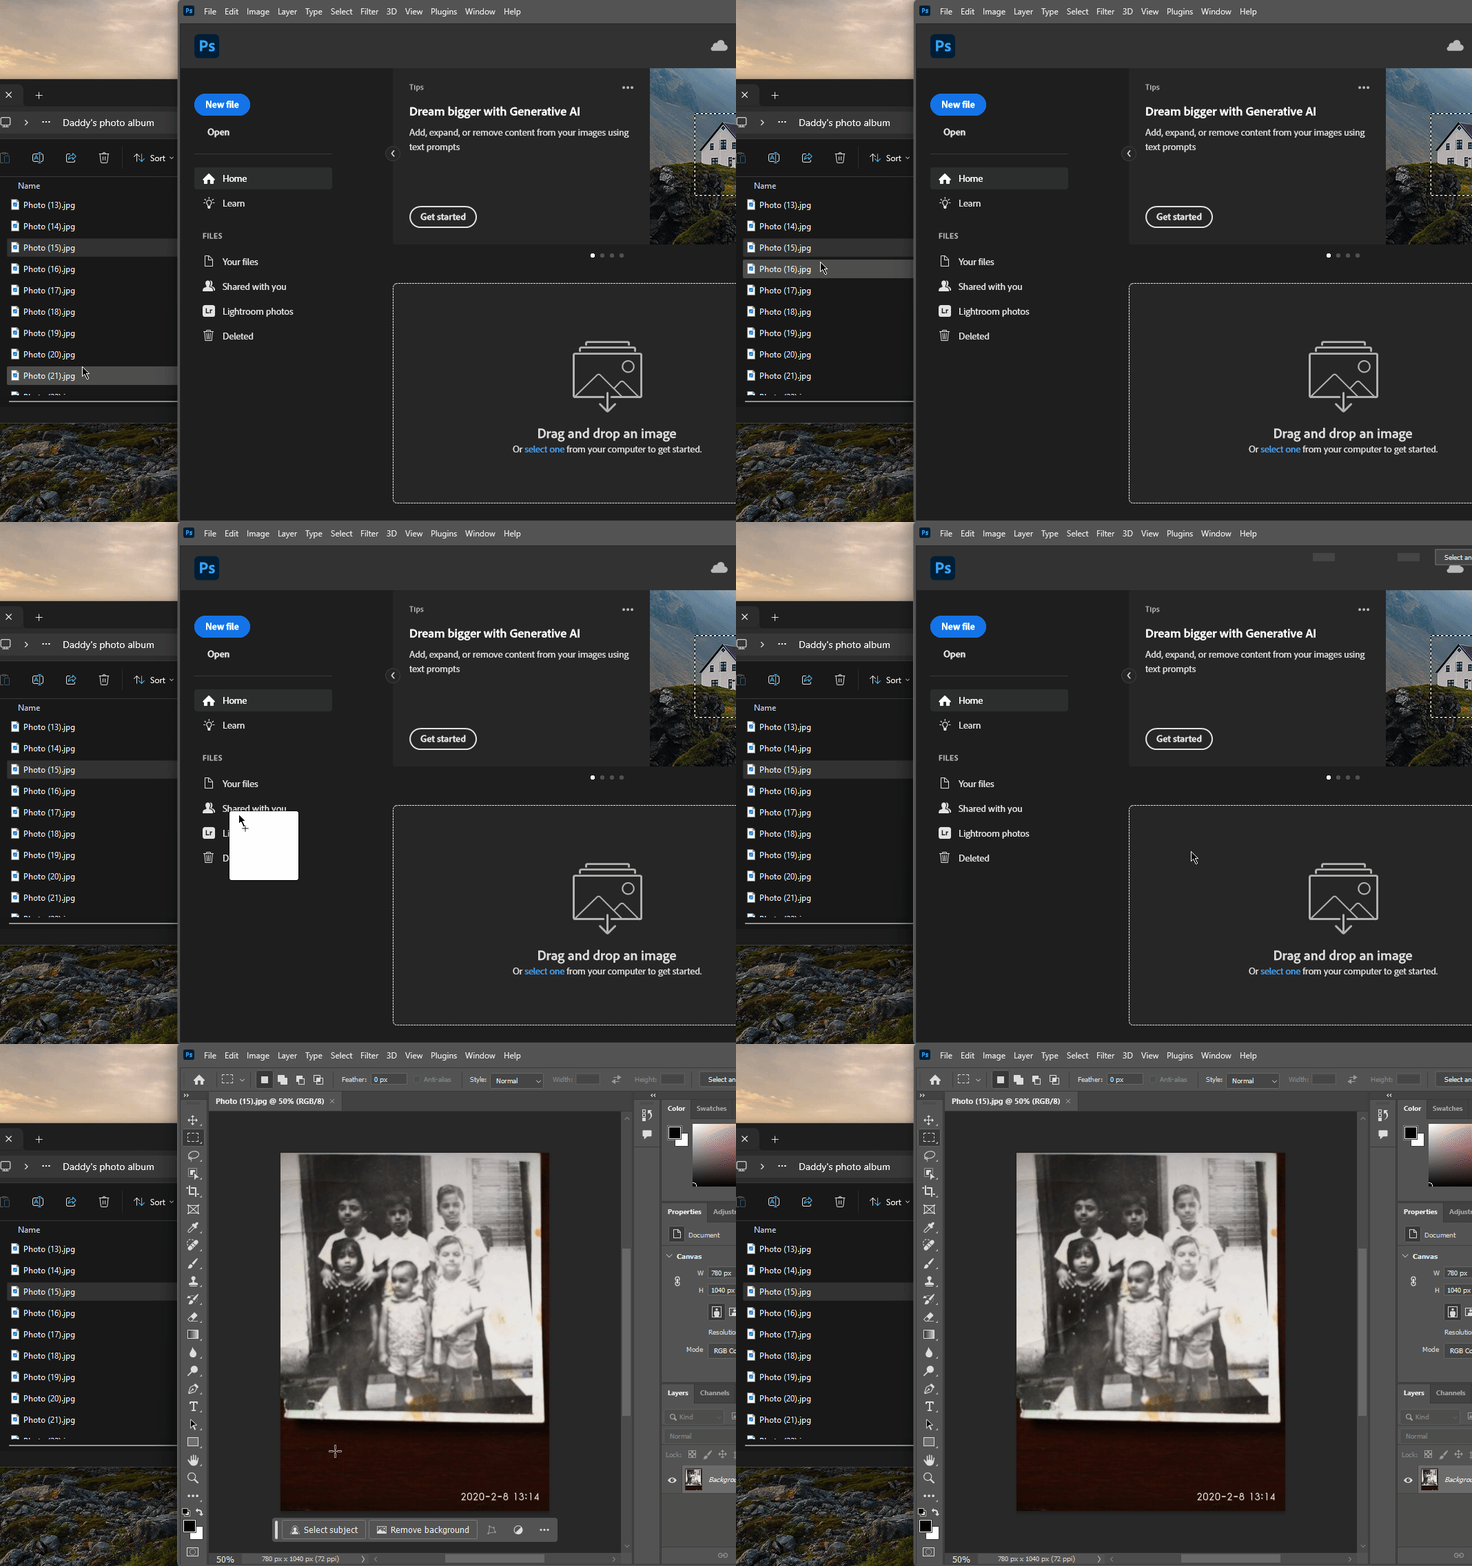
Transfer the digital copies of your photos to your PC. Then open the Photoshop app and simply drag and drop the photo into Photoshop.
Step 2: Crop and Straighten your photo
Your photo scans are likely not going to be perfect. But Photoshop can help you straighten your image and crop out areas that are not part of the image. Here’s how:
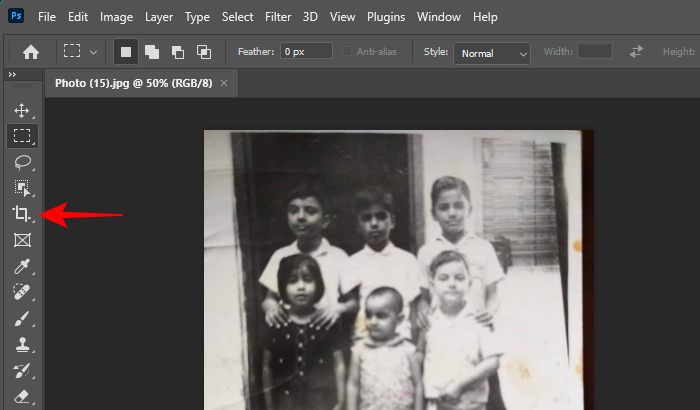
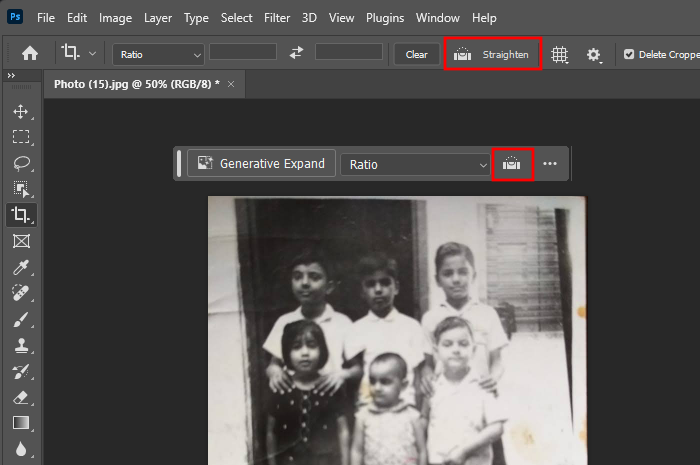
Click on the Crop tool in the left toolbar.
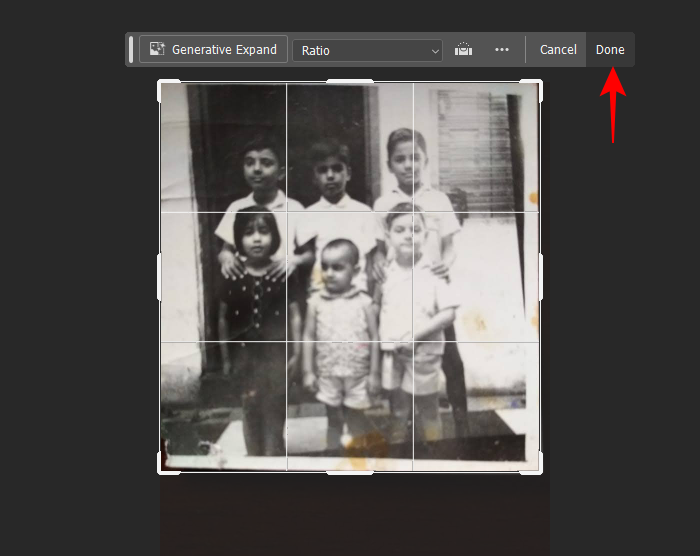
Drag the handlebars at the sides and the corners of the image and crop out unwanted elements. Then click on Done.
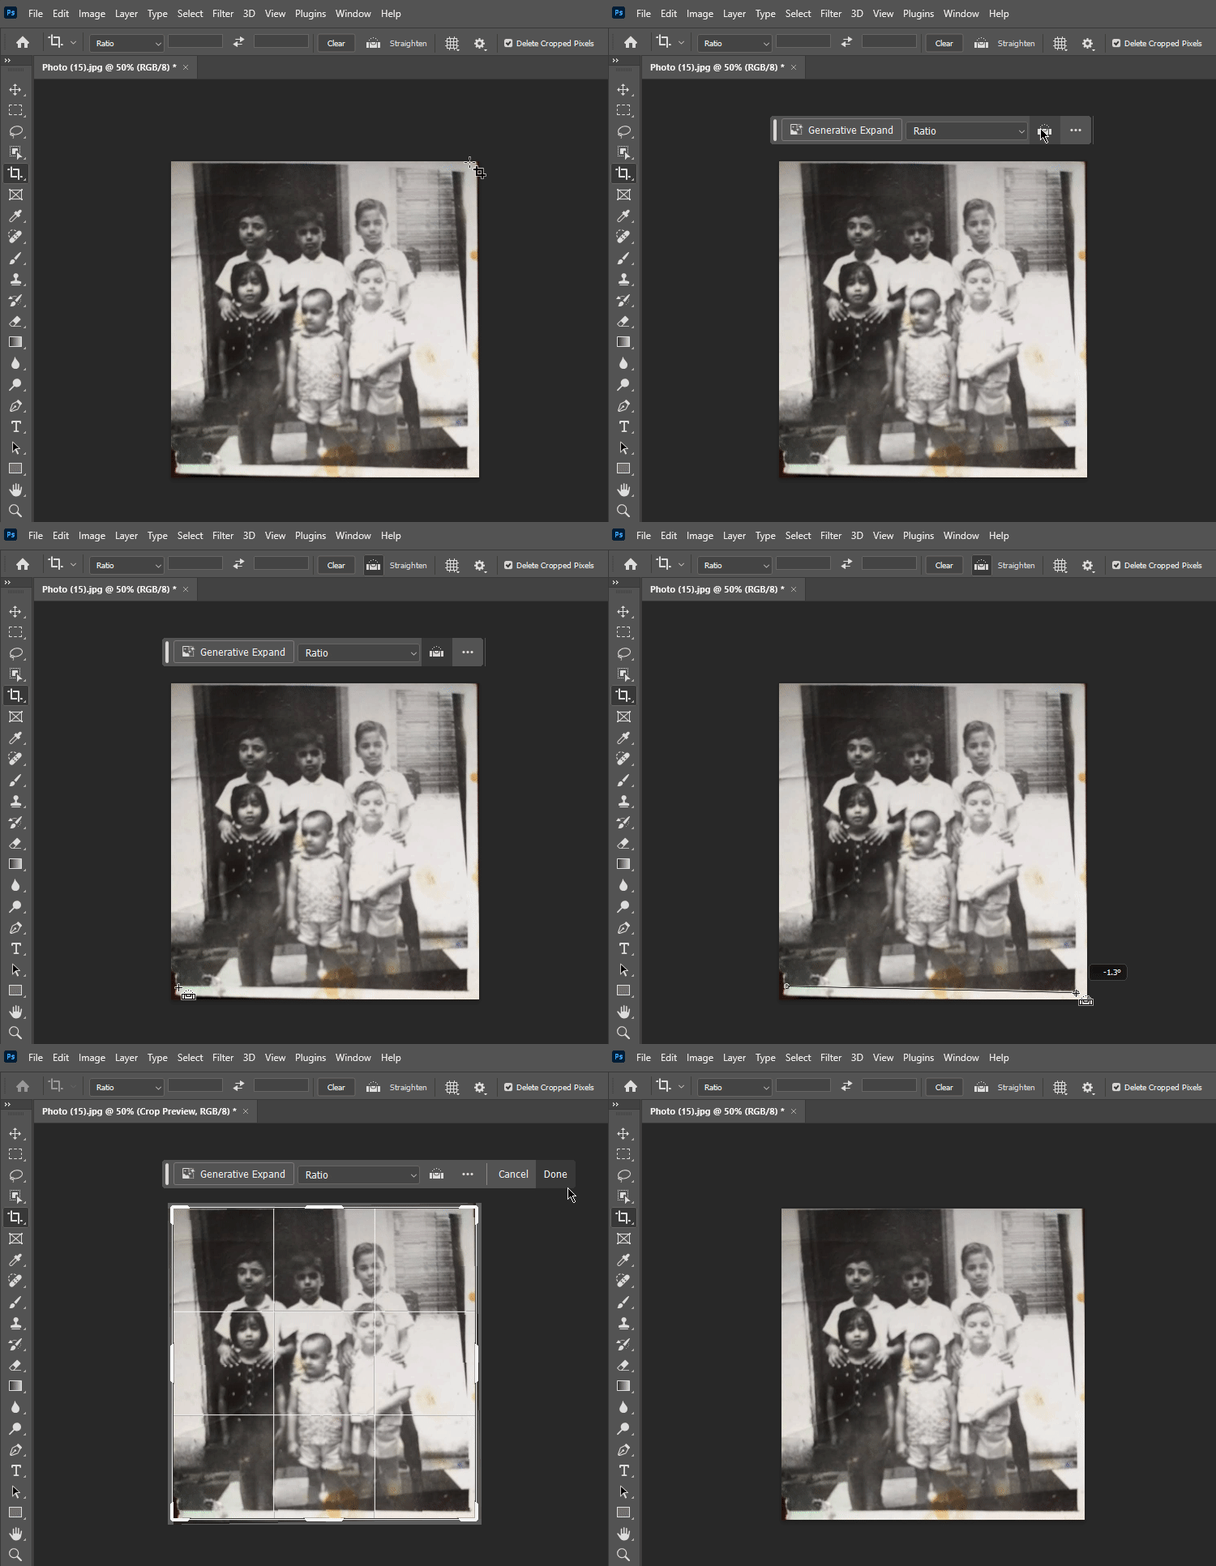
Next, if the rotation of your image is skewed, click on the Straighten option at the top or in the context bar.
Now draw a horizontal or vertical line across one of the elements of the image. This will cue Photoshop to rotate the image along that axis. Then click on Done.
Step 3: Apply the Photo Restoration Neural Filter
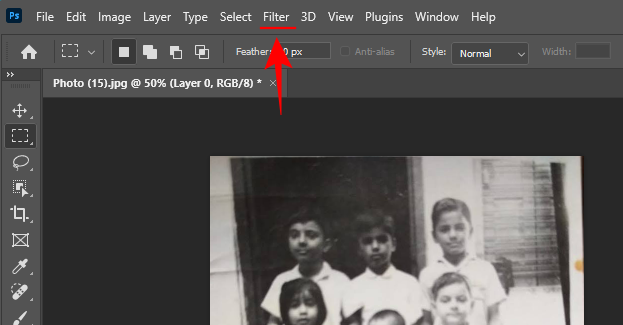
Next, let’s apply the Photo Restoration neural filter, which will automatically improve the image greatly. To do so, click on Filter at the top.
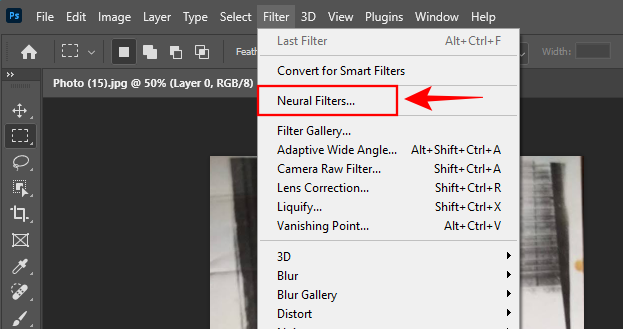
Select Neural Filters.
In the side pane, click on Photo Restoration at the bottom.
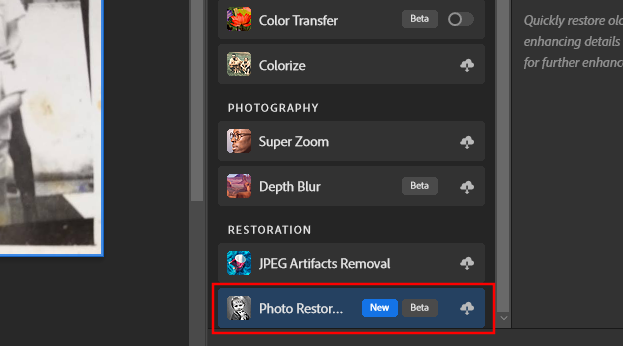
Then click on Download to get the filter.
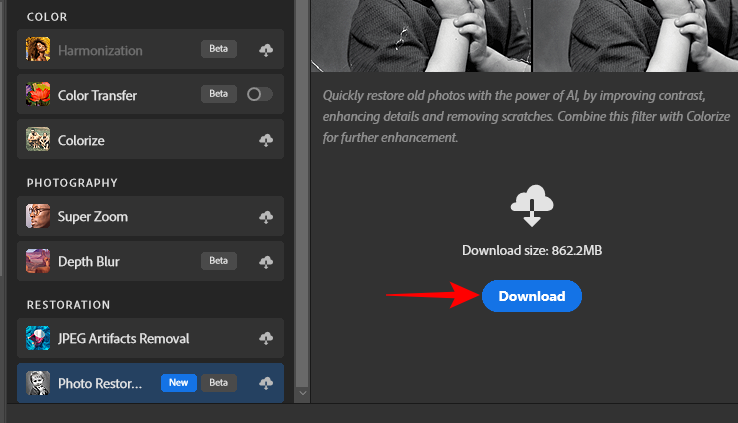
Once the download is complete, make sure ‘Photo Restoration’ is toggled on.
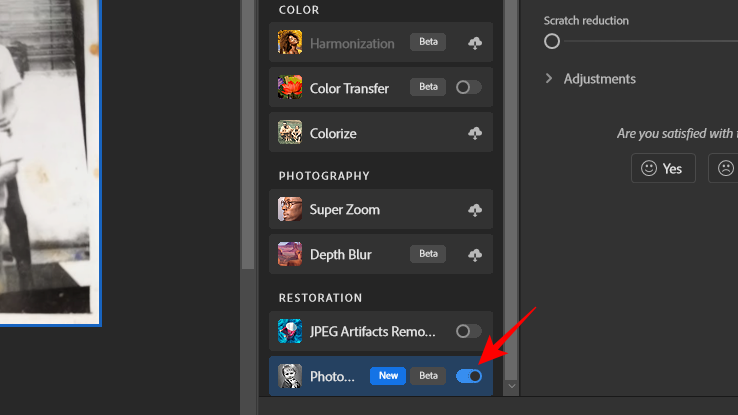
The Photo Restoration plugin (which is still in its beta phase) has three main editing options:
- Photo enhancement – Improves the overall quality of the image by enhancing color, contrast, and details.
- Enhance face – Improves the details on faces.
- Scratch reduction – Removes scratches and creases from the image.
Depending on the image itself, adjust the sliders to determine the strength of each setting.
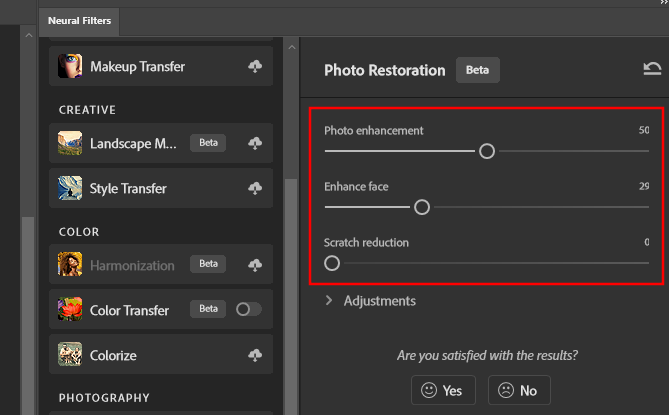
Pay close attention after every adjustment to see the difference. Try not to overcorrect or your images may turn out visibly worked upon. Take some time to find the sweet spot for each individual image.
There are additional adjustments that you can make beyond these three settings. Click on Adjustments to access them.
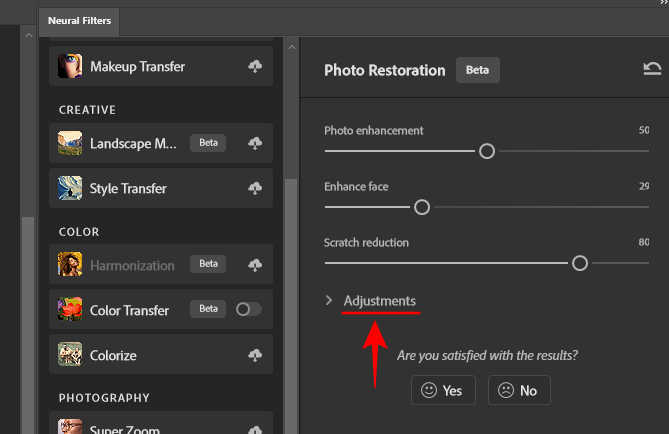
Here, you’ll find four more settings:
- Noise reduction – Reduces image noise that makes the image appear grainy.
- Color noise reduction – A type of noise reduction that caters primarily to random specks of color in an image.
- Halftone artifacts reduction – Reduces the scratchy and jagged edges that often appear in scanned images.
- JPEG artifacts reduction – Reduces the blurry areas in images that have been compressed in the JPEG format.
Use the sliders for each of them to see the difference they make to your images.
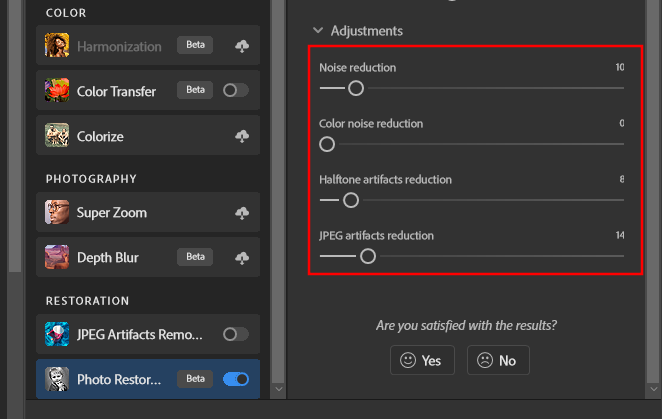
As with the previous settings, pay close attention to how they’re improving your image, if at all. If you don’t see any difference, leave them in their default position. Once done, click on OK in the bottom right corner.
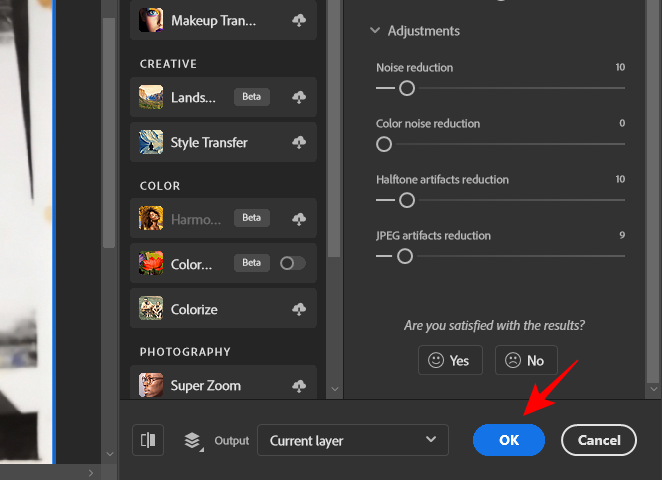
Step 4: Fix damaged areas with the Spot Healing Brush Tool
Next, let’s fix the spots that are on the image. Select the Spot Healing Brush Tool from the left toolbar.
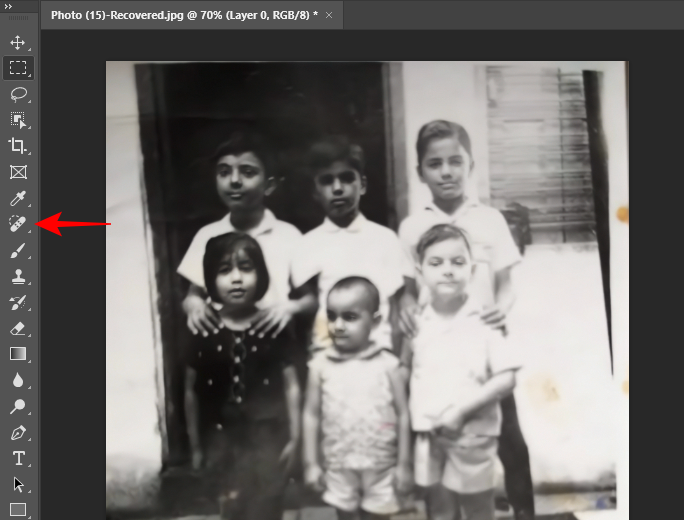
Then click to dab over the spots in your image.
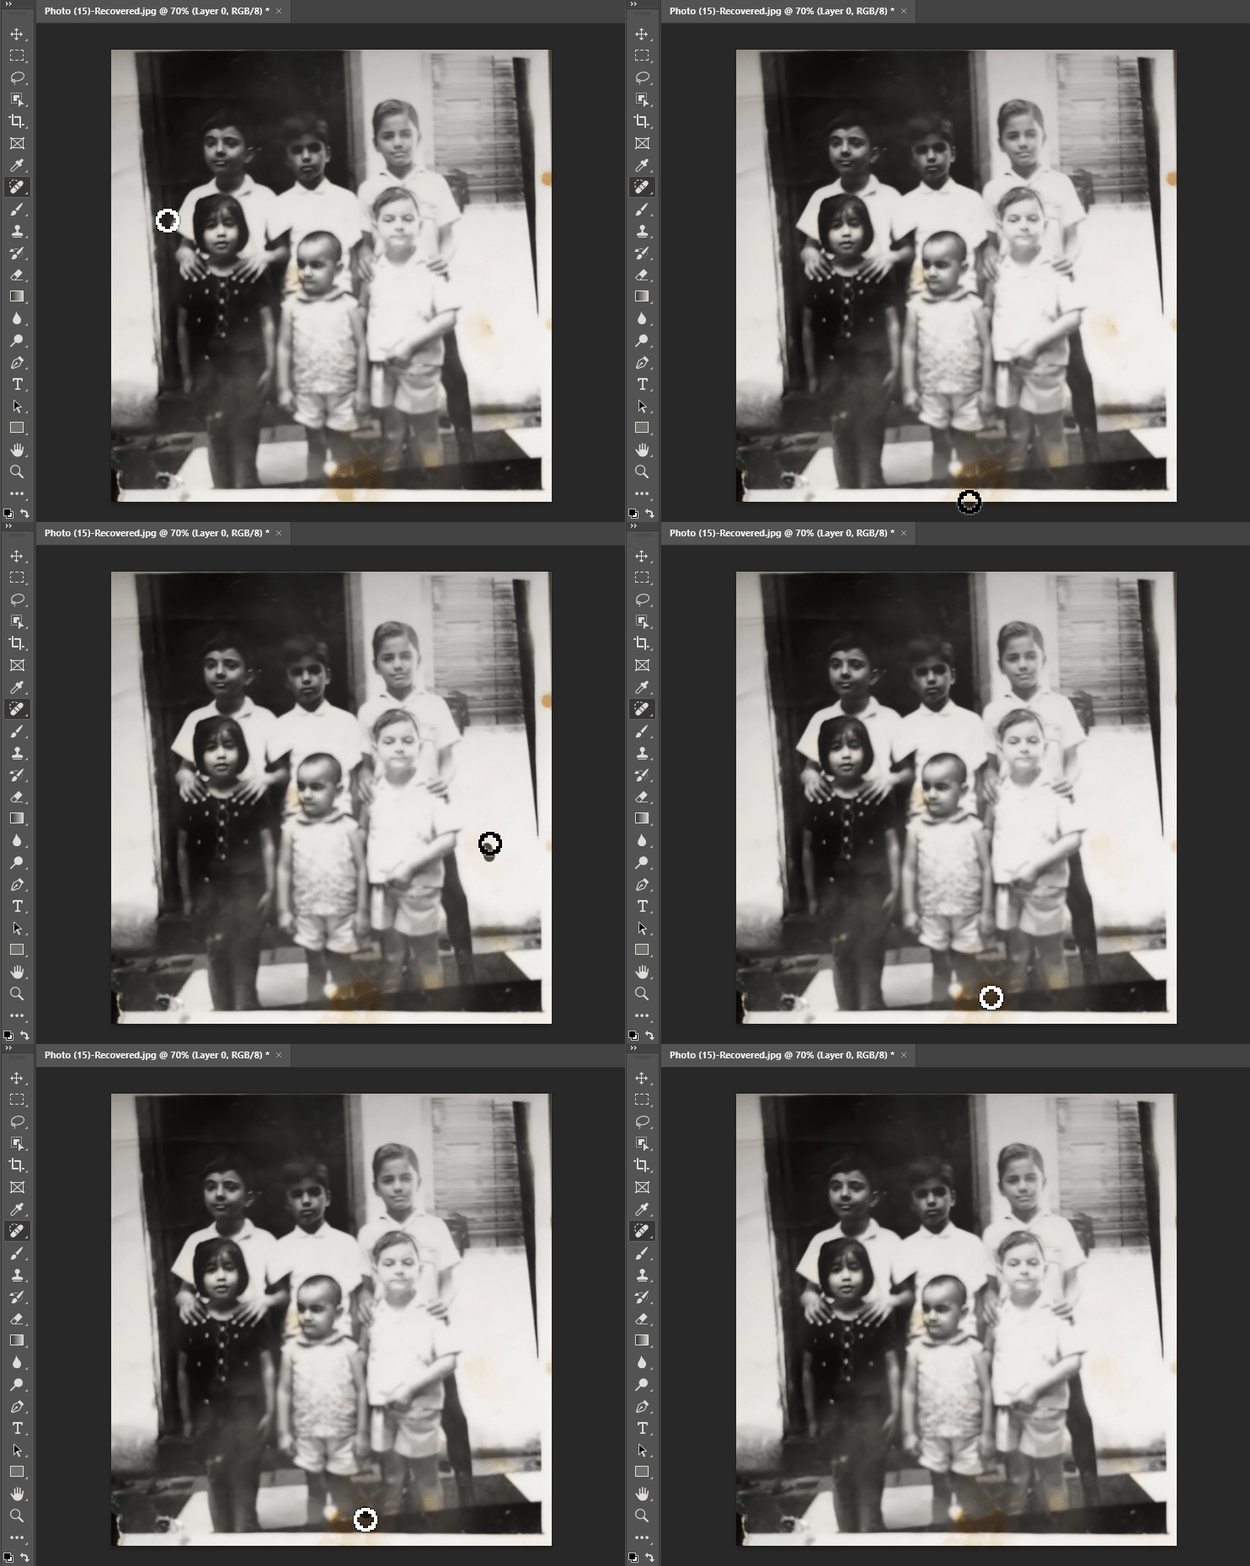
The spot healing brush tool can easily remove all those little stains that the image has accrued over the years so the image is left pristine.
Step 5: Fix unwanted marks with the Clone Stamp Tool
Your images might still be left with a few rough edges that may spoil the memory. To fix these, you can use the Clone Stamp tool to cover up a damaged area with pixels from another point in the image.
To start, select the Clone Stamp tool from the left toolbar.
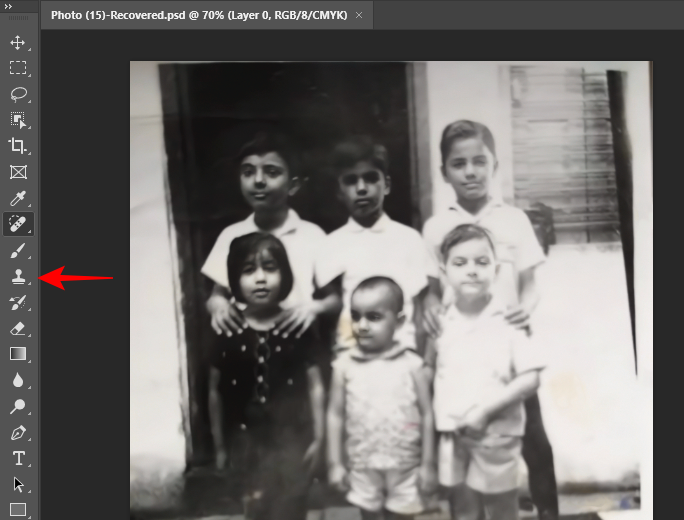
Now, select a sample point from your image by holding down the Alt key and clicking on an undamaged area that you want to clone (your cursor icon will turn into a crosshair). Then let go of the Alt key and use the cursor to paint over the damaged area and cover it up.
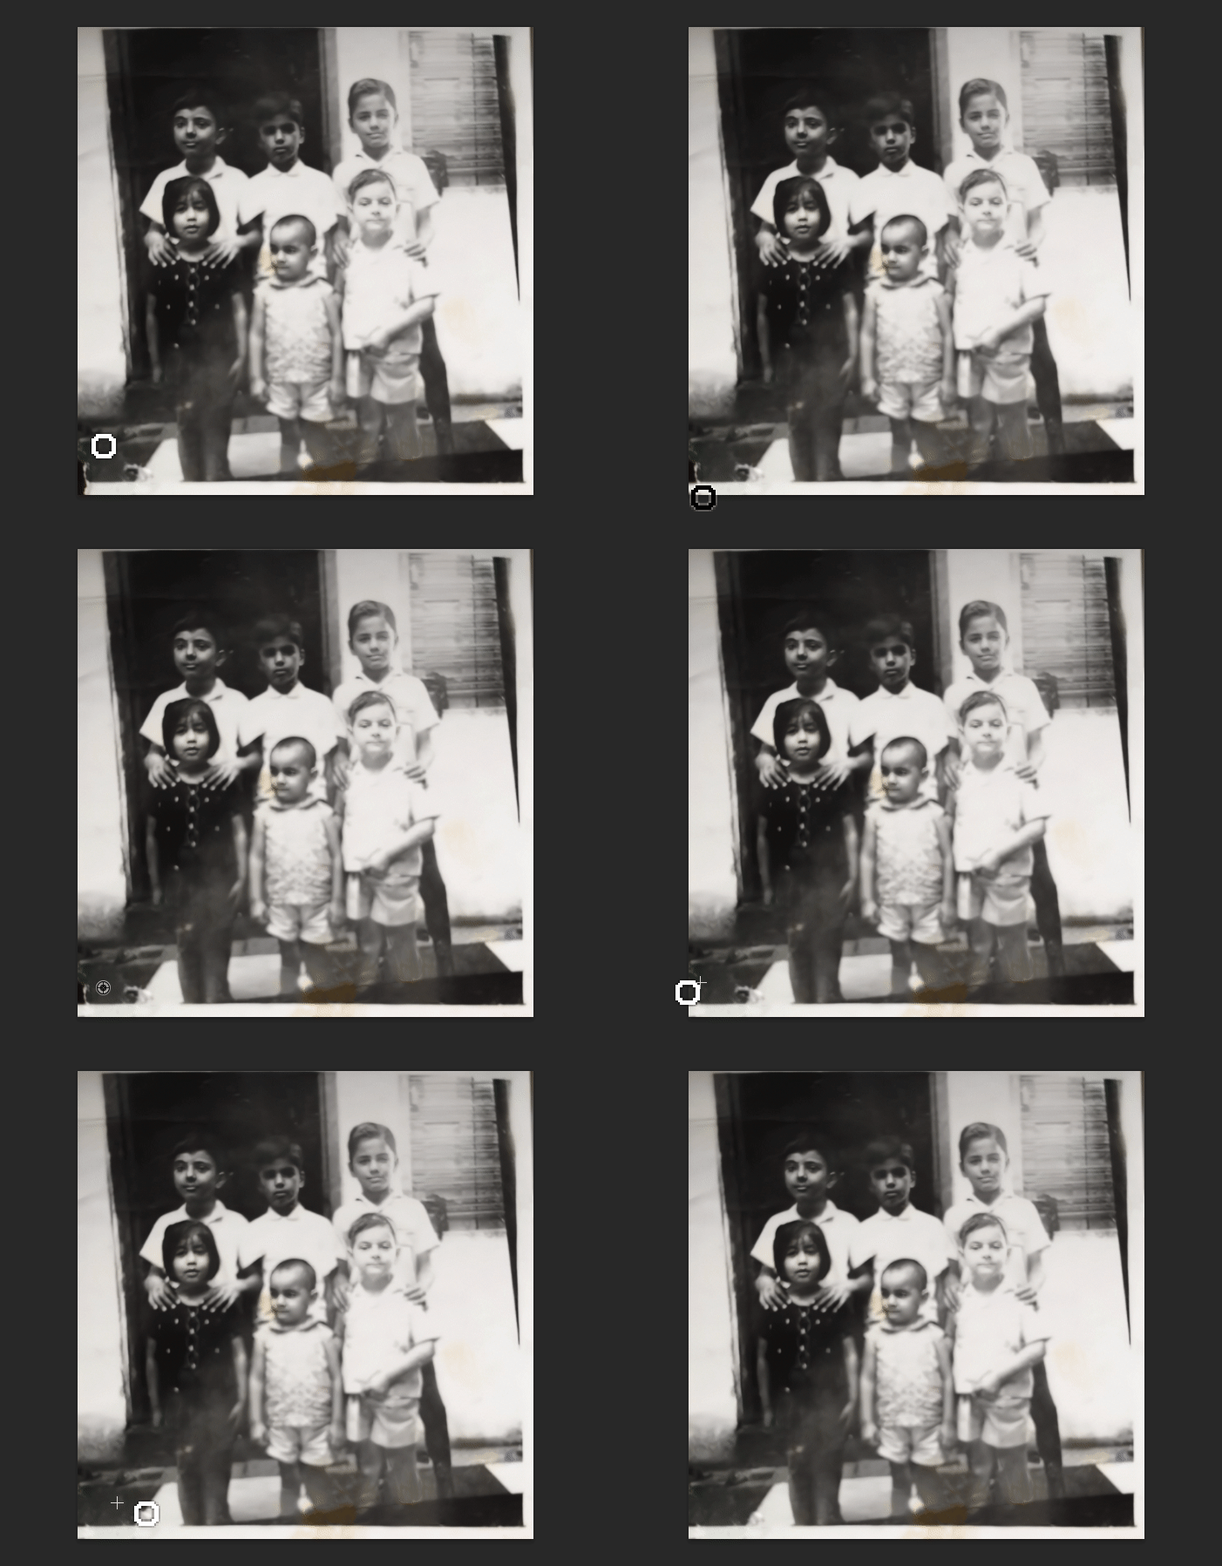
Tip: Make sure to clone an area that is nearer to the damaged area to ensure that the color and texture remain consistent throughout.
Step 6: Apply the Colorize filter
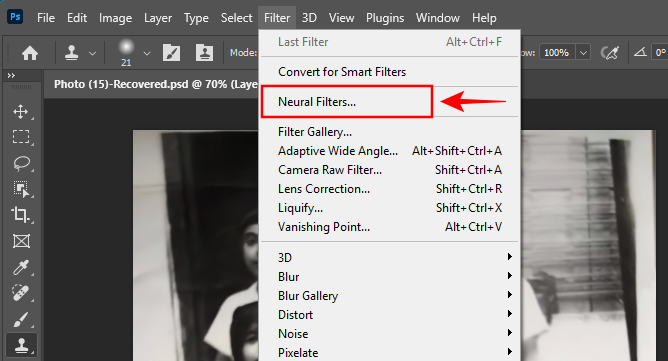
If your image is in black and white (as is the case with our example), you can add some color to it with the ‘Colorize’ filter. To select it, click on Filter.
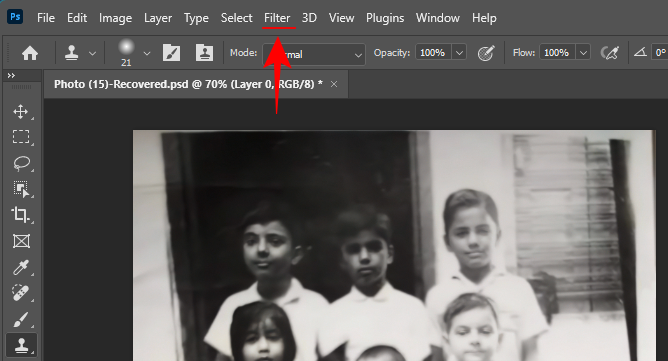
Choose Neural Filters.
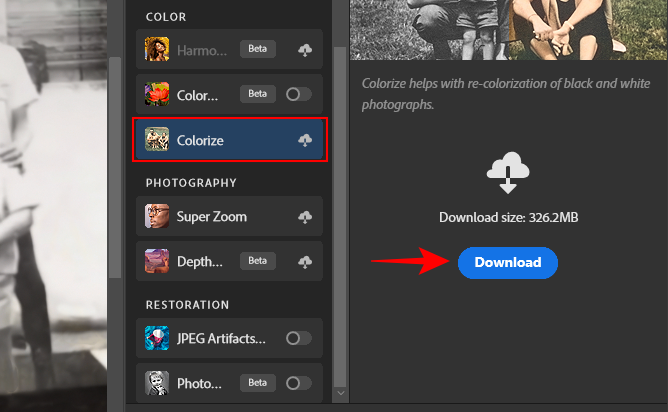
In the sidebar, click on Colorize. Then download the filter.
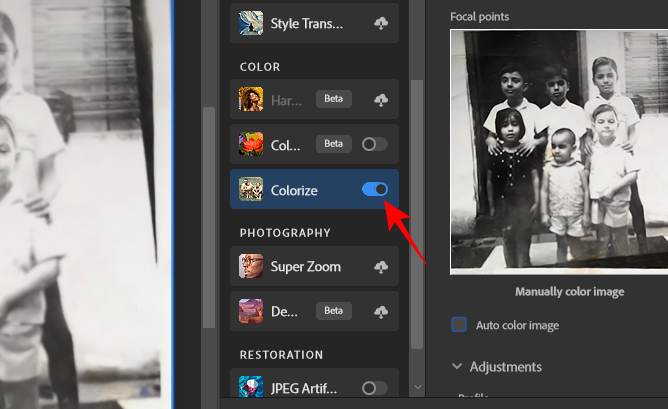
Once downloaded, make sure it is toggled on.
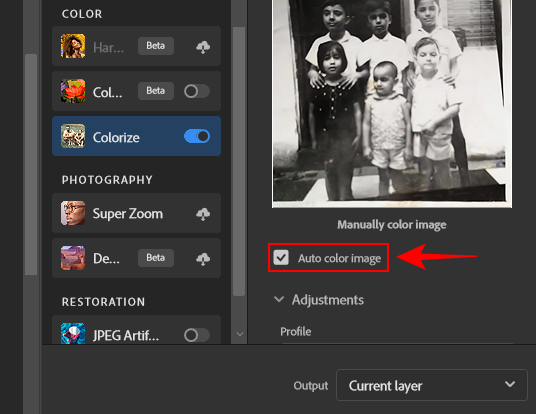
Then check the box next to Auto color image.
You can choose a different color ‘Profile’ from its dropdown menu.
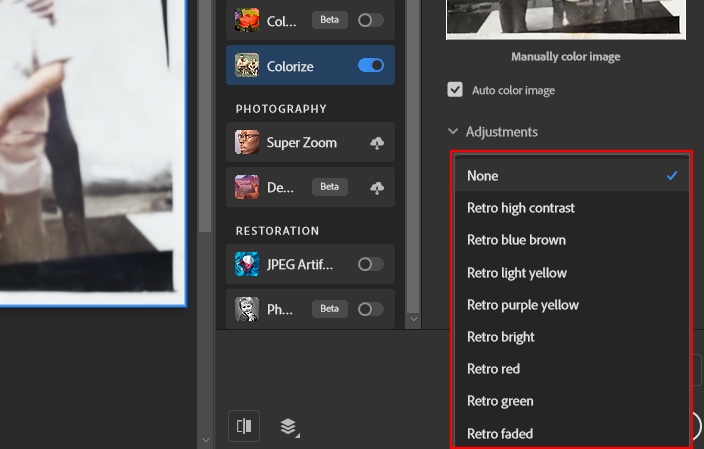
Or manually change the colors if you want.
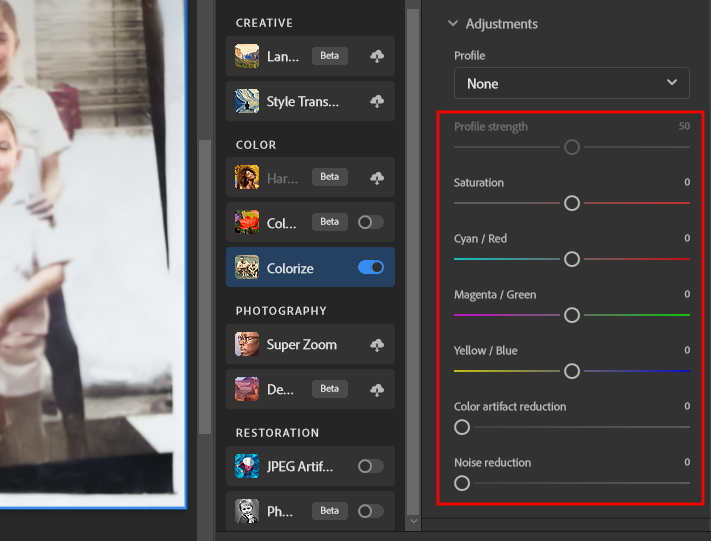
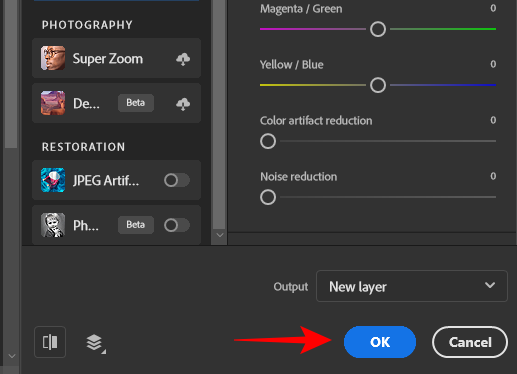
However, the auto-coloring works just as well and can, arguably, provide better results. Once done, click on OK in the bottom right corner.
Step 7: Review your image
Before you export and save your image, make sure to review your image and compare it with the original. Although you can always come back and edit the image again, it’s a good habit to go over the changes and see if you’ve made any mistakes.
In our case, we found that even after reorienting the image the first time, it was still not perfectly aligned. This goes to prove that you can end up ignoring glaring mistakes while you’re in the thick of things. So make sure to double-check your image before exporting.
You also have the option to further edit your image with filters like Sharpness, Dust & Noise, etc., all of which are available under the ‘Filter’ tab in the toolbar at the top.
Step 8: Export image
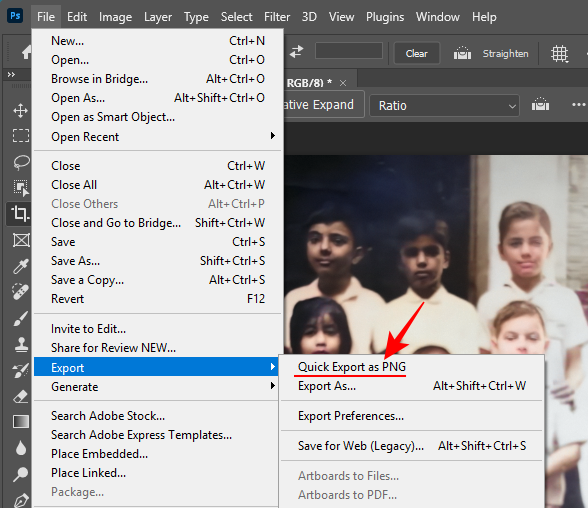
Once you have restored your image to the best of your abilities, click on File at the top.
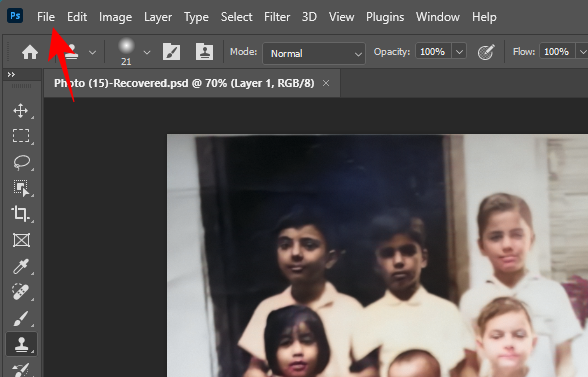
Hover over Export and select Quick Export as PNG.
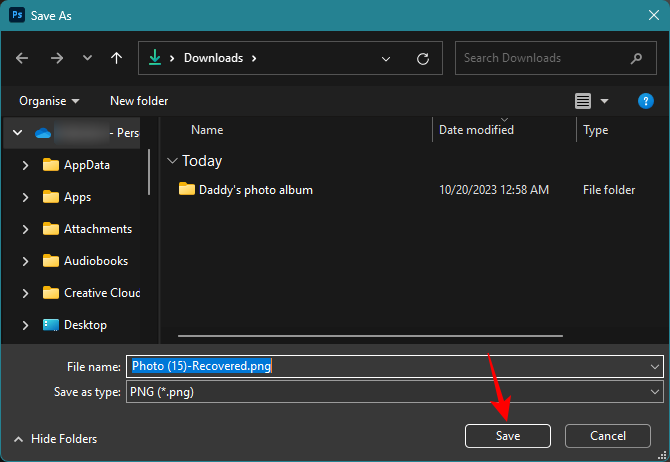
Choose a location for your image, give it a name, and select Save.
Before and After examples of Photo Restoration with Photoshop
Here are a few examples of old images we restored using Photoshop in a before-and-after format so you can get a better visual reference of the difference that photo restoration with Photoshop can make.
Example 1
Before
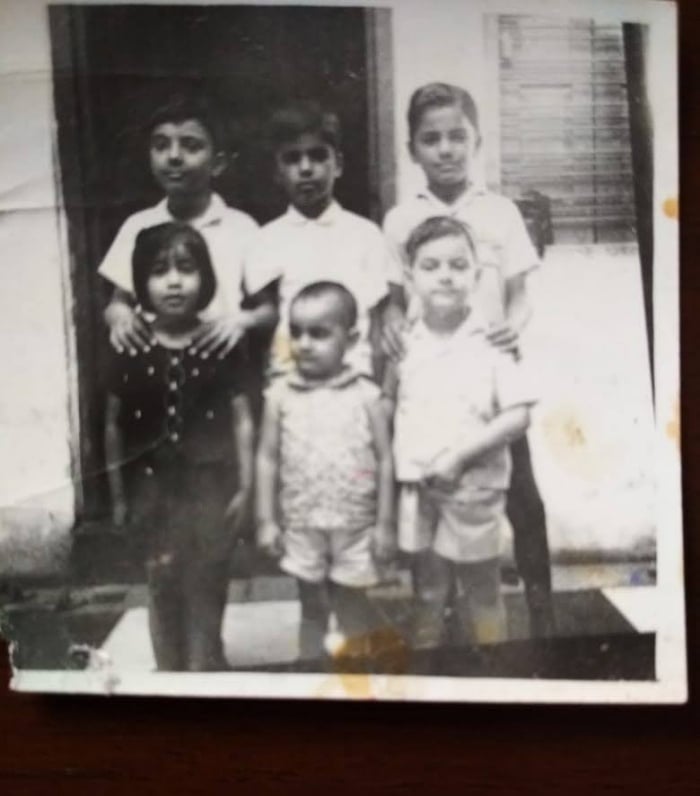
After

Example 2
Before
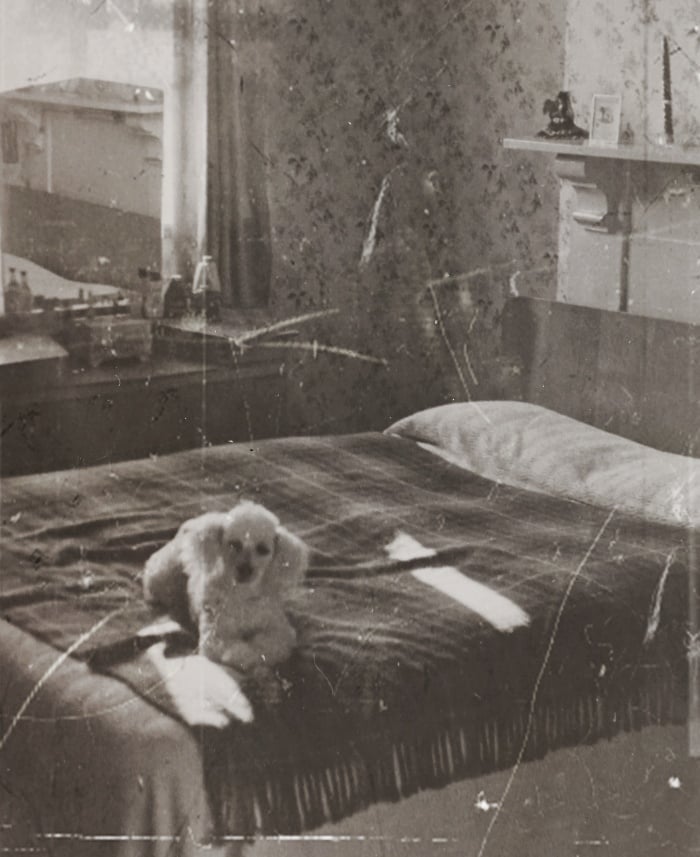
After

Example 3
Before
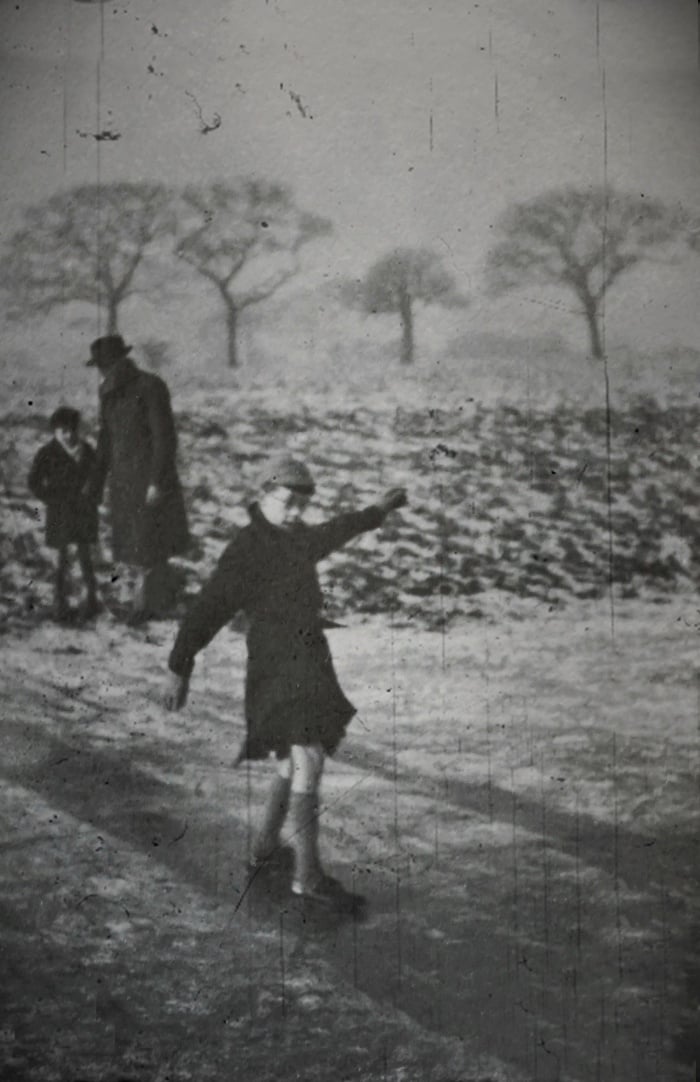
After
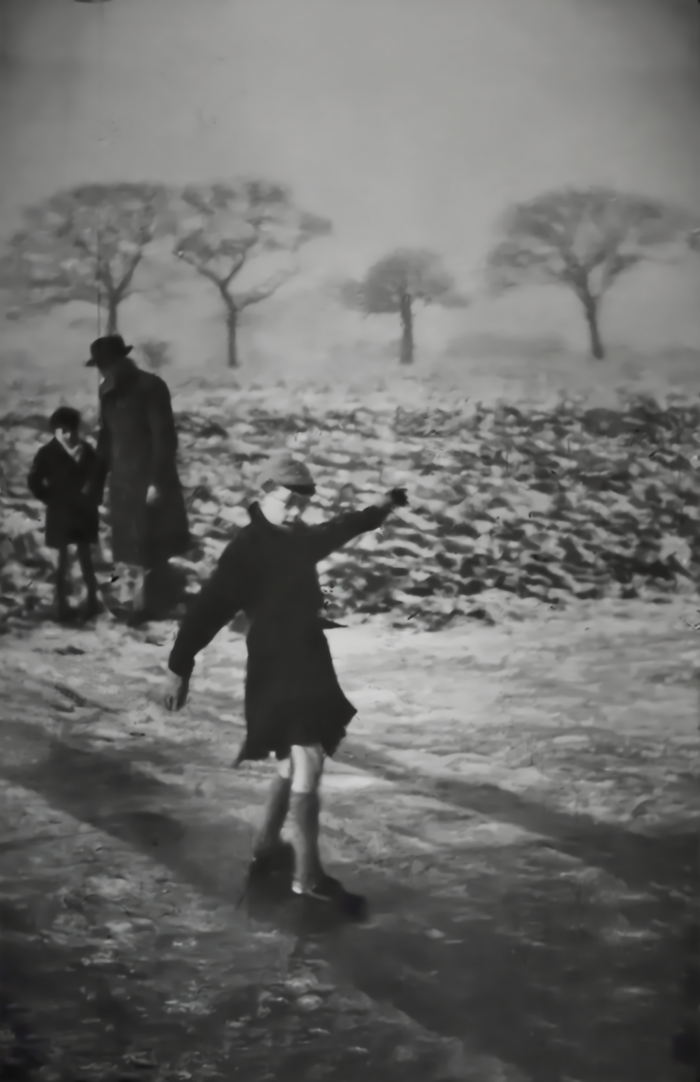
Example 4
Before

After
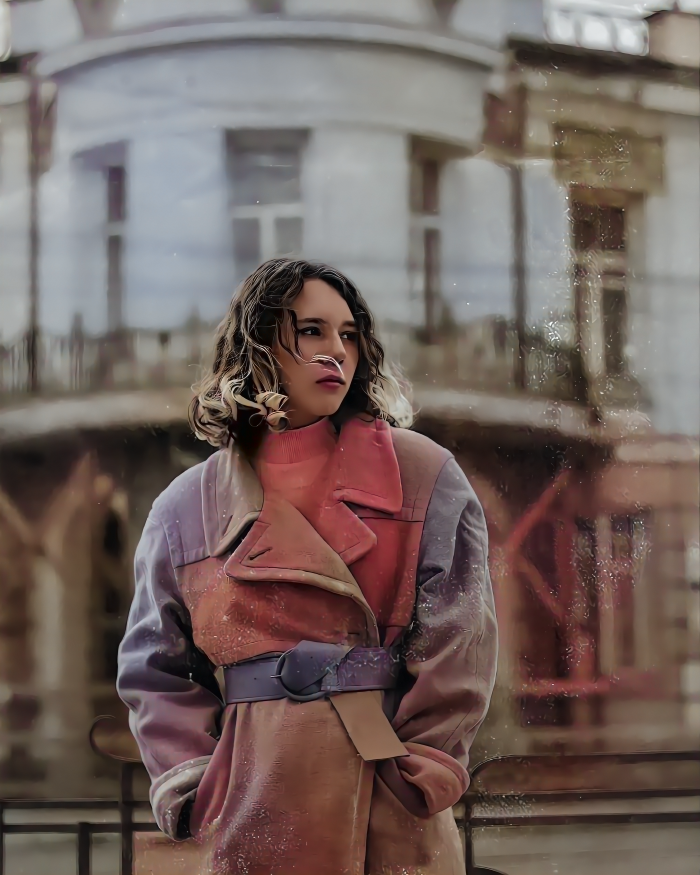
Example 5
Before
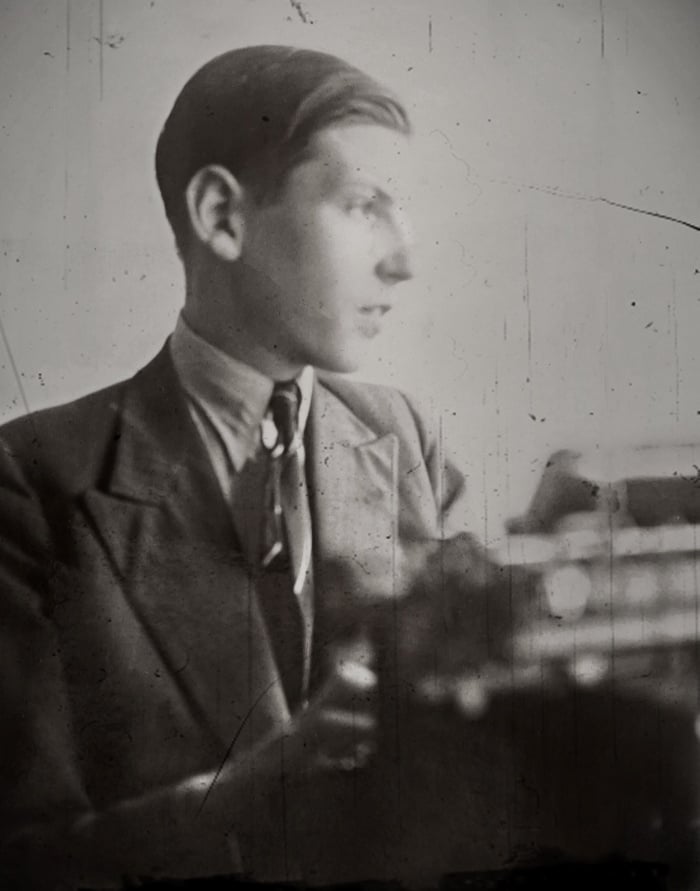
After

Example 6
Before
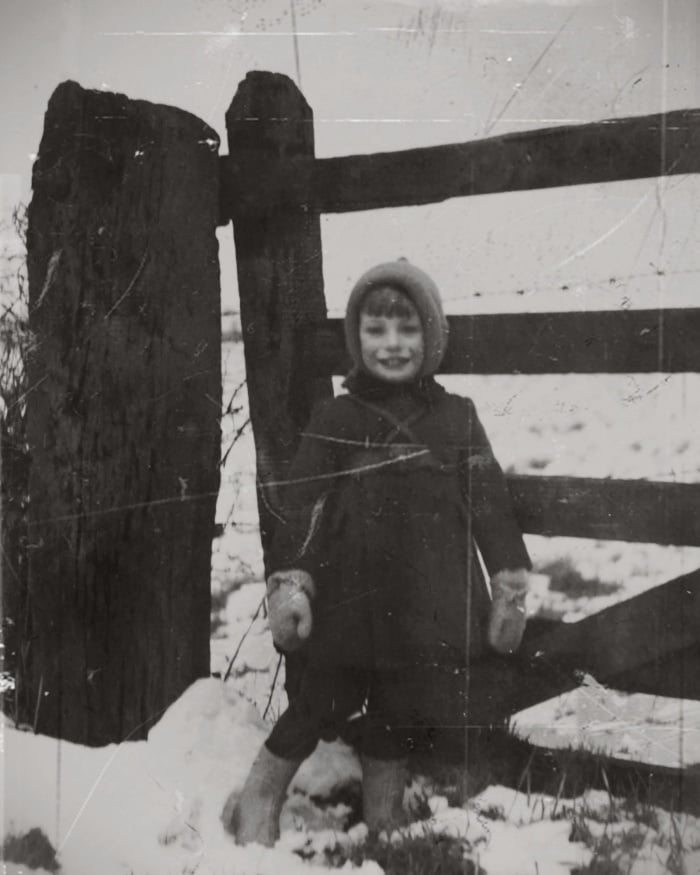
After

Tips and tricks when using Photoshop to restore old photos
Many of the Photoshop features mentioned in this guide are currently in the beta phase. So there might be a few hiccups while using them.
Getting around the neural filter errors
For instance, while you’re adjusting the setting sliders for ‘Photo Restoration’, you might receive an error message like the one below:
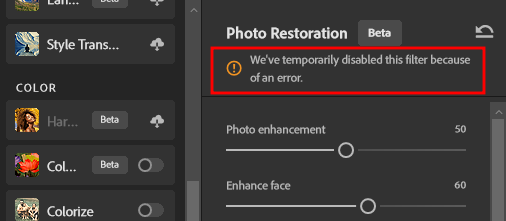
This tends to happen if the application of a particular setting consumes too many resources. The best way to get around this is to close all other apps that are consuming resources in the background, such as Chrome, media players, etc. Then adjust the slider incrementally and wait for Photoshop to process the change before applying a more aggressive setting.
Colorize after edits
The colorization neural filter isn’t perfect in Photoshop. But if you’re going to use it to bring your black-and-white images to life, make sure to do so after you’ve made all other edits. This is to ensure that the colors don’t get affected when you’re using the Spot Healing Brush tool or the Clone Stamp Tool, which can sometimes lead to smudging if you’re not careful.
Save your work
And not just afterward! Save your work after every major edit. It’s no fun if Photoshop crashes and you can’t recover your past edits because you forgot to save your project. All it takes is Ctrl+S.
FAQ
Let’s take a look at a few commonly asked questions about restoring old photos with Photoshop.
What is the fastest way to restore old photos?
The fastest way to restore old photos is to simply upload your image into Photoshop, crop and realign it, and toggle on the Photo Restoration neural filter from Filter > Neural Filters. Then use the default settings to restore your old photos and click OK to confirm.
Can you restore photos on Photoshop for free?
Although Photoshop is a subscription-based product, you can use Adobe products for free for 7 days and cancel your subscription at the end of the trial period. You will have access to all the Photoshop features during the trial period.
Image restoration can be a laborious process if you don’t have the right set of tools. But with Photoshop, since all the heavy lifting is done by the neural filters, it’s really quite the cakewalk. You always have the option to get down and dirty and eliminate every visible issue down to the last speck if you want. However, for most users, a simple touch-up can work similar wonders just as well.
We hope this guide helped you restore your old photos with Photoshop. Until next time!

