What to know
- To remove vocals from a song, import the file into Adobe Audition, click on an empty channel under ‘Effects Rack’ > Stereo Imagery > Center Channel Extractor, and select the Vocal Remove preset.
- To remove the instrument from the center channel, apply the Center Channel Extractor effect and select the Default or Acapella preset.
- To prevent the music or vocals from side channels from bleeding through, click on the ‘Discrimination’ tab and adjust the Crossover Bleed and Phase Discrimination sliders.
As much as we’d like, not all our favorite songs are easily available as acapella or backing tracks for us to sing or jam along to. But you don’t always have to scour the web looking for instrumental – or vocal – only files to do so. As long as you have a good-quality song file, you can easily remove instruments and vocals from them using the Adobe Audition app.
The following guide will provide a step-by-step guide on how to isolate vocals or instruments from a song so you can sing and jam along to it and remix them as you wish.
How to remove vocals from songs using Adobe Audition
Before we begin, make sure that you have the best quality song file that you can get access to. Not only will this ensure that the vocals and the instruments are well differentiated across the two channels, but it will also help you remove or attenuate them with Adobe Audition.
Once you have the song, open Adobe Audition and import the song file.

Now use the steps below to remove the vocals from the song (or the instrument occupying center stage for instrumental songs).
1. Remove vocals using the Center Channel Extractor effect
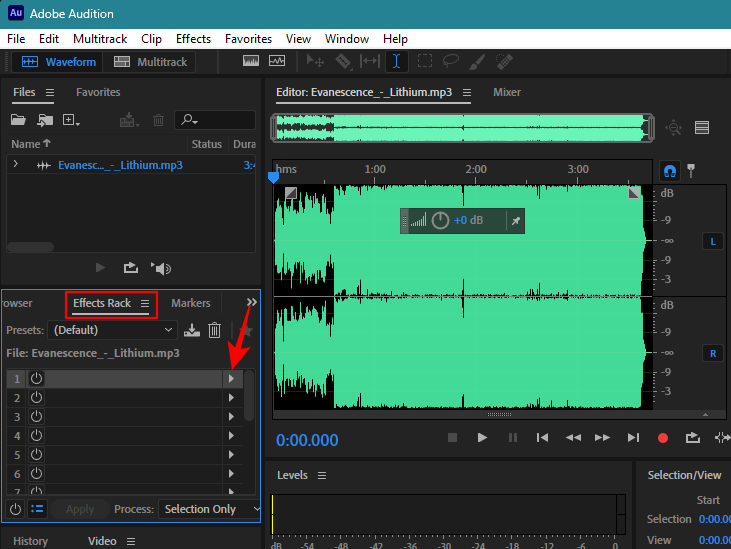
Under the ‘Effects Rack’ tab on the left, click on the arrow next to an empty track.
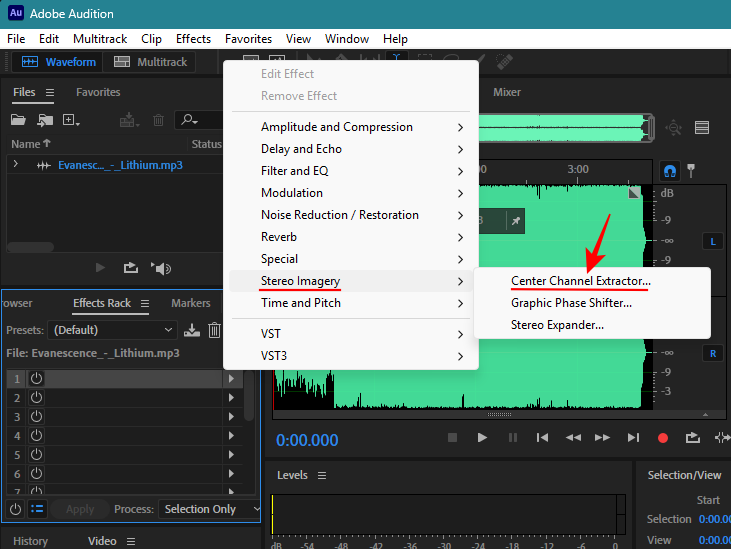
Hover over Stereo Imagery and select Center Channel Extractor.
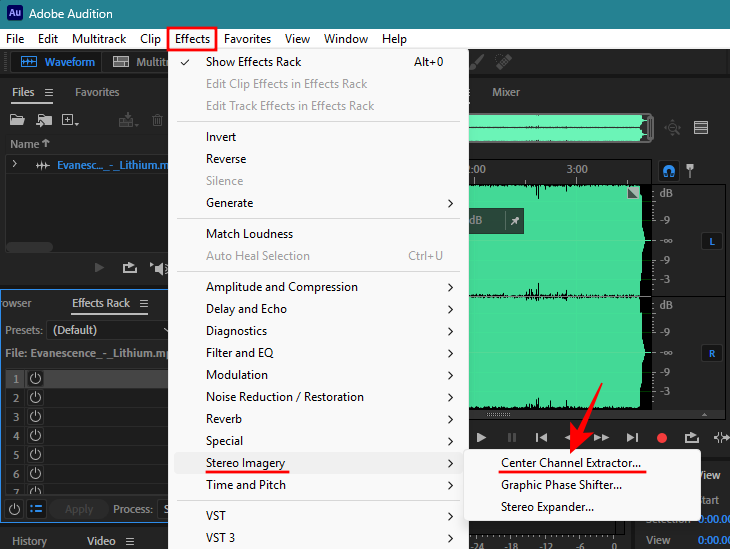
Alternatively, click on the Effects tab at the top and select Stereo Imagery > Center Channel Extractor.
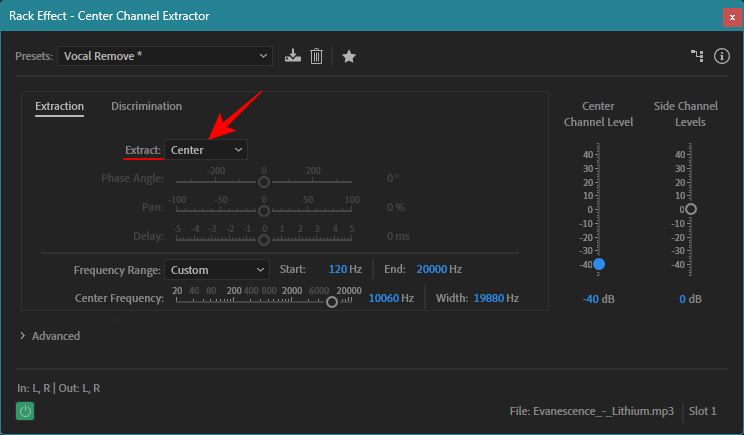
From the Presets dropdown menu, select Vocal Remove.

Since the vocals more often than not take center stage, make sure ‘Extract’ is set to Center.
Play the song in Adobe Audition. Then click on the effect to turn it on or off to see how much the vocals have been attenuated.
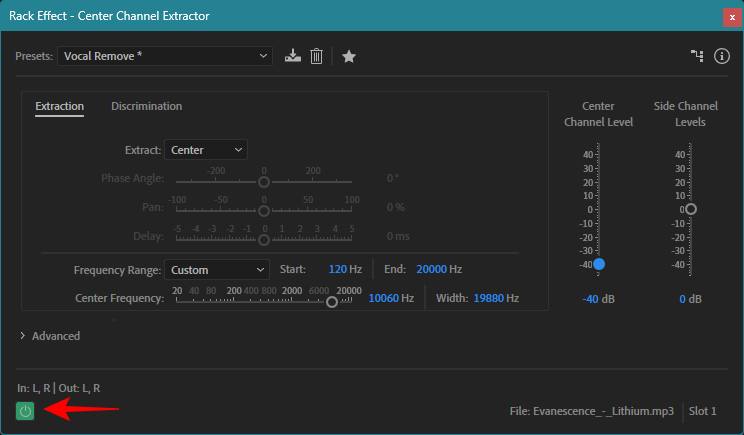
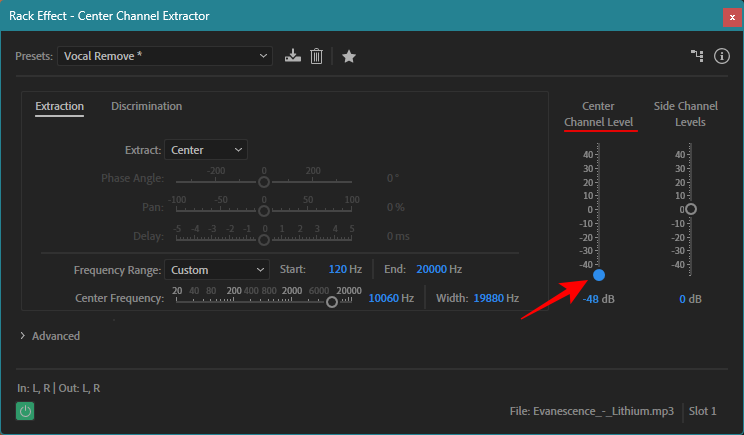
By default, the Vocal Remove preset will lower the volume of the center channel down to -40 decibels. If you want to lower or raise the center channel volume, use the ‘Center Channel Level’ slider on the right.
Note that if the song has multiple layers of vocals that are panned to the side channels, you may still hear them in the background.
2. Preserve instruments
While you are removing the vocals, you may sometimes feel that the instruments in the center channel are also being removed. However, they can be preserved with a few changes.
Bass sounds, for instance, tend to sit in the frequency range of 60 to 200 Hz for modern music. If bass sounds are being attenuated from the center channel, and you want to preserve those sounds, make sure the Frequency Range that is being removed (or lowered in amplitude) starts after the bass range.

By default, the frequency range starts at 120 Hz. But you can increase it to 150 Hz or 200 Hz to ensure that the bass sounds are left untouched.

Click on the Discrimination tab to get additional settings that help identify the center channel.

Here, you’ll find a few sliders to adjust the different settings.

In most cases, they can be left at their default values. But there are a couple of settings that lead to better preservation of other instruments while removing vocals, so let’s go over them briefly:
Crossover Bleed lets the image of different sounds extend beyond their channel frames. With the default preset, a lower bleed value makes the instruments audible while a higher bleed value separates the vocals better.
However, when the preset is set to ‘Vocal Remove’ (as is the case with our example), it does quite the opposite. It’s best to keep crossover bleed around the 60-80 mark when the preset is set to ‘Vocal Remove’ to ensure that the music doesn’t become too robotic, the instruments are preserved for the most part, and the vocals are still being removed.

Phase Discriminator is the other important setting to adjust. With the ‘Vocal Remove’ preset, it’s best to keep the slider at 5 degrees. Anything higher will begin muddying the instruments, while lower values will bring the vocals back into focus. You can, however, experiment with the setting to preserve the instruments, and bring it down a notch, say to 4 degrees or 3.5 degrees without the vocals re-appearing too much.

Note: Although we have focused on removing vocals from songs in this section, the settings also apply to any instrument that primarily occupies the center channel. So, if you have an instrumental song with the guitar in the center channel, use the same settings to remove it from the mix while preserving the other background instruments. In essence, you can create your backing tracks to solo over the same way.
However, note again that if there are multiple layers of vocals or guitars that are panned to the left or the right channels, they will still be audible.
Once you have made the changes, make sure to click on Apply in the bottom left corner.

How to remove instruments from songs using Adobe Audition
Now that we’ve seen how to remove vocals from the mix, let’s look at the flip side, that is, removing instruments from a song while preserving the vocals (or any instrument taking center stage).
As before, import your song by dragging and dropping it into Adobe Audition. Then add the Center Channel Extractor effect in one of the slots under ‘Effects Rack’. Thereafter, use the steps given below.
1. Remove instruments
In the ‘Center Channel Extractor’ window, make sure the Preset is set to Default or Acapella.

The default preset automatically turns down the volume of instruments in the side channels (-30 db) while keeping the voice or the instrument intact in the main center channel.

Acapella is a little more aggressive as it turns down the volume in the side channels (-48 db).

You can choose either of these presets or turn down the side channel levels yourself and apply custom settings. Whatever you do, make sure the ‘Extract’ option is set to Center.

2. Preserve vocals
Depending on the quality of the file and the mix of the song, the instruments might still be audible to you. But a few changes in the settings can fix that to a certain degree.
Firstly, click on the Discrimination tab and switch to it.

Here, move the Crossover Bleed to the right to prevent the instruments from bleeding further into the center channel. Stop at the point where the vocals start becoming robotic.

As for Phase Discrimination, move its slider slightly to the left. But don’t overdo it as that can prevent the vocals from coming through at all.

Once the changes are to your liking, make sure to click on Apply in the bottom left corner.
Note: As mentioned before, the final results depend greatly on the overall mix of the song. If certain instruments are close to the center channel or exactly in the middle, then it gets much harder to make them inaudible while ensuring that the vocals remain untouched. On the other hand, if the mix has well-panned instruments and vocals, you will have no problem in isolating them perfectly. So the final output will vary from song to song.
You are encouraged to play around with the different settings to see what impact they have on the overall song.
FAQ
Let’s consider a few commonly asked questions about removing vocals and instruments from a song using Adobe Audition.
How do I separate background music and voice?
To separate voice or background music from a song in Adobe Audition, apply the Center Channel Extractor effect, use the Acapella preset (to remove music) or the Vocal Remove preset (to remove vocals). You can also fine-tune the channel separation from the ‘Discrimination’ tab by adjusting the ‘Crossover Bleed’ and ‘Phase Discrimination’ settings.
How do you isolate vocals and remove background music?
To remove background music from a song, apply the Center Channel Extractor effect to the song in Adobe Audition and make sure to use the ‘Acapella’ or the ‘Default’ preset.
How do I clean vocals in Adobe Audition?
To clean your vocals in Adobe Audition, you can apply the Denoise effect from Effects > Noise Reduction > Denoise.
Though nothing beats the actual stem files of a song’s final mix, Adobe Audition does a fairly good job of isolating the instrument or the vocals that take center stage from the rest of the song. The results can vary widely depending on how the song was mixed and may not yield perfectly isolated acapella or backing tracks.
But given how easy it is to isolate the center channel from the side channels with Adobe Audition, it sure comes close to the actual stem tracks. We hope this guide proved useful to you. Until next time! Keep jamming.