Slack has been leading in the collaboration space for while now, letting members of an organization communicate and work together through different channels. Like any communication service, Slack keeps you informed about things happening in your workspace through notifications.
But what if, after a long day of work, you just want to take some time away and get rid of all your notifications until you get back to work again? You can do that by using the ‘Pause notifications’ feature inside Slack.
How to manage notifications on Slack
Slack’s ‘Pause notifications’ feature allows you to set a notification schedule which makes sure that you’ll only receive notifications during the days and hours that you choose to get them.
It's the moment some of you have been waiting for! You may now customize your notifications on a per-day basis. If your schedule doesn't conform to traditional work hours, this one's for you. ? https://t.co/VVSQvzNIbI pic.twitter.com/SLPUCW2NCf
— Slack (@SlackHQ) June 25, 2020
Notifications outside the scheduled period will be paused until the next time the schedule kicks in. You can manage notifications on Slack by following the steps below.
On your PC
To manage notifications from Slack on your computer, click on your workspace in the top left corner of your screen. Now hover over ‘Pause notifications’, and then select the ‘Set a notification schedule’ option. 
In the Notifications screen, scroll down till you reach the ‘Notification schedule’ section. Here, click on the drop-down menu under ‘Allow notifications’ and select ‘Weekdays’. This will make sure you’re alerted during the weekdays while Slack pauses any kind of notifications during weekends. Set a start and end time for notifications during which time you’ll get notifications for all the activities on your Slack workspace. 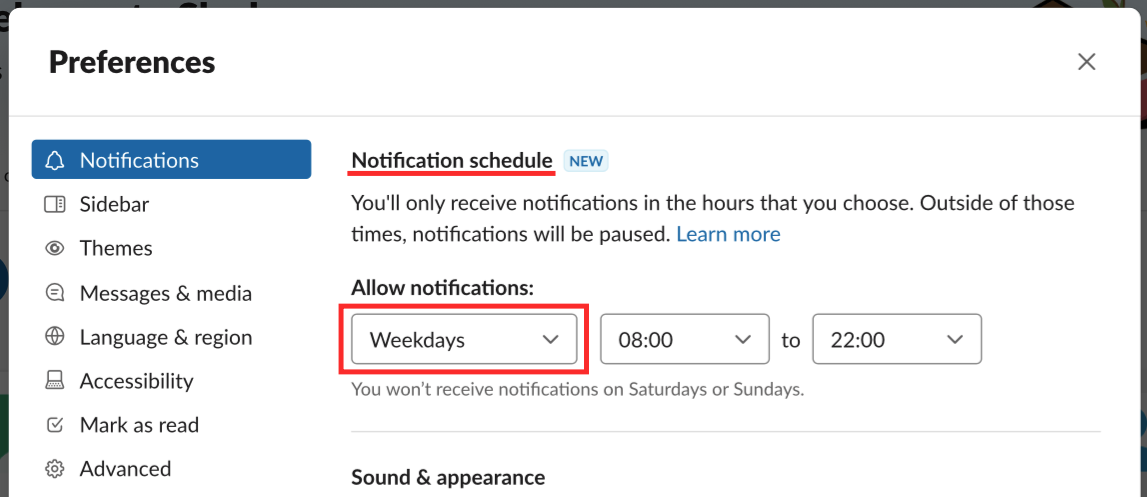
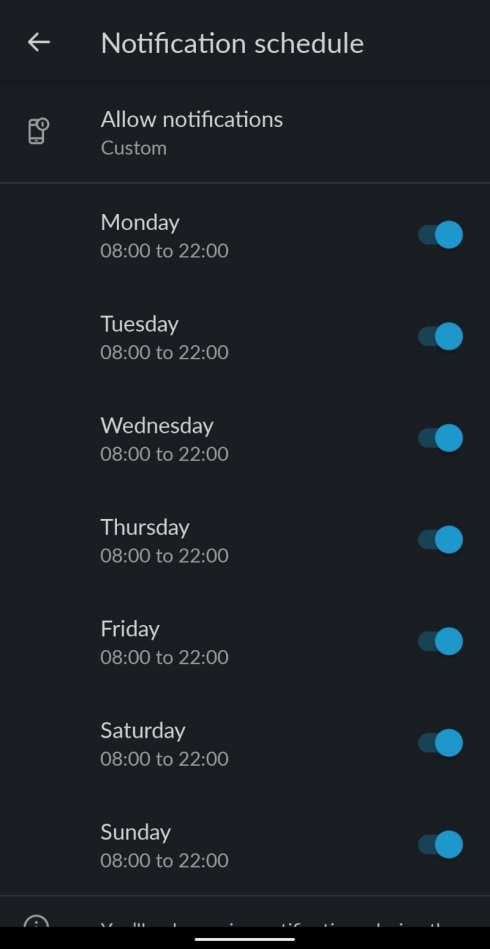
You can customize the notification schedule even further by selecting the ‘Custom’ from the drop-down menu instead of ‘Weekdays’. This will let you personalize alerts for each of the days of a week individually in such a way that you only receive notifications for the days you chose. You also have the ability to select separate start and end times for different days. 
When you’re finished setting your notification schedule on Slack, click on the Close icon to save the changes.
On your phone (iOS/Android)
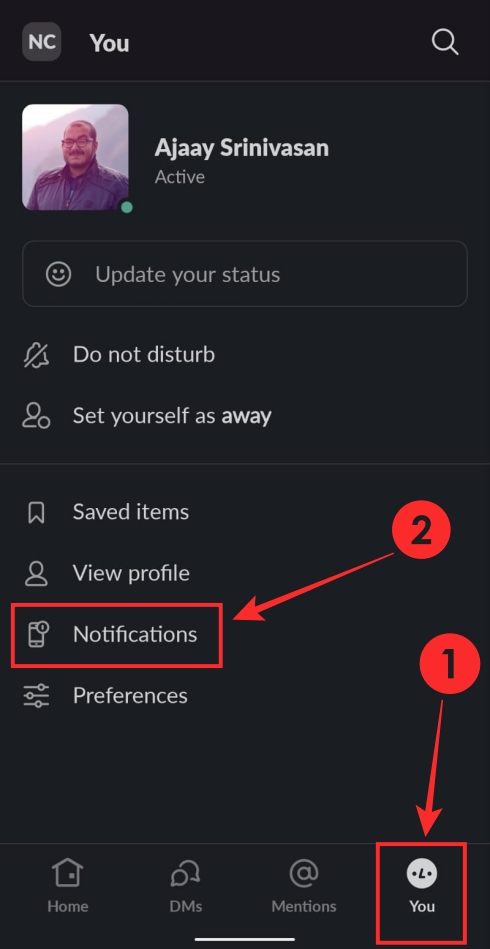
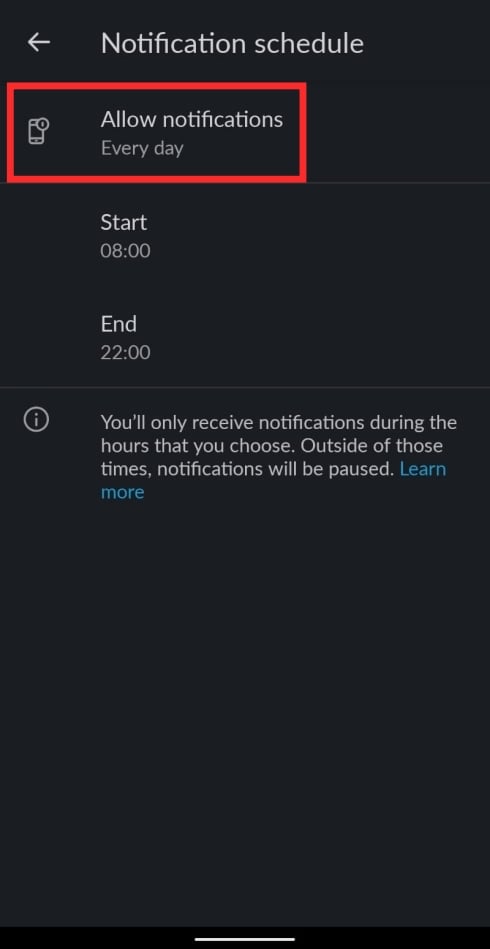
Similar to scheduling them on the PC, you can manage notifications from Slack on your phone. You can do so by tapping on the ‘You’ tab at the bottom right and selecting ‘Notifications’. In the next screen under ‘General Settings’, select the ‘Notification schedule’ option.
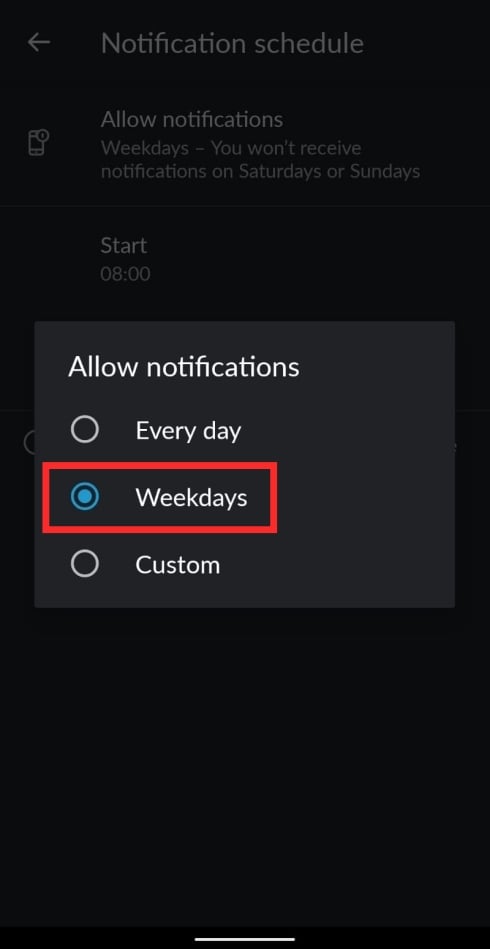
Tap on the ‘Allow notifications’ box and select the ‘Weekdays’ option. You can then choose a start and end time during which period you’ll get notifications for all the activities on your Slack workspace.
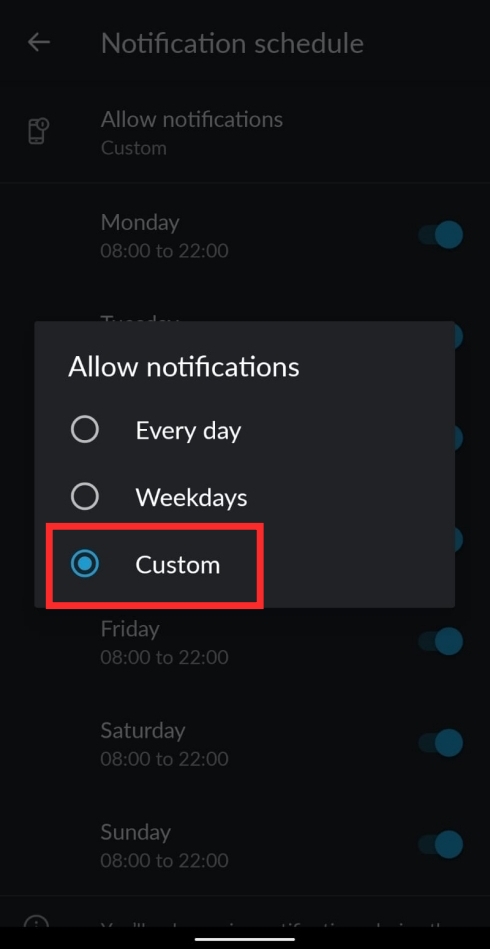
If you wish to customize the notification schedule even further, tap on the ‘Custom’ option inside the ‘Allow notifications’ box instead of ‘Weekdays’. Here you can select the days during which you want alerts to be sent to you with the option to choose separate start and end times for different days.
Did you try the new ‘Notification schedule’ on Slack?


