When it comes to online graphic designing, no service matches the convenience of Canva as it offers an easy-to-use interface, a multitude of elements, templates, backgrounds, and effects, preset and custom canvas, alignment and resizing tools, text animations, collaborative options, and more. For the most part, the service can be used for free but you can opt for its paid tier to get access to its library of premium elements, photos, video, audio, and other tools.
If there was anything that stood out among Canva’s feature-set, it should be its vast library of elements and how easy it is to work with a bunch of them. If you have added multiple elements to your design on Canva and want to move or resize them or preserve their alignment without tweaking them individually, you can group these elements together.
In this post, we’ll explain all the ways you can group elements on your Canva design both temporarily and permanently.
Related: How to Curve Text on Canva: Step-by-Step Guide
How to select multiple elements before grouping
Before you can group the elements that you’ve added to your design, it’s important that you first select the ones that you wish to combine into a single element. You can select multiple elements from your design using a mouse or a keyboard, depending on how the objects are placed on the screen.
Using a mouse
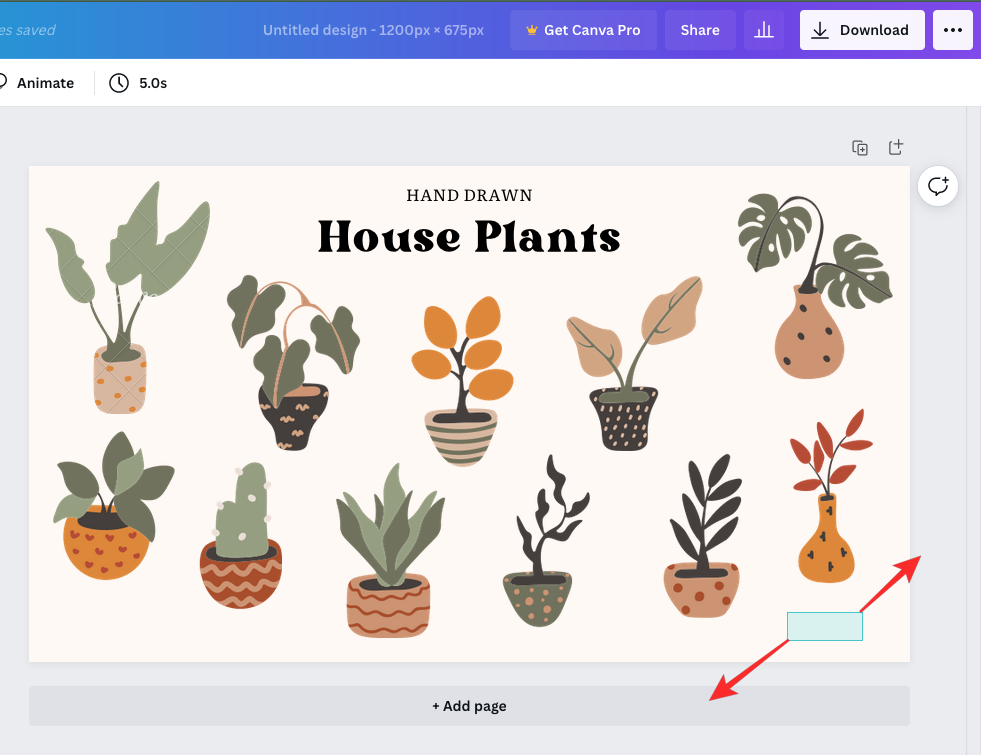
If the elements you want to select from a design are closely packed, you can select them easily using your mouse. To select multiple elements, left-click and hold the cursor near an empty area adjacent to an object you want to select. With the left mouse button pressed, drag the cursor across the items you want to select.
When you start dragging the cursor from an empty space, the area covered by your selection will be marked with a solid blue color and highlighted in a lighter shade of blue.

When this area reaches the object you want to select, the object’s borders will also be colored in blue.

You can drag this cursor across as many elements as you want to select by dragging it across a larger area of the canvas.

Once you’ve selected all the elements, you can lift up your finger from the left mouse button. All your selected elements will be marked by solid blue border lines while the entire area that all of the selected elements take up will be marked in blue dashed lines.

Using a keyboard
If the elements you want to select are scattered across different areas of your design on Canva, you can use a keyboard to get the job done. In this instance, we’ll try selecting the plants that are located at all four corners of the canvas. To get started, click on the first element you want to select (a simple left-click will do). When the element will be selected, it will be highlighted in a light blue line across its borders.

With the first element selected, press and hold the Shift key on the keyboard and click on the next element. This item will now be marked with a light blue border. The area occupied by the elements will also be marked by blue dashed lines.

You can keep the Shift key pressed on your keyboard and click on as many elements you want to select. At the end of this, your selection should look something like this.

With the items selected, you can proceed to group them the way you want by following the instructions below.
How to group elements on Canva
When you’ve selected the elements you wish to group, you can combine them into a single element temporarily or permanently.
Group temporarily
Grouping elements on a temporary basis is beneficial if you’ll only perform one-time actions with them like move, resize, delete, lock, or duplicate them together. The one downside to this method is that the moment you interact with any element in the design other than the ones you selected, your selections will vanish and you will have to manually select each of the items to work on them in unison.

You can group elements temporarily and perform actions on them as soon as your select multiple elements on Canva using the steps from the above section. When elements in a design are grouped temporarily, all elements will have solid blue lines to highlight them and a blue dashed line will run across the area that all the selected elements take up in the design.

Group permanently
If you wish to interact with grouped elements multiple times, grouping them permanently should be the right approach. When elements are grouped permanently, you can come back and interact with the grouped entity at any time without needing to select the items one by one. This saved time and helps preserve the position and aspect ratio of the elements relative to the design.
To group elements on Canva permanently, select them using a mouse or keyboard as we explained in the previous section.
Once the preferred elements have been selected, click on the Group option from the toolbar at the top.

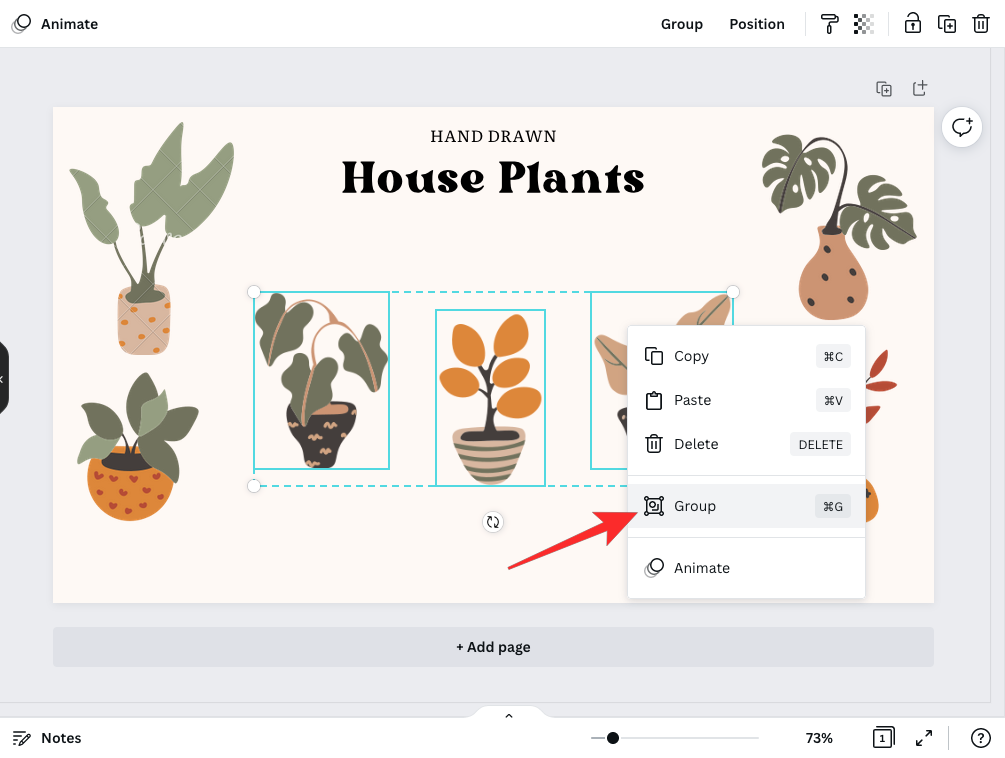
You can also grow these elements by right-clicking on highlighted elements and selecting Group.

An easier to get this done is by using the following keyboard shortcut:
- On Windows: CTRL + G
- On Mac: Command + G
When you group elements permanently, you won’t see blue borders around each of them but a border that marks the perimeter surrounding all the grouped items. Compared to temporary grouping, this border won’t be marked by dashed lines but with solid lines all around.

Once elements have been grouped permanently, you can interact with them as if they’re one single element. At any time in your design, you can select it and move, resize, align, lock, duplicate, or delete the group without needing to select the grouped items again.
Canva Group Elements Shortcut for Windows and Mac:
Yes, there is a handy shortcut available each for grouping and ungrouping on Canva. Here they are:
- Group elements on Canva
- Windows: CTRL + G
- Mac: Command + G
- Ungroup elements on Canva
- Windows: CTRL + SHIFT+ G
- Mac: Command + SHIFT+ G
Remember, you will need to select the elements first by holding the shift button and then clicking on each of the elements you want to group. next, press the group shortcut.
How to ungroup elements on Canva
Unlike grouping elements into one item, ungrouping one is a much simpler task. If you’re done performing multiple actions on a group, you can ungroup them into their own entities.
If you grouped elements temporarily, you can ungroup them by clicking any empty region outside the area of the grouped selection. Before you do that, it’s important that all the grouped items are in their designed positions so as to avoid ruining the alignment of elements in your design.

If you grouped elements permanently, you can ungroup them by selecting the grouped element and then clicking on the Ungroup option from the toolbar at the top.

You can also achieve this result by right-clicking on a grouped element and selecting Ungroup option from the overflow menu.

A much easier way to do this is by selecting a grouped item and using the following keyboard shortcut:
- On Windows: CTRL + G
- On Mac: Command + G
When elements are ungrouped, the border surrounding them will be highlighted in dashed lines instead of solid ones.

How to group and ungroup elements on Canva on iOS/Android
Unlike its desktop tool, the Canva app on iOS or Android doesn’t have a cursor that you can drag and select items with. Instead, the ability to select elements together is available as an option when interacting with an element in your design.
To select elements to group together on Canva, open design inside the Canva app and tap and hold on any one of the elements you’d like to group.

When you do that, a bunch of options will appear at the bottom. Here, tap on Select Multiple.

You can then tap on other elements you want to select. When multiple elements are selected, you should see the number of elements that have been selected show up as a counter inside the Select Multiple tile. Also, just like on the desktop, the elements will be marked by solid blue lines individually and dashed lines across the selected perimeter.

Selecting a bunch of elements together groups them temporarily and you can move, resize, or perform other actions on this selection for as long as you don’t interact with an item outside this selection.
To group this selection permanently, select the Group option from the bottom toolbar.

This will group the selected elements, marking them with solid blue borders. At any time, you can select the grouped element and perform actions (like resize, reposition, duplicate, align, or delete) on all of the elements inside it collectively by preserving its aspect ratio and alignment.

You can ungroup elements you grouped permanently by tapping and holding on it and selecting the Ungroup option from the bottom.

That’s all you need to know about grouping and ungrouping elements on Canva.
RELATED


