Want to keep an eye on the weather without constantly checking your phone? Windows 11 makes it easy to display current conditions right on your taskbar. Here’s how to add this handy feature in just a few clicks:
Enabling the Weather Widget on Windows 11
Video Guide:
Step-by-step guide with Screenshots:
Step 1: Right-click an empty area on your taskbar and select “Taskbar settings.”
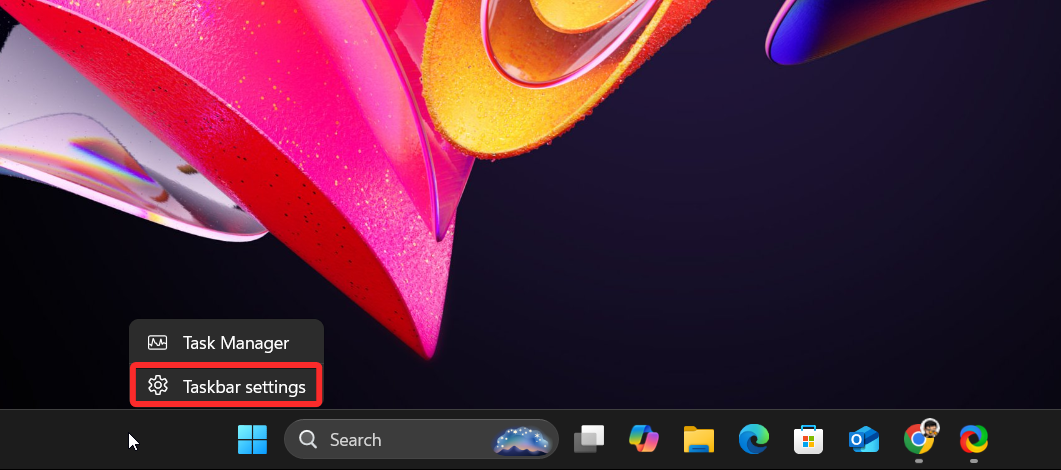
Step 2: In the open window, scroll down to find the “Widgets” option under Taskbar items.
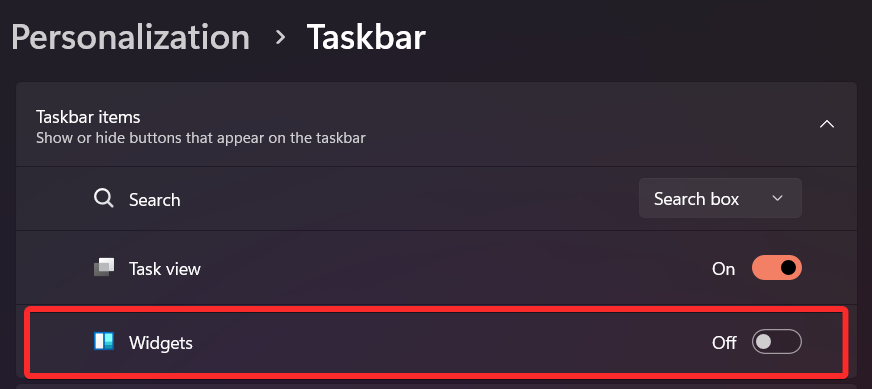
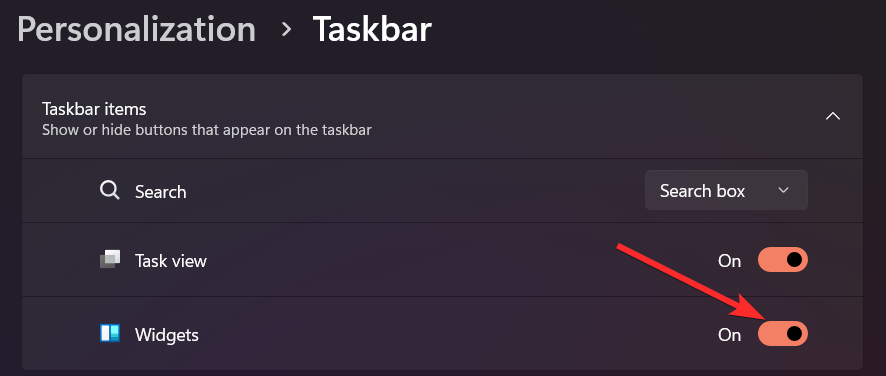
Step 3: Toggle this option on to enable the weather widget.
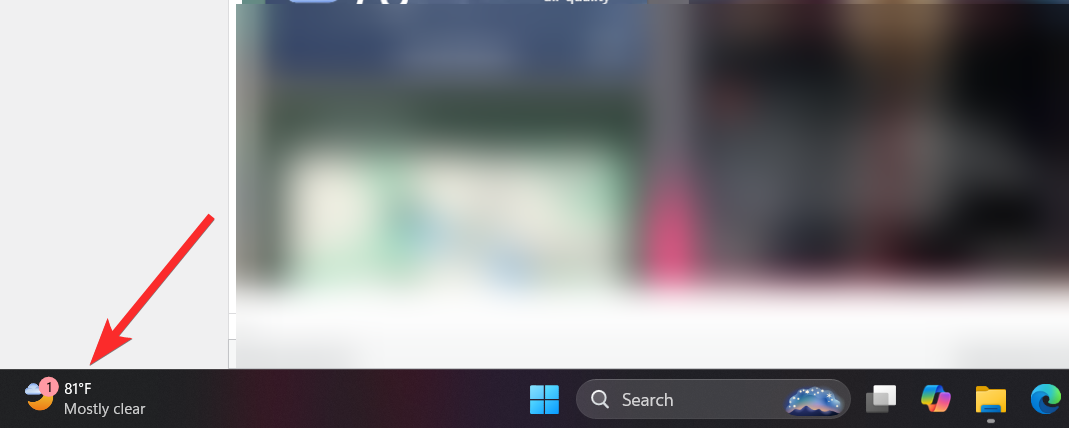
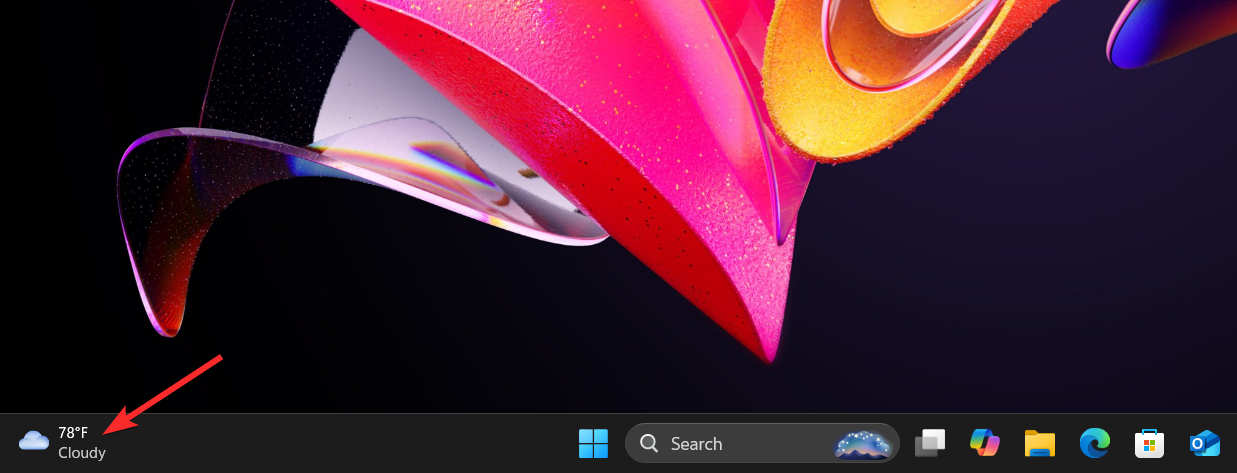
Once activated, you’ll see a small weather icon appear on your taskbar, showing the current temperature and conditions at a glance. The icon’s location depends on your taskbar alignment – it’ll be on the left with left-aligned icons, or to the right with center-aligned icons.
Customizing the Weather Widget on Windows 11
Video Guide:
Step-by-step guide with Screenshots:
Step 1: Click on it to open the full Widgets panel.
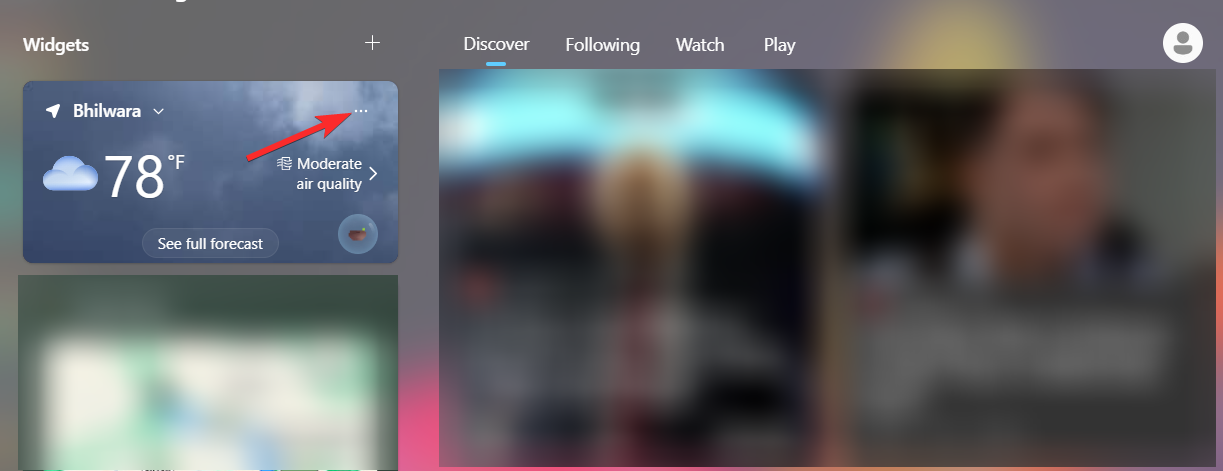
Step 2: Click on three dots.
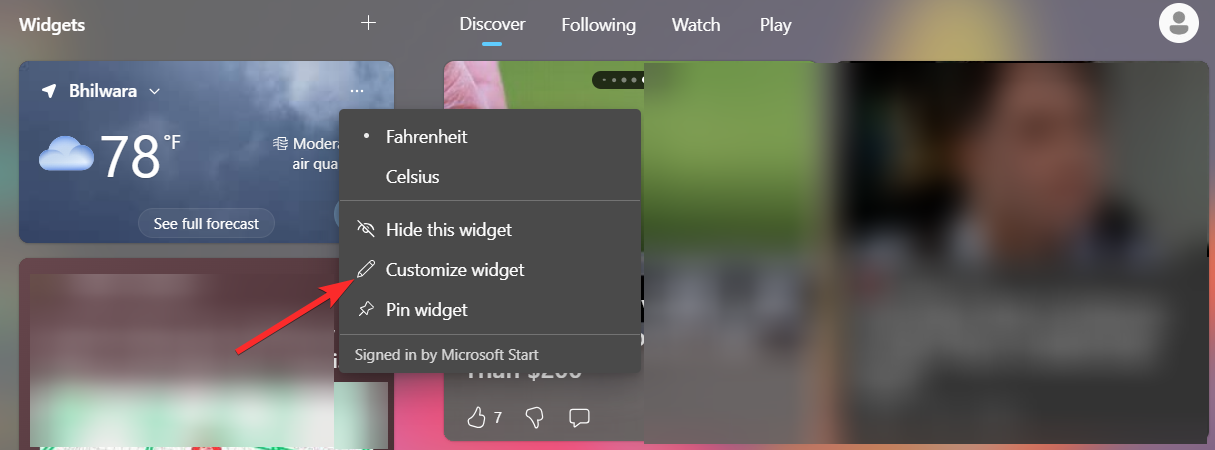
Step 3: Click on customize widget.
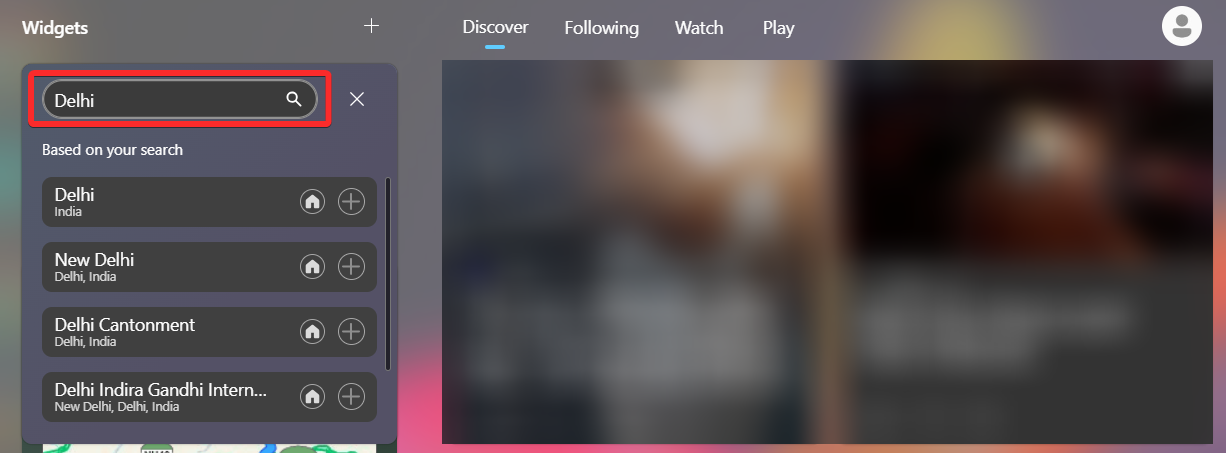
Step 4: Set your preferred location.
Weather Widget on Windows 11 not working or appearing on taskbar? How to troubleshoot this
If you have followed the steps and still don’t see the weather widget on your taskbar in Windows 11, here’s how you can add it manually. Below is a video and step-by-step guide to help you resolve the issue and pin the weather widget to your taskbar.
Video Guide:
Step-by-step guide with Screenshots:
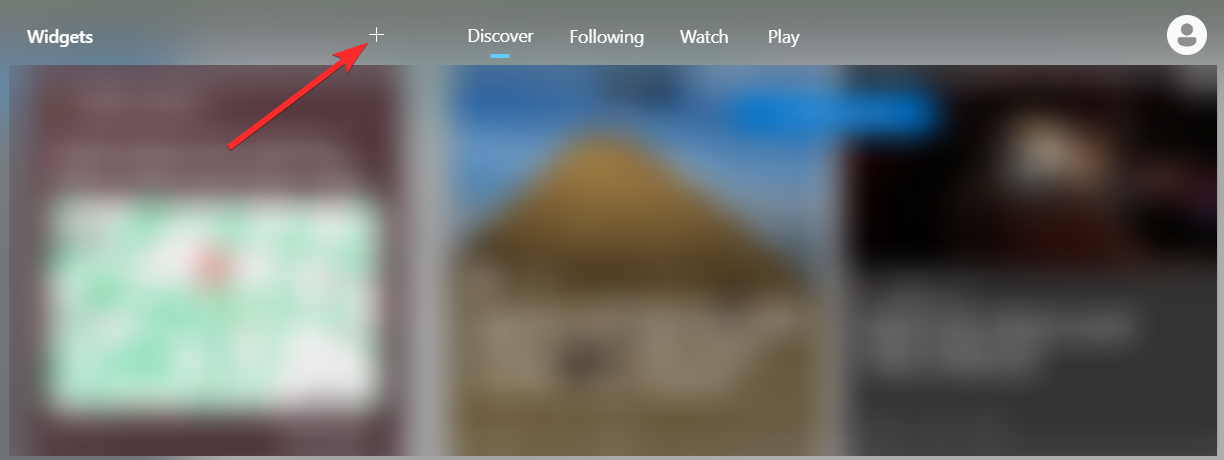
Step 1: Click the “+” icon in the Widgets panel.
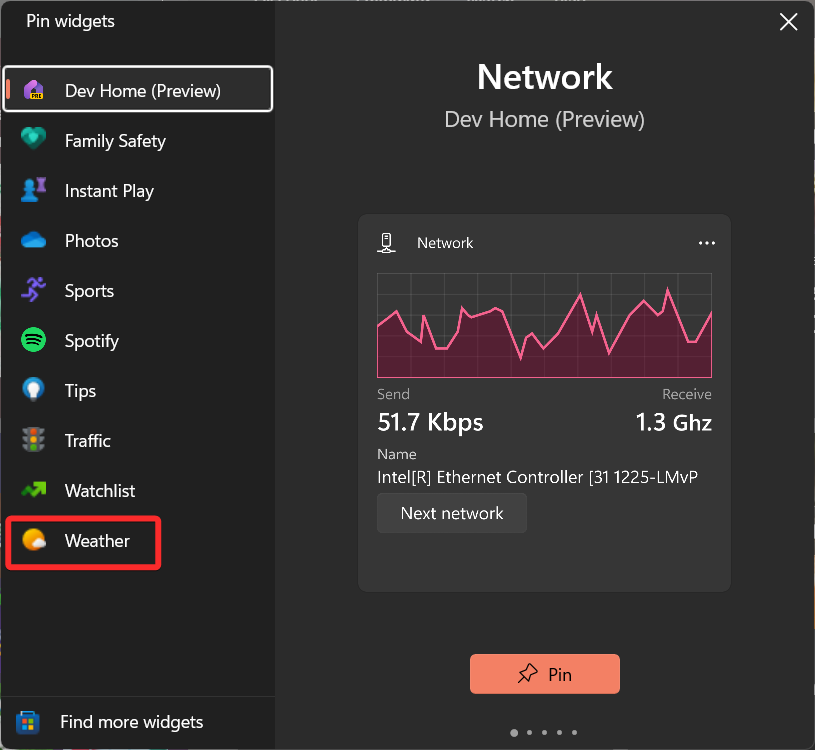
Step 2: Find “Weather” in the list.
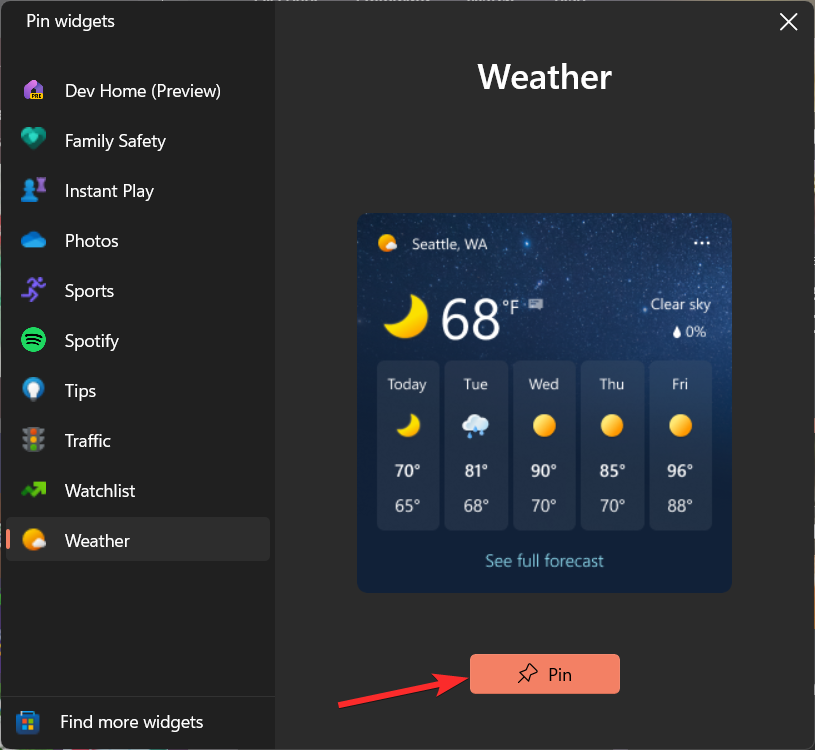
Step 3: Click “Pin” to add it.
Conclusion
With these simple steps, you’ll always know if you need an umbrella or sunglasses before heading out. The taskbar weather widget offers a quick, convenient way to stay informed about conditions in your area without interrupting your workflow.





Discussion