The Windows 11 Health Check Up application has created a major cause for concern with results showing that a user’s PC can’t run on Windows 11. This notification appears when the system does not meet one of the minimum system requirements. Fortunately, this issue is actually something that can be fixed easily.
One of the system requirements for Windows 11 is Trusted Platform Module (TPM) version 2.0, which may be disabled on your system. This is a major reason why many users see rejection in the first place. Your system will become compatible when the TPM is enabled. Here’s what you need to know about how to enable TPM 2.0 on your PC.

What is TPM 2.0 and what role does it play?
TPM 2.0 is a security feature that comes with modern desktops and notebooks. It is a microchip that is present in the motherboard and has now become a system requirement for Windows 11. TPM encrypts all the passwords and sensitive information on your system and provides safe storage for this kind of information.
In case the TPM detects any kind of malware, it executes a process that will quarantine your system till it removes the malware and safeguards your system again. TPM was introduced in 2009 for mainstream computers and laptops and no system runs without it anymore. So unless your system is older than a decade, it will definitely have the TPM 2.0 microchip.
How to enable TPM 2.0 on your PC
Note: If you need help with booting into the BIOS mode of your laptop/Desktop, then see the two methods given in the section below.
Enter the BIOS menu of your PC and do the following. BTW, the mouse functionality may or may not be available here. We ran into both the situations, as you will find below.
Anyway, use the right arrow key to go to the Security tab in your boot menu.
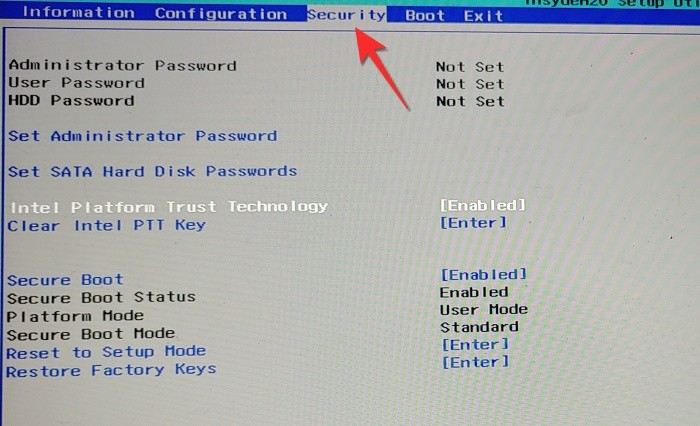
Once in the Security tab, locate the TPM option from the list and move your arrow key to reach the option. It will either be called TPM, Intel Platform Trust Technology (PTT) or AMD CPU TPM, depending on your system manufacturer. The setting of the TPM device option will be <disabled>, move your arrow key to the setting and toggle it to <Enabled>.
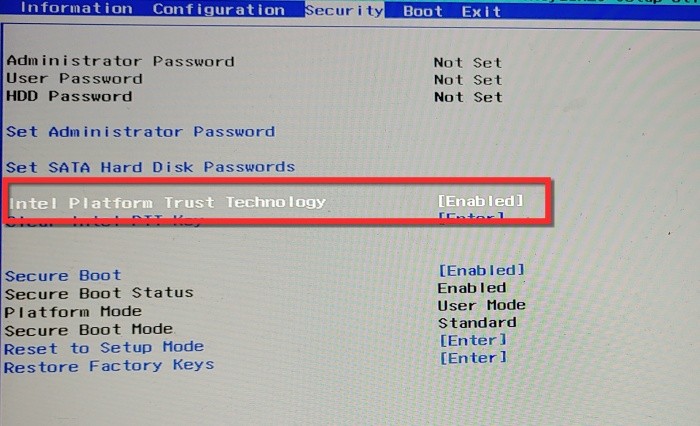
Once it is enabled, go to the Exit menu, save your settings and exit the BIOS.

Can’t find the ‘Secure Boot’ option in BIOS? Or TPM?
Boot your PC into the BIOS settings by hitting the delete key or F12 or whatever button your PC shows for this when you restart it.
In BIOS, turn off CSM first. Here’s how:
Find CSM under BIOS or Security/whatever menu, and double click on it.
Click Disabled.

Now, you will see that CSM has turned off.

You will also see the Secure boot option. But wait, you can’t enable it just yet. So, save and exit and enter the BIOS again.
Go to the Power menu and select Save & Exit setup.

Click Yes to save the settings and reboot the system. Be sure to press the required key again to reboot into BIOS settings again.

So, boot into the BIOS settings again by hitting the delete key or F12 or whatever button your PC shows for this.
Now, go to BIOS settings again and now double-click Secure boot.
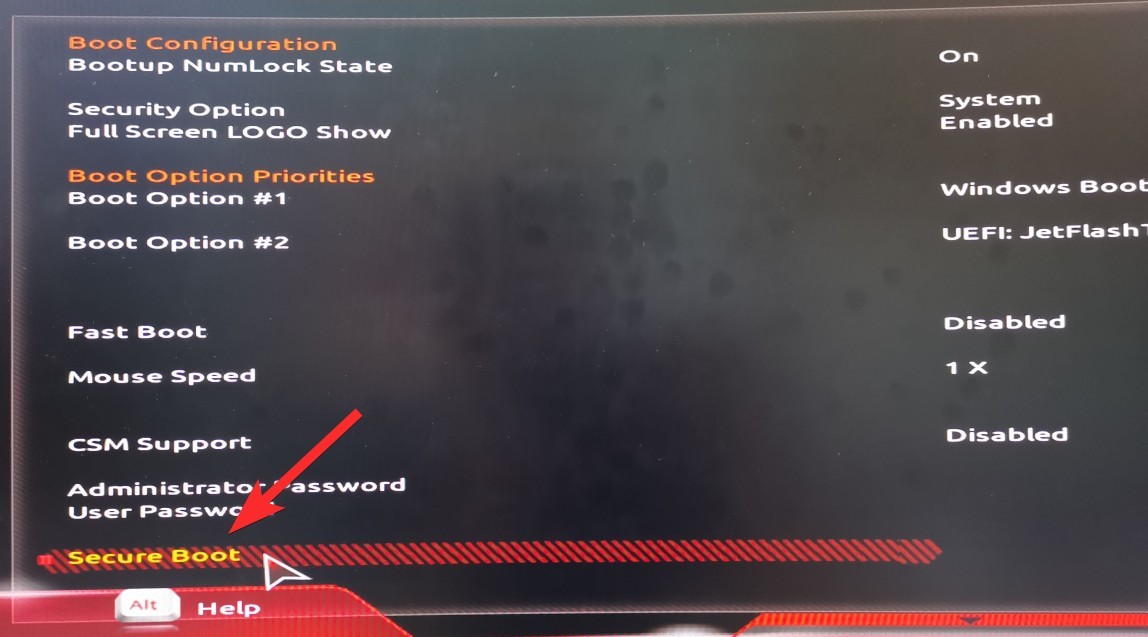
Select Enabled.
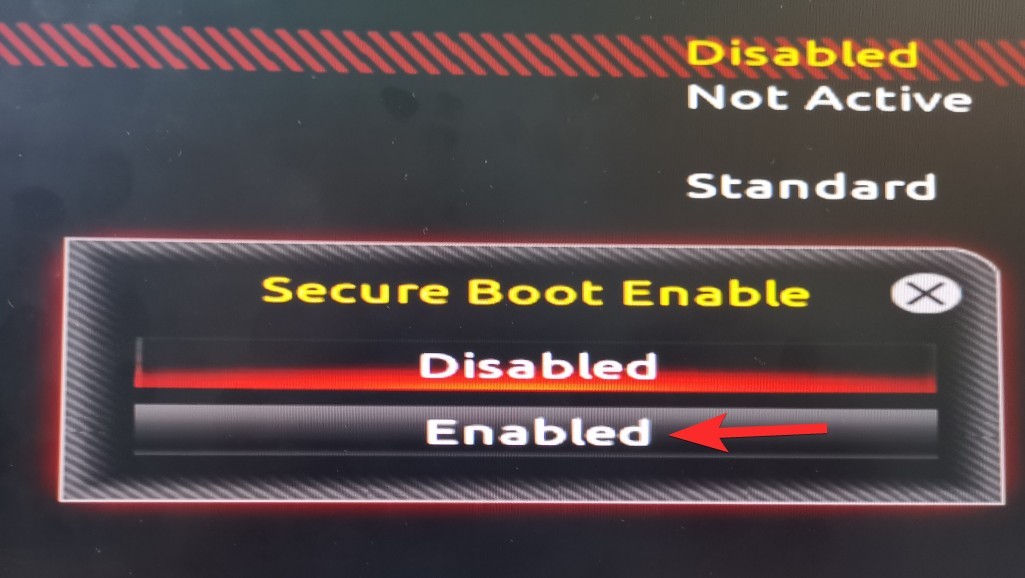
The BIOS screen will now show the Secure Boot as enabled.

So, once again, go to the Power menu and select Save & Exit setup.

Click Yes to save the settings and reboot the system. Be sure to press the required key again to reboot into BIOS settings again. Yes, again, as we need to enable the TPM too.

Let the PC restart but boot into the BIOS screen again.
Now, go to Peripherals (that is what it is on our PC), and double-click on Intel Platform Trust Technology (PTT). You can see it is disabled right now.
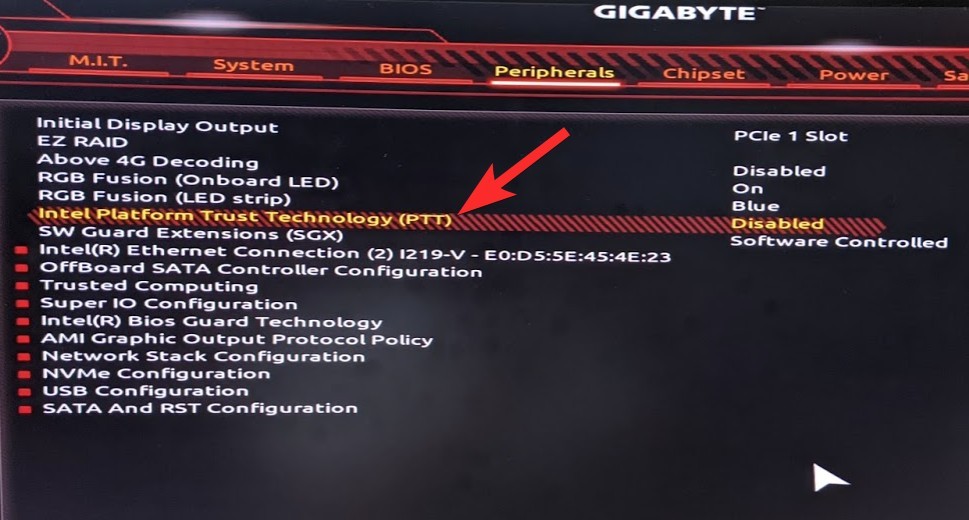
Click Enabled in the pop-up.

Now, it will show the PTT as enabled too. Meaning, TPM 2.0 is now available to your PC.

When you check in the Windows 11 health check app now, it should show Windows 11 to be compatible now.

Here is our TPM Management screen you get from the tpm.msc command in the Run window. It now shows that TPM 2.0 is now available.

We are good to go now. Let’s save and restart and you should be able to install Windows 11 now.
In order to resolve the TPM issue, you will need to enable it from the UEFI/BIOS of your system. Depending on your system, there are two methods that you can use to access the boot menu.
Method #1: Hit the hotkey when your system is booting up
When your PC or Laptop is starting up, there is a small window between the logo appearance and the loading of the Windows start-up page when you need to continuously hit the hotkey that is specific to your system manufacturer.
Upon hitting the hotkey, your system will take you to the UEFI/BIOS page instead of the normal Windows start-up page. The hotkeys that you need to tap to access the boot menu are either DEL or more universally, F2. Lenovo Desktops and Thinkpads specifically use the F1 key for boot up.
A much easier and reliable way to reach your UEFI/BIOS menu is the Windows 10 start menu. Follow these steps:
Type ‘Settings’ in the search box from the Start Menu. Click the Settings menu when it appears.

Click on Update and Security from the Setting menu.

Click on Recovery in the left panel and then click the Restart now button under Advanced startup.

Once you do this, your normal Windows interface will shut down and you will be prompted to select an option from the menu that appears next, click the Troubleshoot option from here.
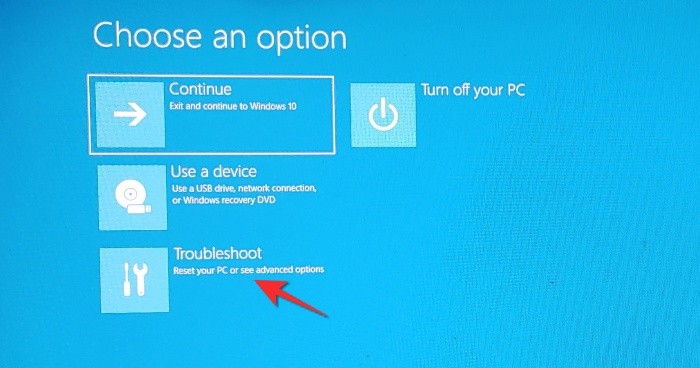
Once the Troubleshoot menu opens, click the Advanced Options menu option from here.
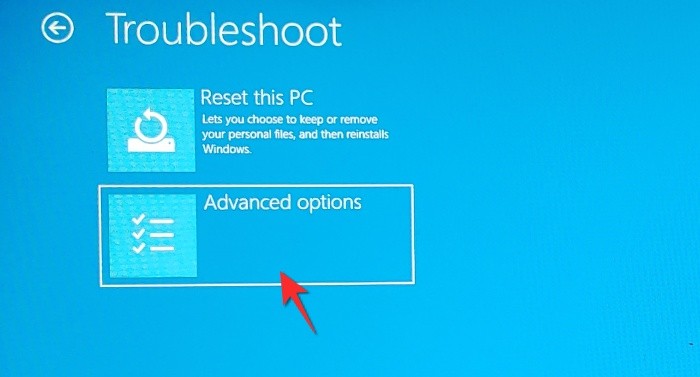
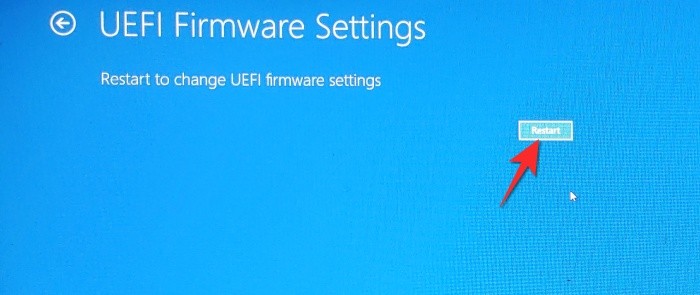
Once the Advanced options menu will open, click the UEFI/BIOS Firmware Settings from the options provided.
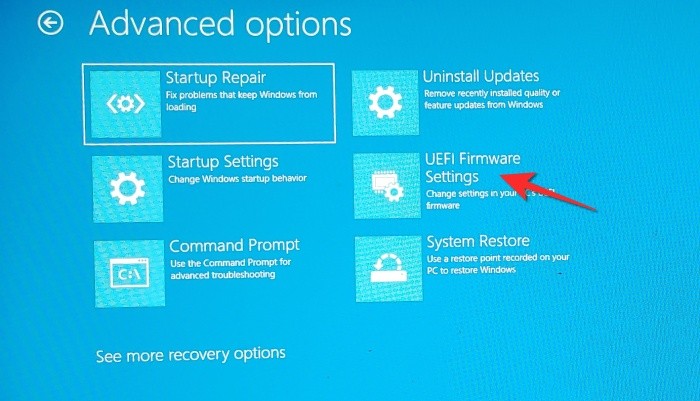
Click the Restart button so that you are redirected to the boot menu.
We hope you found this article helpful. Do let us know in the comments in case of queries! Take care and stay safe.


To me it does not have this option”Intel Platform Trust Technology (PTT)”how to find it to install it?
I am using Lenovo Maschine. I am unable to get to UEFI Firmware settings. In the Device Manager, under Security devices PSP 1.0 is shown. But I could not get to PSP settings in BIOS. Please advise me what to do to get UEFI Firmware back in to my Computer.
Thank You.