What to know
- Print history needs to be enabled in Windows 11 before the print jobs can be logged and viewed later.
- Enable print history from “Settings > Bluetooth & devices > Printers & scanners > printer > Printer properties > Advanced > Keep printed documents”. To view print history, click “Open print queue”.
- Print history can also be enabled and viewed from Event Viewer. Navigate to “Applications and Services Logs > Microsoft > Windows > PrintService”, right-click ‘Operational’ and select Properties > Enable logging. To view print history, double-click ‘Operational’.
- A third-party app like PaperCut Print Logger also provides a comprehensive print history that you can view and export as CSV/Excel files as well.
By default, Windows doesn’t keep track of your printed documents. But that can be addressed easily. There are a few native options that let you log the jobs that are sent to the printer. This step is necessary if you want to later view your print history.
Here are all the ways you can start keeping a log of your print history and view it whenever you need to in Windows 11.
How to view your print history in Windows 11
If you haven’t already enabled print history, you won’t be able to view your older print jobs. So in each of the methods given below, you’ll first need to enable print history (if not done already). Only after this is done will you be able to view the print jobs undertaken.
Method 1: Using the Settings app
Here’s how to enable and view print history from the Settings app.
Step 1: Enable Print History
- Open the Settings app (press
Win+I). - Go to Bluetooth & devices > Printers & scanners.

- Select your printer.
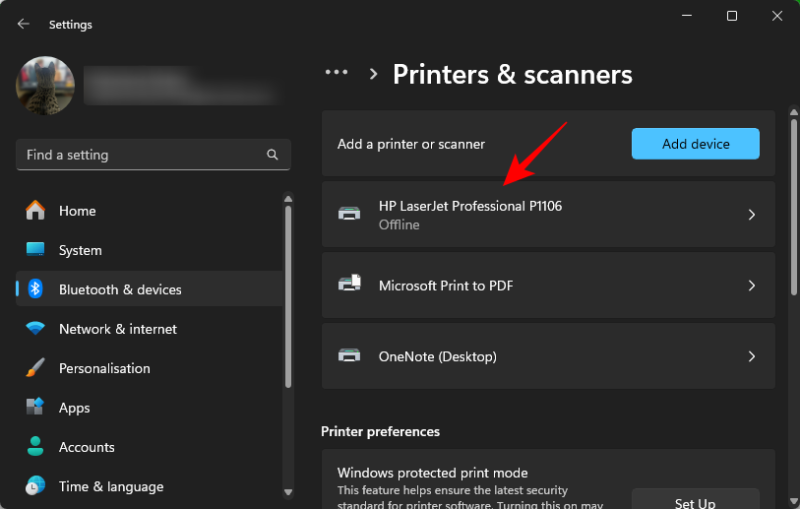
- Click Printer properties.
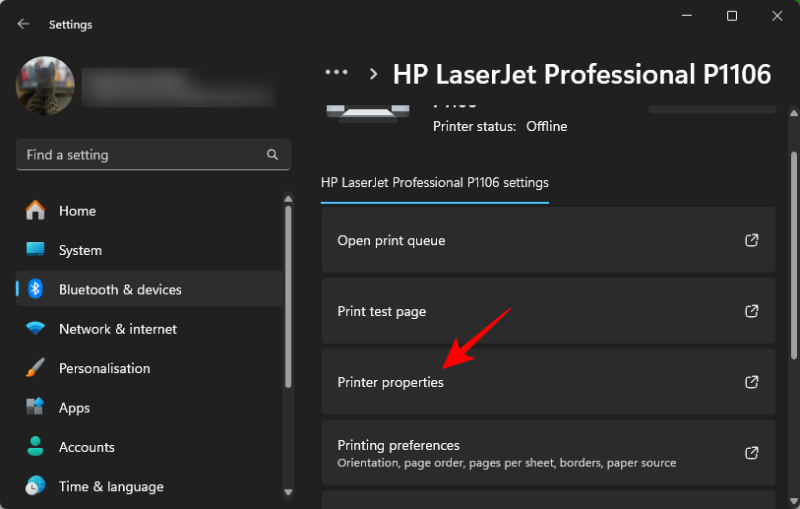
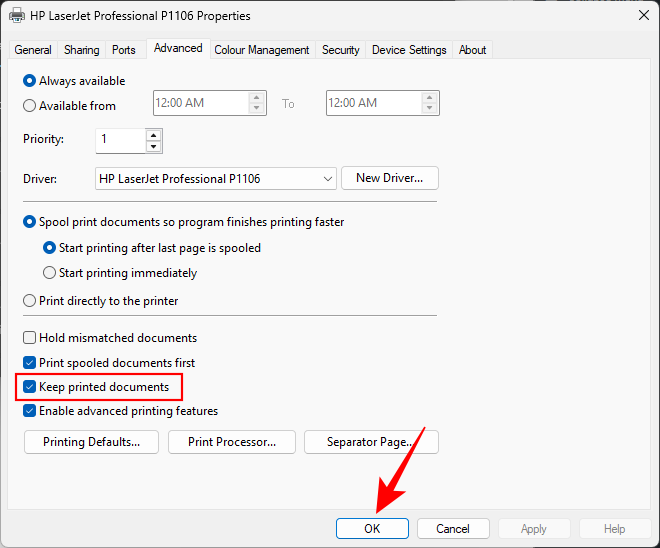
- Click on the Advanced tab.
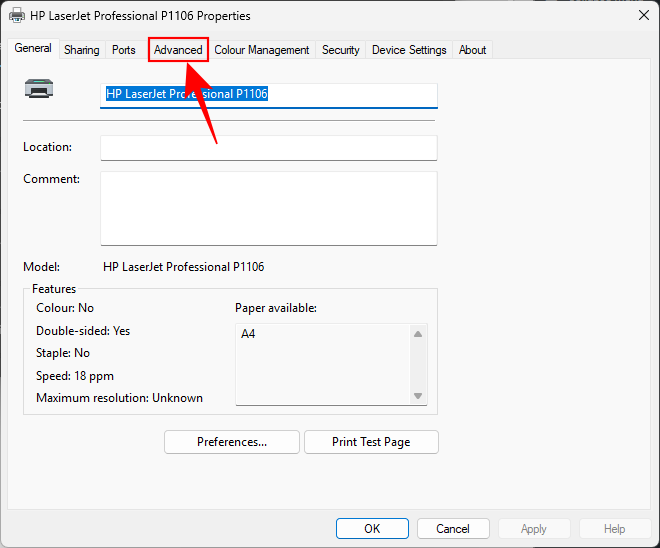
- Enable Keep printed documents. Click OK.
Print history will now be enabled. All documents that you print from now on will be logged and can be viewed easily (using step 2)
Step 2: Check Print History
- Open the Settings app.
- Go to Bluetooth & devices > Printers & scanners.
- Select your printer.
- Click Open print queue.
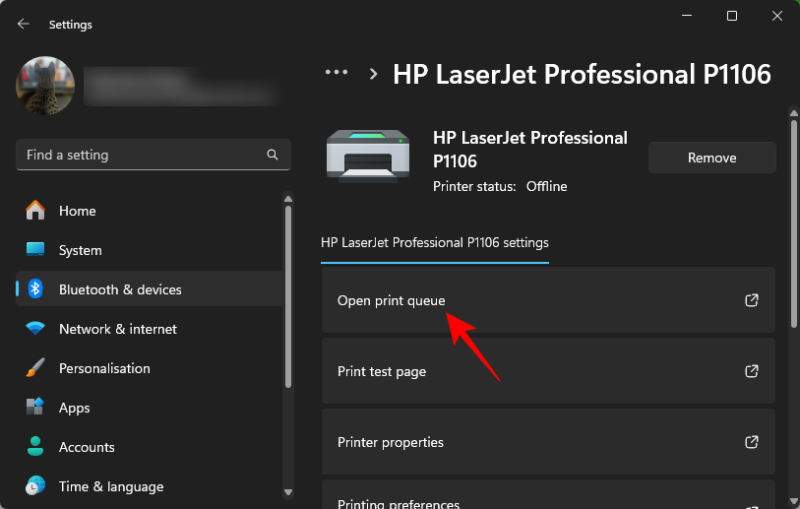
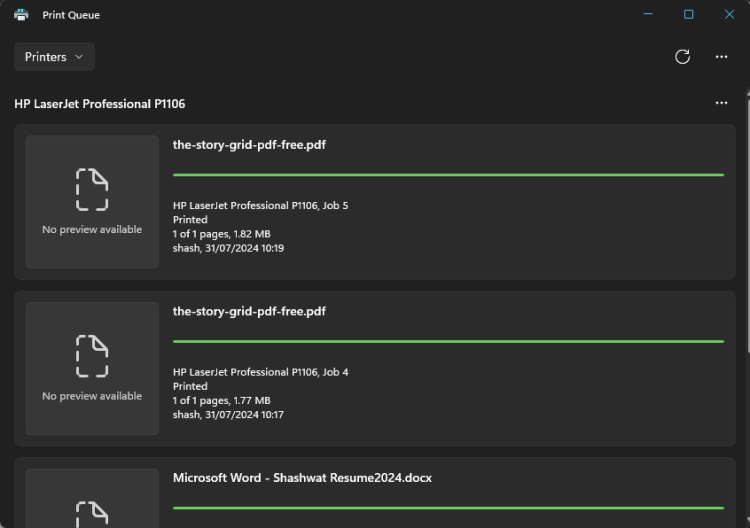
- And view your print history.
Method 2: Using Event Viewer
The Event Viewer on Windows offers yet another way to enable and view print history.
Step 1: Enable Print History logs
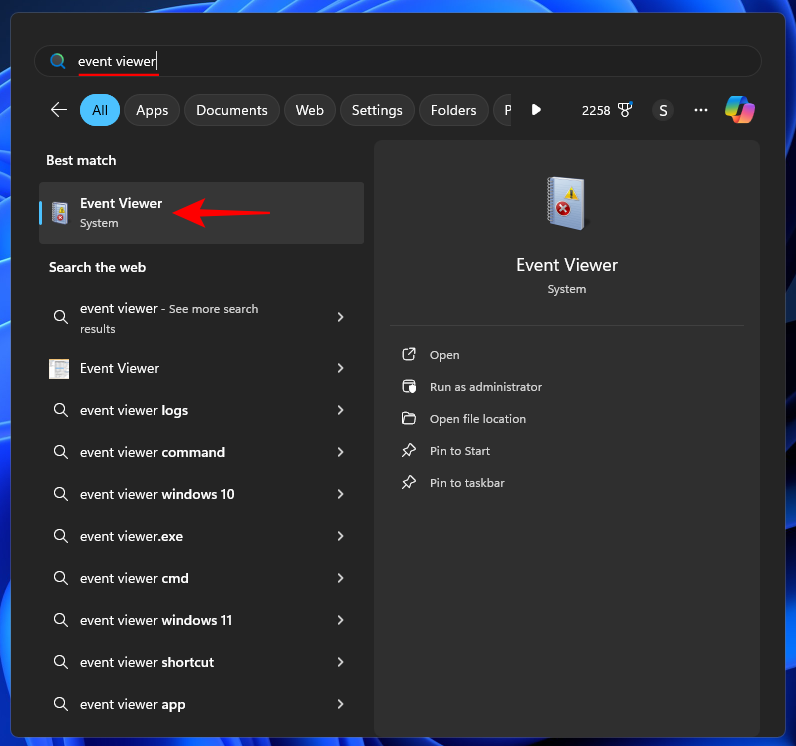
- Press Start, then search and open Event Viewer.
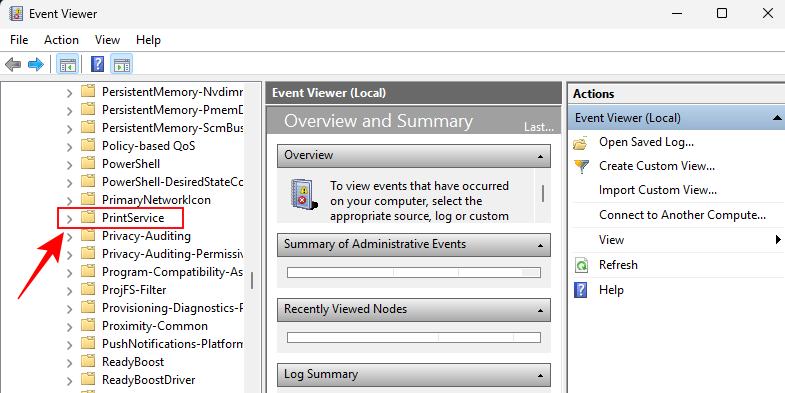
- From the left pane, navigate to Applications and Services Logs > Microsoft > Windows > PrintService
- Right-click Operational on the right and select Properties.
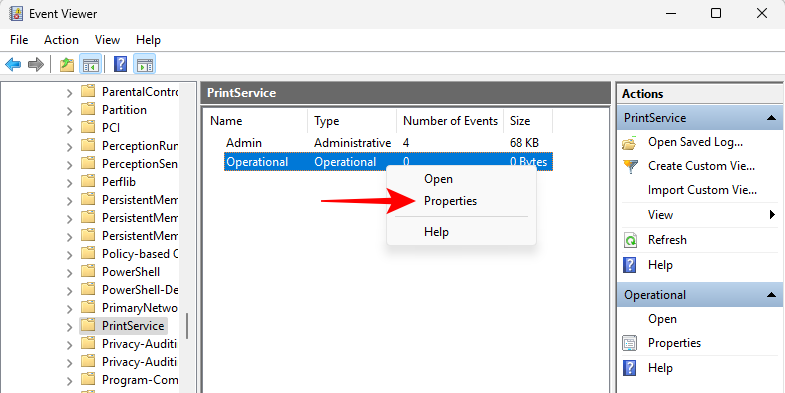
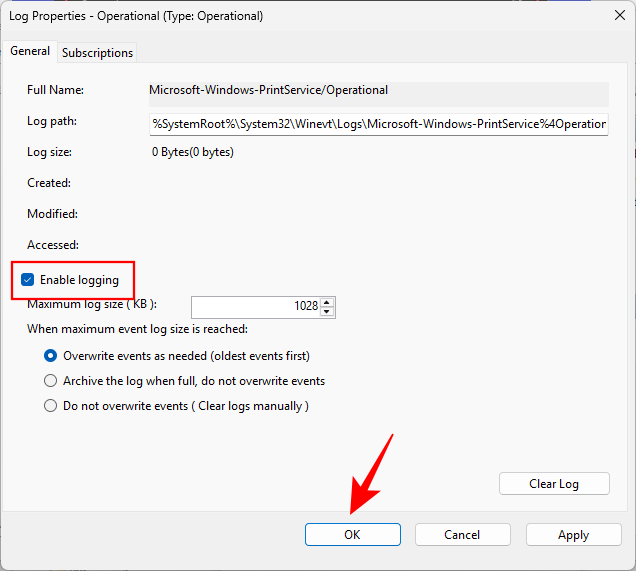
- Select Enable logging. Click OK.
Step 2: Check Print History
- Open Event Viewer and navigate to Applications and Services Logs > Microsoft > Windows > PrintService as before.
- Click on Operational.

- Here, you’ll get a list of all events related to printers, including printer config change, running diagnostics, and printing documents. To find only print document events, click on ‘Task Category’ and sort it accordingly.
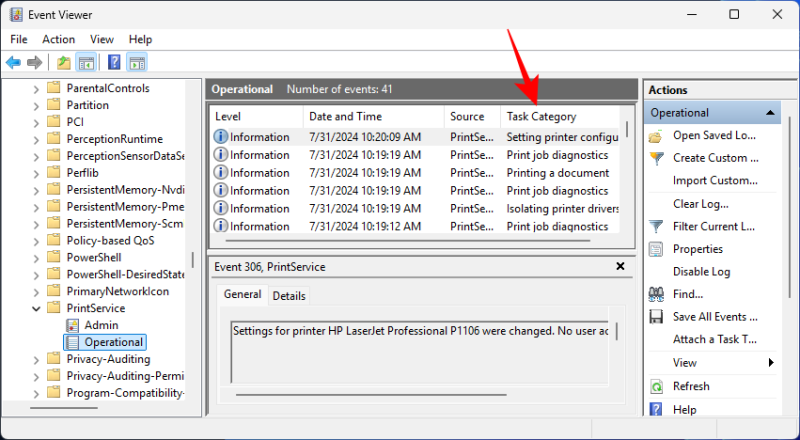
- You’ll find the history of your printed documents along with their date and time. As usual, the history will include both successful and failed print attempts.
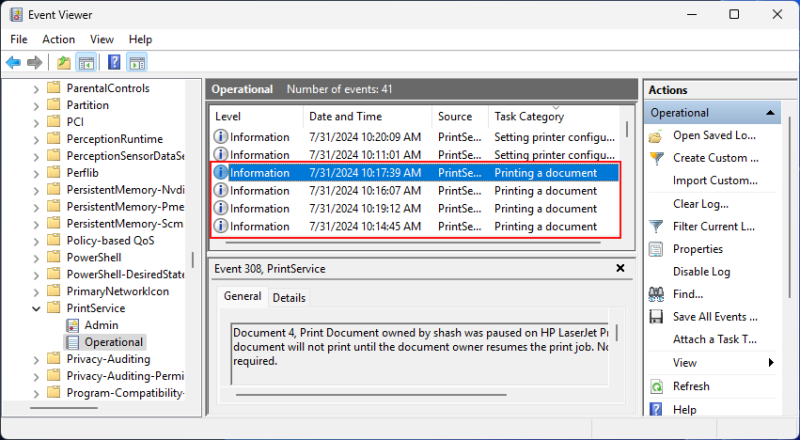
- On the right, you can take certain actions, such as applying filters, saving all events as an event file (.evtx), clearing the log, etc.
Method 3: Using third-party software (PaperCut Print Logger)
Apart from the native methods, there are a few third-party apps that can help you view your print history. One of the most popular of these print logger software is PaperCut Print Logger, one that has universally been recognized as a reliable print history viewer for Windows 11 as well as earlier Windows version.
- PaperCut Print Logger | Download Link
- Use the link above to download and install PaperCut Print Logger.
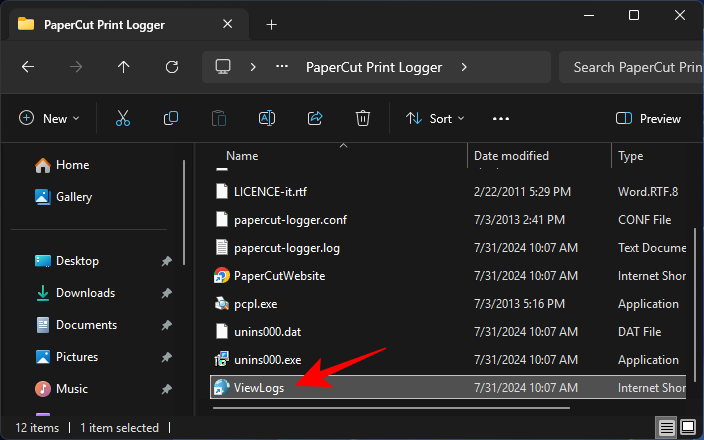
- Once installed, open the location where PaperCut is installed. The default is:
C:\Program Files (x86)\PaperCut Print Logger - Here, double-click ViewLogs.
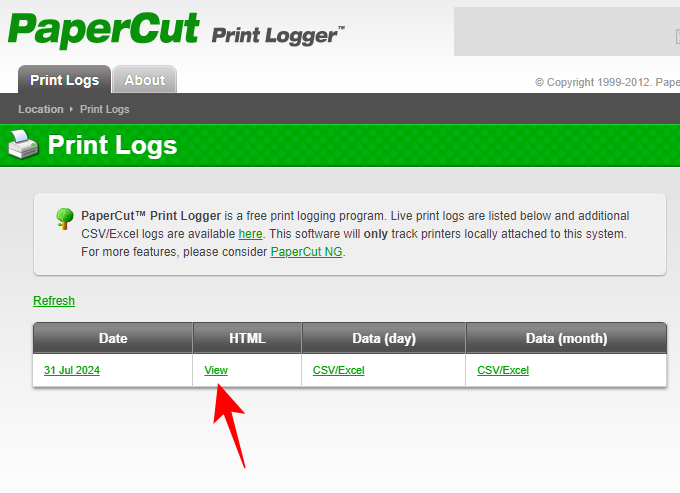
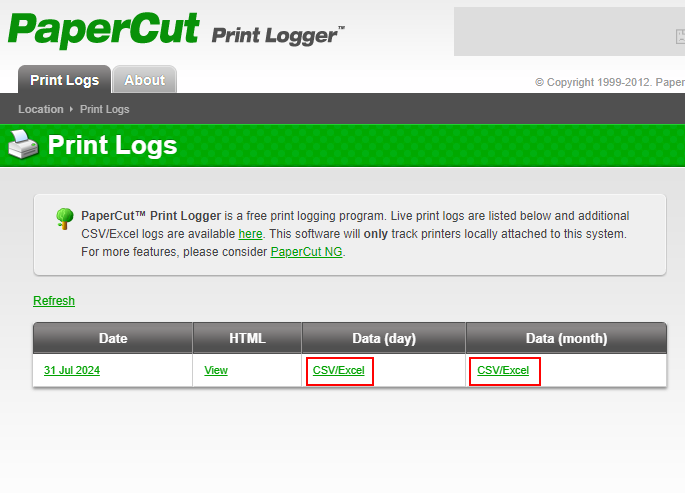
- You’ll see your print history categorized by date. Select one to view the print jobs executed on that day.
- The print history will provide the details of the printed documents, including the time of printing (down to the second), the user executing print, the printer name, and the name of the document.
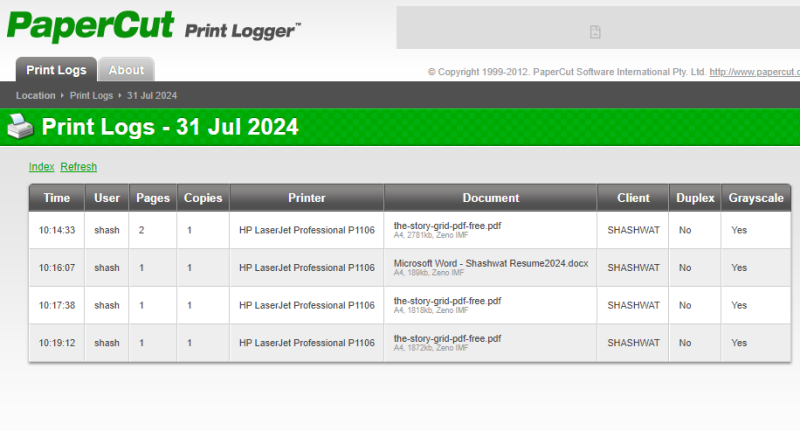
- If you like, you can even export the print data of the day (or the month) to a CSV/Excel file.
Compared to the native methods, PaperCut Print Logger provides a better, more comprehensive view of the print history. If you’re going to check the print history frequently, we recommend creating a shortcut of the ‘ViewLogs’ file for quicker access.
We hope you were able to access your print history in Windows 11. Until next time!


