Windows has never been one to overlook aesthetics. From the bucolic green fields of XP to the blue swirl design of Windows 11, the default desktop wallpaper has been a source of delight for users over the years.
Thanks to Windows Spotlight, you now get access to beautiful, awe-inspiring images straight to the lock screen and desktop wallpapers every day. Unfortunately, these images don’t hang around. If you’ve fallen in love with one of Windows spotlight images, then you’d want to know how to download them so you can keep them as your background for a little while longer. Here’s everything you need to know about it.
What is Windows Spotlight?
Window Spotlight is an automatic wallpaper updater that can be turned on from Personalization > Background in the Settings app.
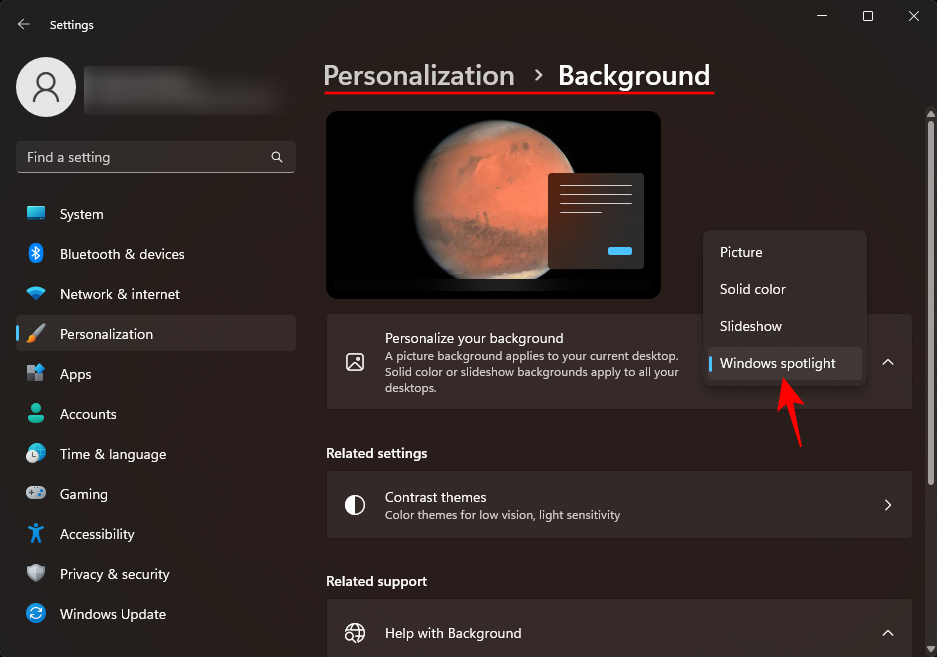
The images are sourced from around the world and updated daily. In recent times, an additional ‘Learn more about this picture’ desktop icon is created that opens to Microsoft Bing where users can get additional information about the image.
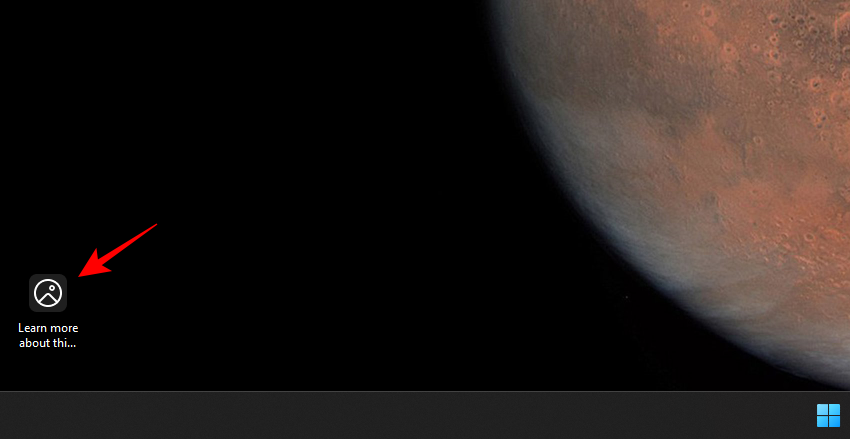
The only issue with Windows Spotlight is that users have no control over which images they get (it’s always a surprise), and how long they will stay before being replaced (usually a day).
Fortunately, there are a few ways that you can save the Windows Spotlight images that are being downloaded on your PC. Here they are:
How to get Windows Spotlight images
Here’s how you can get Windows Spotlight images.
Step 1: Access Windows Spotlight files
Windows Spotlight image files are not easy to find. But they can be accessed in the following way:
- Press
Win+Rto open the RUN command box and copy and paste the following inside it: %LocalAppdata%\Packages\Microsoft.Windows.ContentDeliveryManager_cw5n1h2txyewy/LocalState/Assets
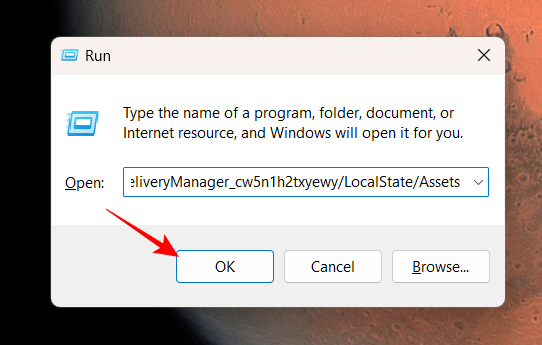
- Then hit Enter. This will open the Windows Spotlight files within the hidden Assets folder.
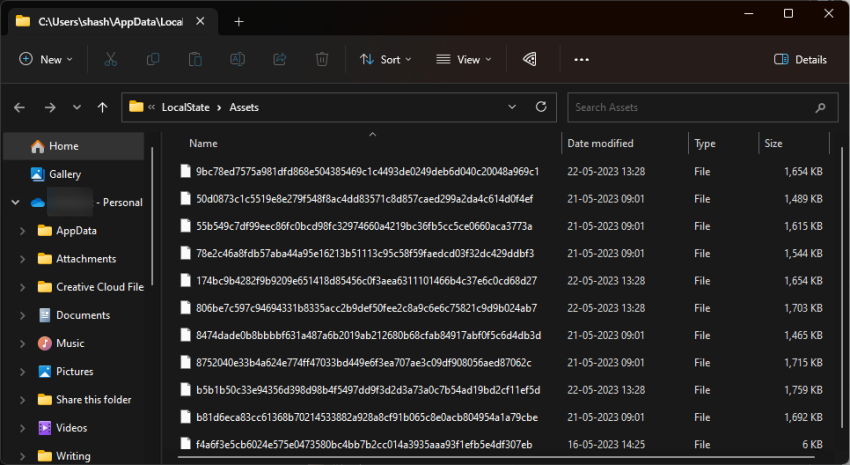
The Windows Spotlight feature receives its images via Windows’ Content Delivery System, which is why the files that you see are all scrambled and without any file extension. Without a recognizable image format, you won’t be able to view or open them. But that can be fixed relatively easily.
Step 2: Convert spotlight files to PNG individually
Once you’re inside the Assets folder, the first thing that you should do is sort the files by size. Here’s how to do so:
- Click on the Size column so that the biggest files are on top.
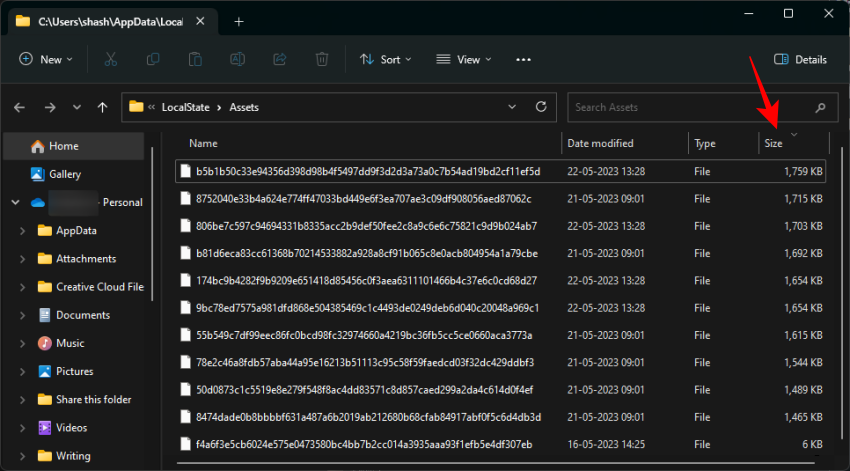
- Doing this will ensure that you see files that have images in them on top while all the other non-image files are relegated to the bottom.
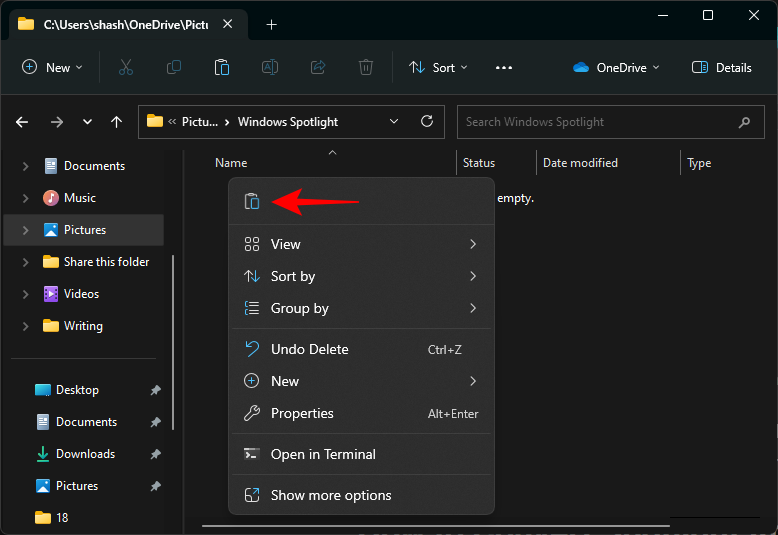
- It’s better to copy these large files and paste them into a different folder so that the originals remain untouched in case Windows Spotlight decides to access them again. Select the files and press
Ctrl+Cto copy them. - Then go to the location where you want to save these files and paste them (
Ctrl+V). We are creating a folder called ‘Windows Spotlight in ‘Pictures’ to save these files in.
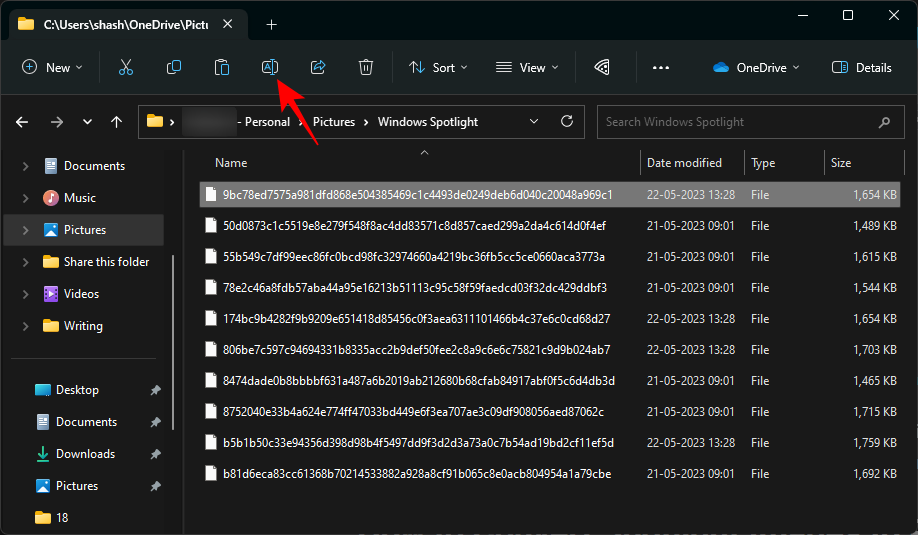
- Next, select a file, and then click on the rename icon at the top.
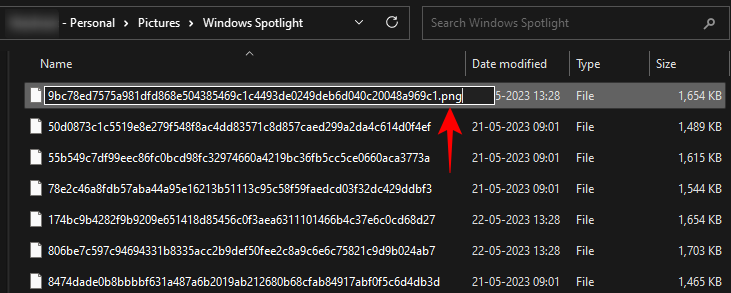
- Now add the extension .png at its end. Hit Enter to confirm the changes.
- Then open it.
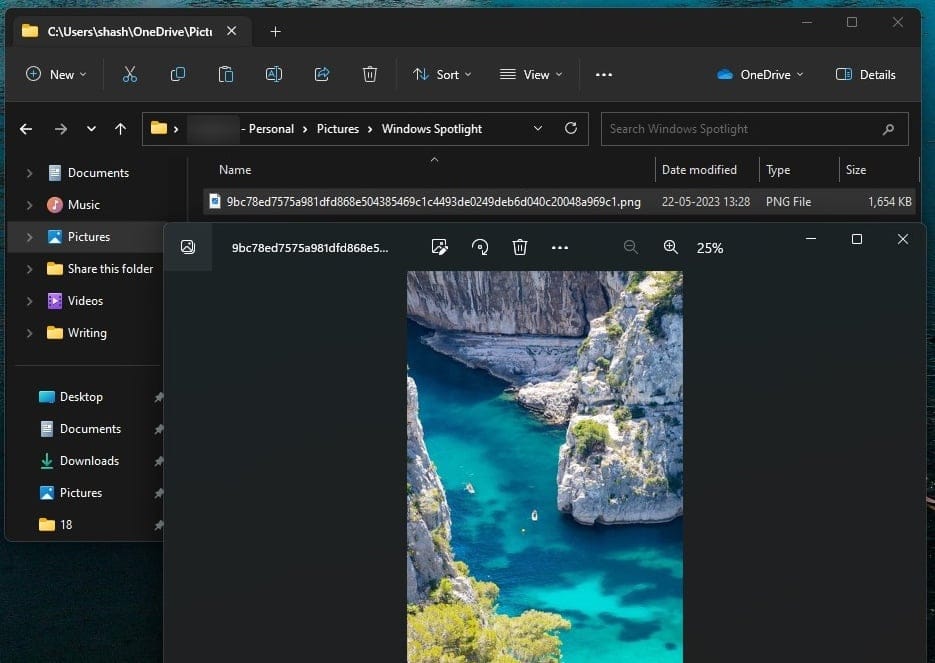
You have now successfully made the scrambled Windows Spotlight files into actual image files.
Step 3: Convert spotlight files to PNG in bulk using a terminal app
Renaming all the files and adding a file extension at the end of every single one of them manually can become tedious. A better alternative is to add the extension to all of them using a terminal app in one go. Here’s how to go about it:
- Firstly, right-click inside the folder and select Open in Terminal.
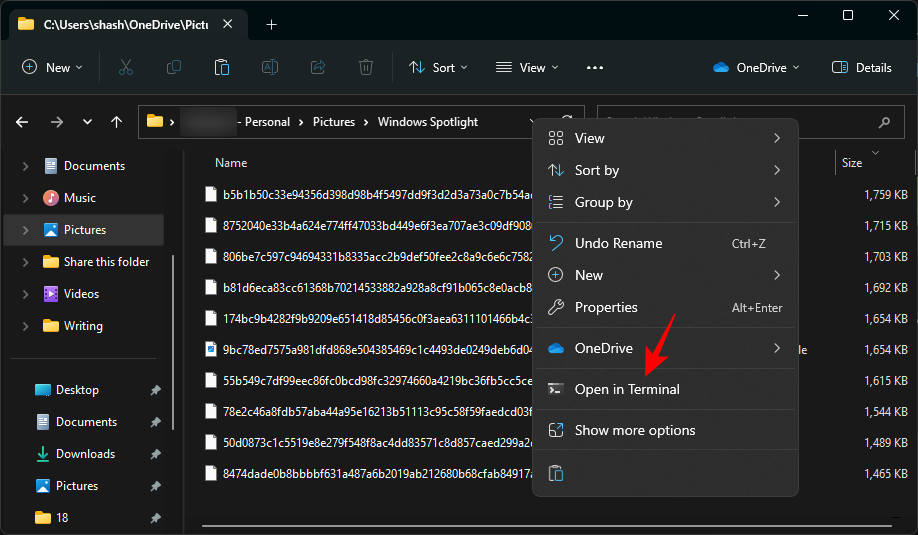
- This will open Windows Terminal (PowerShell) in the same directory as the folder.
- Alternatively, if you’re opening PowerShell separately, then you will need to give the following command first:
cd "full_path" - Replace full_path with the folder address.
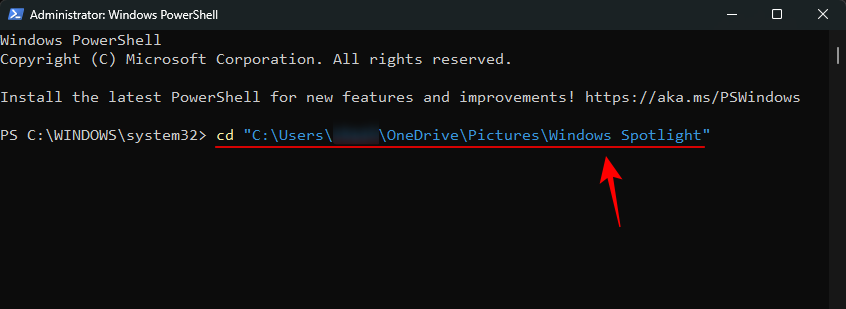
- And hit Enter.
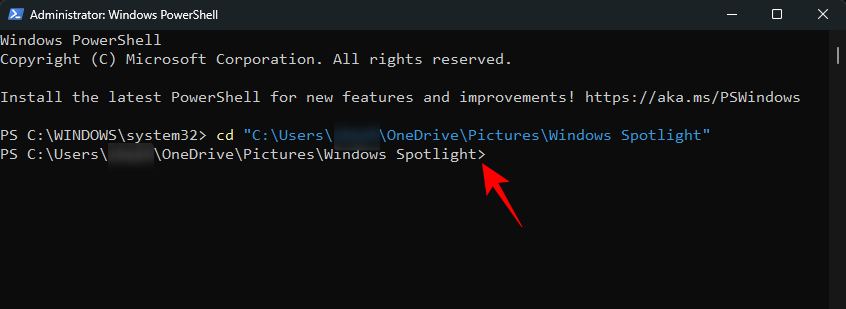
- Now that the terminal is pointing to the right directory, enter the following command:
dir | rename-item -NewName {$_. name + ".png"}
Alternatively, to avoid any errors, copy the above and paste it into the terminal.
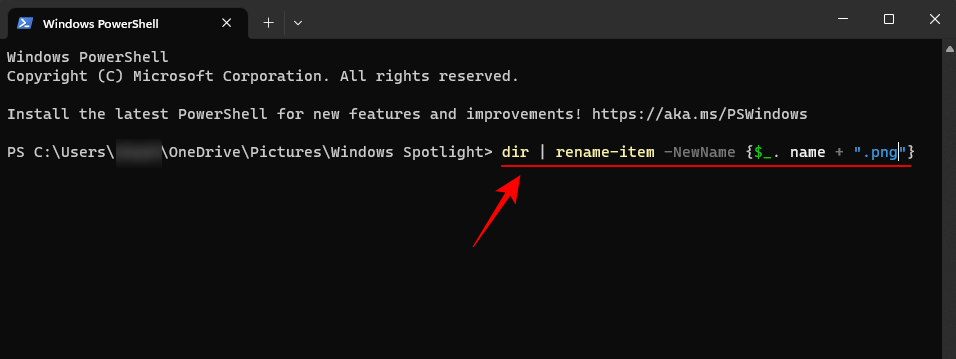
- Then hit Enter. All your files in the folder will be renamed and get the .png extension added to them.
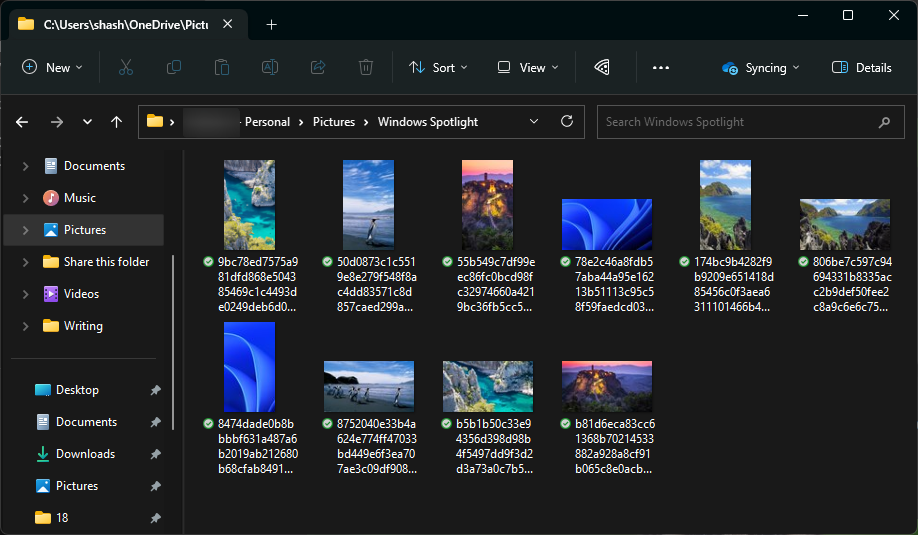
- Your Windows Spotlight files are now saved as images. Go ahead and check them out.
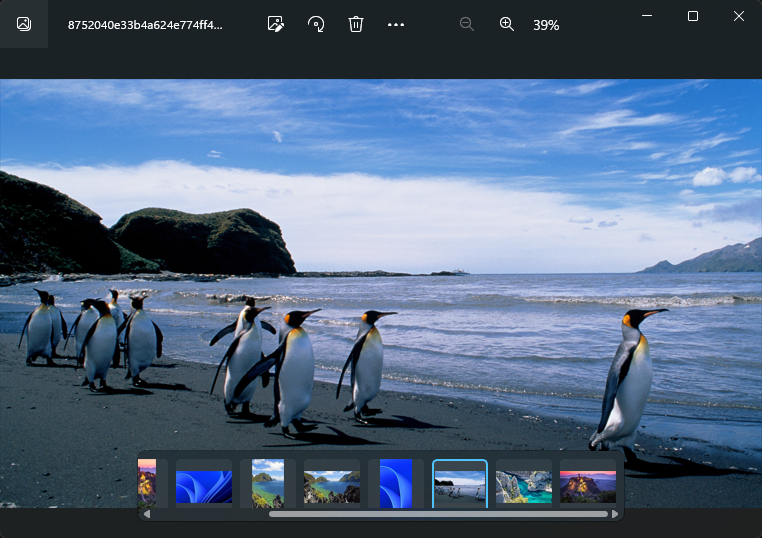
How to get Windows Spotlight images with an app
There’s an app for just about everything under the sun, and one for Windows Spotlight lovers as well. Here’s how to use it:
- Open ‘Microsoft Store’ from Start.
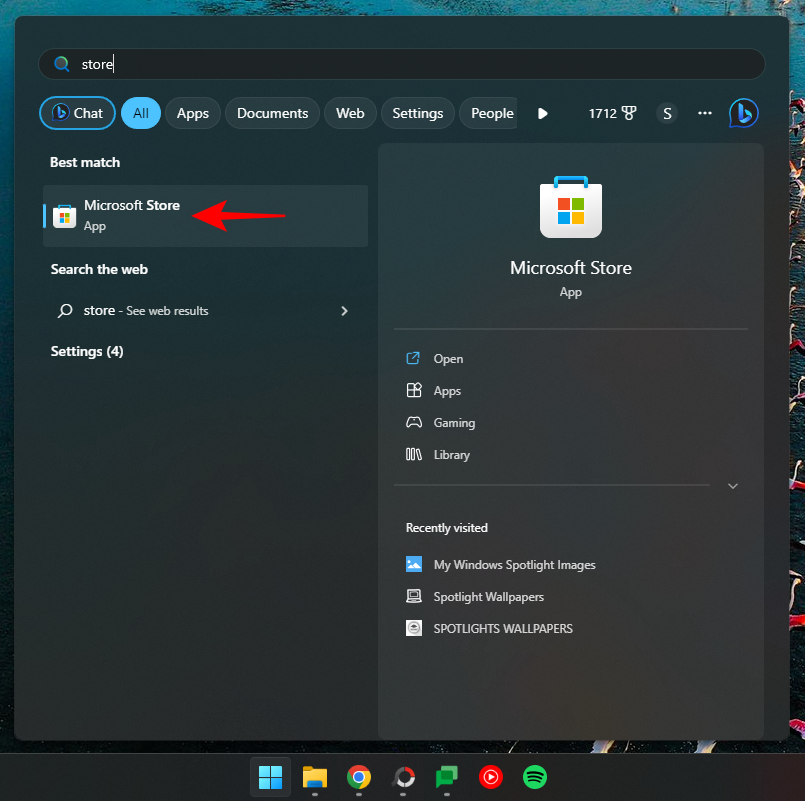
- Search for spotlight
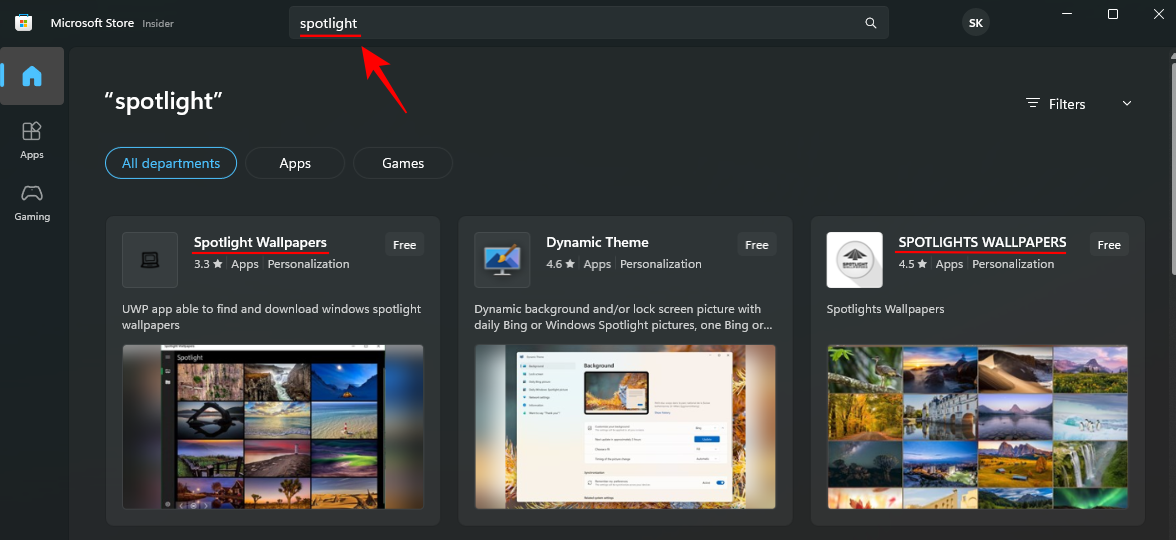
- And choose from the available Spotlight and Bing wallpaper apps. The two that we really liked were Spotlight Wallpapers by Ram6ler and Spotlights Wallpapers by 665Apps. Simply click on them and Get them.
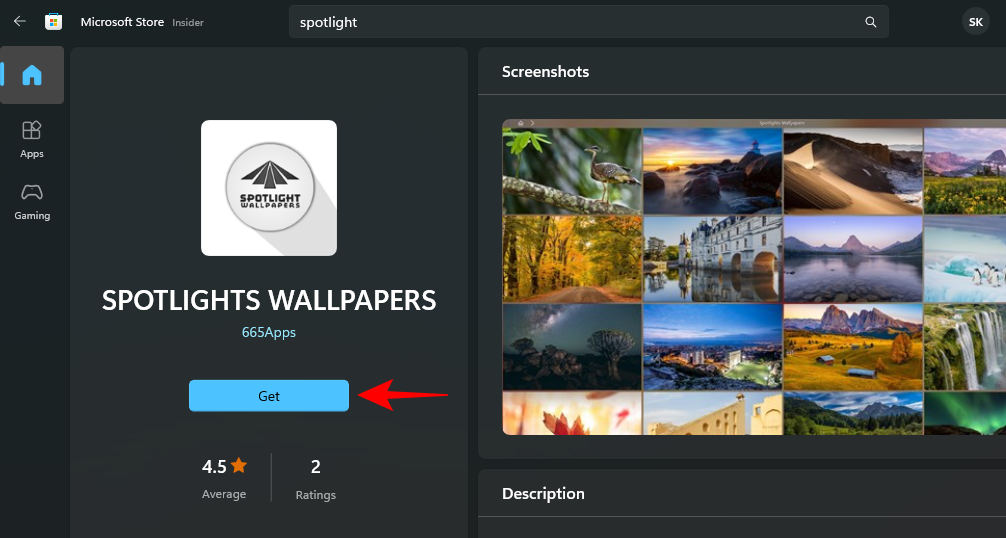
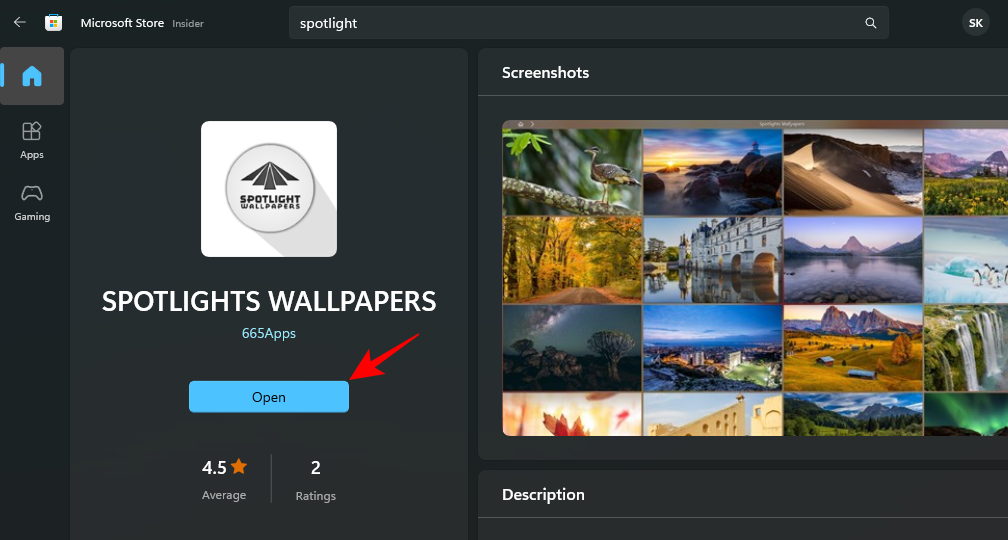
- Once installed, click on Open.
- Found a picture you fancy? Click on it to get additional options, and set it as your desktop and/or lock screen wallpaper, or save it to your PC.
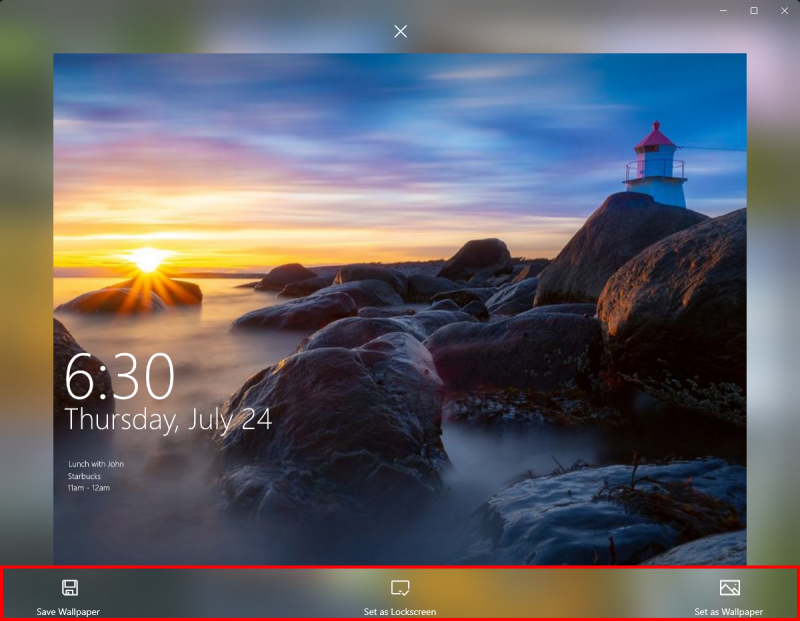
All of your Windows Spotlight images, once they are in a supported format, can be set as your background.
FAQ
Let’s take a look at a few commonly asked questions about Windows Spotlight images.
How do I find Windows Spotlight images on my computer?
Windows Spotlight files are stored in the following location %LocalAppdata%\Packages\Microsoft.Windows.ContentDeliveryManager_cw5n1h2txyewy/LocalState/Assets which you can input into the File Explorer’s address bar or the RUN command box. The files in this folder are your Windows Spotlight image files. But since they don’t have any extension, one will have to be added to them (usually .jpg or .png) before they can be accessed as image files.
How do I download Windows 11 Spotlight lock screen images?
Windows 11 Spotlight lock screen images are the same as the desktop images.
How often does Windows spotlight images change?
Windows spotlight images change every 1-2 days.
After everything is said and done, one’s desktop background is what truly gives one’s personal computer a personality, and Windows Spotlight images give a fresh facelift every day. We hope you were able to find the images that caught your eye. Until next time!








Discussion