Microsoft’s Windows 11, the successor to Windows 10 is packed with a bunch of User Interface updates. From minute easily-glanced over tweaks to bigger, more easily noticeable differences, there are a great many changes to explore. But if the time or date on your Windows 11 is not correct, here is how you can correct that. In most cases, Windows will automatically sync date and time. But if that doesn’t work, you can set it manually too.
Here’s how you can set the time and date on Windows 11 right as well as change their formatting for short and long dates. So, without further ado, let’s get started right away.
Change Time and Date in Windows 11 manually
On the Desktop screen, right-click on the ‘Time and Date’ widget towards the right of the taskbar.

Click on the ‘Adjust date/time’ option from the pop-up list.

You will be taken to the Date and Time settings screen. Check if the ‘Set time automatically option is switched on. If it is, click on the switch button to switch it off. If it was switched off already, move to the next step.

Now, next to ‘Set date and time manually’, click on the ‘Change’ button.

You will now be able to change the Date and Time as per your choice. To apply the changes you made, click on the ‘Change’ button below.

And that’s it! The Date and Time changes have been applied successfully.
Change Time and Date Formatting in Windows 11
The steps to change Date, Time, and Regional Formatting in Windows 11 are shown below. This will help you change the format for the short date, long date, short time, and long time.
Once again, on the Desktop screen, right-click on the ‘Time and Date’ widget at the end of the taskbar.

Click on the ‘Adjust date/time’ option from the pop-up menu.

Here on the Date and Time settings screen, scroll down until you get to ‘Related links’. Under it, you will see the option for ‘Language and region’. Click on it.

You will be taken to the Region Settings screen. Here you can change your device region and the regional format. Scroll down and select your country/region here.

Additionally, to change the date and time format, click on Regional format to reveal more options.

Then click on ‘Change formats’.

Here you can change the calendar, day, date, and time formats as per your choice.

Click the time fields to change them.

Click the date fields to change them.

Change Date and Time in Windows 11 with that old UI
You can also change the Date and Time in Windows 11 the conventional way. To change the Date and Time by the traditional(old UI) method, follow these steps.
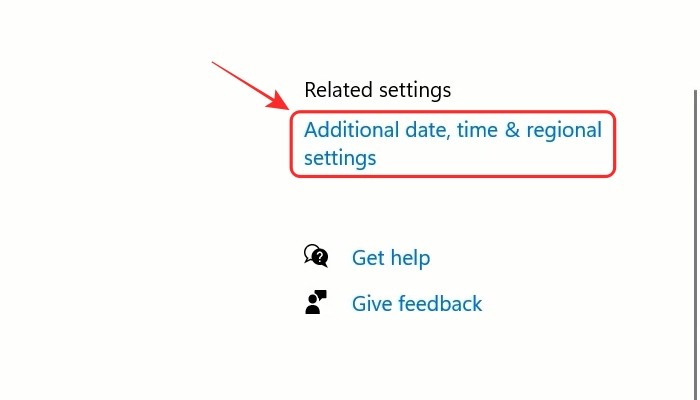
Navigate to the Region Settings Screen using the steps mentioned above. On the right side, under the ‘Related settings’ heading, you will see an option for ‘Additional date, time & regional settings’. Click on it.

Alternatively, you can also open the Control Panel on your system and click on the ‘Clock and Region’ option.

Now you will be directed to the same point as the above step. You will now be able to see a section named ‘Date and Time’ here in the control panel. Click on it.

Now go ahead on click on the ‘Change date and time’ button.

You will now be able to change the Date and Time of your system in the respective fields. After setting the Date and Time to your preference, click on the ‘OK’ button to confirm and apply the changes.

An alternate way to access the Date and Time settings on Windows 11
On the Desktop screen, click on the Start button, or press the Start icon on your keyboard.

From the start menu, click on the ‘Settings’ option.

You will be taken to Settings. Here, you will find the ‘Time and Language’ option in the left panel. Click on it.

And that’s it! That is everything about changing the Date and Time in Windows 11. Hope you found this helpful.


