Rooting and installing custom ROMs is fun, but when things go wrong and your device gets messed up or goes into a bootloop (for any reason), you need to install the stock firmware back to the device to make it function normally again.
Installing stock firmware is different for each manufacturer’s Android devices. On Samsung devices, stock firmware can be installed using the Odin software on your Windows PC.
Install stock firmware on Galaxy Note 7 is similar to that of other Samsung devices. You load the firmware comptaible with your Note 7 model and flash it using Odin.
However, there are few important points you must consider before flashing a stock firmware to your Note 7:
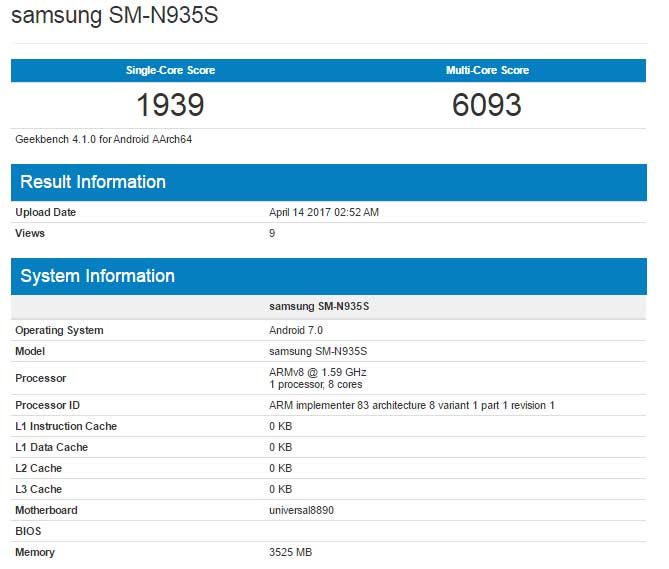
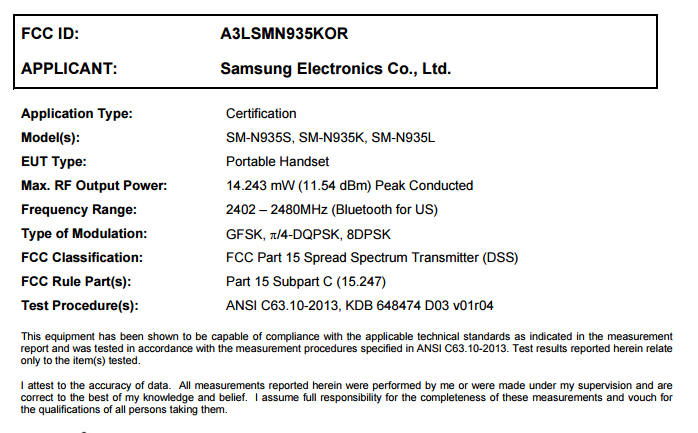
- Galaxy Note 7 has different models for different regions and carriers. So make sure the firmware you are looking to flash to your Note 7 is for your Note 7 device model number only.
- Flashing stock firmware to your Note 7 might wipe its data clean. So make sure you backup your important files before flashing a stock firmware.
- Flashing stock firmware will unroot your Note 7, and also replace any custom recovery like TWRP with the stock Android 3e recovery on the device.
How to Install Stock Firmware on Galaxy Note 7
[icon name=”download” class=”” unprefixed_class=””] Download Odin 3.10.7
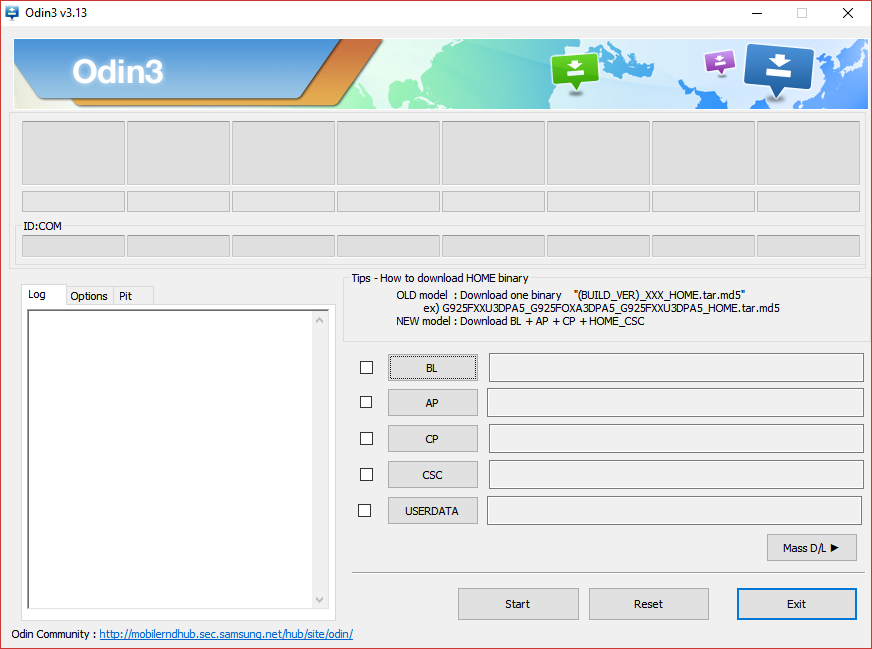
- Unzip the Odin 3.10.7 .zip file and run/open Odin3 v3.10.7.exe file from the extracted files on your PC.
- Enable OEM unlock on your Note 7:
- Go to Settings » About phone » and tap “Build number” seven times to enable “Developer options”.
- Go back to main Settings page, scroll to bottom and select “Developer options” from there.
- Under Developer options, look for “Enable OEM unlock” checkbox/toggle and make sure you Check it or turn it ON.
- Boot your Note 7 into Download mode:
- Switch off your Note 7.
- Press and hold “Home + Power + Volume down” buttons for a few seconds until you see a warning screen.
- Press Volume Up on the warning screen to accept it and boot into Download mode.
- Once your Note 7 is in download mode, connect it to the PC with a USB cable. The Odin window on PC should detect the phone and show an Added!! message.
└ In case you don’t see the Added!! message, download/install Galaxy Note 7 driver on your PC and try again. - Now extract the .zip firmware file you have downloaded for Galaxy Note 7 to get the Odin flashable .tar file inside.
└ Skip this step if you already have a .tar file of the firmware. - Click on the AP tab on Odin window and select the .tar.md5 FIRMWARE file that you downloaded.
└ Note: DON’T play with any other options on the screen. You’re only required to connect your Samsung device and select the FIRMWARE file in PA tab. - Click the Start button on Odin and wait for it to finish the process. Once it has finished successfully, you’ll see a pass message on the Odin screen.
- Your phone will automatically reboot when Odin is done flashing. You can then disconnect your device.
That’s all. Enjoy running the stock firmware on your Galaxy Note 7.
Happy Androiding!