- What to know
-
8 ways to customize Control Center on your iPhone with the iOS 18 update
- 1. Access the New Control Center pages
- 2. Rearrange and Resize controls
- 3. Add a control
- 4. Add a new control center page
- 5. Add standalone connectivity controls to the Control Center separately (iOS 18.1)
- 6. Delete a control or control center page
- 7. Close control center
- 8. Reset the Control Center
What to know
- The Control Center in iOS 18 has been revamped to allow for greater customizations.
- There are now three control center screens with the ability to create as many screens as you like, or delete them all except one.
- You can also rearrange and resize the controls as you see fit, as well as add and remove standalone controls as you like.
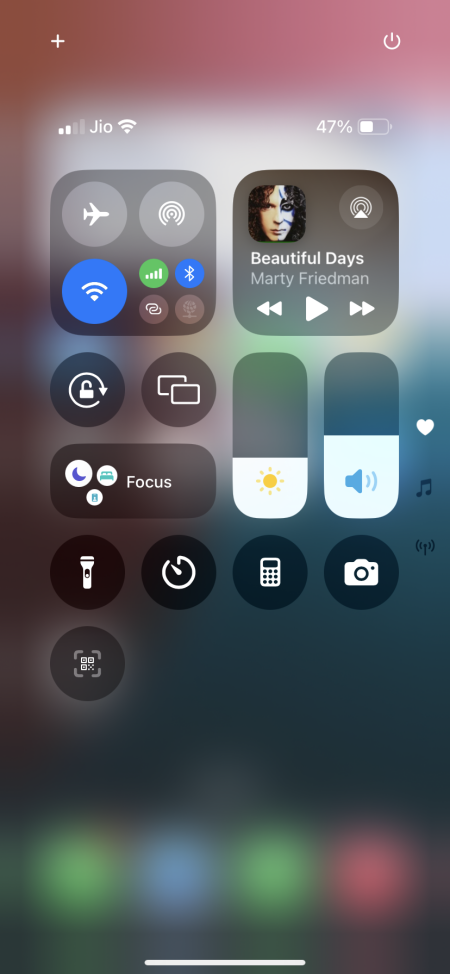
The control center on iOS 18 is one of the many frequented spaces on the iPhone that have received an overhaul. If you recently updated to iOS 18, you will notice more than a few changes, including several customizable options, some of which may not be as intuitive as one may like.
To that end, we’ve curated a list of all the ways in which you can customize the control center in iOS 18 as well as some tips and tricks to help you get used to it quicker.
8 ways to customize Control Center on your iPhone with the iOS 18 update
The changes to the control center are in keeping with the broader personalization-based features in iOS 18, such as rearranging the home screen apps and widgets, changing the color tint, hiding app labels, etc. The control center changes are also in the same vein, with heavy emphasis on customizability.
1. Access the New Control Center pages
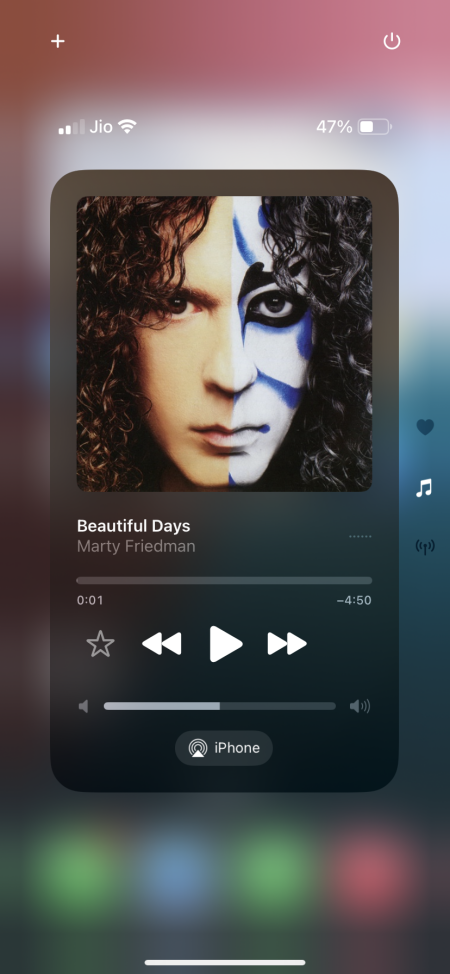
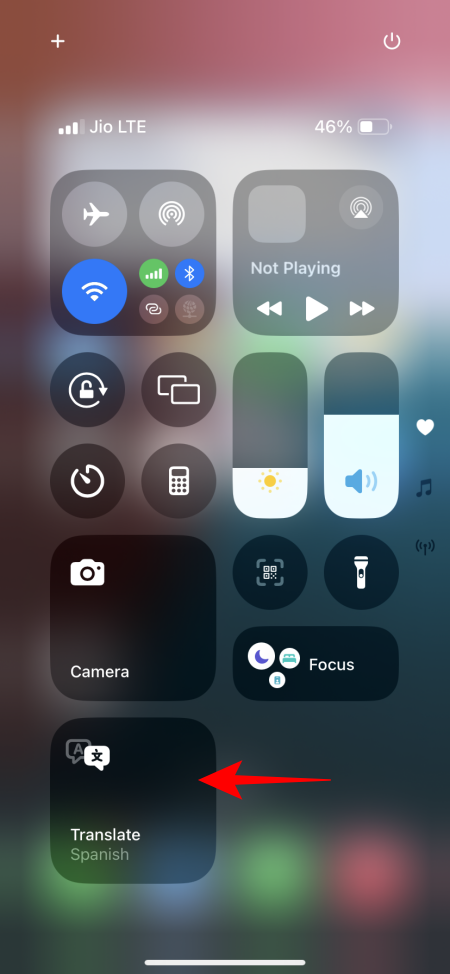
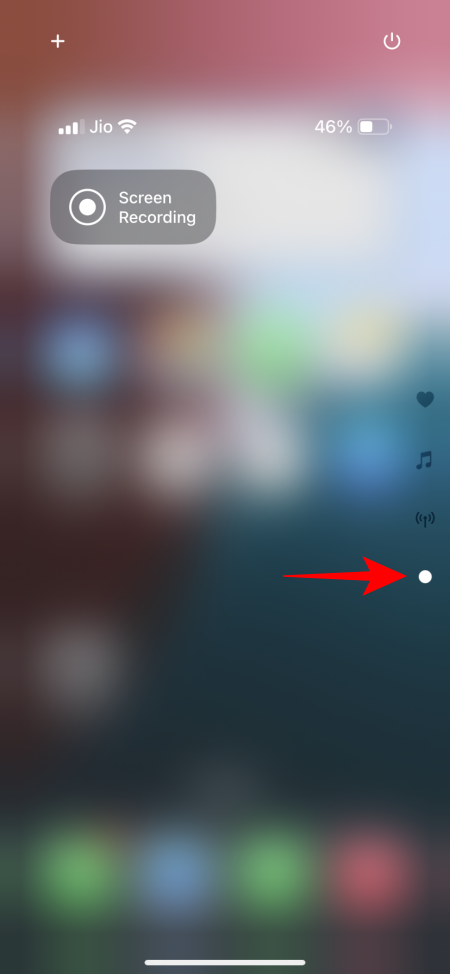
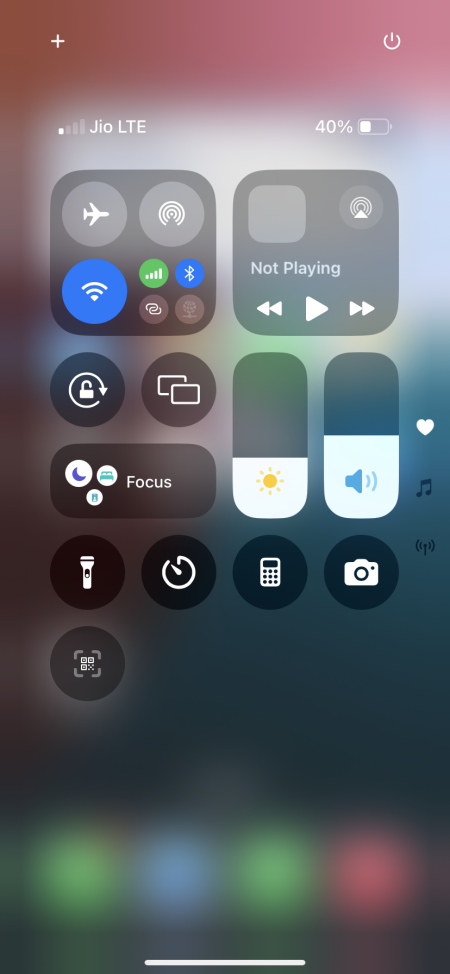
The control center is still accessible by swiping down from the top-right corner of the screen. Here, you’ll find three control center ‘pages’ – the first houses favorites (indicated by a heart sign); the second page is dedicated solely to music, media, and related settings (with the musical notation icon); and the third hosts controls relating to connectivity (network icon).
The icons for the three screens are found to the right. Depending on the control center page you want to land on, you can open the control center and get to the second or the third page all with one long continuous swipe. Once you land on one of the control center pages, you can swipe up or down to move in either direction.
Note: The swipe up gesture was once reserved for closing the control center. Learn more about faster ways of closing control center in the last section.
2. Rearrange and Resize controls
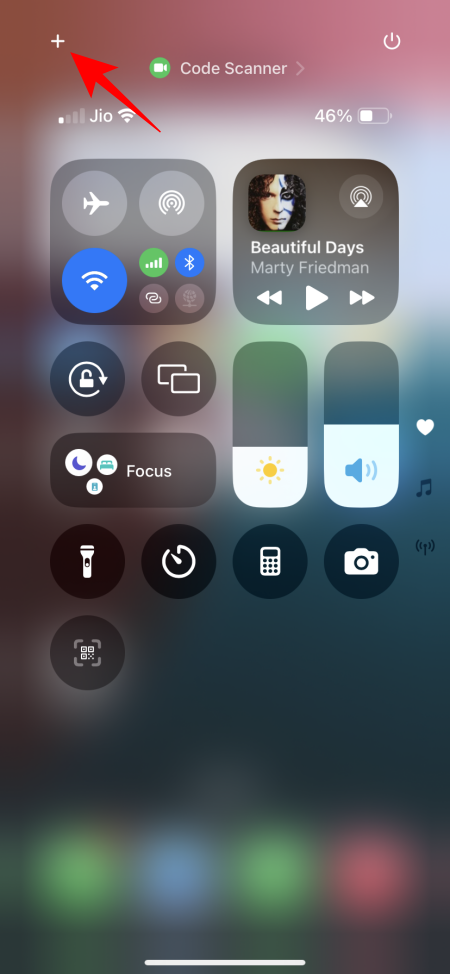
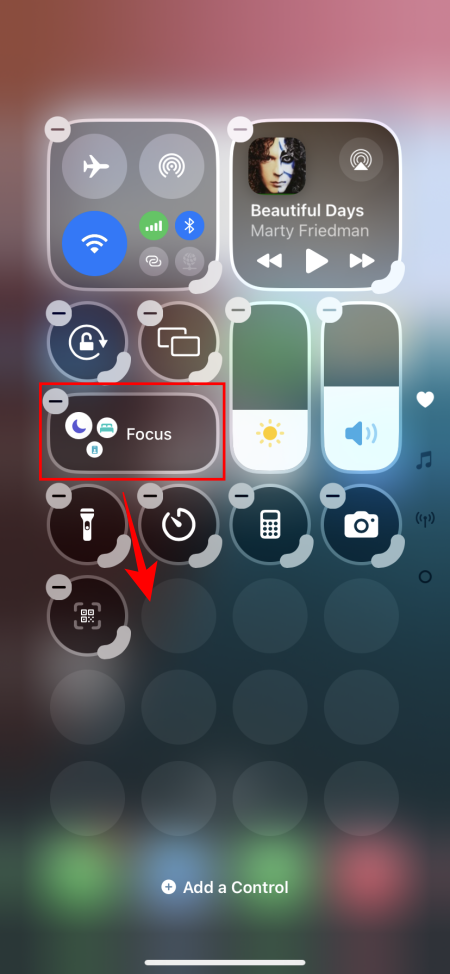
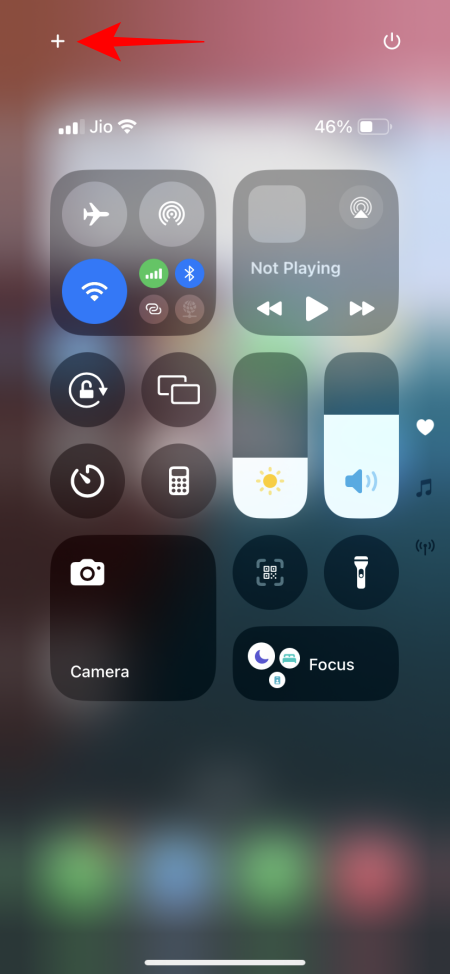
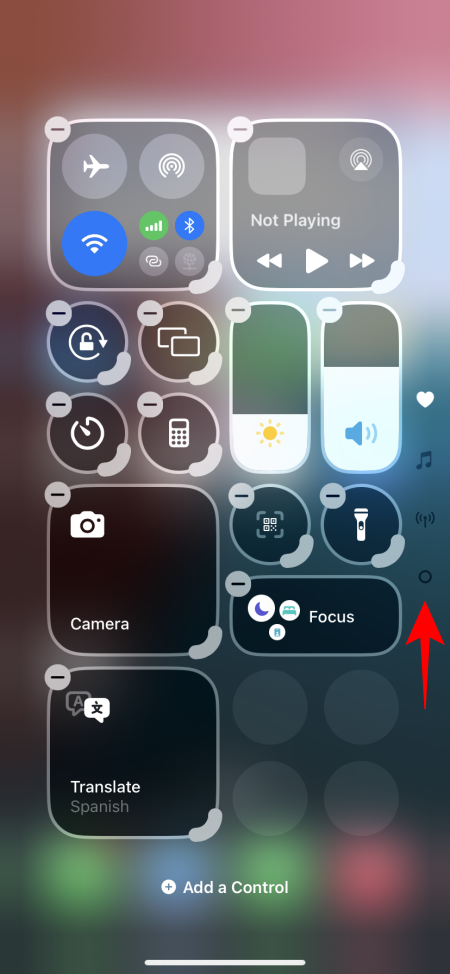
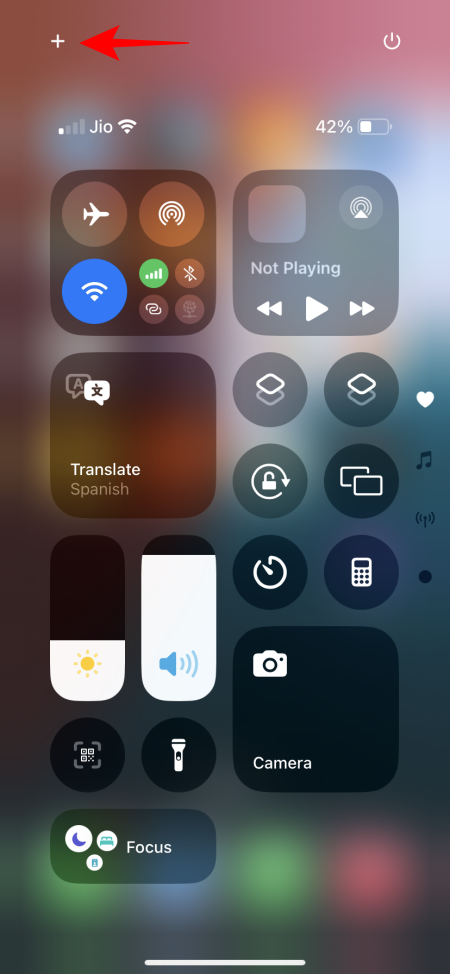
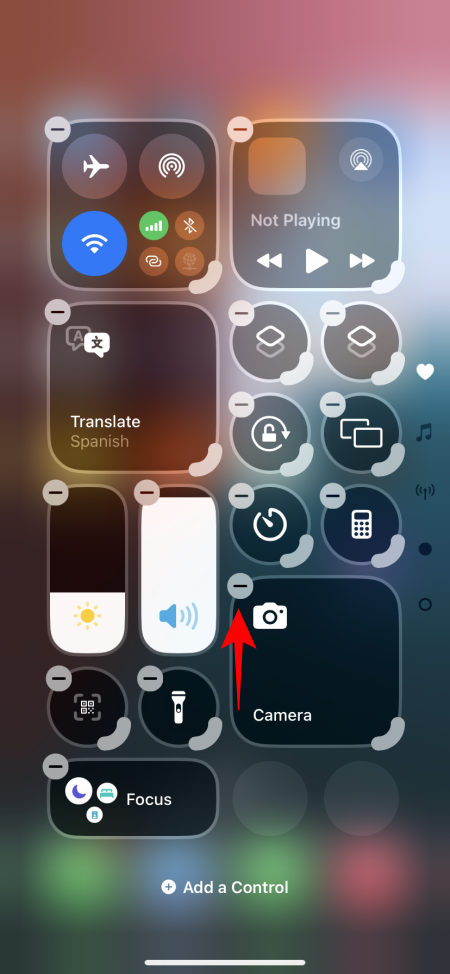
All the control options in the control center can be moved around and resized to your liking. To begin editing, tap on the + icon in the top left corner. The boundaries surrounding an option highlight its exact size. Simply drag and drop a control to your preferred location.
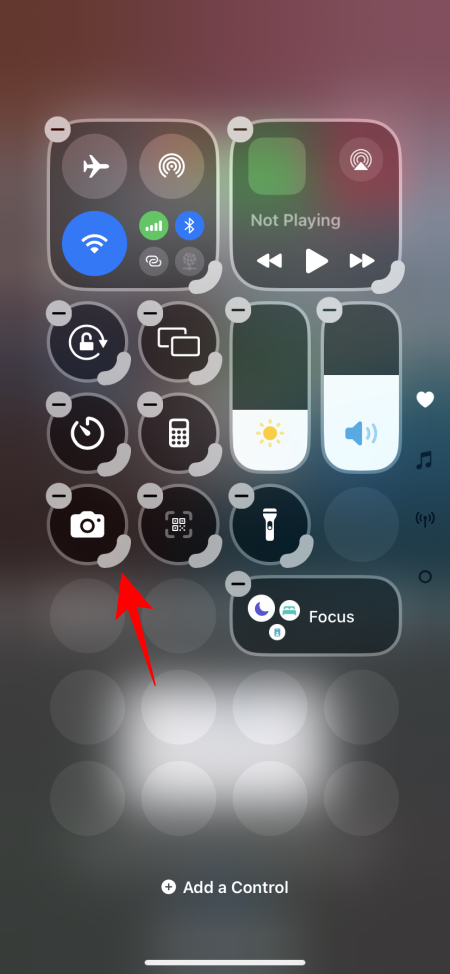
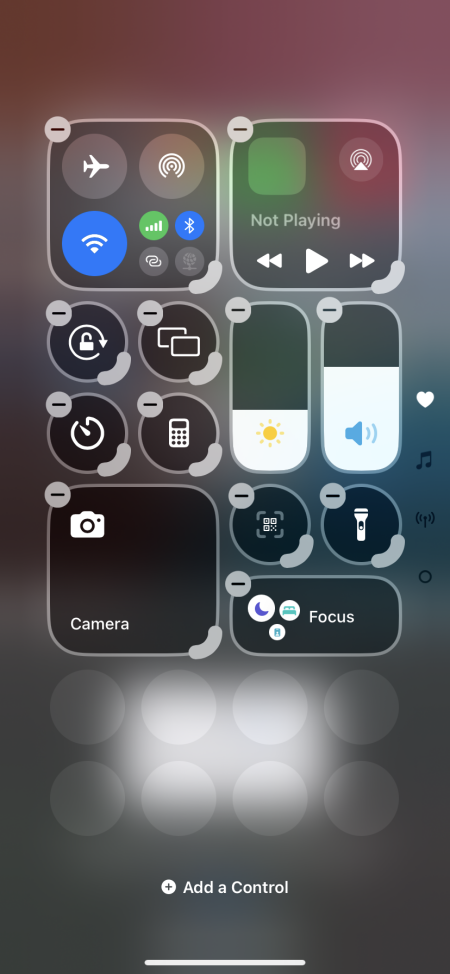
If you must resize a control, use the handle bar in the bottom right corner and drag it to make it bigger or smaller.
Similarly, drag to resize and rearrange the controls until you have reorganized the control center page to your satisfaction. Once you’re done, simply swipe up or tap on an empty space to close the Control Center.
3. Add a control
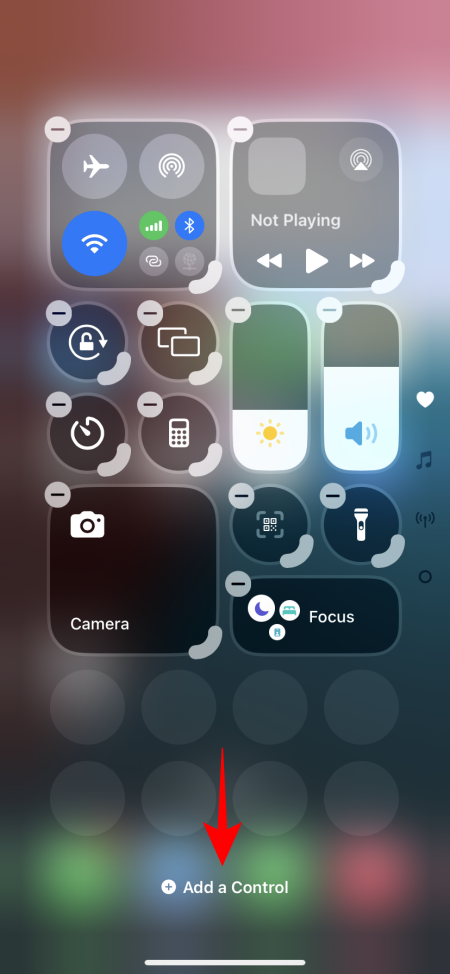
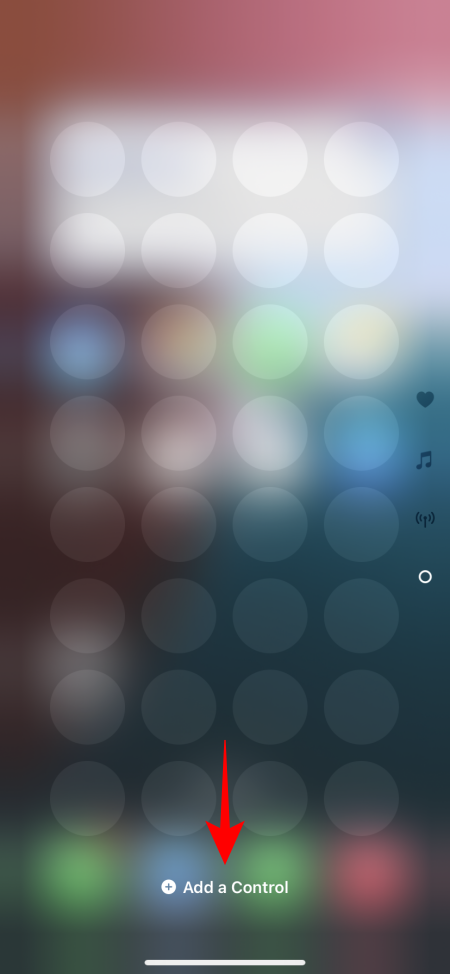
Swipe to the control center page where you want to add a new control. Then invoke the editing screen by tapping on the + icon in the top left corner. Tap on the Add a Control option at the bottom.
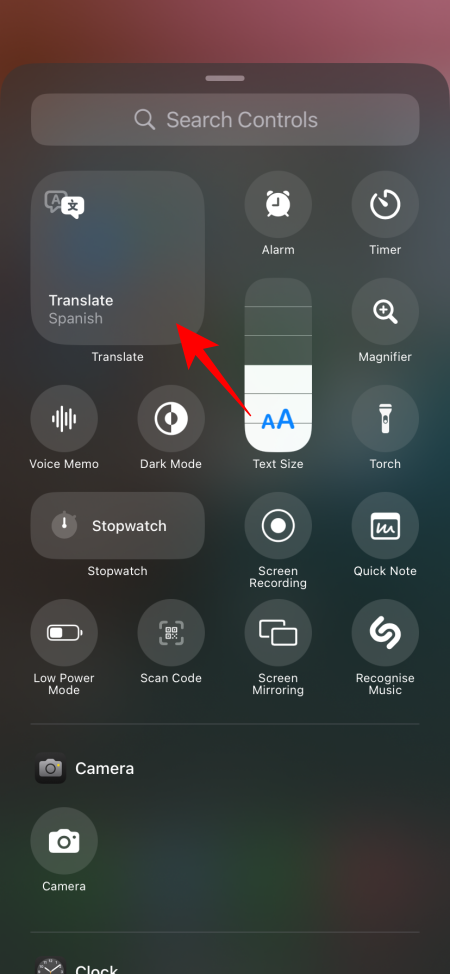
Find the option that you want to add and tap on it. You can later rearrange and resize it as shown before.
4. Add a new control center page
You can keep adding new control center pages/screens. All you need to do is to go into ‘Editing’ mode. Then go to the last page.
Here, tap ‘Add a Control‘ and choose a new control for the page. The new control will be added to the new page.
5. Add standalone connectivity controls to the Control Center separately (iOS 18.1)
The upcoming iOS 18.1 update has standalone controls for all its connectivity options, like Wi-Fi, Bluetooth, Airplane Mode, Mobile data, Personal Hotspot, and VPN. So you can now break out of the traditional ‘Connectivity’ box control and customize the Control Center to your heart’s content.
Refer to our full guide on How to Add Separate Toggles for Wi-Fi, Bluetooth, Personal Hotspot, Airplane Mode, and VPN to iPhone’s Control Center in iOS 18.1 to know how to go about this.
However, if you’re not updated to iOS 18.1, you are stuck with the ‘Connectivity’ box in the Control Center. Fortunately, there’s a roundabout way of adding Bluetooth, Wi-Fi, and other similar options to the control center as a standalone option. The general idea is to create a shortcut from the ‘Shortcuts’ app and then add that shortcut to the Control Center.
6. Delete a control or control center page
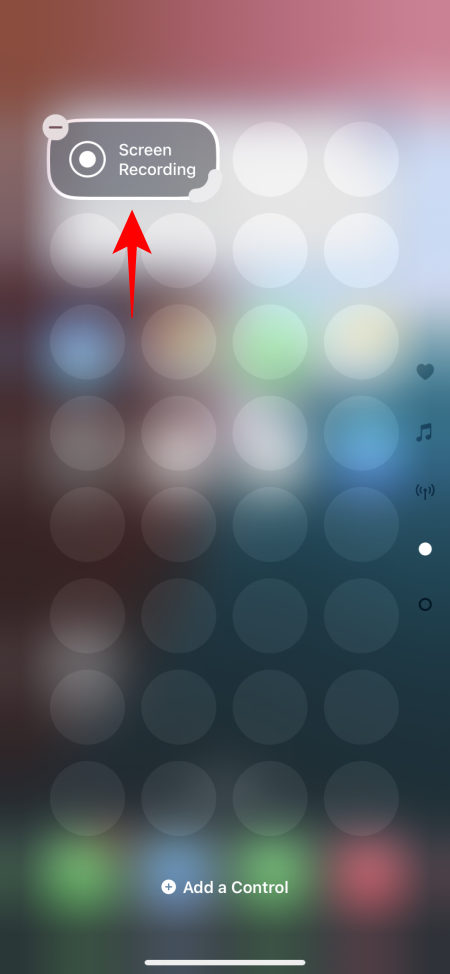
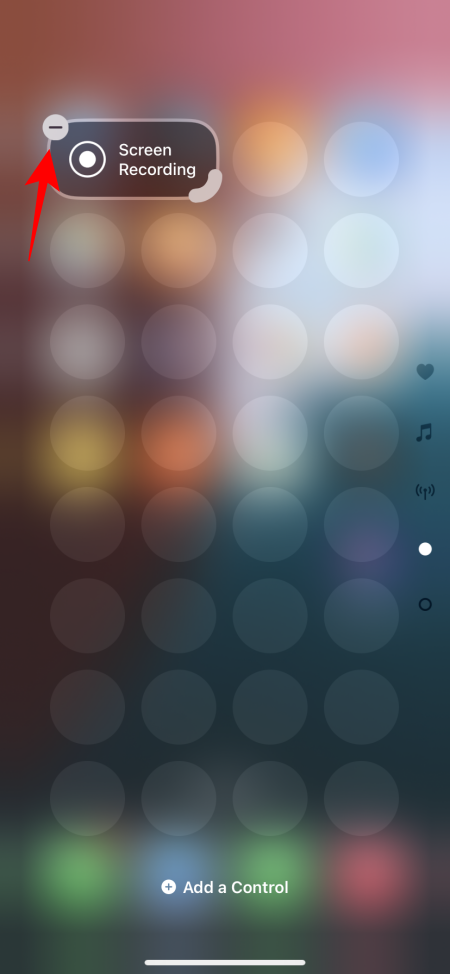
Deleting controls is a cinch. Tap on the + icon to go into ‘Editing’ mode. Then simply tap on the – icon on a control to remove it.
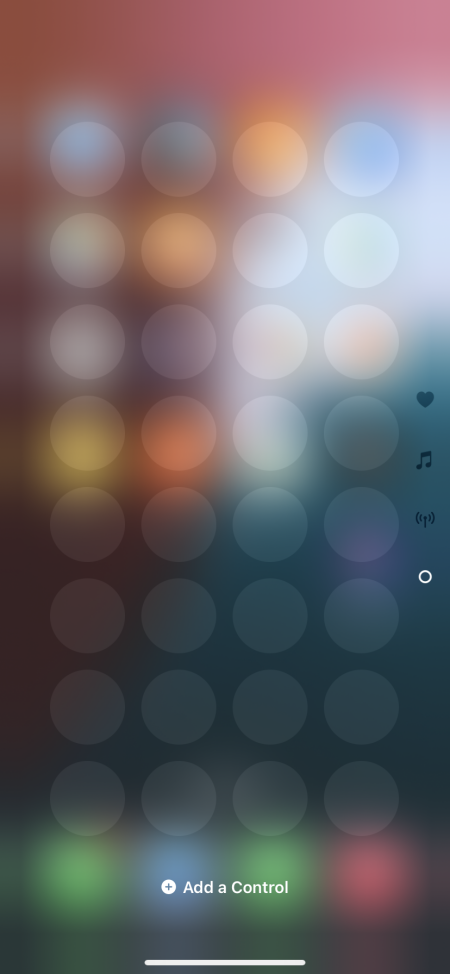
If you don’t like the additional control center pages and screens, you can get rid of them too. To do this, simply remove all the controls on that screen and it will be removed as well.
It’s a pity that Apple doesn’t provide an easy mechanism to do this. But since the company has already embraced greater customizability, perhaps we can expect simpler options in the next update.
7. Close control center
With the addition of the newer control center screens, it’s not easy to close the control center with the once-familiar ‘Swipe up’ gesture. Instead of dismissing the control center, swiping up simply moves you to the next control center screen.
This is another reason why, for those who don’t like the multiple control center pages, it’s better to delete the controls on them and have them disappear altogether.
But if you want to keep the additional control center screens, here are a couple of ways to close the control center:
- Swipe up from the bottom or top of the screen.
- Tap on empty space to close the control center.
8. Reset the Control Center
If you made a bunch of changes to the control center, but ended up making a mess of things, you can get back the control center as it was before. But, again, it’s not easy.
You can use the screenshots as given in this guide and organize the control exactly as shown. However, this can be time consuming.
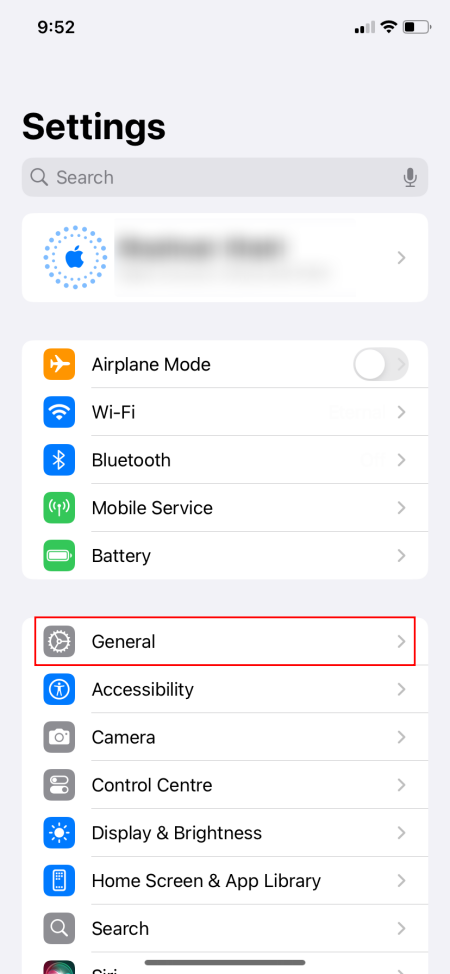
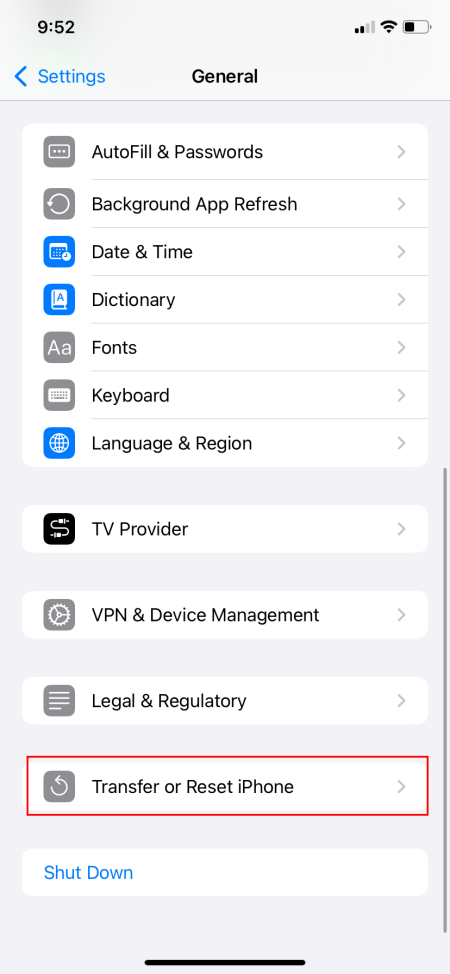
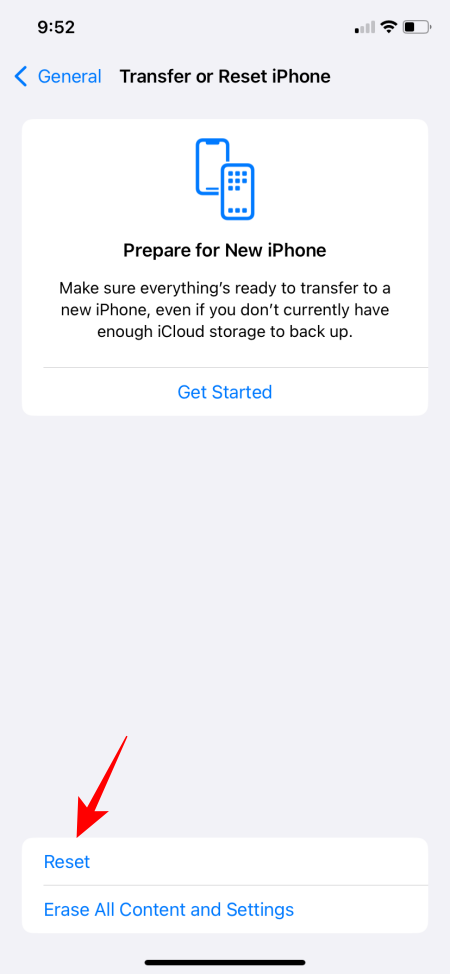
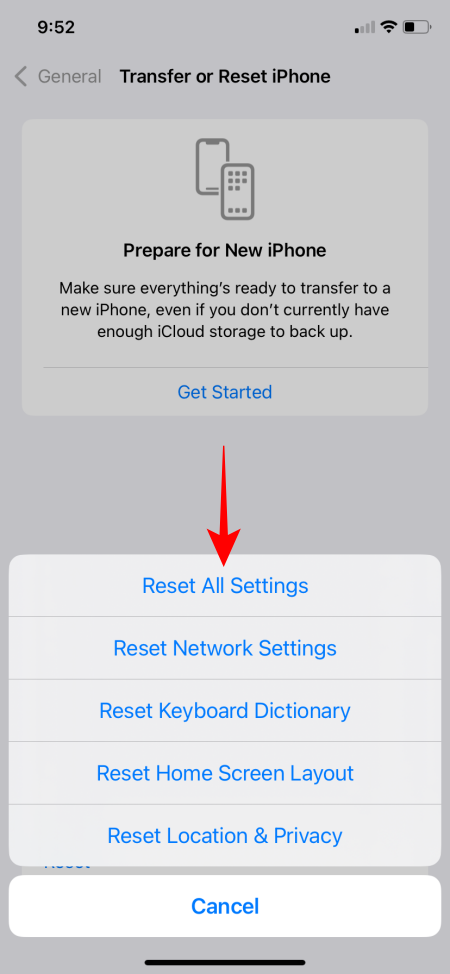
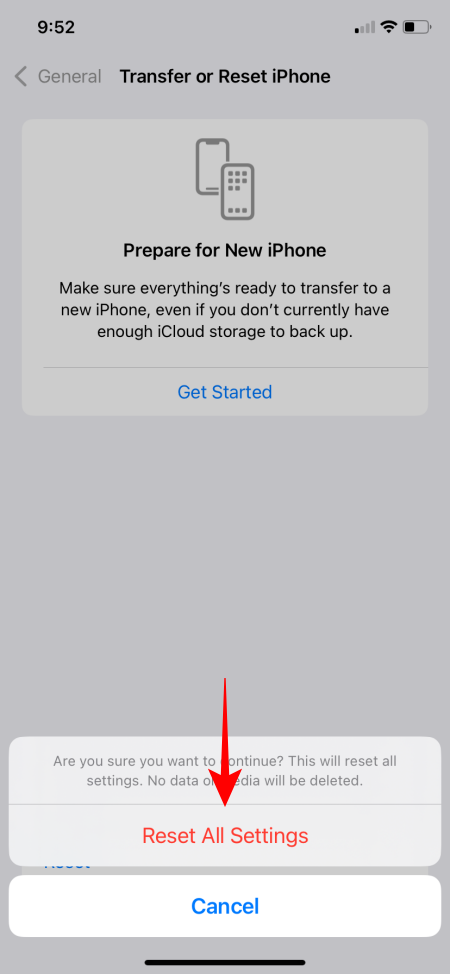
On the other hand, you can Reset your iPhone’s Settings to get back the control center. None of your apps or media will be deleted. However, the settings will. But since there’s no option to reset only the control center, you have to rely on this alone. Here’s how to do so:
- Open the Settings app and go to General > Transfer or Reset iPhone.
- Tap Reset > Reset All Settings.
- Provide the authentication and wait for the iPhone to do a soft reset.
- Once you’re back online, all the controls on the control center will be arranged as before.`
Now that Apple’s breaking away from its traditional mold, allowing more personalization and giving users the ability to set up the control center as they see fit, it will have to find ways in which to satisfy everyone. Allowing customization at all levels is no easy task, but since that’s the game Apple wants to play, it has to be able to play it well.
We hope you found this guide useful in setting up the control center as per your preferences, with the options that are currently available in iOS 18. We’ll make sure to update the same as and when new customizability options are introduced. Until next time!


