
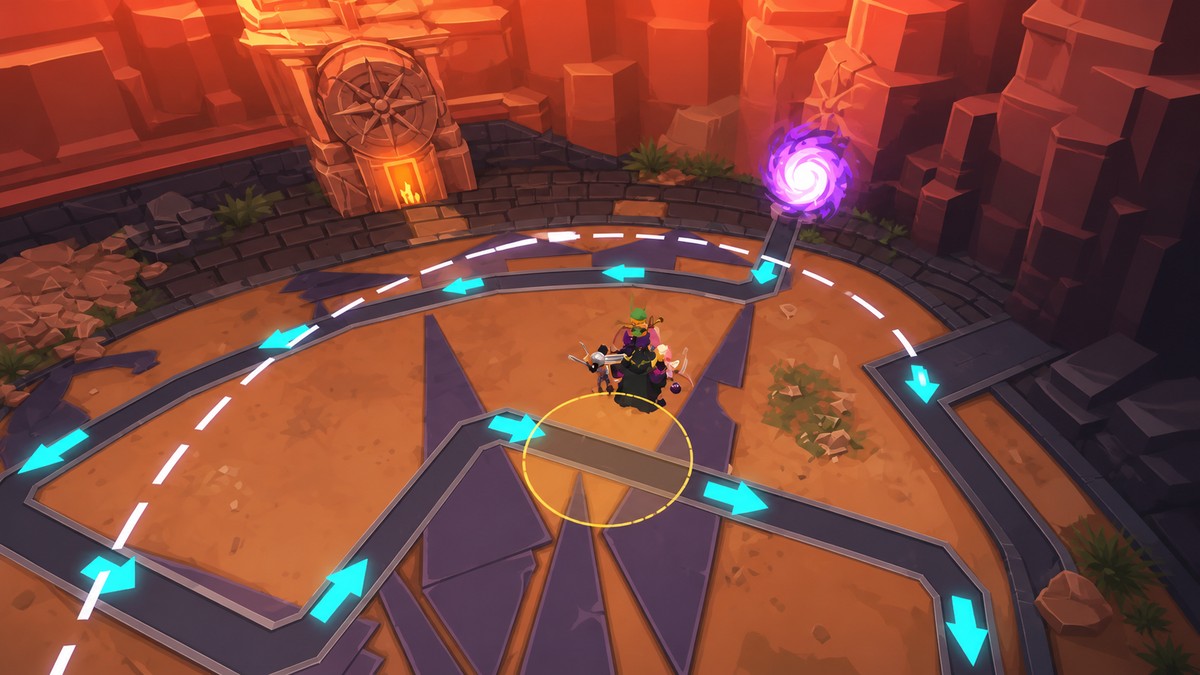
The best Tower farm shown here is to use Anime Expeditions’ built-in autoplay with pre-saved placement zones, a Shadow/Megumi-centered team, later Stone Alchemist farming, slow, shield break, Toy Maker leak control, and auto-next/auto-start so the tower keeps advancing with minimal input.
This is an autoplay Tower setup, not a manual clear route. A single showcase run pushed through Floor 51 with minimal input, but your result still depends on your units, traits, upgrades, and Unbound status.
KEY!
The whole method works because Anime Expeditions remembers your saved placement zones per map. Once the team, priorities, and map circles are set, autoplay can place farms, slows, damage, shield break, and support in a repeatable order.
- Who should use this AFK Tower setup
- Core AFK Tower team slots in Anime Expeditions
- How to set up the AFK Tower autoplay run in Anime Expeditions
- Placement zones that carry across Tower maps
- Gameplay toggles for hands-off Tower chaining
- AFK reliability and macro risk
- Post-Floor-50 Tower team variants
- Farming priorities outside Tower
- Frequently Asked Questions
Who should use this AFK Tower setup
Use this if your goal is to chain Tower floors with built-in autoplay instead of manually placing units every round. It is strongest for accounts that already have the main pieces: Shadow/Megumi, Toy Maker, Stone Alchemist, a slow, a shield breaker, and a buffer.
The setup is not about bursting a single hard floor as fast as possible. It is about making the run stable enough that autoplay can survive the early leaks, build economy, upgrade the right carry, and keep moving into the next floor.
Core AFK Tower team slots in Anime Expeditions
| Slot | Use | Replacement |
|---|---|---|
| Shadow/Megumi | Main carry with damage, stun, reverse, and Mahoraka access. | Post-50 variants can try Elf Mage or another strong full carry. |
| Crow/Itachi | Shield breaker through repeated black-fire shield ticks. | Crimson Brother or another unit with strong shield damage. |
| Salmon Sorcerer | Slow support; run three placements and tune upgrades for 5-second SPA. | Use the same slow role only if it reaches the needed SPA breakpoint. |
| Forbidden Teacher | Buffs Shadow/Megumi and helps Toy Maker in the base version. | Cuber is the stronger post-Floor-50 support option. |
| Toy Maker | Early leak protection and cleanup through summons. | Keep her if possible; change upgrade priority instead of dropping her. |
| Stone Alchemist | Later farm unit; do not make it upgrade priority 1. | No direct swap is given for this autoplay farm route. |
The team is built around Shadow/Megumi doing the heavy lifting while the other slots solve specific autoplay problems. Stone Alchemist is used as a later farm unit, Salmon Sorcerer slows enemies, Crow/Itachi breaks shields, Toy Maker cleans early leaks, and Forbidden Teacher buffs the main damage setup.
KEY!
Autoplay places one unit from each enabled slot before filling out extra copies, so early stability matters more than a perfect manual layout. That is why Toy Maker matters: her summons help cover the rough opening while the later farm and carry are still being upgraded.
How to set up the AFK Tower autoplay run in Anime Expeditions
Configure the autoplay preset first, then use it with saved placement zones so Tower floors can advance with as little input as possible.
STEP 1/11
Choose tiny placement zones
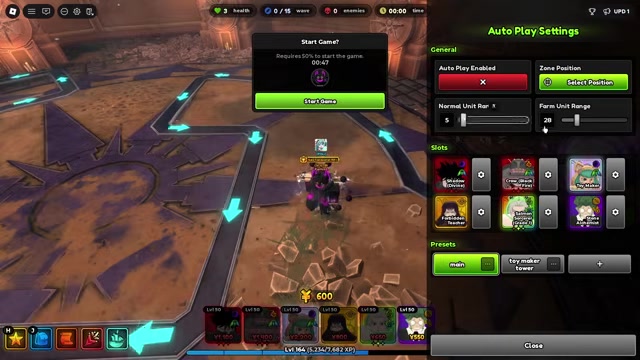
Open autoplay settings, use Zone Position, and make the combat circle as small as possible so your units spawn where they hit the most enemies.
STEP 2/11
Disable phantom-first placement
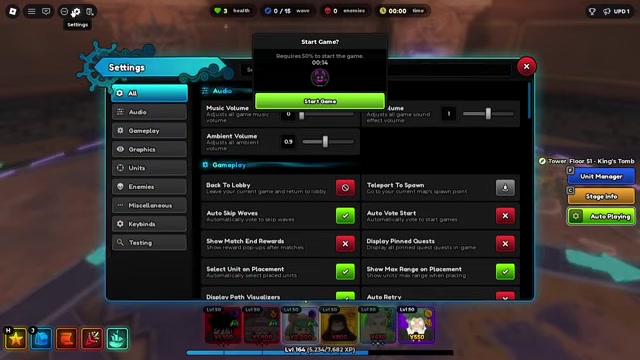
Turn off the setting that prioritizes phantom placement so autoplay spends early money on upgrades instead of extra phantoms.
STEP 3/11
Enable Shadow/Megumi
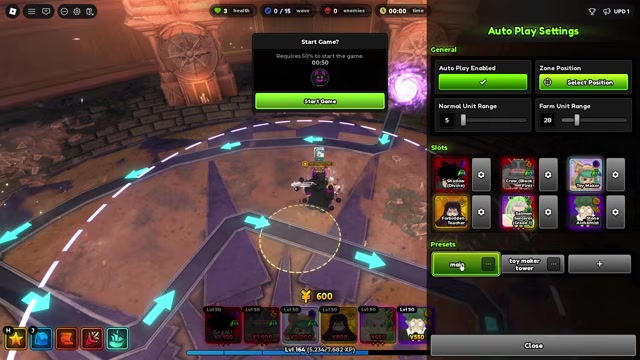
Turn on the slot, Auto Upgrade, and Auto Abilities, then set upgrade priority to 2, placement limit to 1 if Unbound or 2 if not, and max upgrade to 10.
STEP 4/11
Enable Crow/Itachi

Enable the slot with one placement, leave auto upgrade and abilities off, and use him mainly for shield breaking.
STEP 5/11
Set Toy Maker priority
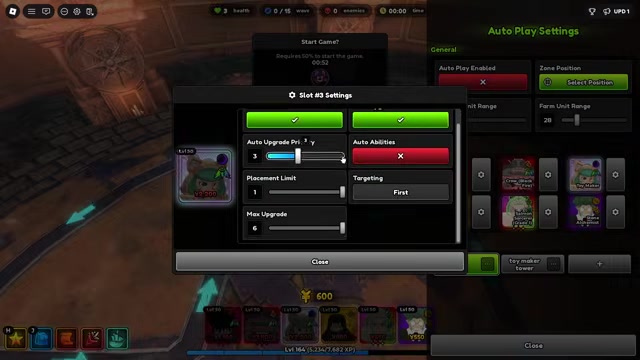
Enable Toy Maker with auto upgrade at priority 3 if she is Unbound and stable, or priority 2 if she is weaker and your run is leaking.
STEP 6/11
Loosen strict priority if needed
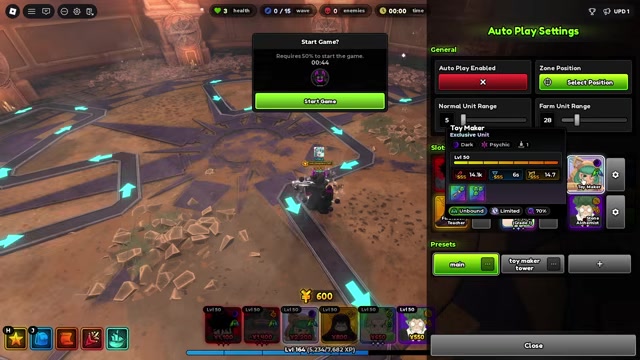
If neither Toy Maker nor Shadow/Megumi is Unbound, disable Strict Auto Upgrade Priority so both can receive upgrades during the dangerous early waves.
STEP 7/11
Tune Salmon Sorcerer
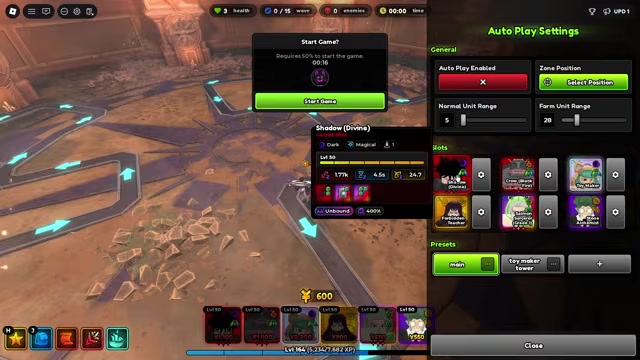
Place three Salmon Sorcerers and only upgrade them until they reach 5-second SPA, using max upgrade 0, 1, or 2 based on your own breakpoint.
STEP 8/11
Auto-upgrade Forbidden Teacher
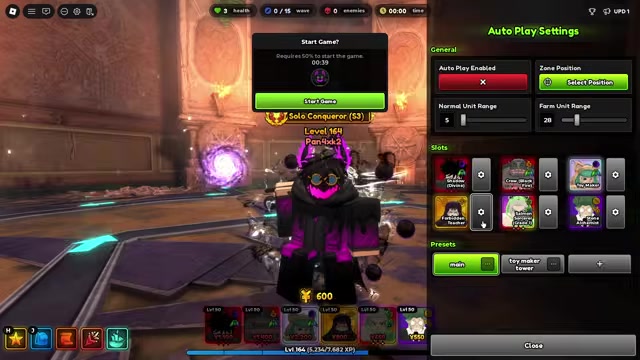
Place one Forbidden Teacher and auto-upgrade her until she gives the maximum buff.
STEP 9/11
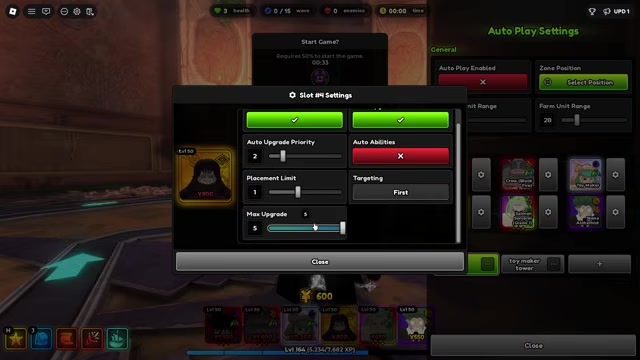
Use Stone Alchemist later
Keep Stone Alchemist as a later farm unit instead of making it upgrade priority 1.
STEP 10/11
Duplicate the preset
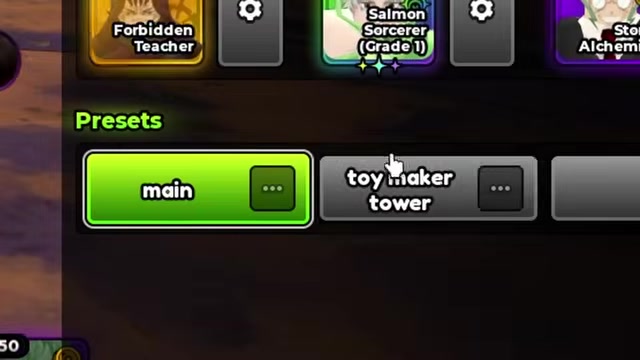
Make a copy of the main preset for leak-heavy stages, with Toy Maker at priority 2 and Shadow/Megumi at priority 3.
STEP 11/11
Start with the main preset
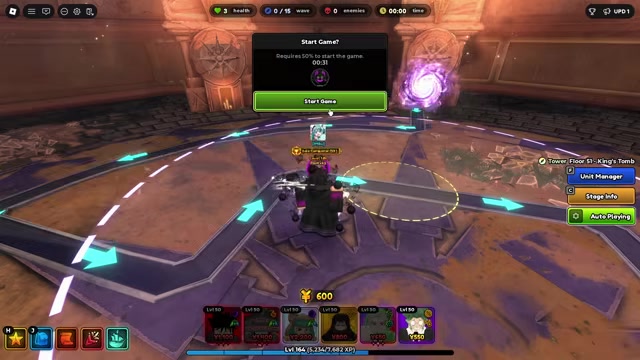
Begin the Tower floor, choose the main preset, and let autoplay place Stone Alchemist, Salmon Sorcerer, and the rest of the team in order.
Video help
Placement zones that carry across Tower maps
After the preset is ready, the most important prep is saving a placement position on each map. Anime Expeditions remembers where you set autoplay for that map, so you only need to visit each relevant story or Tower layout once and define the circles.
Use a small combat circle where your slow, carry, shield breaker, and support can all affect the lane. Put the farm circle where Stone Alchemist can be placed consistently without dragging your combat units away from the best choke point.
For early Tower floors with Unbound characters, the combat circle can sit near the front of the path so Shadow/Megumi kills quickly and Toy Maker catches leaks. Repeat the same setup pass for each map in the rotation so autoplay does not need a fresh placement decision every floor.
Save the smallest useful combat circle on every Tower map before going AFK; tight placement keeps Cuber, Toy Maker, slow, and your carry working inside the same buff and attack area.
Gameplay toggles for hands-off Tower chaining
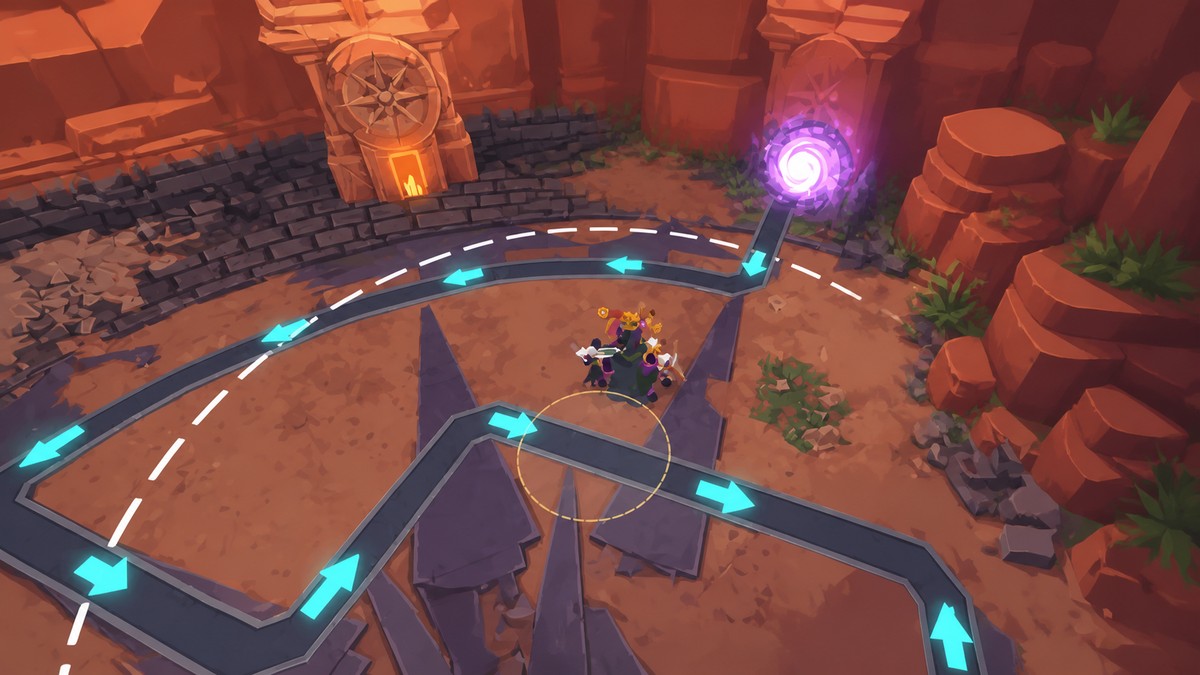
Turn on Auto Next and Auto Start in gameplay settings before you begin the run. These toggles are what let the game move from one cleared Tower floor into the next without waiting for a manual click.
If you are leaving attempts running for a long session, also enable Auto Retry. That does not make the build stronger, but it prevents one failed overnight attempt from ending the farm completely.
Some older AFK farming routes also mention using Repeat Stage after enabling Auto Upgrade, especially for Expedition-style payload defense. For this Tower route, the useful shared idea is the same: use the game’s own repeat and autoplay tools first, then only add outside input tools if you accept the extra risk.
AFK reliability and macro risk
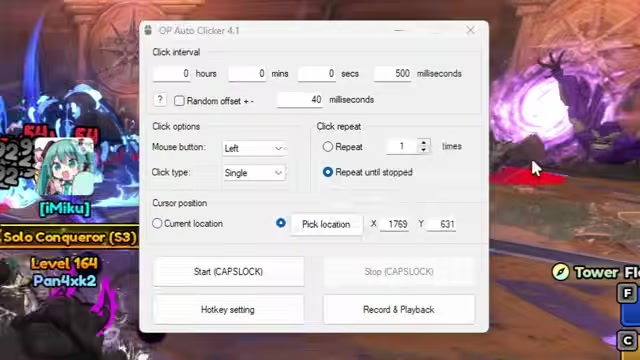
The built-in autoplay button can turn off after a while, which is the main reliability problem for long Tower sessions. The showcased workaround is an auto-clicker aimed at the autoplay button, using a short click interval so the button keeps being reactivated during the run.
That workaround is also the riskiest part of the setup. External macros, scripts, executors, and auto-farm tools are treated inconsistently across player guides, and policies can change, so the cleaner approach is to rely on Auto Next, Auto Start, Auto Retry, saved placement zones, and in-game autoplay whenever possible.
If you still use an auto-clicker, keep the setup simple: click only the autoplay button, avoid scripts or executor-based farming, and do not build the run around actions the game’s own autoplay cannot already perform.
Post-Floor-50 Tower team variants
| Unit | Use | When to run it |
|---|---|---|
| Cuber | Range-based cube support that buffs nearby units and adds stun. | Use after Floor 50 in place of Forbidden Teacher. |
| Forbidden Teacher | Base support for the Shadow/Megumi setup. | Use before you have Cuber or before post-50 pushing. |
| Elf Mage | Alternative carry that can work with Cuber support. | Try when replacing Shadow/Megumi for a post-50 variant. |
| Toy Maker | Leak control and single-target cleanup when buffed by Cuber. | Keep her in the post-50 team, especially if early enemies slip through. |
After Floor 50, Cuber becomes the main support upgrade over Forbidden Teacher. Cuber works especially well with this autoplay method because the whole setup is already packed into one tight circle, letting his cubes reach the units that need the buff.
Cuber also brings extra stun value, so the carry slot can be more flexible. Shadow/Megumi is still excellent, but Elf Mage is a supported swap idea when you want a different full carry that can benefit from Cuber’s range-based support.
For the smoothest Tower grind, aim for Unbound on the main damage and leak-control pieces first. Crow/Itachi and Cuber do not need Unbound for their listed jobs, but Toy Maker and Shadow/Megumi gain much more from it.
Farming priorities outside Tower
| Farm | Best use |
|---|---|
| Fastest stable auto-clear | Main repeat farm when your goal is steady long-session currency or materials. |
| Daily and Weekly Quests | Stack these alongside farming for Gold, Sprites, and Trait Crystal value. |
| Regular Challenges | Run when the reward matches your target resource and the timer is available. |
| Story and Hard Story first-time rewards | Clear for one-time Gems before grinding lower-value repeats. |
| Expeditions payload defense | Use after the mode unlocks at Level 20, especially for passive-style farming. |
Outside Tower, the best farming rule is simple: run the fastest stage your team can auto-clear consistently, not the hardest stage you can barely finish. Stable clears scale better over long sessions because failures, leaks, and stalled repeats erase the value of a bigger reward screen.
Older farming numbers from before Update 0.5 are useful only as starting points. Check the current in-game rewards before committing a night of farming, especially for Gem routes, Gold routes, Mastery stages, Challenges, and Expedition payload defense.
Related Anime Expeditions guides
Frequently Asked Questions
Can you run this Tower farm without Unbound units?
Yes, but expect a slower and less stable setup. Use two Shadow/Megumi placements instead of one if needed, keep Toy Maker upgraded earlier when leaks happen, and prioritize getting Unbound on the main carry or Toy Maker before pushing higher floors overnight.
Should Toy Maker or Shadow/Megumi get upgrade priority first if I am leaking?
If leaks are the problem, switch to the backup preset where Toy Maker is priority 2 and Shadow/Megumi is priority 3. If the run is already stable, keep Shadow/Megumi ahead and let Toy Maker sit at priority 3.
Is Cuber better than Forbidden Teacher for Tower farming after Floor 50?
Yes. Cuber is the stronger post-Floor-50 support because the tight autoplay circle keeps units inside his range, letting him buff more of the team while also adding stun support.




Leave a Reply