

The best Palworld 1.0 accessories to chase early are Growth Acceleration Bell, the upgraded climate charms, fire-damage stack pieces, Warsect Terra’s Belt, Islander Tool Belt, Pal Tamer’s Glasses, Phantom Ring, and Air Walker Boots Mark II, with most schematics coming from Ancient Remnant towers or caves between roughly level 30 and 50.
Palworld 1.0 makes accessories feel like real build pieces, not small stat trinkets. The fastest route is to start with XP and survival, then add fire-damage stacking, player utility, and movement once you can safely reach Sakurajima, Mount Obsidian, Feybreak, and Astral Mountain.
- Early accessory priority list
- How Palworld schematic towers work
- Crafting materials to stock before the route
- Growth Acceleration Bell route
- Vanguard Charm route
- Wandering Merchant Charm route
- Multiclimate Undershirt fallback route
- Elemental accessory families for fire stacking
- Blazehowl Ring route
- Fire Support Whistle route
- Attack Support Whistle route
- Flame Emperor’s Baton route
- Blazehowl Ring route
- Accessory slots and elemental stacking
- Warsect Terra’s Belt route
- Islander Tool Belt route
- Pal Tamer’s Glasses route
- Phantom Ring route
- Air Walker Boots Mark II and X
- Frequently Asked Questions
Early accessory priority list
| Accessory | Effect | Schematic location |
|---|---|---|
| Growth Acceleration Bell | 50% more Pal XP | Western side of Mount Flopie Summit |
| Vanguard Charm | Heat and cold resistance, Health Up Lv4 | Feybreak Island, -816, -847 |
| Wandering Merchant Charm | Heat and cold resistance, Max Carry Capacity Lv4 | Southern Feybreak, near 784, -1221 with the first sign worth checking in-game |
| Multiclimate Undershirt | Heat and cold resistance | Desert region, 602, 308 |
| Blazehowl Ring | Fire damage enhancement, grass damage reduction | Flame Pulse Island, 752, 430 |
| Fire Support Whistle | Fire elemental damage support | Scorching Mineshaft entrance, -433, -521 |
| Attack Support Whistle | Pal attack support | Mount Obsidian, near the watchtower artifact tower |
| Flame Emperor’s Baton | Fire build baton with Pal Attack Up Lv4 | Western Feybreak, around -315, -1083 |
| Blazehowl Ring | Fire build talisman with damage and defense value | Feybreak cave entrance, -1209, -326 |
| Warsect Terra’s Belt | 25% max HP and 25% defense | Southern Sakurajima, -664, 27 |
| Islander Tool Belt | 25% work speed and +300 carry capacity | Astral Mountain cave entrance, -144, 320 |
| Pal Tamer’s Glasses | Mercy Ring plus Ability Glasses-style utility | Foot of Astral Mountain, 7, 123 |
| Phantom Ring | 20% longer dodge invulnerability window | Astral Mountain, 106, 478 |
| Air Walker Boots Mark II | Extra jumps and an extra dash | Feybreak Island, -1200, -528 |
| Air Walker Boots X | Two jumps and two dashes | Far northern Sunreach/Sunbridge Isles area, level 60 boss; later upgrade |
KEY!Use the table as an acquisition order, not a strict level checklist. Air Walker Boots X are the only item here that should be treated as a later push rather than an early target.

How Palworld schematic towers work
The relevant 1.0 schematics in this route come from Ancient Remnant structures, artifact-style hacking towers, and cave-end towers. Some are simple console grabs after the tower interaction, while others are guarded by a boss or an enemy you need to clear first.
The actual crafts are usually cheap once the schematic is in hand, but the route is gated by specific materials. Watch especially for Mysterious Mushrooms, Ancient Bones, Ancient Lava, Ancient Bark, Polymer, Hexolite, Ancient Civilization Parts, and Civilization Cores.

Crafting materials to stock before the route
| Material | Early source |
|---|---|
| Mysterious Mushrooms | Blue mushrooms in southern Sakurajima, or drops from Shroomer Noct |
| Ancient Bones | Skeletons at Wildlife Sanctuary No. 3 |
| Ancient Lava | Mineable lava deposits at Wildlife Sanctuary No. 2 |
| Ancient Bark | Stumps at Wildlife Sanctuary No. 1 |
| Polymer | Recipe unlock at level 33 |
| Hexolite | Needed for Air Walker Boots Mark II |
| Civilization Cores | Needed for the Feybreak baton and talisman crafts |
| Ancient Civilization Parts | Used by the Bell, Ring, and Whistle crafts |
Stocking these before you start hopping between islands saves a lot of return trips. Polymer is the main hard level gate in the early half of the route, while the ancient materials mostly come down to visiting the right sanctuary.
Growth Acceleration Bell route
Reach Mount Flopie Summit
Go to the western side of Mount Flopie Summit and look for the artifact-style tower.
Hack the tower
Interact with the tower console and take the Growth Acceleration Bell schematic.
Farm Mysterious Mushrooms
Collect blue mushrooms in southern Sakurajima, or hunt Shroomer Noct for a chance at the same material.
Craft the Bell
Use ingots, Paldium, Mysterious Mushrooms, and Ancient Civilization Parts to craft it for a 50% Pal XP increase.
Equip Growth Acceleration Bell before farming the rest of the route; the 50% Pal XP bonus turns the required fights and travel into faster party leveling instead of dead time.
Vanguard Charm route
Go to Feybreak Island
Head to -816, -847 and find the Ancient Remnant tower.
Take the schematic
Hack the tower and claim the Vanguard Charm schematic.
Meet the Polymer gate
Unlock Polymer at level 33 before trying to finish the craft.
Mine Ancient Bones
Visit Wildlife Sanctuary No. 3 and mine the skeletons for Ancient Bones.
Craft the charm
Equip it for both climate resistances plus Health Up Lv4, which is about 20% extra HP.
Wandering Merchant Charm route
Go farther south on Feybreak
The route points to southern Feybreak near 784, -1221, but check the first coordinate sign against your map before setting the final pin.
Find the tower
Use the southern Feybreak tower as the anchor and grab the Wandering Merchant Charm schematic.
Use the same craft plan
Its craft cost matches the Vanguard Charm route, including the Polymer and Ancient Bones gates.
Equip for carrying
The charm gives heat and cold resistance plus Max Carry Capacity Lv4, roughly +300 carry capacity.
Multiclimate Undershirt fallback route
Go to the desert tower
Head to the desert region at 602, 308.
Collect the schematic
Interact with the tower there to get the Multiclimate Undershirt schematic.
Check the level gate
It does not need Ancient Bones, but it still uses Polymer, so it is not truly pre-level-33.
Elemental accessory families for fire stacking
| Accessory type | Main bonuses |
|---|---|
| Baton | Elemental damage enhancement Lv4 at about 20%, plus Pal Attack Up Lv4 at about 16% |
| Ring | Elemental damage enhancement Lv4 at about 20%, plus elemental damage reduction Lv4 at about 35% |
| Talisman | Elemental damage enhancement Lv4 at about 20%, plus Pal Defense Up Lv4 at about 20% |
| Attack Support Whistle | About 12% Pal attack boost during battle |
| Fire Support Whistle | About 18% fire elemental damage during battle |
Elemental accessories are build pieces. The real value comes from combining families: a ring, baton, talisman, and whistle can all push the same element or support the same Pal in different ways.
Fire is the easiest offensive example in this route because its early pieces are spread across Flame Pulse Island, Mount Obsidian, and Feybreak. Once you understand the fire setup, the same logic applies to other element families.
Blazehowl Ring route
Go to Flame Pulse Island
Head to 752, 430.
Claim the ring schematic
Use the tower there to get the Blazehowl Ring schematic.
Craft the ring
The craft uses refined ingots, Paldium, Flame Organs, and Ancient Civilization Parts.
Equip it for fire
Blazehowl Ring gives fire damage enhancement and grass damage reduction.
Fire Support Whistle route
Enter Scorching Mineshaft
Go to the cave entrance at -433, -521 on Mount Obsidian.
Break the rocks inside
Move through the cave and destroy the rocks blocking the route.
Take the schematic
Grab the Fire Support Whistle schematic from inside.
Craft the whistle
Use ingots, horns, sulfur, and Ancient Civilization Parts for a battle effect worth about 18% fire elemental damage.
Attack Support Whistle route
Search Mount Obsidian
Look near the watchtower area for a nearby artifact tower.
Grab the schematic
Take the Attack Support Whistle schematic from that tower.
Craft and pair it
It adds about 12% Pal attack and stacks with Fire Support Whistle.
Flame Emperor’s Baton route
Go to western Feybreak
Head to around -315, -1083.
Clear the enemy
Defeat the enemy at the tower and collect the baton schematic.
Craft the fire baton
The craft uses refined ingots and Civilization Cores.
Stack the attack boosts
Attack Support Whistle plus the baton reaches about 28% Pal attack from the 12% whistle boost and the 16% baton boost.
The western Feybreak fire baton is the Flame Emperor’s Baton route for this setup; if your item label changes after a hotfix, follow the -315, -1083 schematic location.
Blazehowl Ring route
Find the Feybreak cave
Go to the cave entrance at -1209, -326.
Reach the tower inside
Push through the cave until you can interact with the tower.
Take the talisman schematic
Claim the Blazehowl Ring schematic.
Craft the replacement piece
Its cost matches the baton style, and it helps move the setup toward heavier elemental damage and defensive bonuses.
Accessory slots and elemental stacking
| Stacking setup | Result |
|---|---|
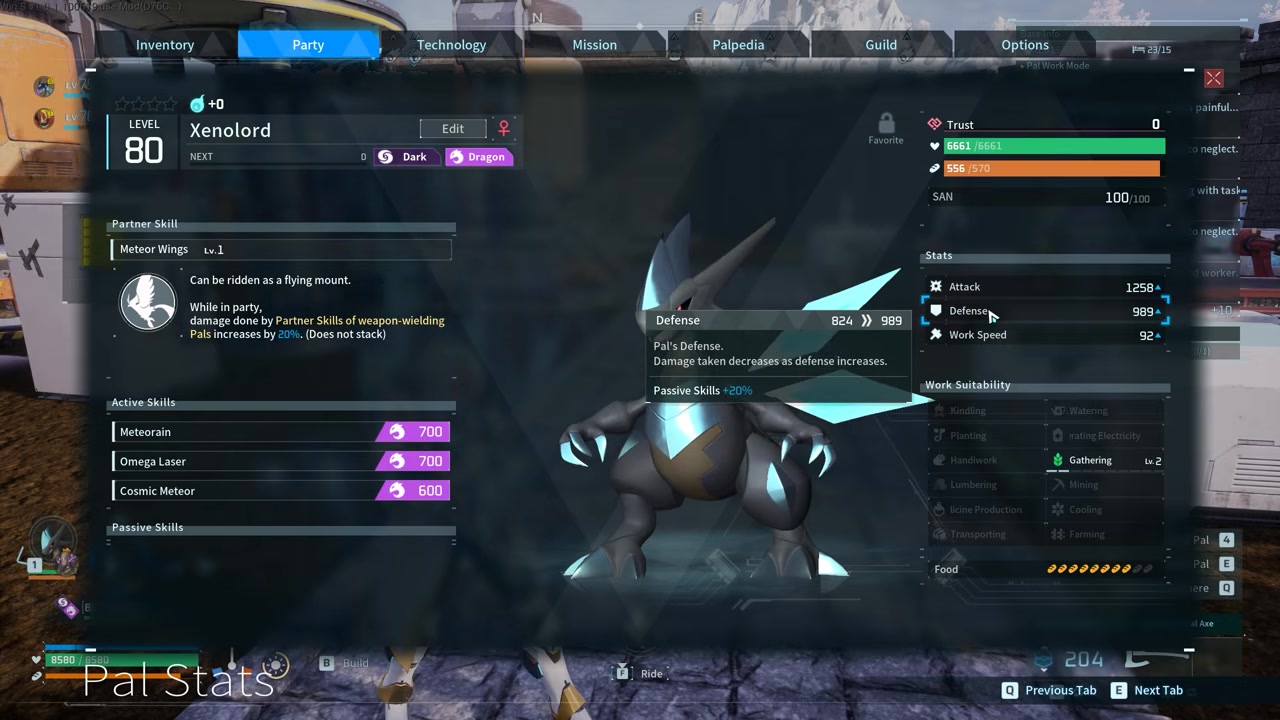
| Two batons on a dark/dragon Pal such as Xenolord | Two Pal Attack Up Lv4 bonuses can total about 32% |
| Two talismans matching both elements | Two Pal Defense Up Lv4 bonuses can total about 40%, with elemental damage also stacking by element |
| Two rings for different incoming elements | Two separate elemental damage reductions can apply, each about 35% for its element |
| Ring, baton, talisman, and whistle for one fire setup | Elemental damage, Pal attack, Pal defense, and resistance bonuses can work together instead of replacing one another |
Extra accessory slots come from church merchants, including the desert church merchant, through Mysterious Accessory Early. Current player numbers are split between 50 and 300 Dog Coins for the two boxes and 100 and 1000 Dog Coins, so bring extra Dog Coins before shopping.
Once expanded, you can reach four accessory slots. That is where elemental setups become much stronger, because dual-element Pals can benefit from two accessories of the same family when each one matches one of their elements.
Warsect Terra’s Belt route
Go to southern Sakurajima
Head to -664, 27.
Defeat the guard
Clear the level 40 enemy at the schematic location.
Mine Ancient Lava
Visit Wildlife Sanctuary No. 2 and mine the lava deposits for Ancient Lava.
Craft the belt
Equip Warsect Terra’s Belt for 25% max HP and 25% defense.
Islander Tool Belt route
Enter the Astral Mountain cave
Go to the cave entrance at -144, 320.
Clear the cave boss
Defeat the level 35 boss at the end.
Use the tower
Interact with the cave-end tower to get the Islander Tool Belt schematic.
Collect Ancient Bark
Mine the stumps at Wildlife Sanctuary No. 1 for Ancient Bark.
Craft the belt
Equip it for 25% work speed and +300 carry capacity.
Pal Tamer’s Glasses route
Go to the foot of Astral Mountain
Head to 7, 123.
Grab the schematic
Use the tower there to claim the Pal Tamer’s Glasses schematic.
Bring Ancient Bark
Use Ancient Bark from Wildlife Sanctuary No. 1 for the craft.
Equip the utility slot
The glasses combine Mercy Ring and Ability Glasses-style utility in one accessory.
Phantom Ring route
Go north on Astral Mountain
Head to 106, 478.
Drop down the cliff
Move down the cliffside until you find the tower sitting below.
Take the schematic
Claim the Phantom Ring schematic and craft it.
Use it for active defense
The ring increases your dodge invulnerability window by 20%.
Air Walker Boots Mark II and X
| Boots | Where to get them | Mobility gain |
|---|---|---|
| Air Walker Boots Mark II | Feybreak Island, -1200, -528 | Extra jumps and an extra dash |
| Air Walker Boots X | Far northern Sunreach/Sunbridge Isles area, guarded by a level 60 boss | Two jumps and two dashes |
Air Walker Boots Mark II are the practical early-to-mid target. The schematic is on Feybreak Island at -1200, -528, the craft uses Hexolite, and the mobility gain is strong enough to change climbing, cave movement, and tower routing.
Air Walker Boots X are stronger, but the route belongs later. There is no dependable coordinate pair to route by yet; use the far northern Sunreach/Sunbridge Isles area and the level 60 tower boss as your marker. The low-gravity passive synergy is a bonus once you are already going for the X version.
Frequently Asked Questions
Which Palworld accessory should you get first?
Get Growth Acceleration Bell first on a fresh or midgame save, because it improves Pal leveling while you work through the rest of the schematic route.
Are Vanguard Charm and Wandering Merchant Charm better than Multiclimate Undershirt?
Yes. Vanguard Charm and Wandering Merchant Charm give the same heat and cold coverage while adding either HP or carry capacity, so Multiclimate Undershirt is mainly the fallback when Feybreak is not reachable.
In Palworld accessories stack?
Yes. Matching bonuses can stack across different accessory families, and dual-element Pals can benefit from two same-family items when each one matches one of their elements.
How do you unlock more accessory slots?
Buy Mysterious Accessory Early from church merchants with Dog Coins. Once both upgrades are bought, you can equip up to four accessories.
Where do you get ancient bones, ancient lava, and ancient bark?
Ancient Bones come from skeletons at Wildlife Sanctuary No. 3, Ancient Lava comes from deposits at Wildlife Sanctuary No. 2, and Ancient Bark comes from stumps at Wildlife Sanctuary No. 1.
More questions⤵
Which Air Walker Boots are worth getting early?
Air Walker Boots Mark II are the early pick. Air Walker Boots X are better on paper, but the level 60 guard makes them a later mobility upgrade.
Video help






Leave a Reply