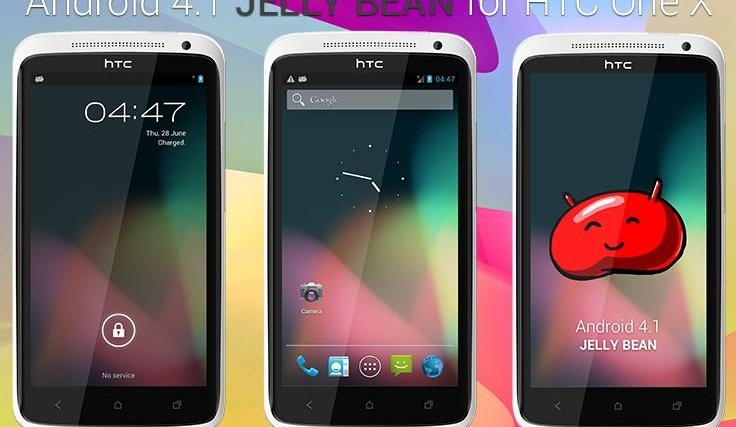
The HTC One X – HTC’s flagship quad-core device – has received an AOSP custom ROM based on Jelly Bean Android 4.1, the latest version of Android that brings many features such as improved and smoother performance, better Google Search functionality thanks to the voice-recognition Google Now app, better stock keyboard, and more. The ROM gives you a pure stock Android experience without HTC Sense on top, as found on Nexus devices.
NOTE: The ROM is currently in the alpha stage, with a few things that do not work properly, so consider this more of a preview of Jelly Bean than a stable ROM that you can use every day. As sources for Jelly Bean are out, more and more stuff will get fixed in the coming days, but until then, consider this a strictly experimental ROM.
Here’s the list of things that work/do not work currently (the most updated list can be seen on the official development page linked in step 5):
Works:
- Core System
- HW-Acceleration
- Internal Memory usage
- Vibration motor
- Activating Bluetooth/Bluetooth search
- Accelerometer
- Multi-touch
- WiFi
- GPS
- NFC
- Light sensor
- Button backlights
- Notification light
- USB mounting
Doesn’t work:
- Radio *
- Sound *
- Google Now *
- Camera
- Everything related to the issues above
Let’s take a look at how Jelly Bean Android 4.1 can be installed on your HTC One X.
Compatibility
This guide is applicable only for HTC One X. DO NOT try this on any other device.
Warning!
The methods and procedures discussed here are considered risky and you should not attempt anything if you don’t know completely what it is. If any damage occurs to your device, we won’t be held liable.
How to Install Android 4.1 Jelly Bean SDK Port on HTC One X
- This procedure will wipe all your apps, data and settings (but it will NOT touch your SD cards, so don’t worry about those). Backup your Apps and important data — bookmarks, contacts, SMS, APNs (internet settings), etc. This Android backup guide would help you.
Important! Don’t forget to at least make a backup of your APN settings, which you can restore later if your data connection does not work after installing the ROM. Use the backup guide to find out how. - Unlock the bootloader on your HTC One X by following the guide → here. This will delete your SD card files as well, so save them on your computer.
- Install ClockWorkMod (CWM) recovery by following the guide → here.
- Download and install HTC Sync software on your computer in order to install the required drivers for the phone.
Download HTC Sync
Skip this step if you already installed the drivers while following step 2, or if you have HTC Sync installed already. - Download the ROM from the official download page.
- Download the Google Apps package. This will install apps like Market, Gmail, etc. which are not present in the ROM.
Download Gapps | Filename: gapps-jb.1.zip - Copy the zip files downloaded in step 5 and 6 (don’t extract them) to the SD card.
- Also download the Flash_Boot.zip file from → here. This is required to flash the necessary kernel on the phone.
- Extract the Flash_Boot.zip file to a convenient location on the computer.
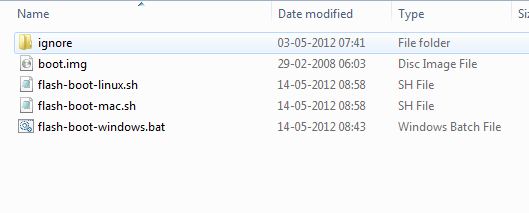
- Open the ROM’s zip file (downloaded in step 5) on the computer and extract the boot.img file from inside it. Then, copy the boot.img file to the folder where you extracted the Flash_Boot.zip file in step 9. You will then have the following files in the folder as shown in screenshot below:

- Switch off the phone. Boot into the bootloader mode first by holding the Volume Down button while powering on the phone. Then, select FASTBOOT from there using the volume buttons to navigate and power button to select to enter fastboot mode. Then connect your phone to the computer.
- Go to the folder where you extracted the .zip file in step 8. Double-click the flash-boot-windows.bat file to flash the required kernel.
- After the kernel is flashed, the window that showed up will automatically close. It might also say OKAY/finished and stay open, which is normal.
- Now, press the power button on the phone to select BOOTLOADER, then navigate to the RECOVERY option and select it using the power button to boot into ClockworkMod recovery.
- Perform a wipe:
- Select wipe data/factory reset, then select Yes on the next screen to confirm data wipe. This will only delete your installed apps and settings, but will leave all other files and data on the SD card intact, so don’t worry.
- Select wipe cache then select Yes on next screen to confirm.
- Select advanced, and then select wipe dalvik cache » Yes – wipe dalvik. Then go back to the main recovery menu.
- Then, select install zip from sdcard, then select choose zip from sdcard. Scroll to the ROM file on the SD card and select it. Confirm installation by selecting Yes on the next screen.
- After ROM installation completes, select choose zip from sdcard again, then select the gapps-jb.1.zip file to install the Google apps package.
- After installation is complete, select go back then select reboot system now to reboot the phone and boot up into Android 4.1 aka Jelly Bean.
Android 4.1 Jelly Bean is up and running on your HTC One X. Be sure to check back here as we will regularly update the article with the most recent changes. Let us know how it works!


