
The four Relaxaurus Effigies in Palworld 1.0 are in the volcanic biome near a waterfall and small bridge, the northern snow biome by a hidden stone formation, the desert biome between two rock walls, and the blossom biome in front of a shrine-like building — collect all four, then spend them at a level-9 Statue of Power for a 50% EXP Gain boost.
Relaxaurus Effigies are collectibles scattered across the Palpagos Islands, and unlike most exploration pickups in the 1.0 update they pay out permanently: four of them convert into a flat 50% bump to everything you earn. Each one sits in a different biome, tucked next to a landmark you’d walk straight past if you weren’t looking for it. Below is where all four are, in the order that makes for the cleanest run.
- All four Relaxaurus Effigies at a glance
- Relaxaurus Effigy 1 under the volcanic waterfall
- Relaxaurus Effigy 2 in the northern snow biome
- Relaxaurus Effigy 3 between the desert rocks
- Relaxaurus Effigy 4 by the Sakurajima shrine
- Spend all four Effigies at the Statue of Power
- What to do if one Effigy still won’t show up
- Frequently Asked Questions
All four Relaxaurus Effigies at a glance
| Effigy | Where to find it |
|---|---|
| Effigy 1 | Volcanic biome — under the waterfall, by a small bridge and a lone tree |
| Effigy 2 | Snow biome — north, in a hidden elevated area beside a distinct stone formation |
| Effigy 3 | Desert biome — through the gap between two large rocks |
| Effigy 4 | Blossom biome — in front of a shrine on Sakurajima Island |
The table is the shortcut if you already know which one you’re missing. Each Effigy gets its own route below, because the landmarks matter far more than a map pin here — every one of them is a small object placed next to a much bigger piece of scenery, and the scenery is what you actually navigate by.
Relaxaurus Effigy 1 under the volcanic waterfall
Head into the volcanic biome
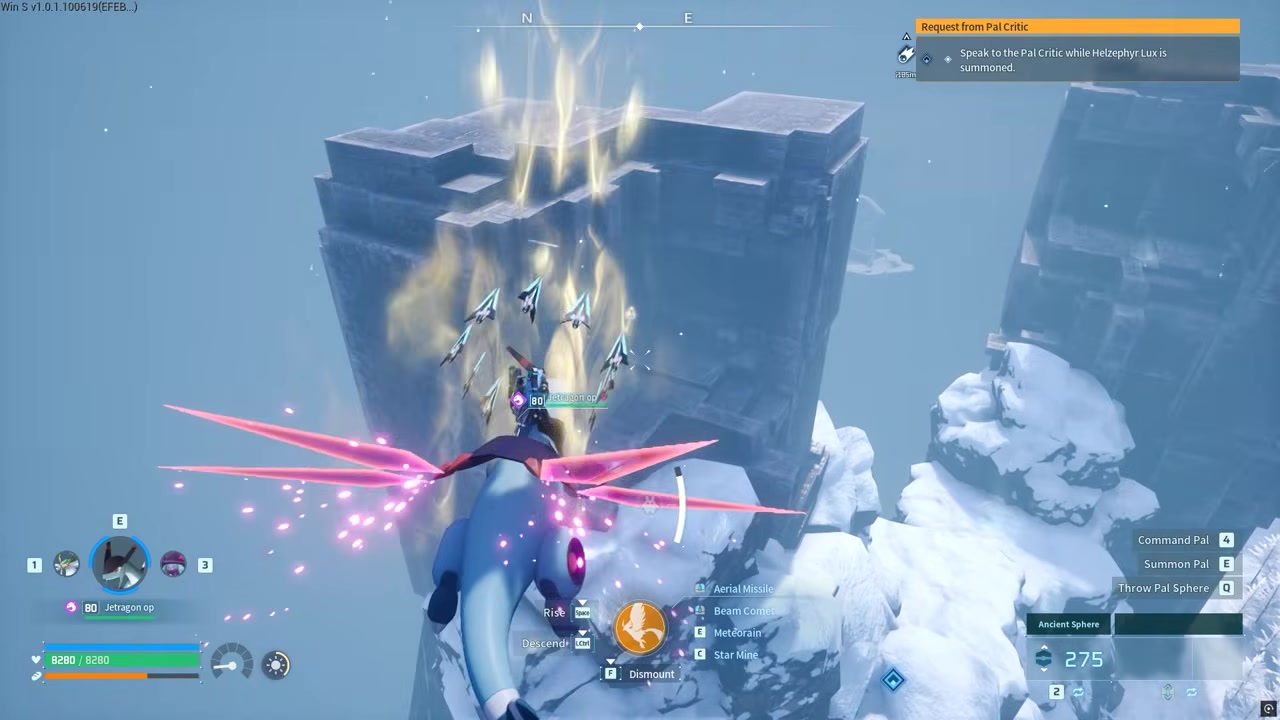
Make for the southern stretch of Mount Obsidian, where the terrain opens into the area beneath the falls.
Find the waterfall and the small bridge
The Effigy’s pocket of land sits directly under the waterfall, with a small bridge running across it.
Look beside the lone tree
Walk into the clearing and check next to the tree — the Effigy is sitting right there, low to the ground.
Players hunting this one from the other direction often use the Mount Obsidian – Anubis Statue teleport point on the southern coast and head north toward the ring-shaped lake, which drops you in the same pocket of the volcano from above. Either approach works; the waterfall and bridge are the reliable visual cue once you’re in the area.
Relaxaurus Effigy 2 in the northern snow biome
Travel to the northern snow biome
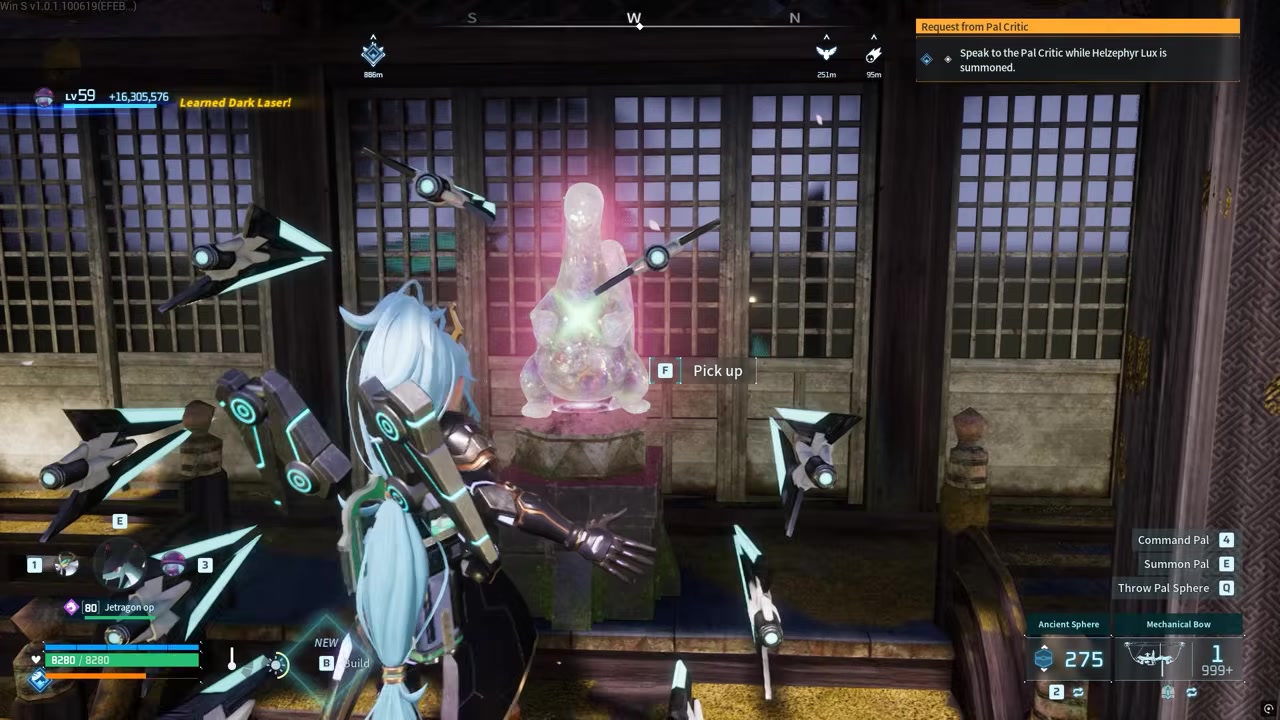
Push to the northern edge of the snow region — the southern half of the biome doesn’t hold this one.
The Effigy is above the snowline in a tucked-away pocket, so look for ground that rises away from the main path.
Spot the distinct stone formation
A single odd-looking stone marks the spot; the Effigy is at its base, in that same small area.
This is the easiest one to walk past. The stone is unusual enough to stand out against flat snow, but only if you’re at the right elevation — from below it reads as ordinary terrain, which is why players sweeping the biome at ground level keep missing it.
Relaxaurus Effigy 3 between the desert rocks
Head into the desert biome
The Effigy sits in an open stretch of desert flanked by large rock walls.
Find the entrance between two rocks
Two big rocks form what looks like a natural doorway — that gap is the way in.
Move through the gap
Push between the rocks and the Effigy is waiting on the other side, in the small pocket the rocks enclose.
The gap genuinely reads as an entrance rather than a crack in the scenery, so once you’re close enough it’s hard to mistake. The trouble is spotting it from a distance, since the two rocks blend into the surrounding formations until you’re almost level with them.
Relaxaurus Effigy 4 by the Sakurajima shrine
Fly to Sakurajima Island
Sakurajima sits in the northwestern region of the Palpagos Islands, in the blossom biome.
Use the Moonflower Tower Entrance teleport point
This fast-travel point sits near the Moonflower Tower, where you fight Saya and Selyne; head west from it to pick up the path.
Follow the path to the estate
The path leads to a massive Japanese-themed estate, which is the building you’re looking for.
Check in front of the shrine
The Effigy sits out front of the shrine, in plain view once you’re facing the building.
There’s an injured Pal in the same area, so don’t let it pull your attention off the shrine itself. The building is large and unmistakable — if you’re standing in front of it and can’t see the Effigy, you’re probably at the wrong structure on the estate grounds.
Unlock the Statue of Power before you start collecting — it becomes available at level 9, so having it ready means the fourth Effigy converts into your EXP boost the moment you finish the run.
Spend all four Effigies at the Statue of Power
Collect the fourth Effigy
The achievement unlocks the instant the set is complete.
Go to a Statue of Power
The Statue of Power unlocks at level 9, so make sure you’ve reached it before making the trip.
Spend all four Effigies
Interact with the statue and enhance EXP Gain — the four Relaxaurus Effigies raise it by 50%.
What to do if one Effigy still won’t show up
When one is refusing to appear, the fix is almost always elevation rather than position. The snow and volcano Effigies both sit on raised ground that looks like nothing special from below, so climb and re-approach instead of circling the same patch at ground level. Coordinate lists floating around for these are patchy, and chasing a number to the metre is a worse use of your time than finding the landmark and sweeping the ground around it.
Work off the structures, not the map. Each Effigy is anchored to something large and distinctive — the waterfall and bridge, the odd stone, the rock doorway, the estate shrine — and those are visible from far enough away to steer by. Once you can see the landmark, the Effigy is within a short walk of it.
One more thing worth knowing: version 1.0.1 is a hotfix that addresses save-data loss, a lingering Burning status after touching a Campfire, and Fast Travel freezes on Xbox. It adds no content, so there’s no fifth Effigy or alternate route that arrived with it — the four above are the set.
Frequently Asked Questions
How many Relaxaurus Effigies do you need for the EXP boost?
All four. The statue takes the complete set in a single exchange, so there’s no partial payout for turning in one, two, or three — hold onto them until you have every one.
Where do you use Relaxaurus Effigies?
At a Statue of Power, the same structure you use for other Pal Effigy enhancements. You interact with it and pick the EXP Gain enhancement rather than a Pal-focused one.
What level unlocks the Statue of Power?
Level 9. It’s early enough that most players will have it well before they finish sweeping four biomes, but it’s worth checking, since arriving with all four Effigies and no statue means a second trip.
Does collecting all four Relaxaurus Effigies unlock an achievement?
Yes, and it fires the moment you pick up the fourth one — before you’ve spent them. The achievement and the EXP boost are separate rewards, so finishing the collection doesn’t cost you the pickup.
Are exact coordinates required to find the four Effigies?
No. Partial coordinate pairs circulate for a couple of them, but the biome-plus-landmark routes above get you there without any of them, and they hold up whichever direction you approach from.
Video help






Leave a Reply