Last month, Apple finally unveiled its much-anticipated pocket-sized tracker: AirTag. It has been selling like hotcakes since its launch, and we believe the FindMy device would continue to dominate the segment thanks to the sheer number of iOS devices in the world.
Unfortunately, not every AirTag user has been able to make use of Apple’s technological marvel right out of the box. To remedy that, we have decided to come up with an all-in-one guide for most of your AirTag problems. So, without further ado, let’s get to it.
Related: What Is AirTag’s Range? Explained!
AirTag Precision Finding not working (Fix)
In its keynote, Apple talked in length about Precision Finding and how you would be able to use your Apple device to track your lost items — with AirTags attached to them — with immaculate accuracy. Sadly, this doesn’t apply to all Apple iPhones in circulation. Only the newly released iPhone 12 devices and the previous-gen iPhone 11 are supported. This discrepancy is down to the U1 chip and ultra-wideband technology, which is available only in iPhone 11 and above. Without U1 to communicate with your AirTags, your phones would not be able to tell their precise locations.
So, if you don’t have an iPhone 11 or 12, forget about using Precision Finding to track your lost items.
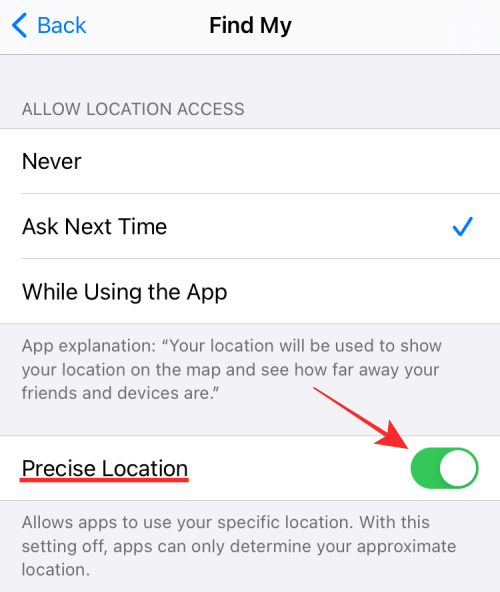
If you do have one of the supported devices, you have to go to your device Settings to see if ‘Precise Location’ is turned on. First, go to Settings and tap on ‘Privacy.’ Now, go to ‘Location services’ and open up ‘Find My.’ Select ‘While Using the App’ and make sure ‘Precise Location’ is turned on.

Additionally, you have to keep in mind that not all regions and countries allow the use of the ultra-wideband network. Talk to your Apple Customer Care executive to learn more about AirTag restrictions.
Related: 22 Best Airtag Holders
Make sure Find My is enabled
Find My is the backbone of this entire operation. So, it’s absolutely crucial to make sure that it is enabled. Find My is turned on by default for every Apple user — with an account — but it doesn’t hurt to double-check. To check if Find My is enabled, first, go to Settings and tap on your Apple name to head over to your profile page. Now, tap on ‘Find My.’ Finally, make sure ‘Find My iPhone’ is turned on.

Related: Best Airtag Dog Collar Attachments [May 2021]
Turn on Two-Factor Authentication
Apple has focused heavily on the privacy and security aspects of AirTag, which is why it has made it mandatory for all users to turn on the Two-Factor Authentication. To turn on Two-Factor Authentication or 2FA, first, go to Settings and tap on your Apple ID at the top. Now, go to ‘Password & Security.’ Tap on ‘Two-factor authentication’ to start the procedure. You will need to enter your phone number to complete the authentication process.

Related: How Far Can Airtag Reach?
Turn Location and Bluetooth off and on
Since AirTag is dependent on both Bluetooth and Location Services, it’s important to make sure they are working properly. If you suspect inconsistencies, all you have to do is turn them off and back on again. Bluetooth can be toggled on and off from the quick access panel or by going to the Settings.
Location services can only be turned off from Settings. Go to ‘Privacy’ and toggle ‘Location Services’ off and on. Alternatively, you could keep both Bluetooth and Location off and restart your iPhone.

And while you’re at it, consider restarting your WiFi and Cellular as well.
Related: What Is AirTag’s Range? Explained!
Reset networking settings
In the previous section, we looked at restarting your network components manually. If that doesn’t work for you, and you find yourself looking for a more potent reset button, consider your network settings in their entirety. To reset, first, go to Settings. Now, open the ‘General’ tab. Now, scroll down to the bottom of the page and tap on ‘Reset.’ Tap on ‘Reset Network Settings’ and confirm by tapping ‘Reset Network Settings’ again.

Use your personal Apple account
Apple has stated that managed Apple accounts — Education, for example — will not support AirTags. So, of your institution has set you up with a Managed Apple ID, you won’t be able to use Apple’s latest tracker. Thankfully, since Managed accounts have no impact on your personal Apple ID, you can very easily jump over to your personal account and set up AirTags.
the dialogue pops up.
Reset your AirTag
Although network issues are the usual suspects, you must also rule out device-related errors. Resetting your device — AirTag, in this case — is the best way to do that, and that’s exactly what we’re checking out here.
To reset your AirTag, first, go to Settings and tap on your profile at the top. Now, go to ‘Find My.’ Then, go to ‘Items’ and tap on the AirTag you want to reset. Swipe to reveal options and tap on ‘Remove Item’ at the bottom of the screen. Confirm by tapping ‘Remove’ again.

After the AirTag is removed, you will have to reconnect it. Just bring the AirTag close to your iPhone/iPad and tap on the ‘Connect’ button.
Software update
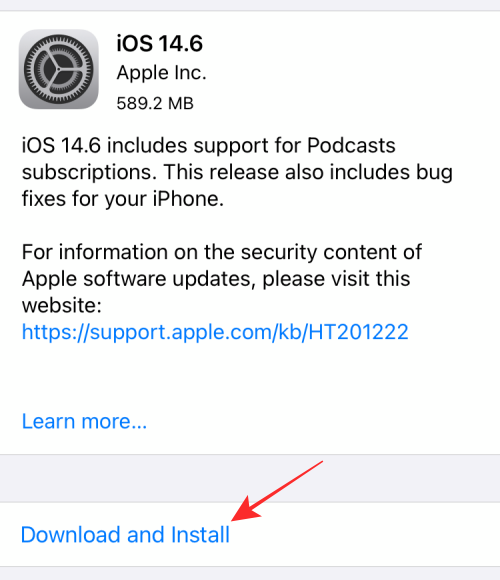
The option to add and use AirTags went live in iOS 14.5 — just over a month ago. Apple is famous for delivering complete software solutions, but bugs are always a possibility, especially after a new update. So, if the AirTag system is broken for some reason, Apple is likely to fix it with a software update. Go to Settings > ‘General’ > ‘Software Update’ to see if an update is available for download.

Clean your AirTag
Yes, AirTag’s are ready to withstand abuse. However, that shouldn’t mean you can go around dipping it into muddy waters. If your AirTag seems dirty to you, make sure to open it up — rotate the stainless steel bit counter-clockwise — and clean it thoroughly. If you are using an AirTag holder, make sure to clean it up as well.
Also, if you see any atrocities on the surface of the piece, make sure to clean it with a microfiber cloth. Having a thick layer of dirt/similar stuff can dampen your AirTag’s Bluetooth reception.
As we all know, Apple is rather conservative when it comes to restoration and fixes. So, it was a pleasant surprise when it decided to make the AirTag’s battery easy to replace. Simply press down the stainless steel section of the AirTag and rotate it counter-clockwise until the cap comes off. Inside it, you’ll find a CR2032 battery. You can get a replacement battery from Amazon pretty easily.
Duracell’s 4-pack is currently selling for $6.69 on Amazon.
Talk to Apple
Tried all the above and still no luck? You should look for support from Apple and see if you can get your device replaced. Click on this link to connect to Apple Support.


