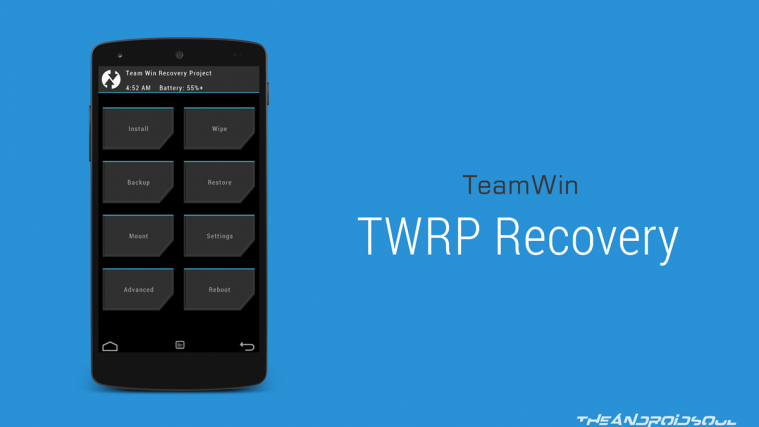
[rominfo]
TWRP RECOVERY INFO
| Name | TWRP Recovery |
| Version | 2.8.0.0 |
| Stability | Good |
| Credits | TeamWin |
[/rominfo]
WARNING!
Warranty may be void of your device if you follow the procedures given on this page.
You only are responsible for your device. We won’t be liable if any damage occurs to your device and/or its components.
GUIDE: TWRP RECOVERY FOR NEXUS 4
Before you begin with guide instructions below, make sure your android device is adequately charged — at least 50% battery of the device.
STEP 0: CHECK DEVICE MODEL NO.
To make sure your device is eligible with this, you must first confirm its model no. in ‘About device’ option under Settings. Another way to confirm model no. is by looking for it on the packaging box of your device. It must be E960!
Do not use the procedures discussed here on any other variant of Nexus 4 or any other device of LG or any other company. You have been warned!
STEP 1: BACKUP YOUR DEVICE
Back up important data and stuff before you start playing around here as there are chances you might lose your apps and app-data (app settings, game progress, etc.), and in rare case, files on the internal memory, too.
For help on Backup and Restore, check out our exclusive page on that linked right below.
► ANDROID BACK UP AND RESTORE GUIDE: APPS AND TIPS
STEP 2: INSTALL LATEST DRIVER
You must have proper and working driver installed on your windows computer to be able to successfully flash TWRP Recovery on your Nexus 4. If you are not sure, follow the link below for a guide to install driver for your Nexus 4 on your computer.
► NEXUS 5 DRIVERS FOR WINDOWS (Nexus 5 drivers are compatible with Nexus 4)
STEP 3: UNLOCK BOOTLOADER
Skip this step if your device is already bootloader unlocked.
Use must first unlock the bootloader on your Nexus 4 before proceeding with the guide below. Without unlocking the bootloader you won’t be able to use fastboot commands to flash the recovery on your device.
Check out our step-by-step guide (linked below) on unlocking the bootloader on Nexus 4.
► How to Unlock Nexus 4 Bootloader
STEP 4: INSTALLATION INSTRUCTIONS
DOWNLOADS
Download the TWRP Recovery Image and One click recovery installer file given below. Transfer both the files to a separate folder on your computer.
TWRP RECOVERY IMAGE
DOWNLOAD LINK | File name: openrecovery-twrp-2.8.0.0-mako.img (8.8 MB)
Download latest version available of TWRP from here.
ONE CLICK RECOVERY INSTALLER
DOWNLOAD LINK | File name: one-click-recovery-installer.zip (920 KB)
STEP-BY-STEP GUIDE
Important Note: Backup important files stored on internal SD card of your device, so that in case a situation arises requiring you to do a factory reset after flashing TWRP Recovery, which might delete internal sd card too, your files will remain safe on PC.
- Prepare your phone:
- Enable developer options: Go to your phone’s Settings » select About phone » Scroll to the bottom and tap on “Build number” seven times to enable developer options.
- Enable USB Debugging: Open phone’s Settings » select Developer options » Tick the “USB debugging” check-box (under Debugging section).
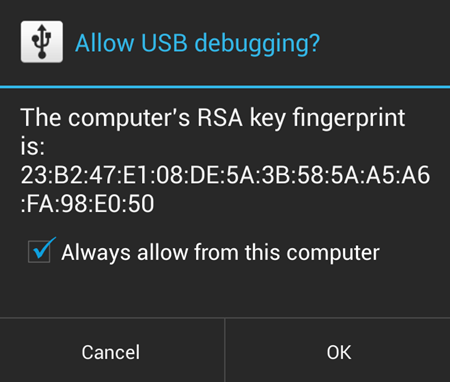
- Connect your phone to PC with a USB cable and if a pop-up screen shows up on phone asking you to Allow USB debugging for the computer, make sure you tick the checkbox and tap OK.
- Extract the installer file one-click-recovery-installer.zip (using 7-zip free software, preferably). You’ll get the following files:
- one-click-recovery-installer.bat
- adb.exe
- adb-linux
- adb-mac
- AdbWinApi.dll
- AdbWinUsbApi.dll
- fastboot.exe
- fastboot-linux
- fastboot-mac
└ The only file that matters for you is one-click-recovery-installer.bat, you can ignore others (but DON’T delete any).
- [!Important] Rename the the TWRP recovery image file you downloaded above from openrecovery-twrp-2.8.0.0-mako.img → TO → recovery.img
- Paste the recovery.img file to the folder where you extracted the files in the Step 3.
└ Both the one-click-recovery-installer.bat file and recovery.img file should be in the same folder along with all the other files we got in Step 3. - Double-click/Run the ‘one-click-recovery-installer.bat’ file and follow the simple on-screen instructions like ‘Press any key to continue..’ to install TWRP recovery on your Nexus 4.
└ Note: In case the script gets stuck on < waiting for device > (see image below) for more than a minute or so, then it means you don’t have proper drivers installed on your computer for your Nexus 4. Follow the drivers installation guide provided above for troubleshooting driver and other connectivity issues.

- Once the TWRP recovery is flashed successfully, your device will automatically reboot into system.
That’s it!
You have successfully flashed TWRP Recovery on your Nexus 4. It was easy to install, right? Let us know how you plan to use it in comments below.
BOOTING INTO NEXUS 4 RECOVERY MODE
- Power off your device and wait 4-5 seconds after lights go off.
- Press and hold Volume Down + Power key together and release the Power key once the Screen turns on. You will boot into Bootloader mode.
- Press Volume Up twice to highlight Recovery option, and then press Power key to reboot into recovery mode
Your suggestions and queries, if any, are most welcomed!