Barney’s questline ends in one binary choice — turn him in to Officer Duckman and he escapes (you then treat Duckman as a patient in Room 7), or stay silent to protect him and he rewards you with a second, faster coffee machine.
Barney is one of the few visitors in Animal Hospital Anomaly whose whole arc comes down to a single decision, and the two outcomes could not be more different. One path hands you a bonus reward; the other opens up a fresh patient to treat. Below is exactly how each ending triggers, what you walk away with, and the one mistake that throws the entire questline away.
The choice and its two payoffs
When Officer Duckman shows up looking for the serial killer, you either give Barney up or keep quiet. Hide him and he hands over a suitcase that contains an extra coffee machine. Turn him in and there is no coffee machine at all — instead, Duckman becomes your next patient and the story rolls on from there.
Who Barney is in Animal Hospital Anomaly
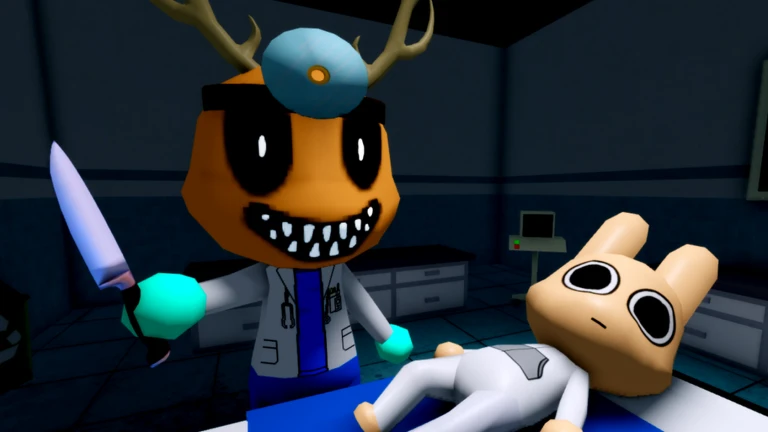
Barney first reads as one of the friendliest faces in the game. He’s a white rabbit who turns up at the check-in booth, speaks politely, and keeps calling you his “dear friend” — nothing like the unsettling visitors you normally screen. Plenty of players assume he’s completely harmless the first time they meet him, which is exactly the point.
His real nature is an anomaly hiding in plain sight, and he’s eventually revealed to be both an anomaly and a serial killer. The tell comes through a photo and later CCTV evidence: when you snap his picture at the booth, the developed shot shows sharp teeth and a far more aggressive expression than the polite rabbit standing in front of you.
His exact look is reported inconsistently, so don’t be thrown if yours doesn’t match a description you’ve read. Some accounts describe a black mustache and brown cap, while others list black slit eyes, a mustache, a brown hat and plaid brown pants — possibly a model change between versions, possibly just mixed reporting. Either way, the behaviour and the questline are the same.
How Barney’s story builds across your shifts
Barney’s arc plays out over several visits rather than in one encounter. His first appearance reportedly comes after Shift 2, though one listing places his debut at Shift 3 — these don’t really conflict if Shift 3 is simply the earliest he can spawn, so treat the timing as “early game, around Shift 2–3” rather than a fixed moment. It’s worth keeping coffee stocked before you reach that point, since his requests lean on it.
On that first visit he asks for two cups of coffee after a long day, then hands you a suitcase and asks you to keep it safe — at this stage it feels like a harmless side interaction. On a later visit he asks for coffee again, but this time also wants you to photograph him with the booth camera, and that’s the shot that exposes his anomaly form.
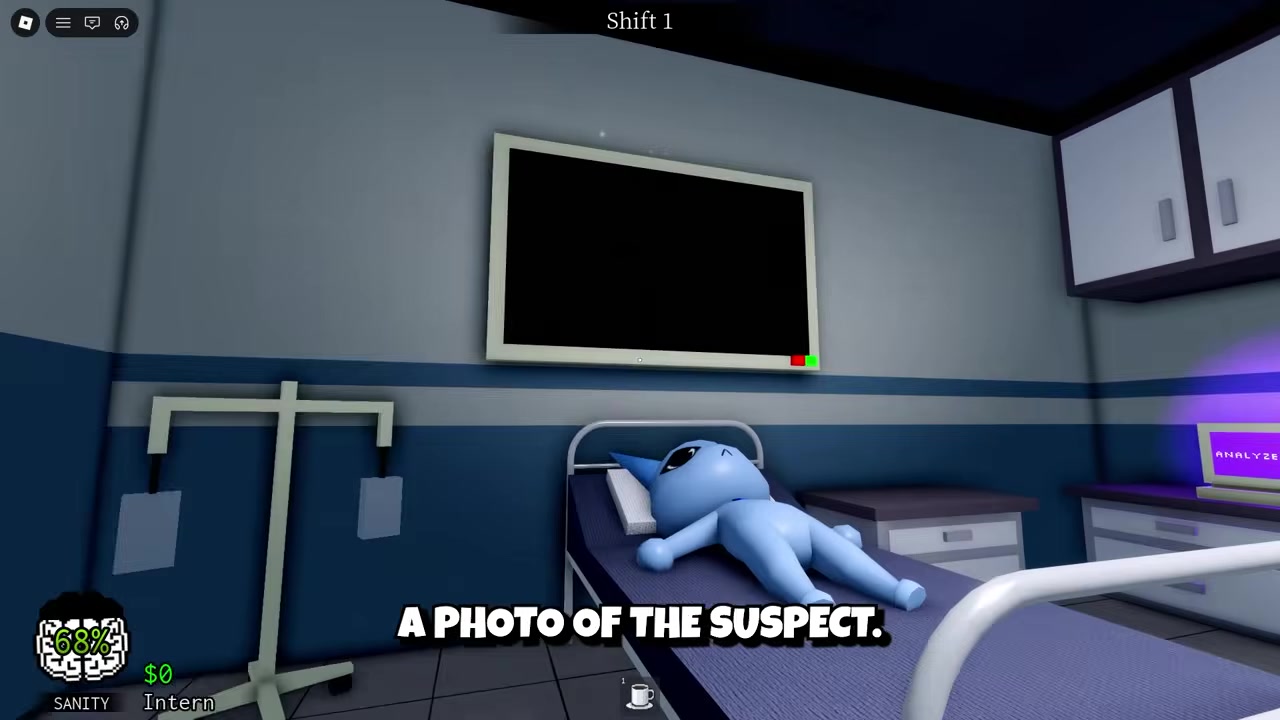
The turn comes during a later shift when he stops asking for coffee and instead asks you to hide him. If you agree, he tucks himself inside the check-in booth beside the coffee machine. A few minutes later Officer Duckman arrives, explains he’s hunting a dangerous serial killer, and shows you a photo of the suspect — and the suspect is Barney. That’s your branching point.
Both endings — triggers, outcomes and rewards
| Ending | How to trigger | What happens | Reward / follow-up |
|---|---|---|---|
| Turn Barney in | Hold E on Officer Duckman | Barney attacks Duckman, wrecks a CCTV camera, and escapes | Duckman becomes a patient for Room 7; no coffee machine |
| Stay silent | Don’t interact with Duckman; wait roughly 30 seconds | Duckman thanks you and leaves; Barney comes back out | Barney gives you the suitcase, which holds a second coffee machine |
Once Duckman is standing at your desk with the photo, the choice is live. Here’s the side-by-side before the full breakdown:
Ending 1 — turn Barney in. After Duckman finishes talking, hold E on him to report Barney. He moves to arrest him, but it goes sideways fast: Barney attacks Duckman with what’s shown as a kitchen knife (one account instead describes him asking for and threatening with a scalpel), takes him down, destroys one of the CCTV cameras, and bolts from the hospital. Your work isn’t done, though — Duckman now becomes a patient, and you have to move him to Room 7 and apply the correct treatment items so he recovers. After that the story continues, Barney is gone, and you get no coffee machine on this path.
Ending 2 — stay silent. Instead of interacting with Duckman, you simply do nothing and wait. After about 30 seconds — a timer that comes from player reporting rather than a confirmed in-game counter, so give it a beat — Duckman thanks you for your cooperation and leaves without finding Barney. Barney then steps back out, thanks you for protecting him, and hands over the suitcase he asked you to safeguard earlier. Inside is a coffee machine — the unique reward for letting him escape.
If you want the bonus reward, do not press E or touch anything while Officer Duckman is at the desk — just wait him out, and Barney’s suitcase coffee machine is yours.
Why you should never shutter Barney away
Which Barney ending to pick
It comes down to what you’re after. Stay silent if you want the second coffee machine — it reportedly brews faster than the default and helps with Sanity recovery on long grinds, which is a real quality-of-life boost on rough nights (no exact brew-speed multiplier is publicly confirmed, but the upside is the point).
Turn him in if you’d rather see Officer Duckman’s patient storyline and treat him in Room 7. The game deliberately leaves it up to you, so there’s no “wrong” answer — only the reward or the storyline.
Video help
Frequently Asked Questions
When does Barney first appear?
He’s reported to show up after Shift 2, while one listing gives his debut as Shift 3. Treat it as early game around that window rather than a fixed shift, and keep coffee stocked beforehand since his requests need it.
What’s the reward for hiding Barney?
He gives you the suitcase he asked you to keep safe, and inside is a second coffee machine said to brew faster than the default — useful for keeping Sanity topped up during long shifts.
Can you get both endings in one playthrough?
No. The Duckman encounter forces a single choice — report Barney or stay quiet — and that one decision locks in one outcome. To see the other ending you’ll need a separate run.
What happens if you shutter Barney away?
Closing the window on him with the shutters makes him leave like a normal anomaly and cancels the whole quest. You get neither ending and miss the coffee machine, so don’t reject him if you want to finish his story.
Do you lose the coffee machine if you turn Barney in?
Yes. The coffee machine only comes from the stay-silent path. If you hold E on Duckman, Barney escapes and you get the Duckman patient storyline instead, with no coffee machine.