
![7 ways to fix “download error 0x80248007” on Windows [Step-by-step guide]](/content/images/size/w2000/format/webp/wp-content/uploads/2022/12/uploade-failed-error-0x80248007-1.png)
Whether it is to access the latest features and tools or to keep your system safe, keeping your Windows up to date is the prudent thing to do. The Windows Update feature is commonly how most users get such updates. But, every now and then you may encounter a download error when updating Windows via Windows Update.
One such common error is the “download error 0x80248007”. Why does this happen, and how can you fix it so that you can continue updating your Windows? Here’s everything you need to know.
What is the Download error 0x80248007 on Windows Update?
The download error 0x80248007 or 0x80072ee7, a similar error, is a Windows Update error that can pop up during the download phase of the update. Though there are various reasons why this happens, there have been certain buggy update packages that are the root cause. This problem is not new to Windows 11 as it used to occur in previous versions as well.
These errors indicate that this Windows update has some files missing, or that the update cannot find the Microsoft Software License Terms, mostly due to corrupt or missing files, but sometimes, as mentioned, because of a bug with the update. In the past, Microsoft has acknowledged this fact and tried releasing fixes using further updates. But since bugs are a natural part of the system, and arise because of technical or human errors, there is no guarantee that such errors will never recur.
To that purpose, it is good to know how to go about fixing these.
How to Fix Download error 0x80248007 [7 ways]
In many cases, the manual download of the Windows Update package has been the fix that has helped most users, especially when the update package in Windows Update is buggy. However, before you get to that last resort, let us take a look at a few other possibilities that we recommend you try in case the cause of the error lies elsewhere.
Fix 1: Start Windows Installer service
The proper functioning of Windows updates depends on a few services. One of these is the Windows Installer service which can be turned on or restarted manually in a couple of ways.
From Service
Here’s how to go about turning on the Windows Installer service from the Services app.
- Press Start, type services, and hit Enter.
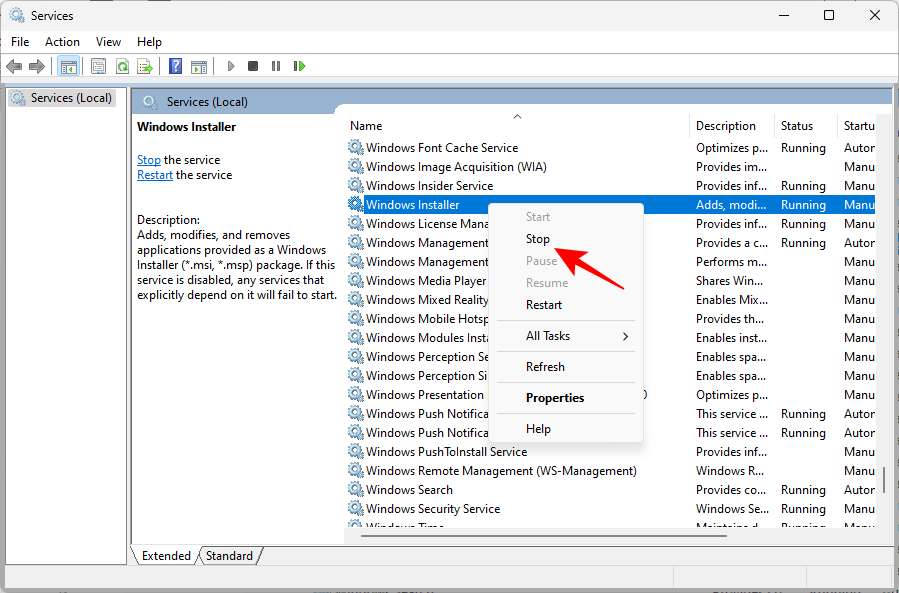
- In the Services app, scroll down the list of services and find “Windows Installer”. Right-click on it and select Start.
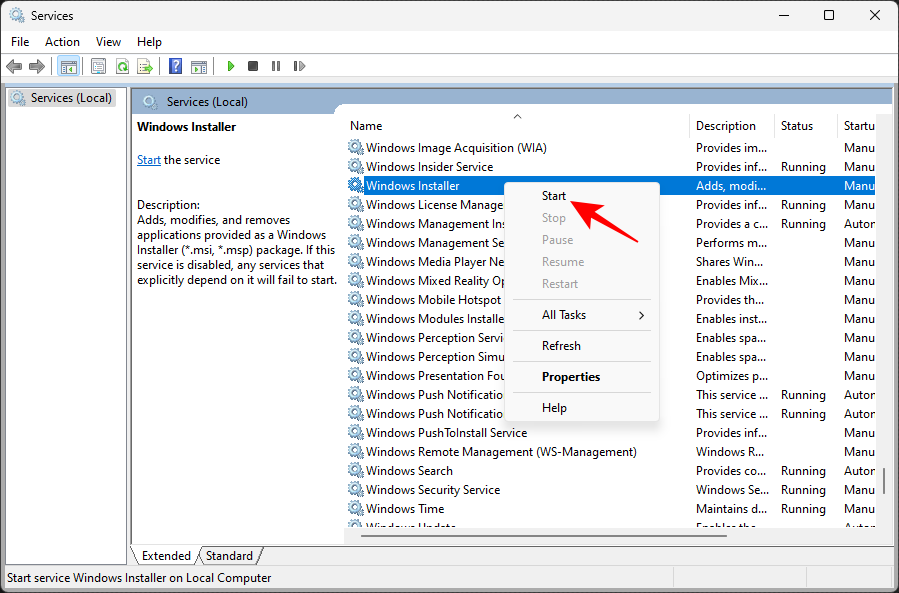
- If you see the Restart option instead, this means that the Windows Installer service is already running.
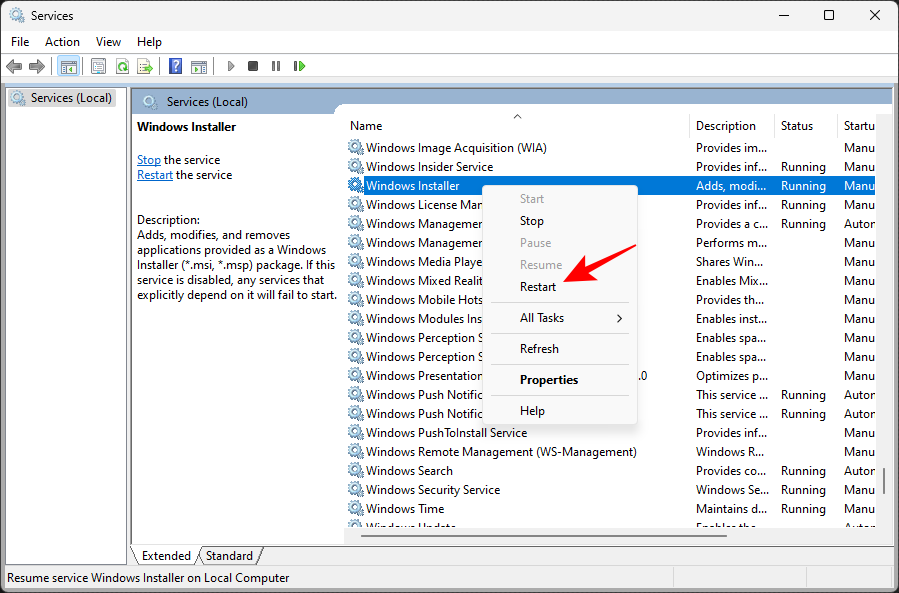
- Click on the restart option and then check for updates again via Windows Update in the Settings app.
From Command Prompt
Another way to restart the service is from an elevated command prompt instance. Here’s how to go about it:
- Press Start, type cmd, then right-click on the best-matched option and select Run as administrator.
- Now type the following command:
net start msiserver
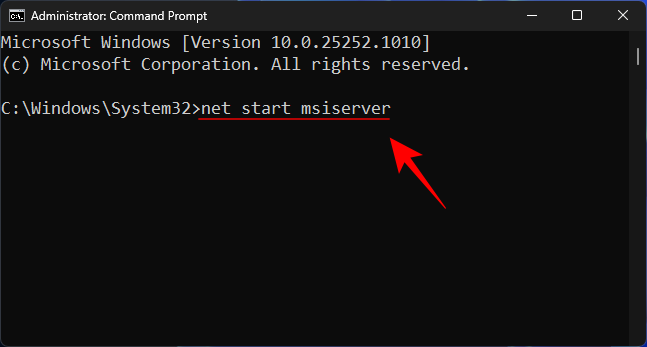
- Then hit Enter.
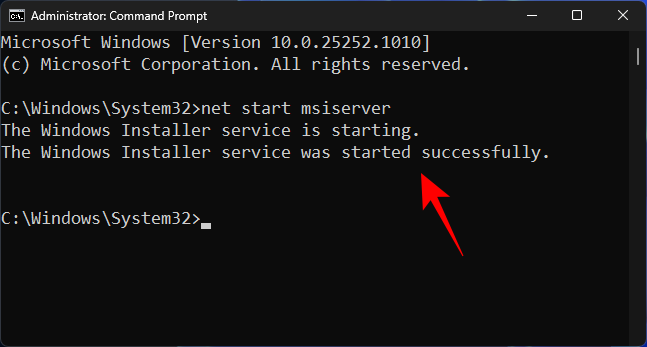
Restart the computer for good measure and then check for updates again.
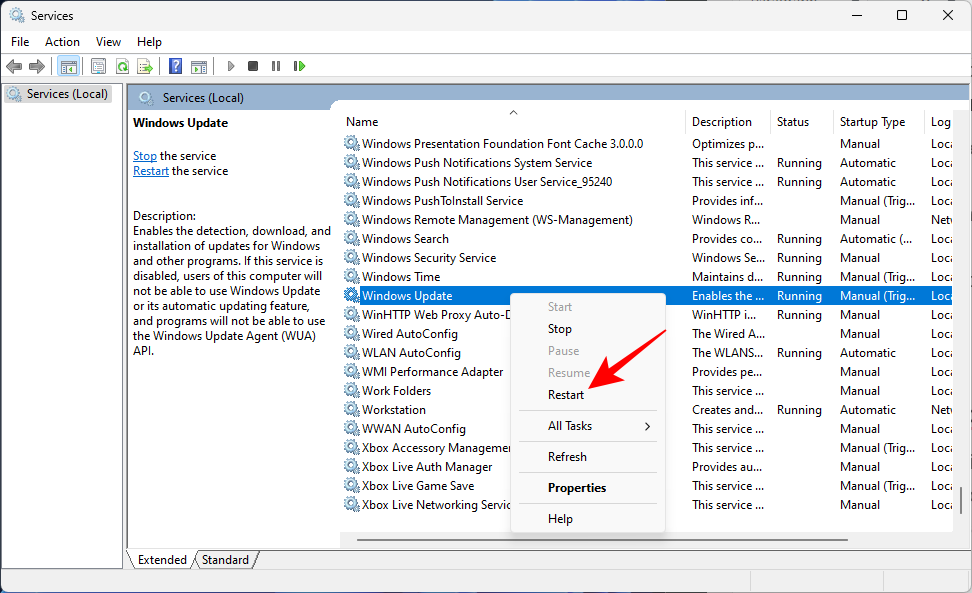
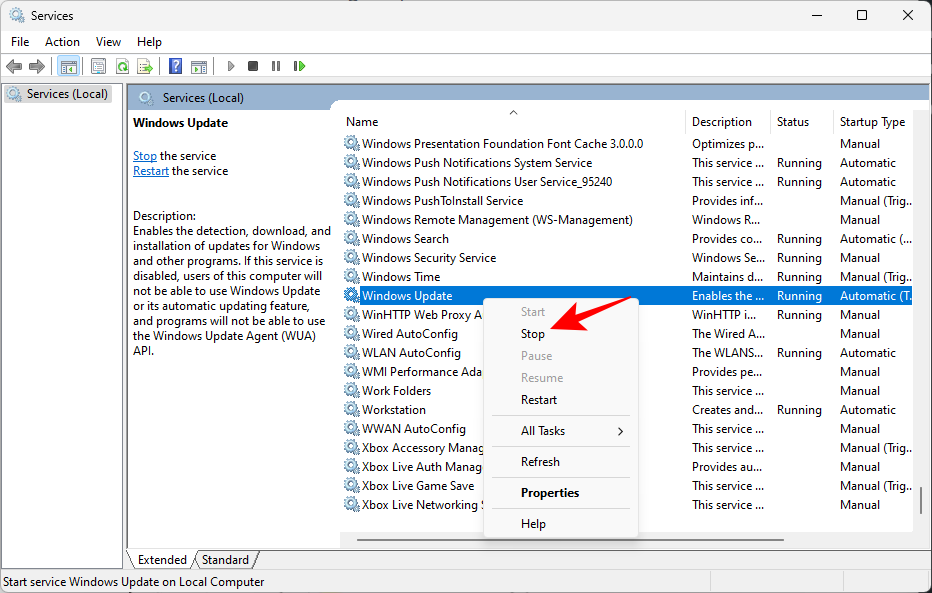
Fix 2: Restart Windows Update service
The other important service that Windows Update relies on is the Windows Update service itself. Similar to the previous service, this too can be started or restarted from the service app as well as the command prompt.
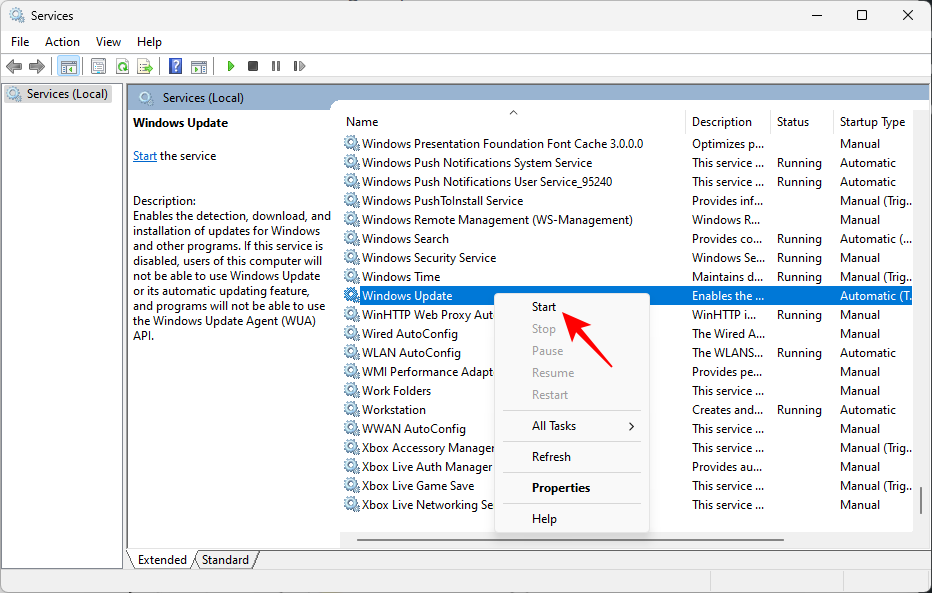
From the Services app
- Open the Service app as shown above (search for ‘Services’ in the Start Menu). Then find the Windows Update service, right-click on it and select Start.

- If it’s already running, Restart it.
From the Command Prompt
- Alternatively, open an elevated instance of the command prompt as shown before and type the following command:
net start wuauserv
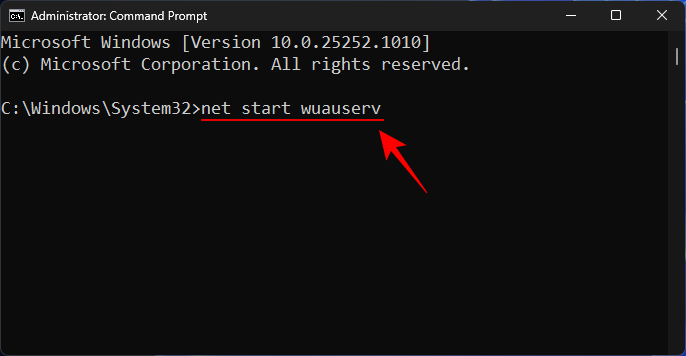
- Then hit Enter.
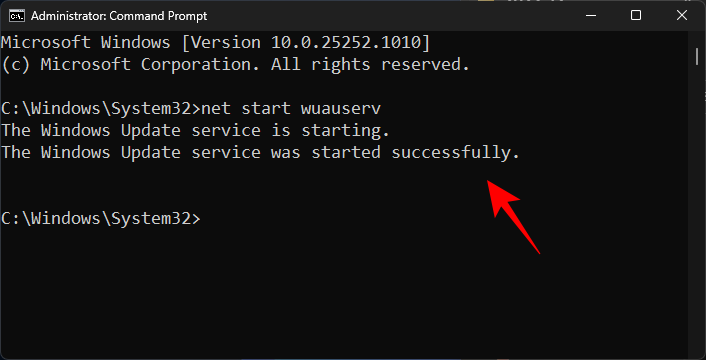
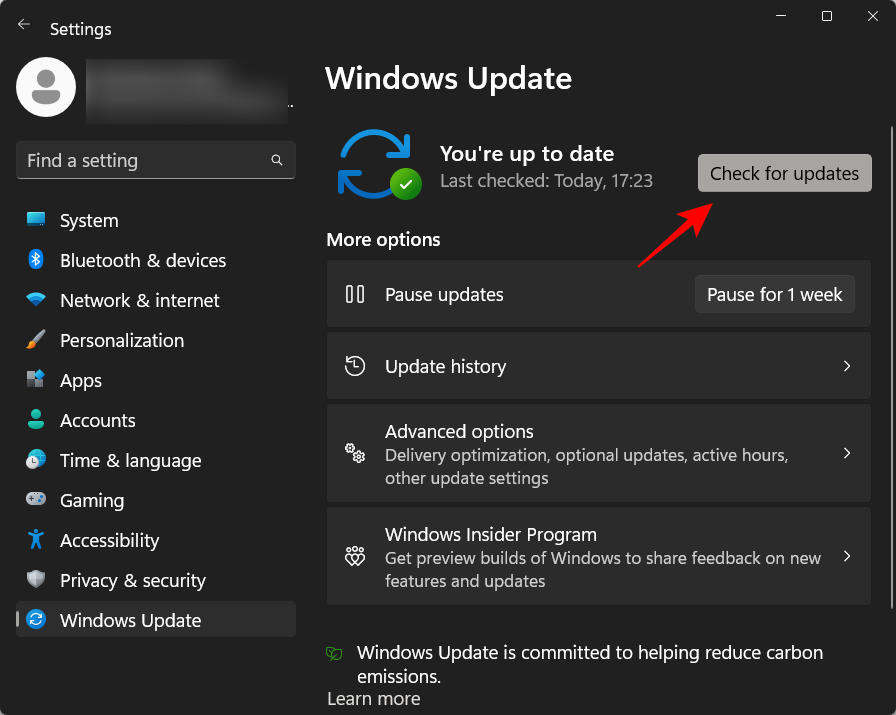
Now restart your computer for good measure and then check for updates in the Windows Update settings.
Fix 3: Run Windows Update troubleshooter
The in-built troubleshooter in the Windows Settings app can also be used to diagnose problems with Windows update and find possible solutions to fix with. Here’s how to use it:
- Press
Win+Ito open the Settings app. Then scroll down on the right and click on Troubleshoot.
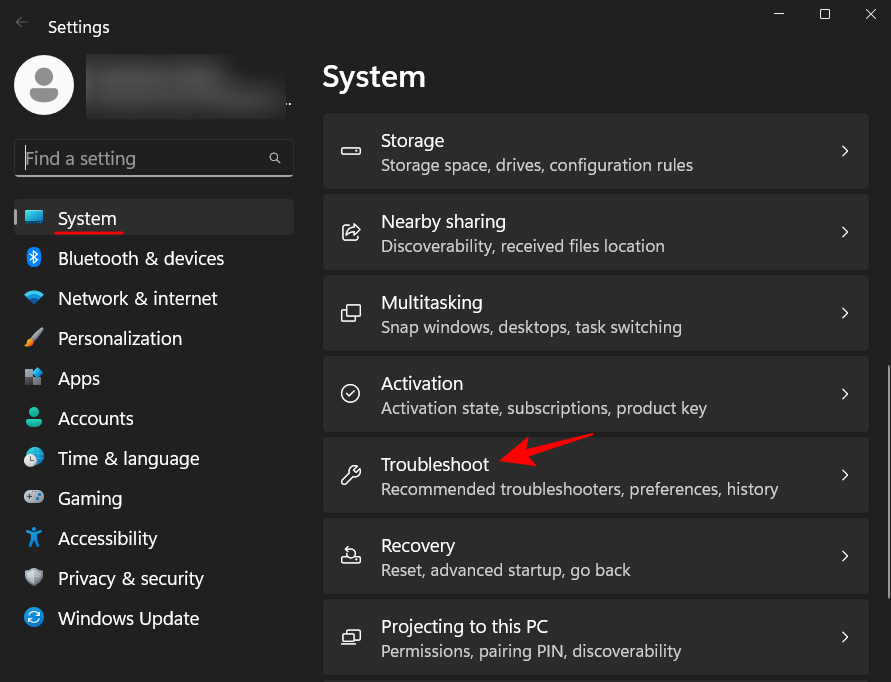
- Click on Other troubleshooters.
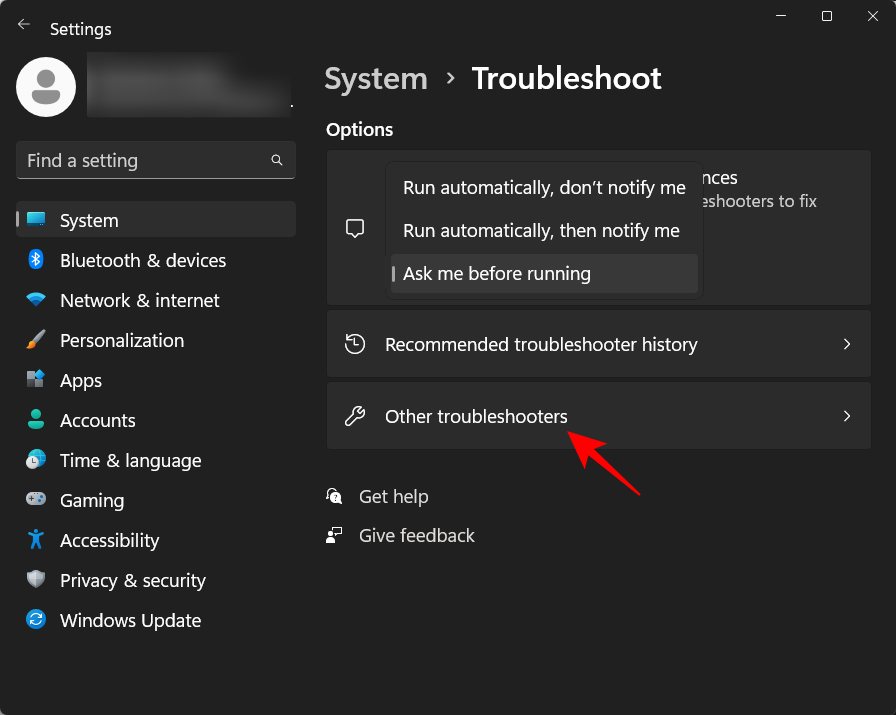
- Then click on Run next to “Windows Update”.
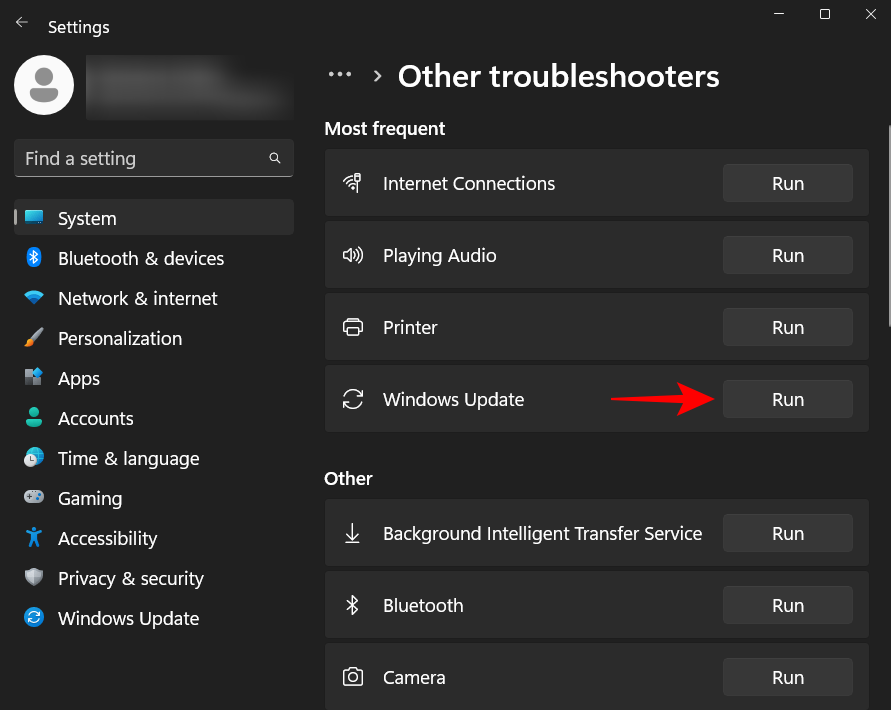
- Troubleshoot will now do its thing and look for possible solutions to the problems related to Windows Update.
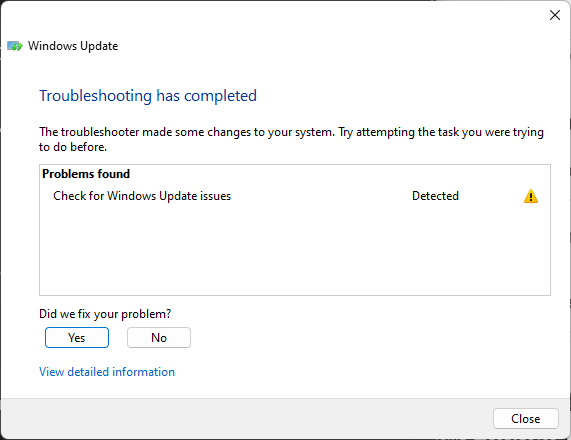
- Once it is done diagnosing and fixing the issues, go back to Windows Update and check if the issue has really been fixed.
Fix 4: Delete SoftwareDistribution folder content and reset Windows update components
Another issue that might be derailing your Windows Update could be the existing files in the Software Distribution folder. The files within it make up a critical part of the Windows update process. The corruption of these files can really throw a monkey wrench in your efforts to download and install Windows updates.
In such a case, you will have to delete a couple of folders that are within the SoftwareDistribution folder. But before that, you will have to stop certain services and later resume these as well. Here’s how to go about the whole process:
Step 1: Stop Windows Update services
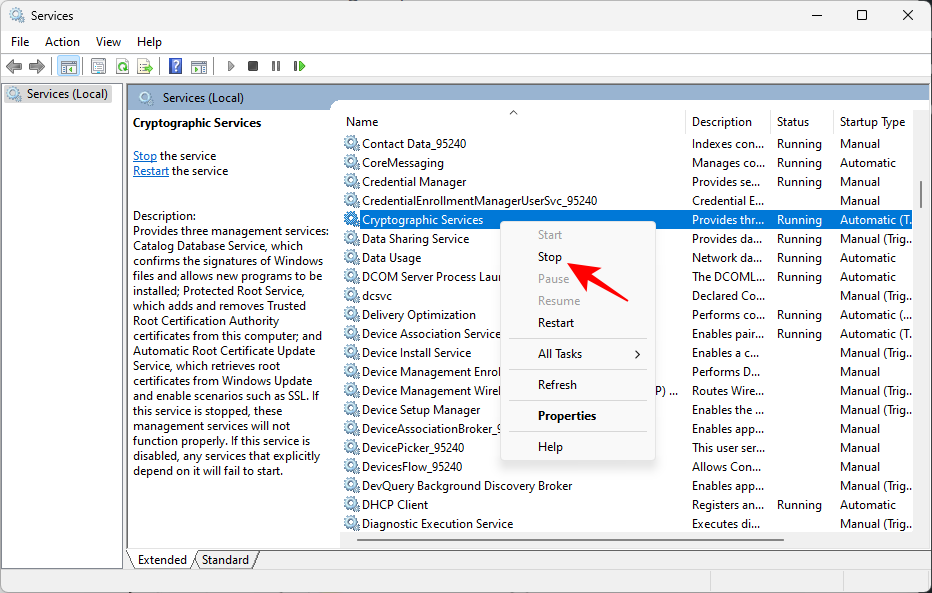
Firstly, we have to stop a few services which can either be done from the Services app or from the Command Prompt.
- Open the Services app as shown above. Then find the Windows Update service, right-click on it and click Stop.
- Then find Cryptographic Services, right-click on it and click Stop.
- Then, right-click on the Background Intelligent Transfer Service, and click Stop.
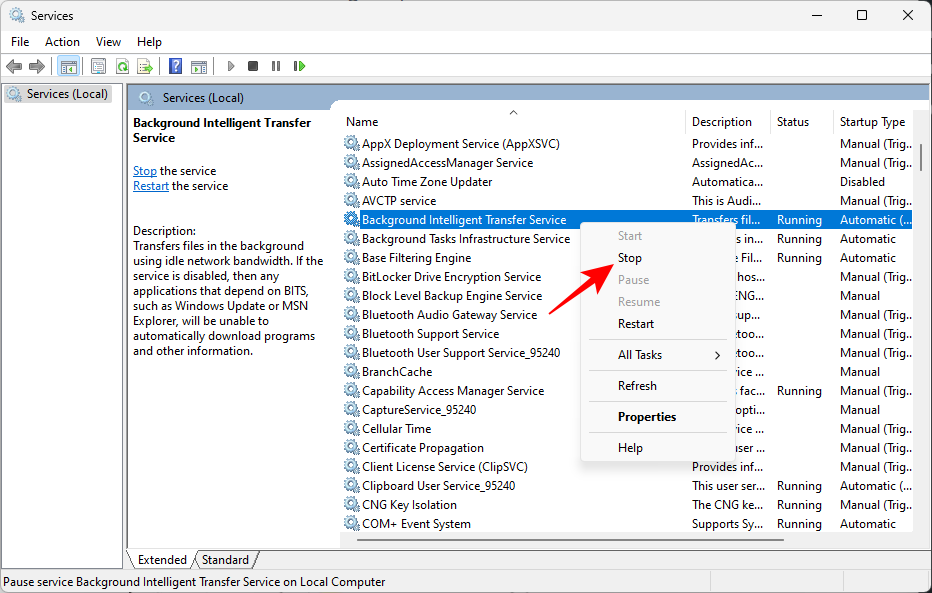
- Finally, Stop the Windows Installer service.
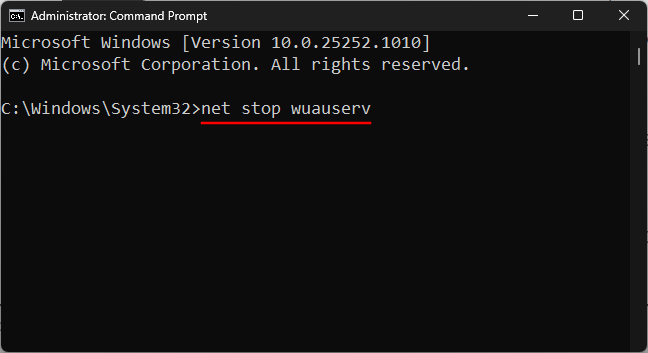
- Alternatively, if you’re using the command prompt, type the following command and hit Enter:
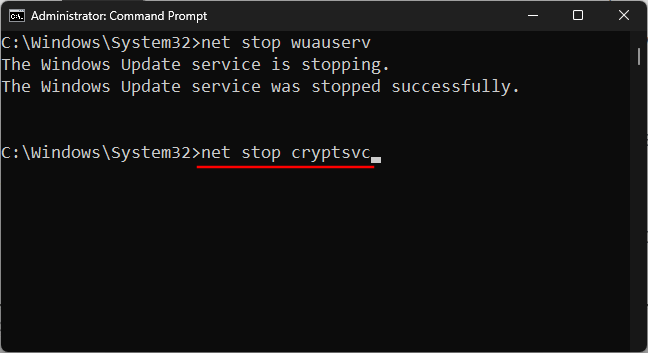
net stop wuauserv
- Then enter this command:
net stop cryptsvc
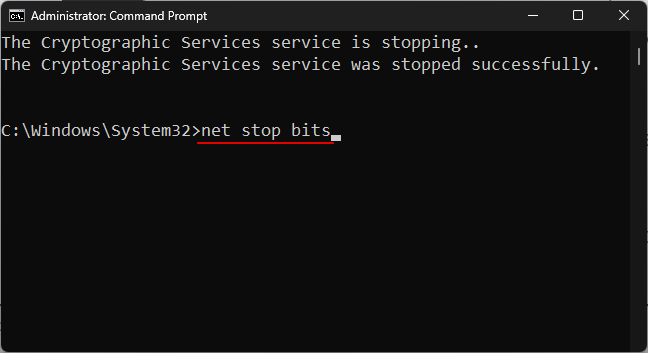
- Now enter this command:
net stop bits
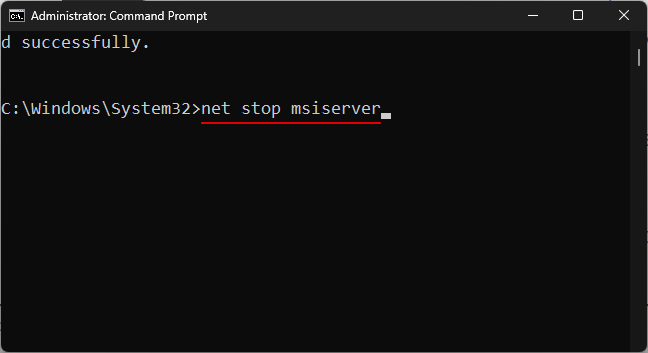
- Finally, enter this command:
net stop msiserver
Now that these services are stopped, we can safely delete the contents of the SoftwareDistribution folder
Step 2: Delete folders inside SoftwareDistribution folder
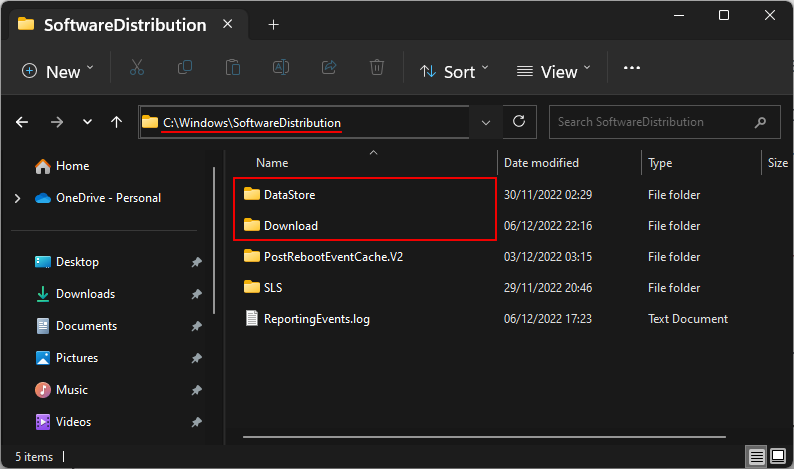
Open the File Explorer by pressing Win+E. Now navigate to the following folder: C:\Windows\SoftwareDistribution
- Here, select the folders DataStore and Download.
- Then hit the Delete key, or click on the trash can icon in the toolbar.
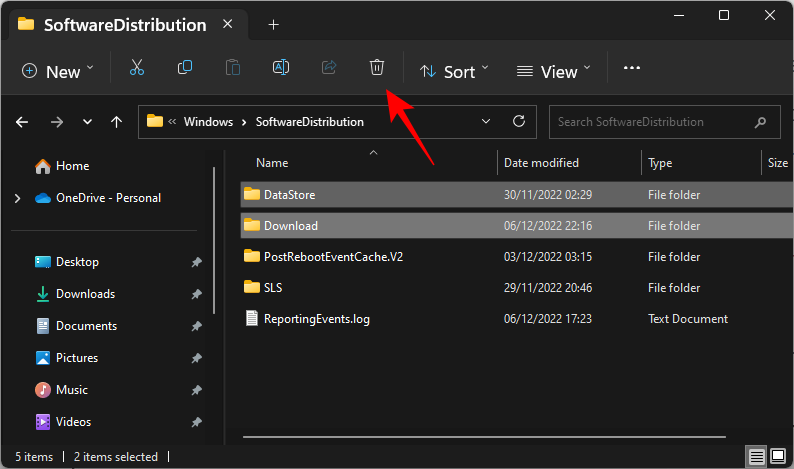
- When prompted, click Continue.
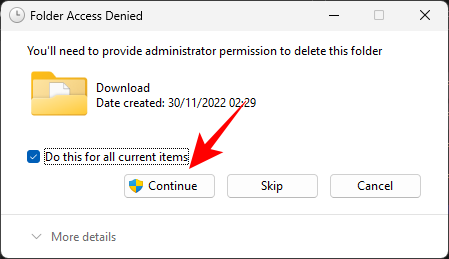
This will delete these two folders.
Step 3: Restart the Windows Update services
Finally, we will restart the services that we stopped in Step 1 so that the folders deleted in the previous Step can be repopulated with functional files. Here’s how to do so:
Open the Services app, find the services that were stopped in step 1 and start them back up again.
Here are the names of the services that you need to restart:
- Windows Update
- Background Intelligent Transfer Service
- Cryptographic Services
- Windows Installer
Alternatively, if you’re using the command prompt (with elevated admin privileges), type the following commands one by one and hit Enter after each one:
net start wuauserv
net start cryptsvc
net start bits
net start msiserver
Once done, close the Services app or the command prompt and check for updates from the Windows Update settings page.
Fix 5: Run SFC and DISM scan
Sometimes, the problem may be a symptom of a deeper corruption of system files. These need to scanned for and fixed before the Windows update download error can go away and you continue to download the update packages. Here are a couple of important scans that should do the trick.
- First up, press Start, type cmd, then right-click on the best-matched result and select Run as administrator.
- Now, type the following command to run the System File Checker tool:
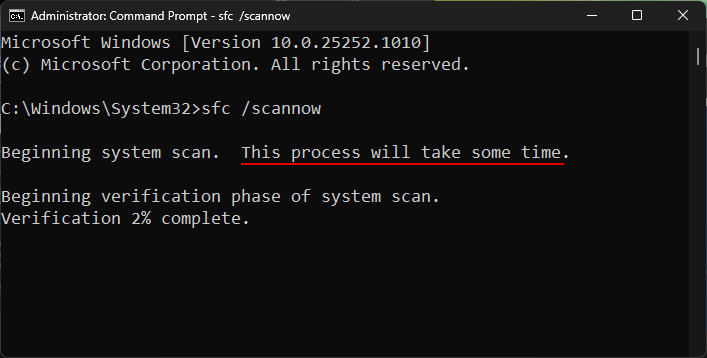
sfc /scannow
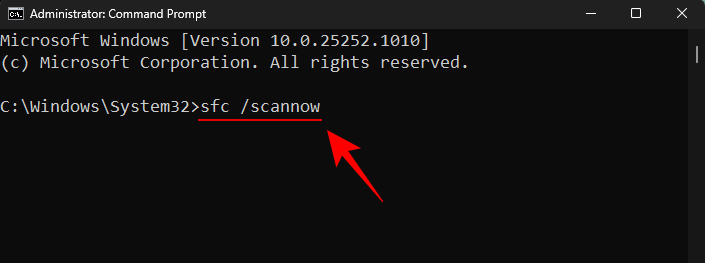
- Then hit Enter. Wait for the scan to finish.
- Next, to run the Deployment Image Servicing and Management (DISM) tool, type the following command:
DISM /Online /Cleanup-Image /ScanHealth
- Then hit Enter. The DISM tool will now scan for corrupted files and clean up your system image.
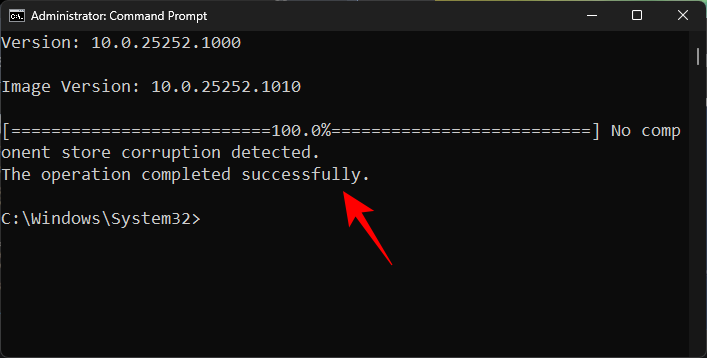
- Once done, restart your PC and check if the Windows update issues have been resolved.
Fix 6: Manually install Windows Update
Finally, if all else fails, you will have to go the manual route of downloading and installing the Windows update package yourself. Hopefully, the update should fix the issue so that future updates can be downloaded without getting the 0x80248007 error. Here’s how to go about it:
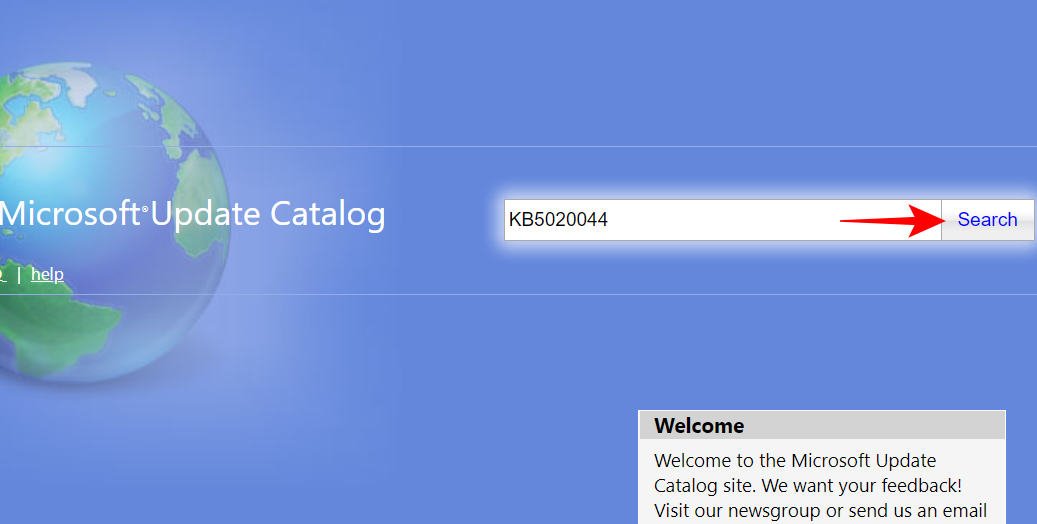
- Go to the Microsoft Update Catalog website and click on the search bar.

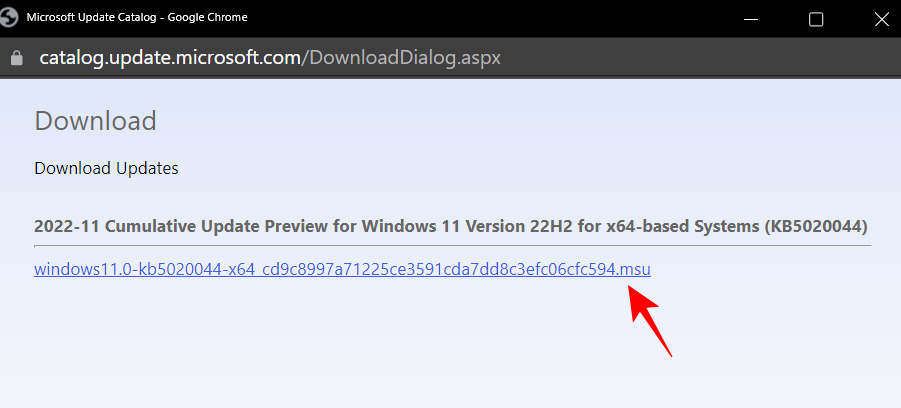
- Type the update package that you want to install. In our instance, we’re looking for KB5020044.
- On the next page, click on Download for x64-based Systems.
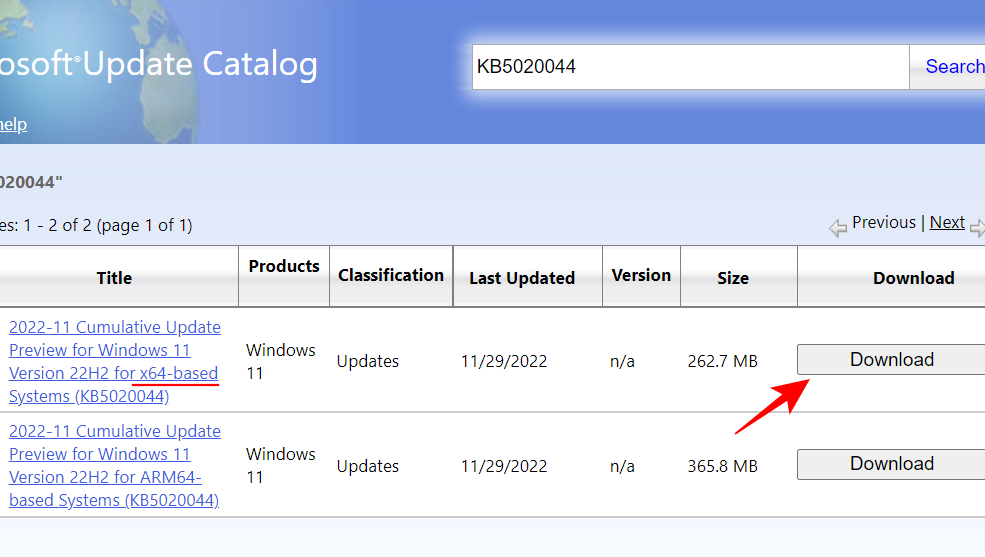
- This will open another download page. Click on the update package (.msu) to begin downloading.
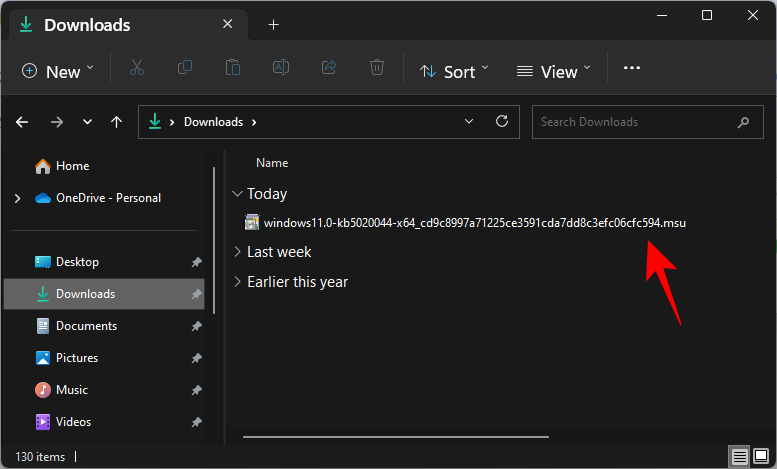
Note: Some latest preview Dev and Beta channel builds might not be available from the Microsoft Update Catalog. For stable builds, however, you can easily find links with a quick search. You can find all the info pertaining to the general availability channel on the Windows 11 release information page. For information on installing the latest builds using the ISO setup, refer to the next fix. - Once the package is downloaded from the Microsoft Update Catalog website, simply run the .msu file.
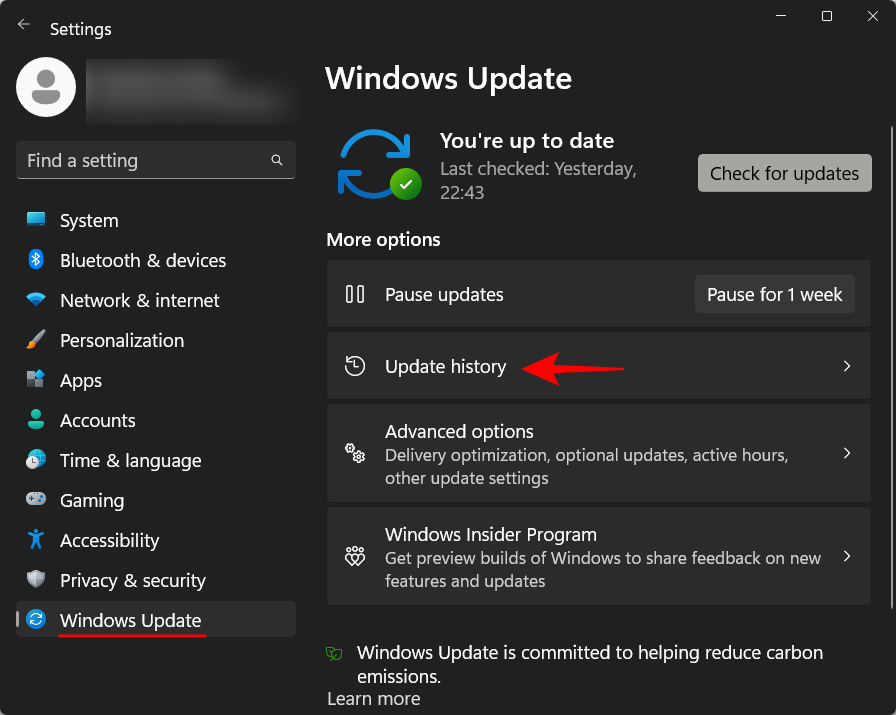
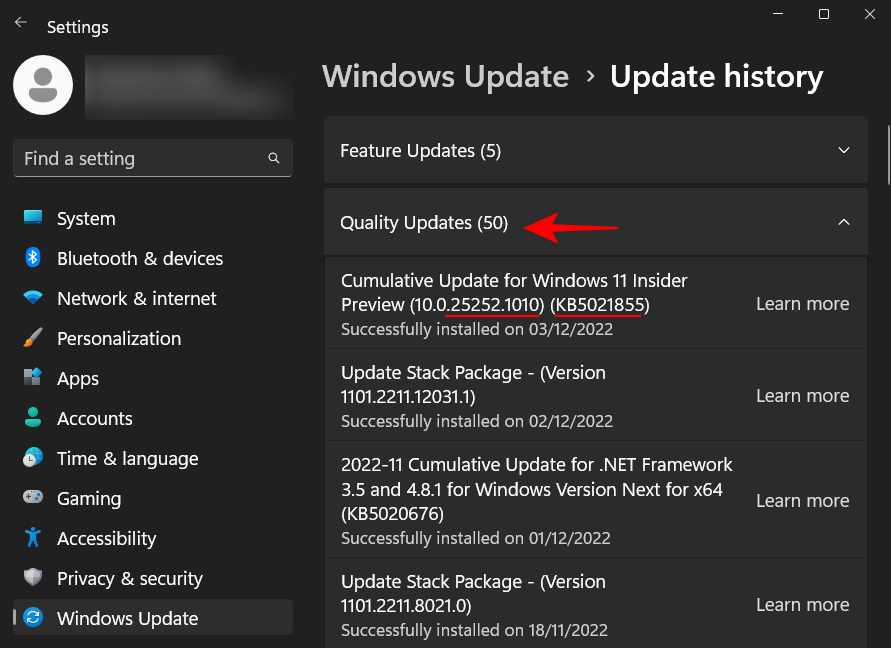
Quick Tip: If you get the error message that the “update is not applicable to your computer”, it is most probably because you either already have this update (or a later update), or you don’t have the pre-requisite builds that are needed to upgrade. So, for instance, if you want to install build 22623, you will at least have to have build 22621.726. - To check your latest cumulative update build, click on “Update history” on the Windows Update Settings page.
- Then check for the latest successfully installed update under Quality Updates and check the build and the KB number.
Although there are certain in-between builds that Microsoft has never released publicly, as long as you are currently running a high build number, you should be able to install the downloaded update.
Fix 7: Use Windows 11 Setup to install updates (and do a soft reset)
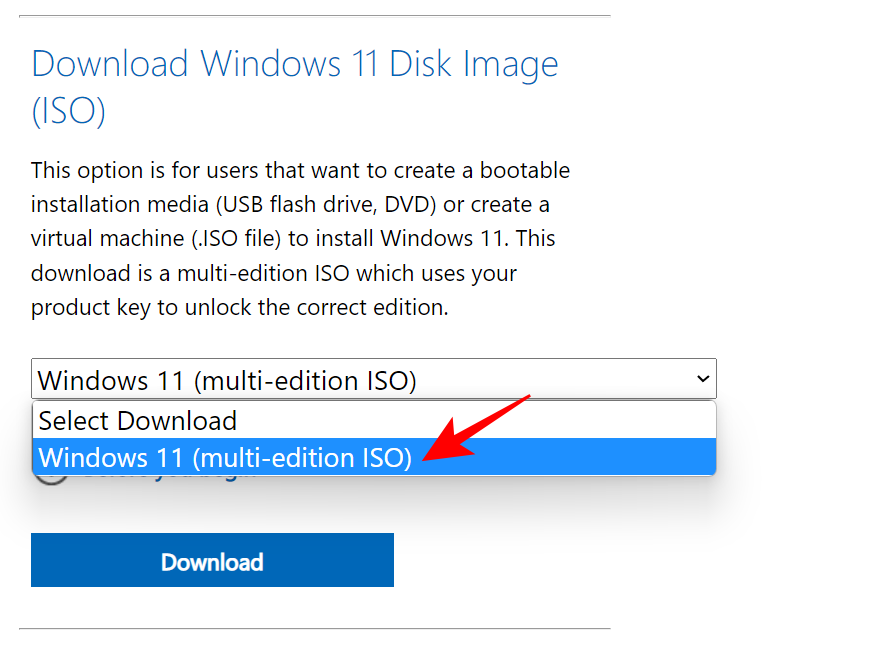
Another way to get around the download error 0x80248007 is to install updates from the Windows 11 ISO setup. Here are the links to access the ISO files for the public release builds:
Windows 11 Public Release | Download link
- Go to the aforementioned links to download the ISO file for your Windows 11 version.
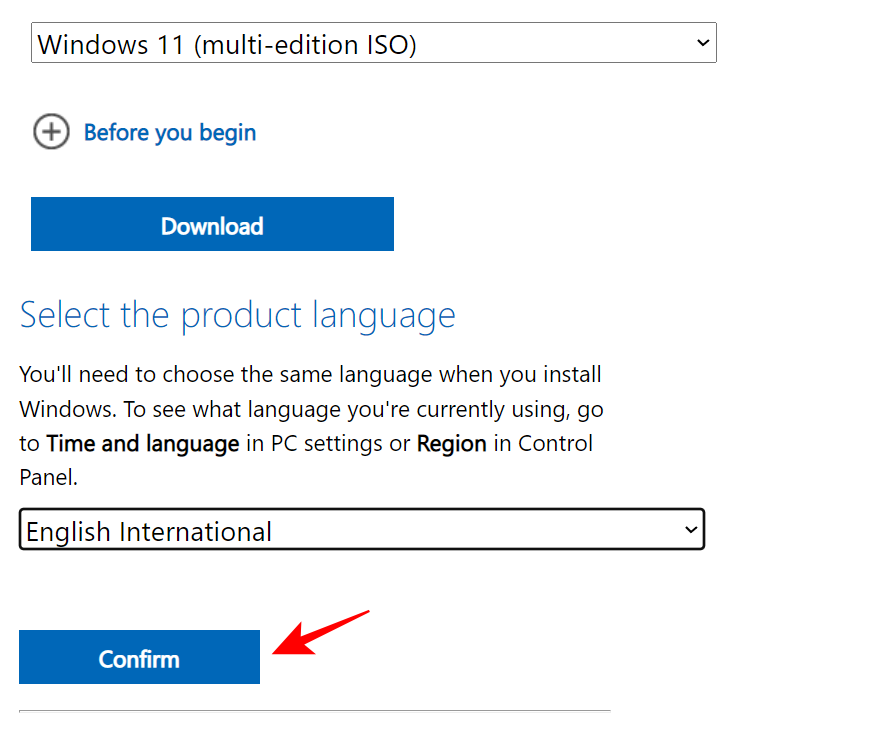
- Choose your setup language and click on Confirm.
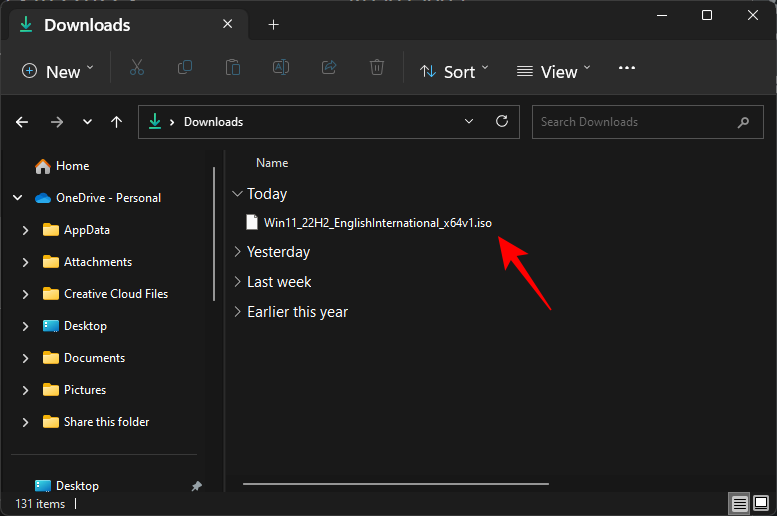
- Once downloaded, double-click on it to run it.
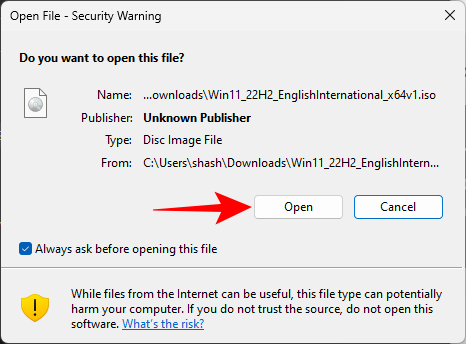
- If prompted, click on Open.
- Then double-click on setup.exe.

- Click Next.
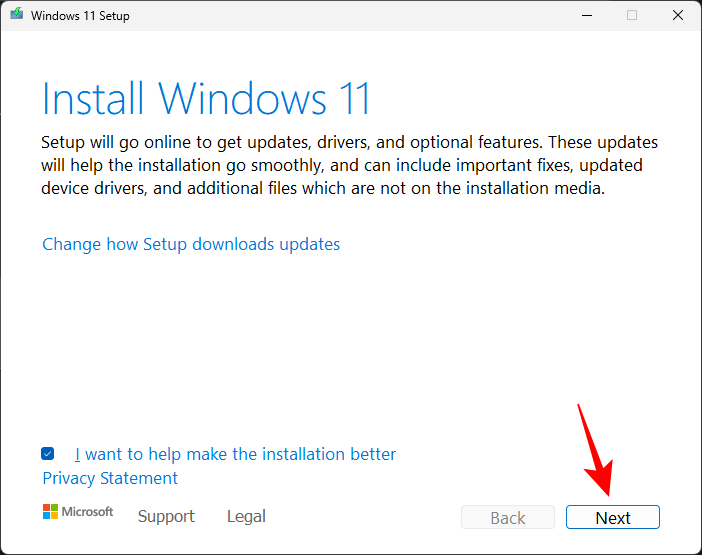
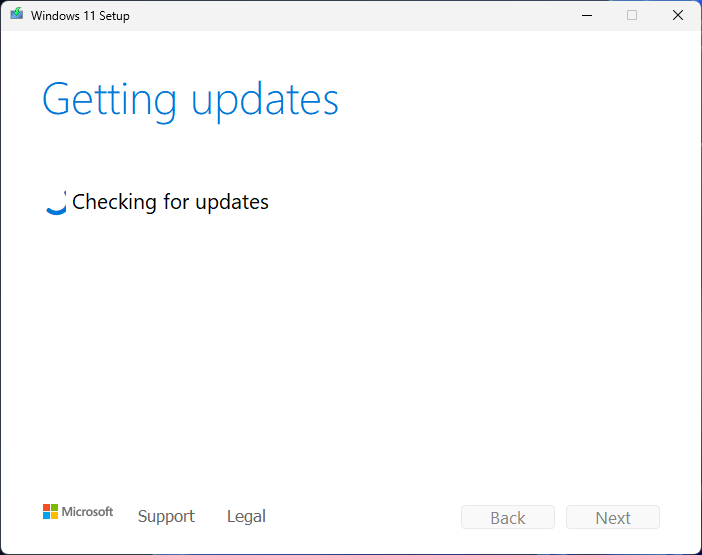
- Setup will now start checking for updates.
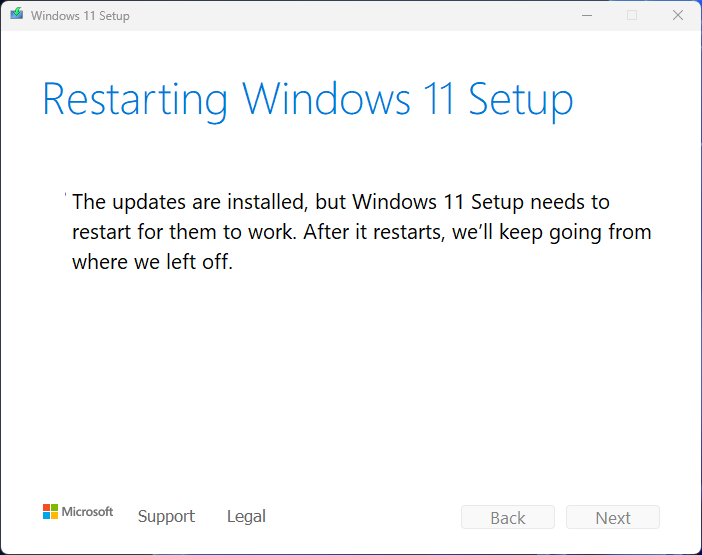
- Once the updates are installed, the setup will restart.
- Then simply follow the on-screen instructions and make sure you choose to Keep personal files and apps.
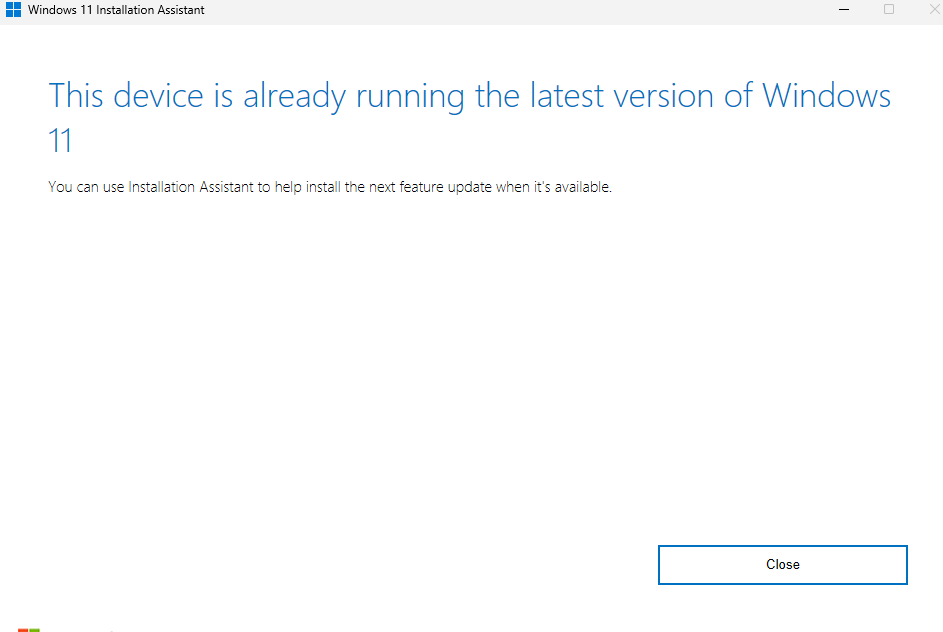
- Alternatively, you can download “Windows 11 Installation Assistant” from the Windows 11 public release link above.
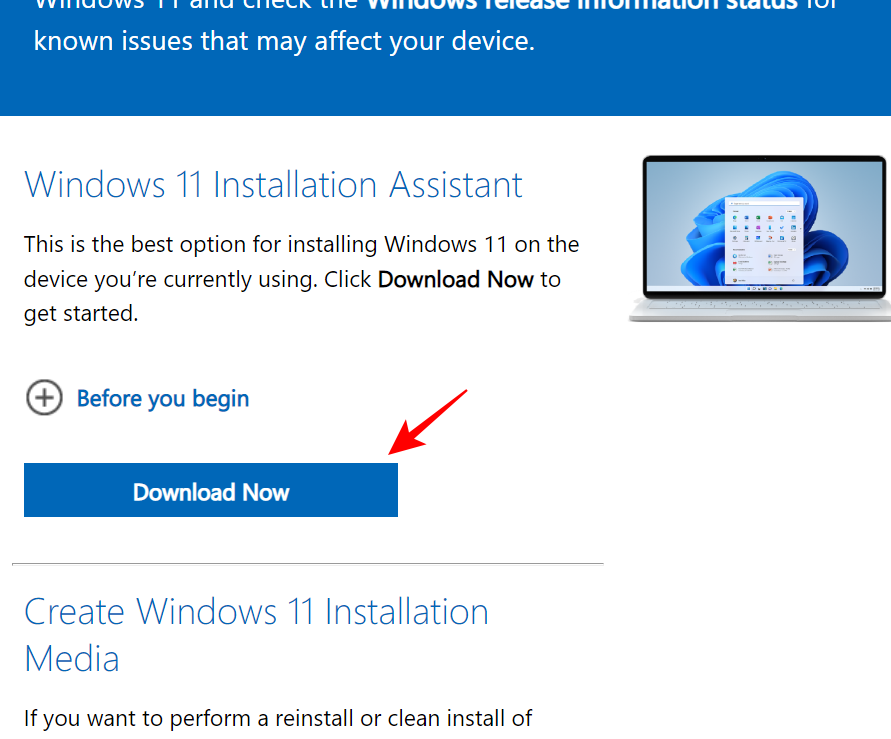
- And let that program check for an update. Any important updates will be installed this way. And if you’re running the latest version, you will get the message for the same.
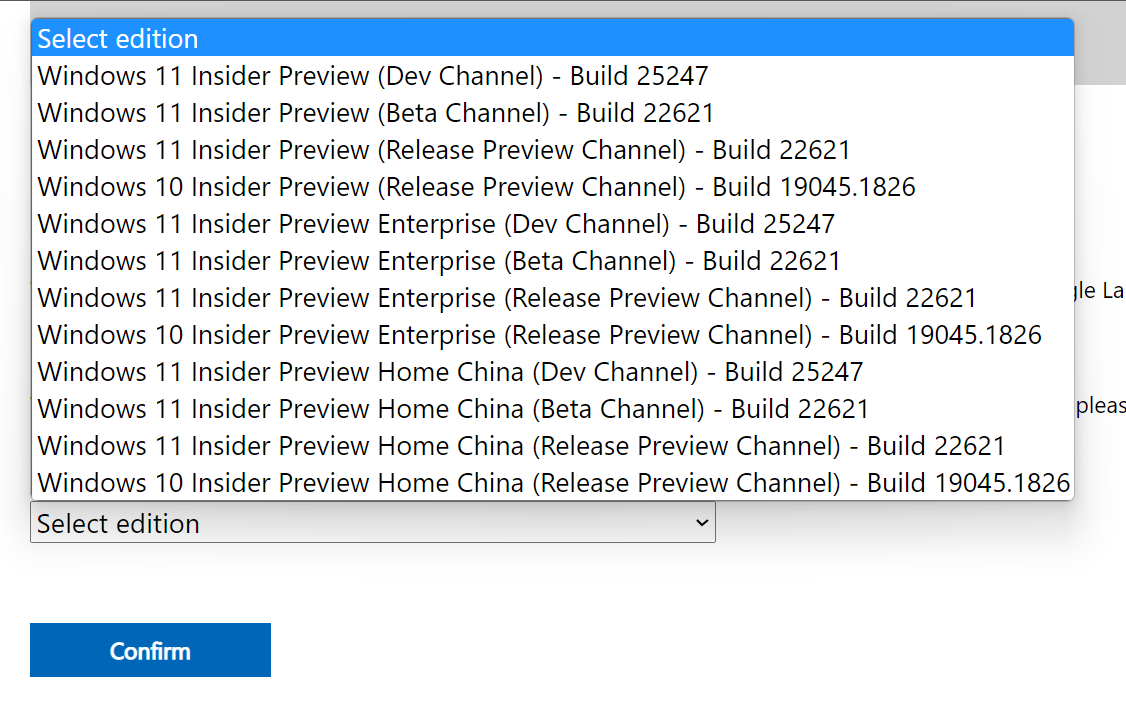
- To get Windows 11 Dev, Beta, and Release Preview channel updates, use the following link: Windows 11 Dev, Beta, and Release Preview channels | Download link
- Scroll down on the page and click on the drop-down menu to select your Windows 11 build.
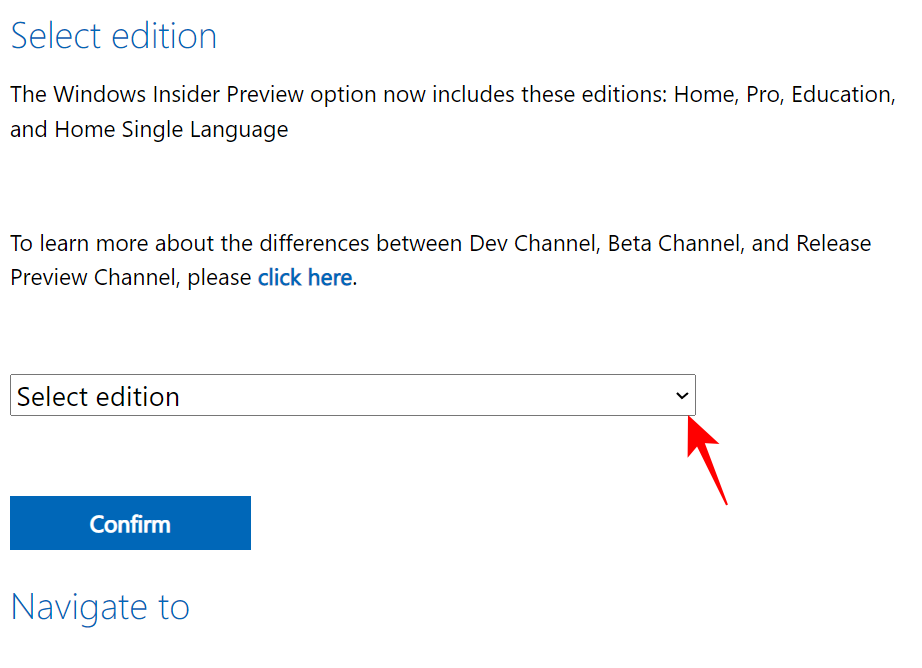
- Select your Insider build.
- Then click Confirm.
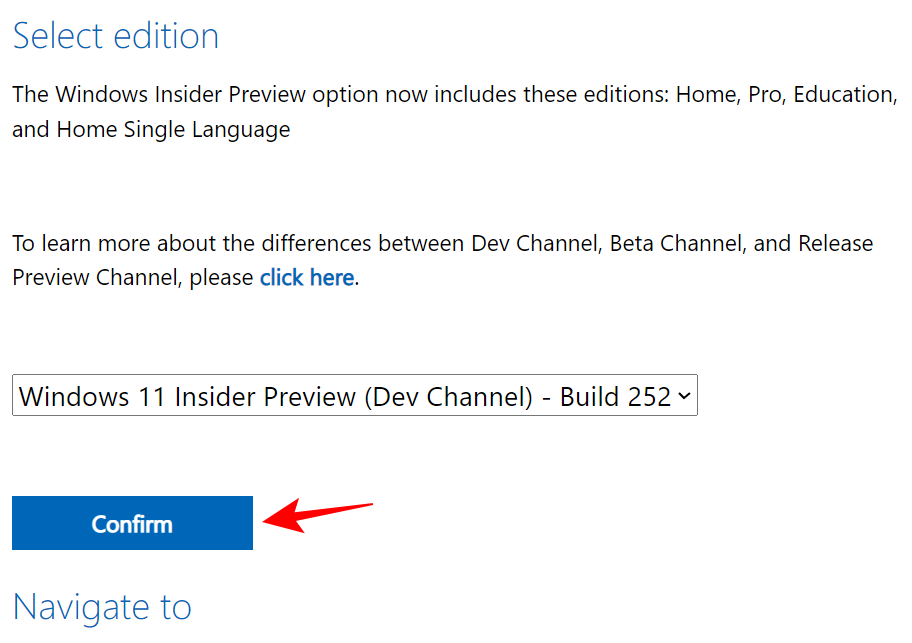
Once downloaded, run it and follow the on-screen instructions to complete the update.
FAQs
In this section, we answer a few commonly asked queries about the download error 0x80248007 and other related issues.
What does download error 0x80248007 mean?
The download error 0x80248007 means that Windows Update can’t find the files necessary to continue with the update. This can be a result of many factors, such as file corruption, incomplete downloads, services not running, or sometimes even because of a bug in the build itself.
How do I fix Windows Update 11 error?
The Windows Update 11 errors, such as the download error 0x80248007, can be fixed in a number of ways, depending on where the problem exactly lies. When dealing with such problems, it is always better to cast as big a net as possible so that you leave no stone unturned in fixing the issue. Refer to the fixes given in the guide above to try all available solutions.
We hope you were able to fix the download error 0x80248007 with your Windows Update and are now able to update your Windows and download further updates for your system.


Discussion