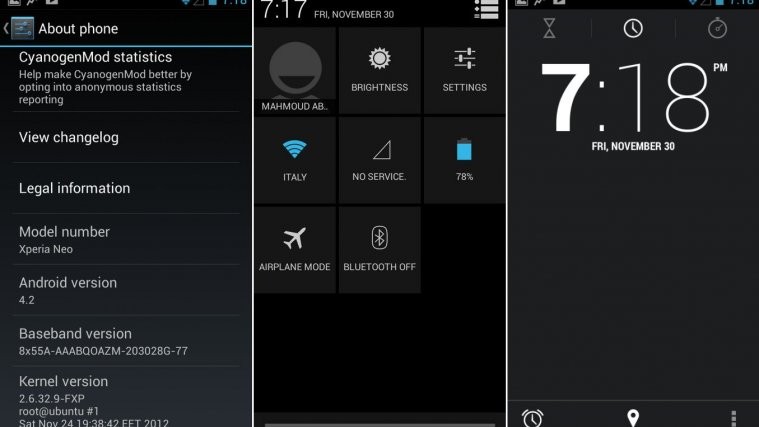
Now that Android 4.2 AOSP source has been officially made available by Google to the developer community, it is only a matter of time before we see a variety of custom ROMs for various devices start showing up all over the place. One such custom ROM, which is usually very much awaited and looked forward to is CyanogenMod, and there is no denying that it one of the most popular, and most customizable custom ROMs currently available for Android devices.
XDA member Zackconsole has just released a very early Alpha preview of an unofficial CyanogenMod or CM 10.1 custom ROM based on FXP sources. CM 10.1 is based on Android 4.2 – the latest flavor of Jelly Bean and includes all those cool, new features that Jelly Bean 4.2 brings, like the Photo Sphere in the camera app, improved Google Now, revamped gallery and a lot more.
As mentioned earlier, this is an early Alpha preview, and definitely not ready to be a daily driver yet. As of now, Bluetooth and Camera are still not working and are still work-in-progress. Most of the rest of the stuff should work fine, but don’t be surprised if you come across more bugs. If you still wan’t to go ahead and test it on an Xperia Neo, follow our handy guide below to know how you can.
Compatibility
This ROM and the guide below are compatible only and only with the Sony Xperia Neo, model number MT15i. It’s not compatible with any other device and may render an incompatible device unusable. Check your device model in Settings » About phone.
Warning!
The methods and procedures discussed here are considered risky and you should not attempt anything if you don’t know completely what you’re doing. If any damage occurs to your device, we won’t be held liable.
How to Install AOKP ROM on Xperia Neo
- This procedure will wipe all your apps, data and settings (but it will NOT touch your SD cards, so don’t worry about those). Backup your Apps and important data — bookmarks, contacts, SMS, APNs (internet settings), etc. This Android backup guide would help you.
Important! Don’t forget to at least make a backup of your APN settings, which you can restore later if your data connection does not work after installing the ROM. Use the backup guide to find out how. - Important! Your Xperia Neo must have an unlocked bootloader. You can unlock your bootloader officially → here.
- Important! Your Xperia Neo must have ClockworkMod Recovery installed. To install CWM on your device you can use this guide → here.
- Download the latest version of the CM 10.1 ROM and Gapps package from the official source page.
- Connect your phone to the PC and transfer the CM 10.1 ROM and Gapps package you downloaded in Step 5 to the SD card
- Now Download fastboot, which will be used to flash the kernel required to flash the ROM. Download Fastboot. Extract the downloaded zip file to your C: drive. You should get a foldr named fastboot
- Download the kernel boot image which is required to flash CM 10.1 . Download Boot Image. Transfer the downloaded boot.img file to the fastboot folder on your C: drive. See Step 6
- Now, connect your phone to the computer in fastboot mode. To do this, first plug the USB cable to PC, then pick up your phone and hold the Menu key (key at the bottom right on your Neo), and then, while holding the Menu key, connect the USB cable to your phone.
- Fire up a command prompt on your PC and change directory to the fastboot folder on your C drive. Once you are in the directory, type in the following command:
fastboot flash boot boot.img - Once the kernel has been flashed, you will see a success message in the command prompt window. Disconnect the phone from the computer once this is done.
- Now turn off the phone completely and reboot to recovery mode. To do this, Turn on the phone. The screen will turn on and show you the kernel logo. As soon as the blue LED lights up, start pressing the Back button on your phone continuously until you boot into recovery. In recovery, use Volume buttons to navigate and Home button to select options.
- While this is optional, the first thing to do before flashing a new custom ROM on your device, is to perform a Nandroid backup of your existing ROM. One of the super things that CWM can do is to create a full image of your existing ROM, which you can restore to at a later point, in case something gets messed up with the new ROM. After all, prevention is always better than cure – and that holds true even for mobile geeks. To perform a backup, select Backup and Restore –> On the next screen, select Backup again. Go back to main recovery menu after backup is complete
- Now that we have our existing ROM safely backed up, we can go ahead with the new one. From the CWM main menu Select wipe data/factory reset, then select Yes on the next screen to confirm. Wait a while till the data wipe is complete.
- Next Select Wipe Cache Partition, and confirm Wipe on the next screen
- Next Select Install zip from sdcard, then select choose zip from sdcard. Scroll to the CM 10.1 zip file that you copied to the SD card in Step 5 and select it. Confirm installation by selecting Yes on the next screen. The ROM will start installing.
- Once the ROM installation is complete, repeat Step 15, but this time select the Gapps package. The Gapps package contains all of the default Google apps such as Gmail You tube, Google Search, Maps etc and needs to be flashed separately.
- Once Gapps has finished installing go back to the main menu and Select wipe data/factory reset, then select Yes on the next screen to confirm. Wait a while till the data wipe is complete.
- Next Select Wipe Cache Partition, and confirm Wipe on the next screen
- Once the wipe is complete, Select Go Back and then select Reboot System Now.
- The first boot may take a bit longer, so do not panic and be patient.


kernel image download is not available
reupload please
thank you
kernel image download is not available
reupload please
thank you