Gmail has all the means necessary to help you manage your emails effectively, including muting certain email threads. Muting threads on Gmail lets you remove unwanted messages from your inbox and help keep your inbox clutter-free.
If you’ve muted messages on Gmail in the past but now want to recover them, the following post should help you unmute them so you can stay on top of these messages on time.
How to find muted messages on Gmail
When you mute messages from your inbox on Gmail, they’re instantly removed from your inbox and sent to the “All Mail” folder alongside all the other messages you received on your Gmail account. Before you can unmute messages you muted earlier, you first need to locate them inside your Gmail account.
You can follow the steps below to find messages you muted on Gmail on the web and using the Gmail app on your phone.
Method 1: Using Gmail.com on the web
- On a desktop, you can locate muted messages in your inbox by launching Gmail.com on a web browser. This will open your Gmail inbox on the screen, showing you a list of messages that aren’t muted or read.
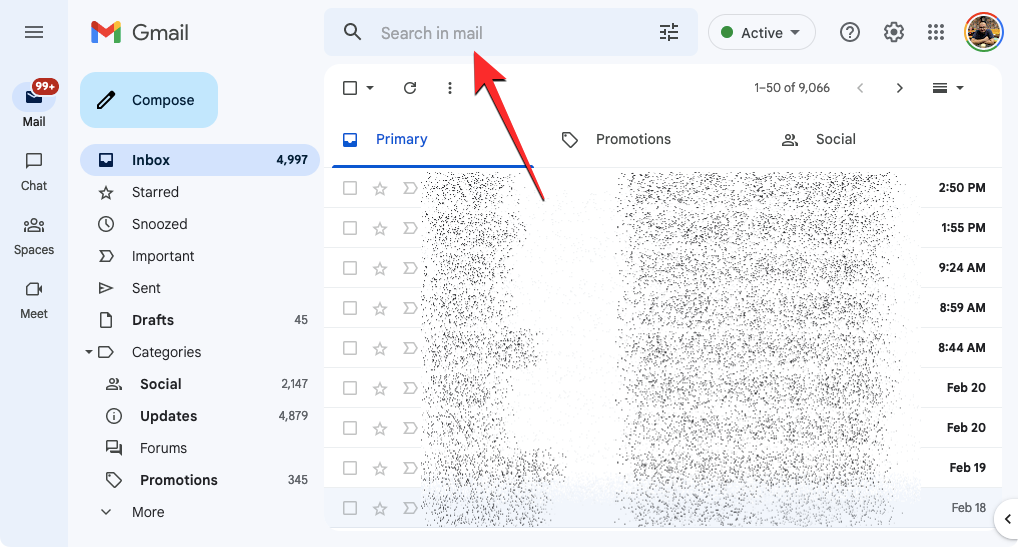
- The easiest means to find messages you previously muted is by clicking on the search bar at the top of the screen.
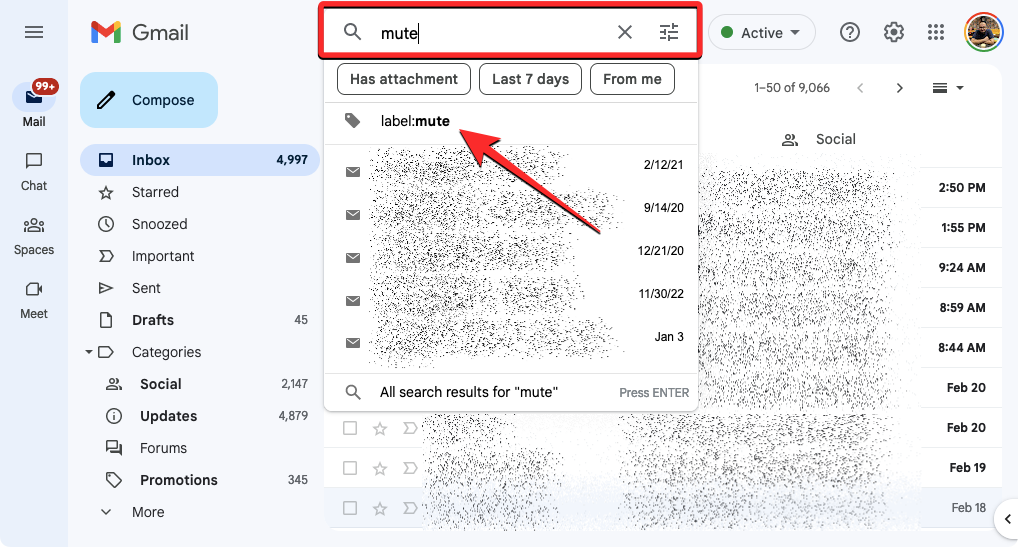
- Inside the search bar, type “mute” and click on label:mute from the search results (it should generally be at the top of the results).
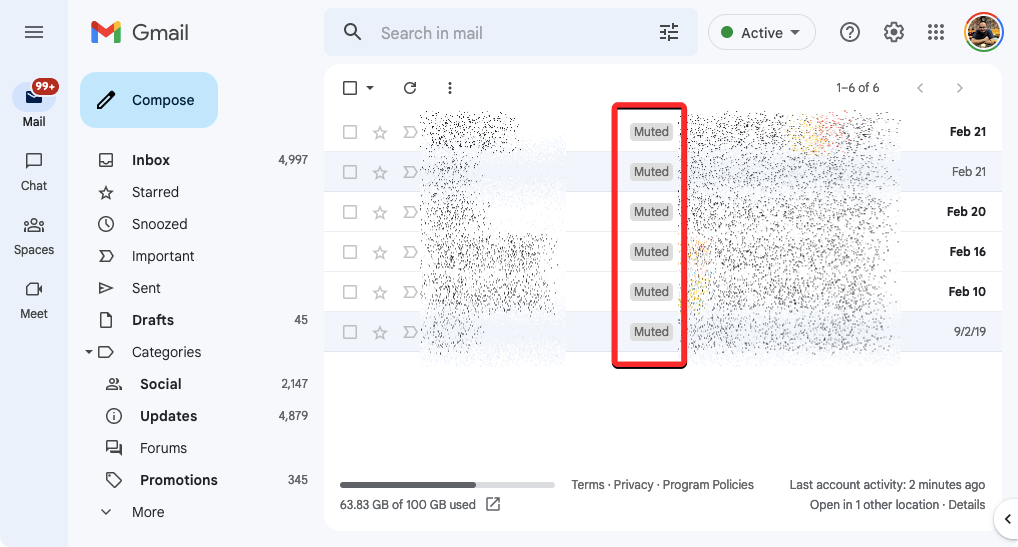
- On the next screen, Gmail should show all the messages you muted from your inbox and all of them will appear with a “Mute” label on the left side of the message preview.
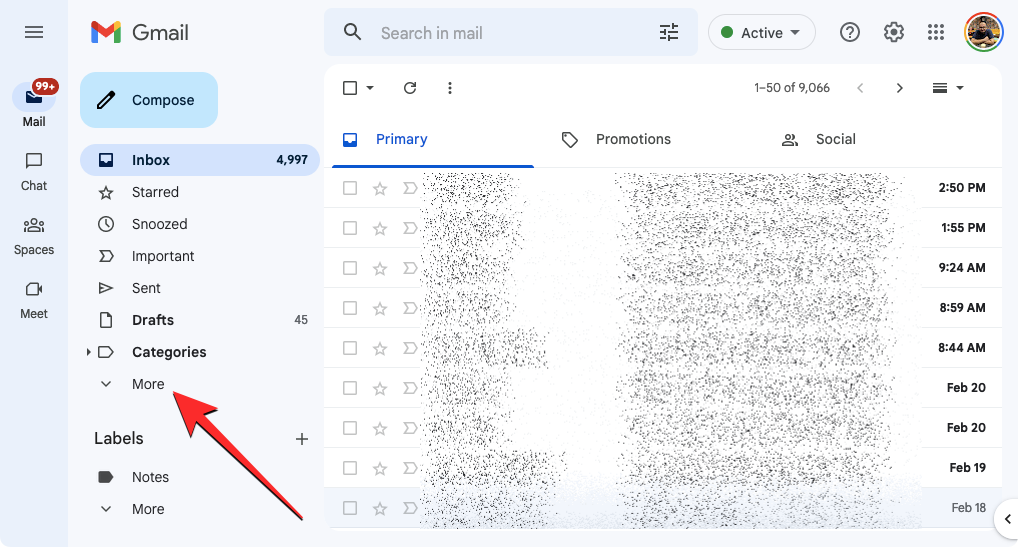
- You can also find muted messages on Gmail by clicking on the More tab from the left sidebar on the Inbox screen.
- When this section expands to show more labels, click on All Mail to proceed.
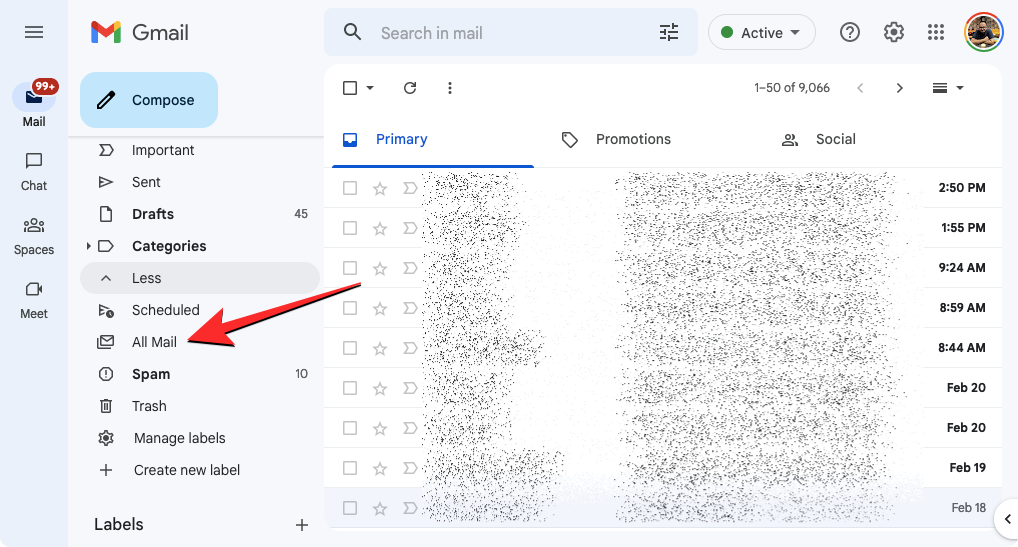
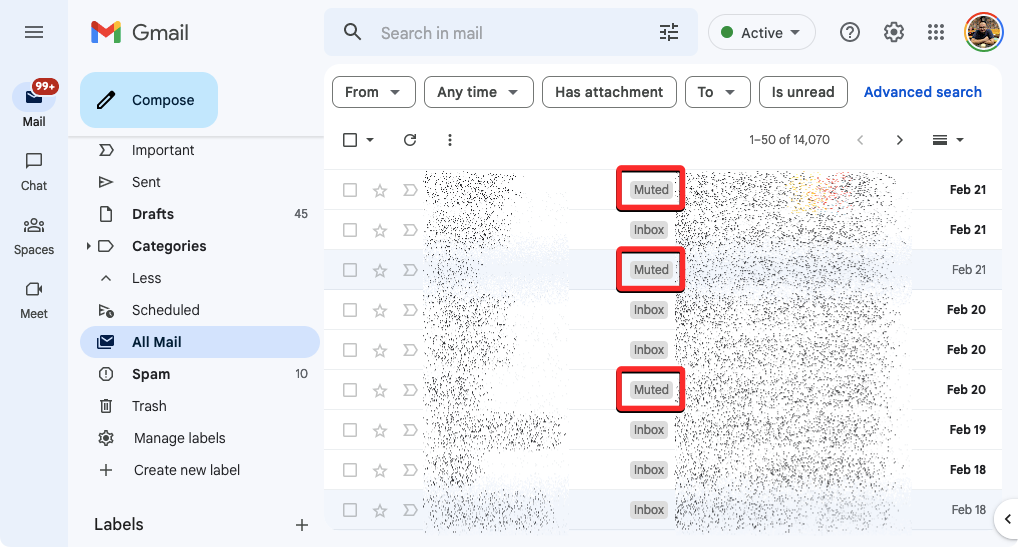
- You’ll now arrive on the All Mail screen that shows you all the messages you’ve received on your Gmail account with filters. From here, you can locate the messages you’ve muted by looking for a “Mute” label on the left side of their message previews. To distinguish muted messages from those that aren’t muted, Gmail will label them as “Inbox” or have other labels adjacent to them.
Method 2: Using the Gmail app on iOS/Android
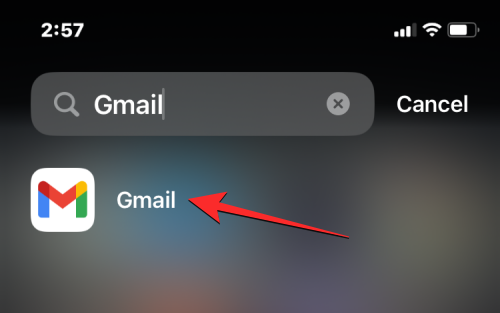
- If you view emails on your iPhone or Android device, you can check for messages you’ve muted by first opening the Gmail app on your phone.
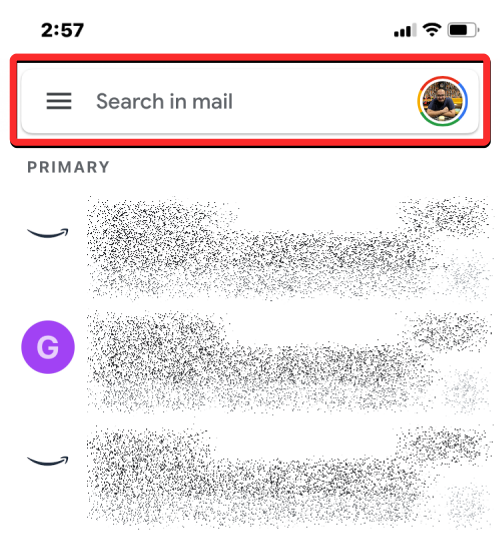
- When the app opens, you can tap on the search bar to look for muted messages the same way you would on the web.
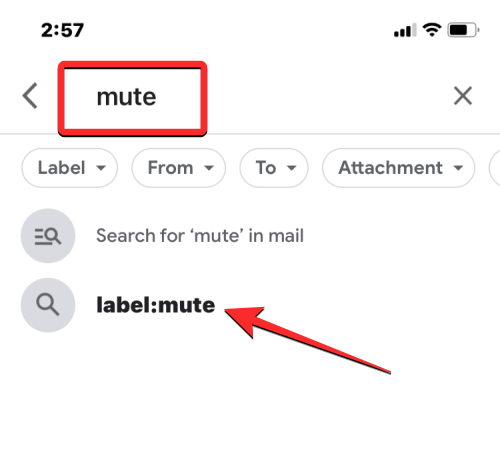
- Inside the search bar, type “mute” and select label:mute from the search results.
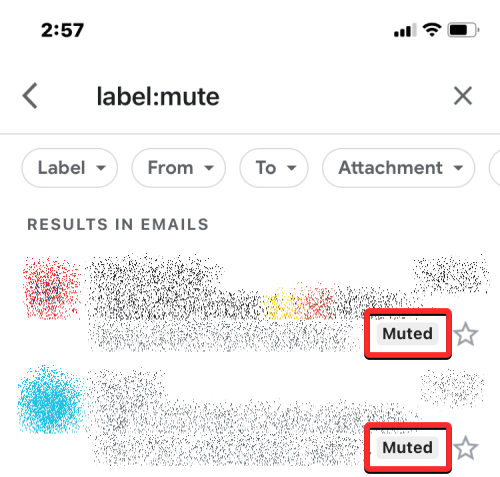
- This will load up all the messages you’ve muted in the past from your Gmail account.
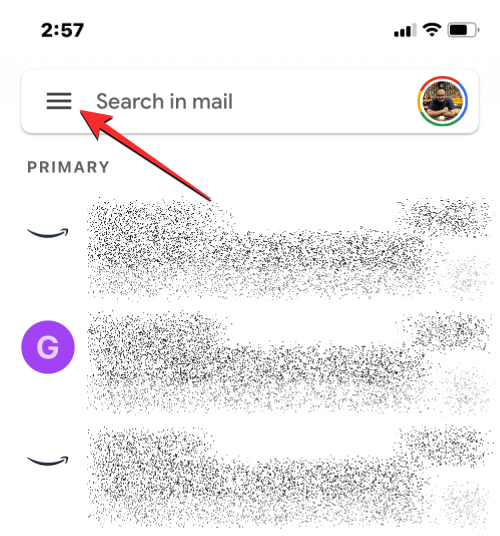
- You can also mute messages inside the All Mail section on the Gmail app. For this, tap on the 3-lines icon at the top left corner of the Gmail app.
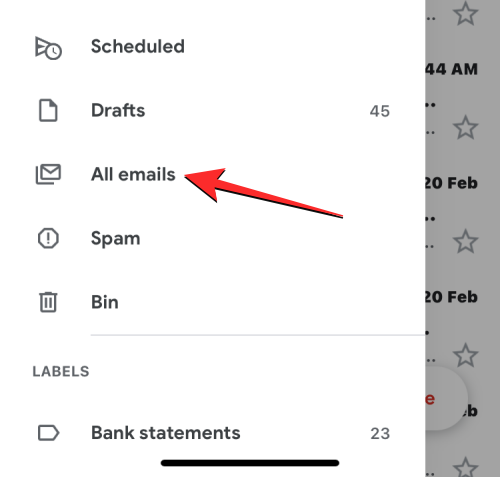
- In the sidebar that shows up on the left, select All emails.
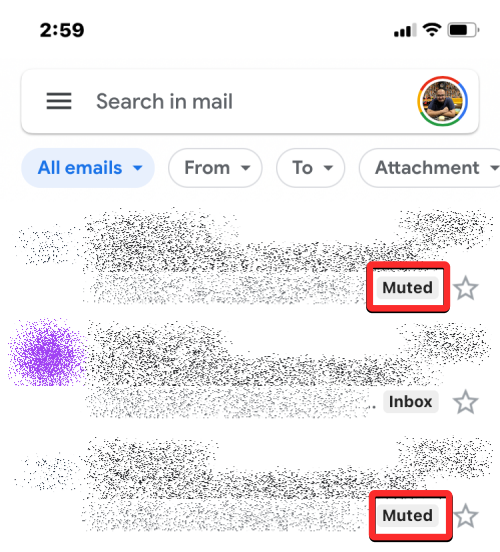
- You’ll now arrive on the All Mail screen that shows you all the messages you’ve received on your Gmail account with filters. From here, you can locate the messages you’ve muted by looking for a “Mute” label on the right side of their message previews. To distinguish muted messages from other messages that aren’t muted, Gmail will label them as “Inbox” or have other labels adjacent to them.
How to unmute messages on Gmail permanently [2 methods]
Once you’ve located the messages you want to unmute, you can follow the steps below to unmute them on Gmail.
Method 1: Using Gmail.com on the web
- To unmute an individual message from the All Mail screen or the search results, right-click on the desired message and select Unmute from the overflow menu.
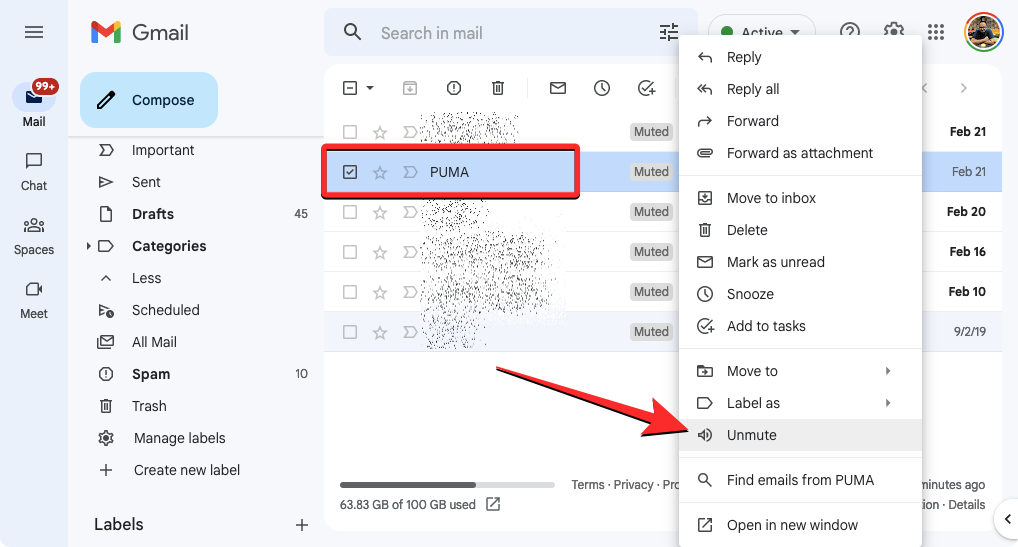
- The selected message will be unmuted and sent back to your Gmail inbox.
- To unmute multiple messages from this screen, check the boxes on the left-hand side of the desired messages you want to unmute.
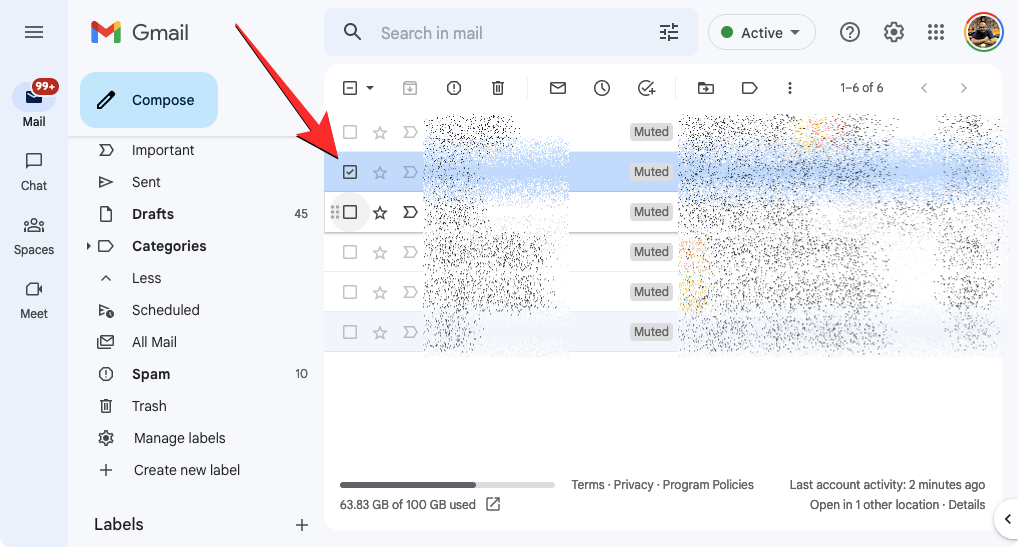
- When you select messages, they will be highlighted on the screen. Once you’ve made your selection, click on the 3-dots icon from the toolbar at the top (below the search bar).
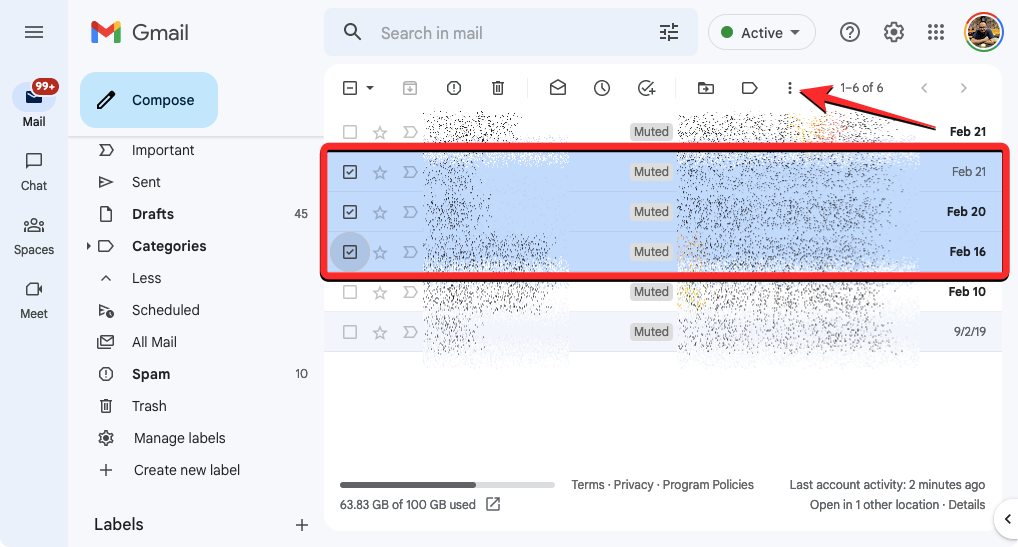
- From the options that appear in an overflow menu, click on Unmute.
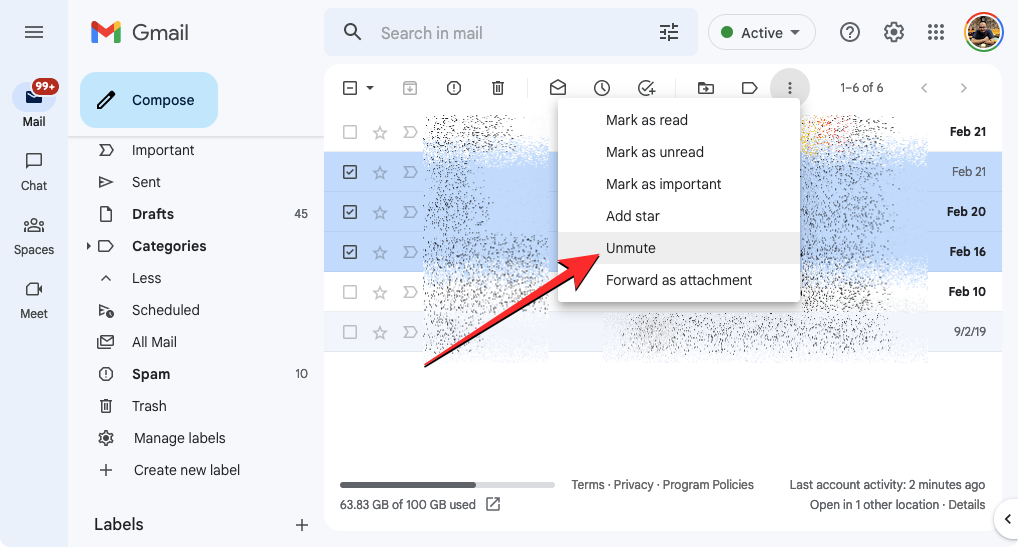
All the selected messages will now be unmuted and sent back to your Gmail inbox.
Method 2: Using the Gmail app on iOS/Android
When you find the messages you want to unmute, you can unmute them individually or all at once.
- To unmute a single message from this list, tap on the desired message to open it.
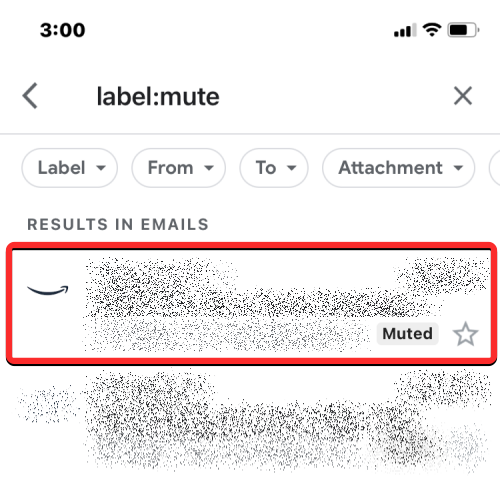
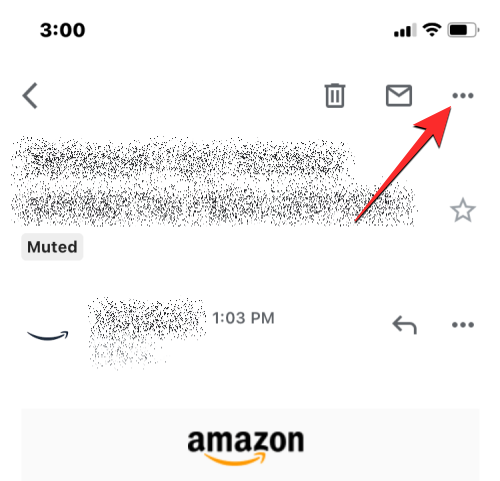
- When the selected message opens on the next screen, tap on the 3-dots icon at the top right corner.
- In the menu that pops up from the bottom, select Unmute.
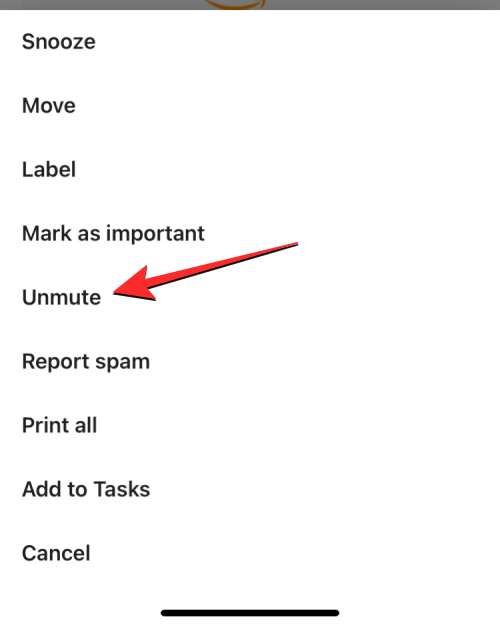
- The selected message will be unmuted and sent back to your Gmail inbox.
- To unmute multiple messages at once, tap and hold on one of these messages.

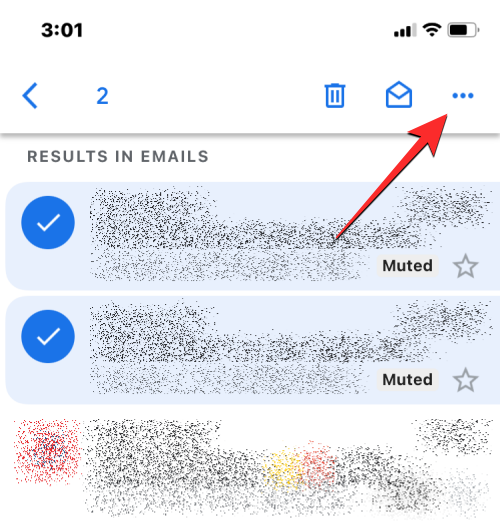
- When the selected message gets highlighted with a tick sign, tap on other messages you want to unmute. Once you’re done selecting all the messages you want to unmute, tap on the 3-dots icon at the top right corner.
- In the menu that pops up from the bottom, select Unmute.
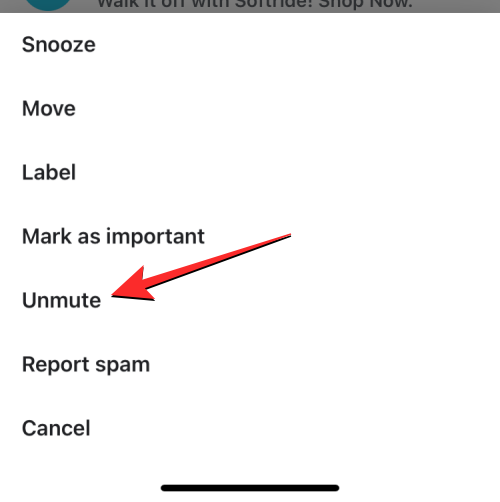
All the messages you selected will now be unmuted and sent to the inbox on your Gmail account.
How to unmute messages on Gmail temporarily [2 methods]
Muting is a convenient way to ignore messages and replies inside them on Gmail without taking extreme measures like deleting them or blocking the sender. When you unmute muted messages on Gmail, however, these messages will be sent back to your inbox permanently. If you wish to ignore messages temporarily inside Gmail, you can use the Snooze function to pause conversations for a limited time in a way that you can interact with them later.
► How to Snooze Messages on Gmail
Similar to Mute, when you use the Snooze feature, the selected messages will be removed from your inbox and sent to the Snooze folder inside Gmail. Here, these messages will be kept for a specific duration that you choose and you won’t receive any notifications when replies are sent to this conversation. After the specified duration, these emails will return to your inbox and you will continue to receive notifications for replies within them.
Method 1: Using Gmail.com on the web
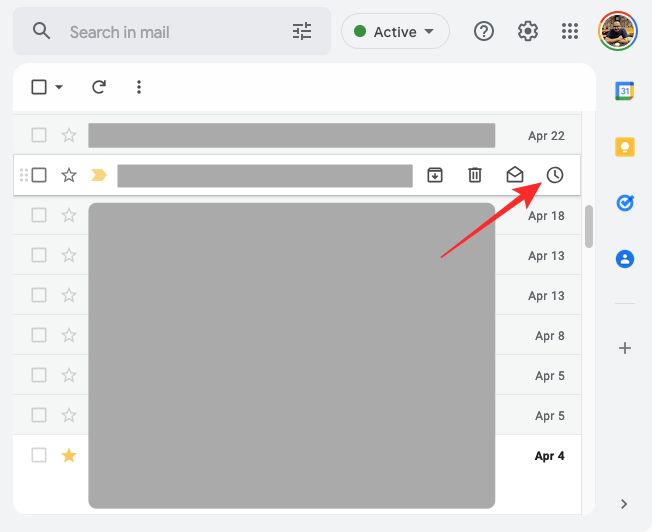
- To snooze an email on the web, open Gmail on a web browser and hover over the email you want to snooze. Now, click on the Snooze button (marked by a clock icon) on the extreme right side of the email to get more options.
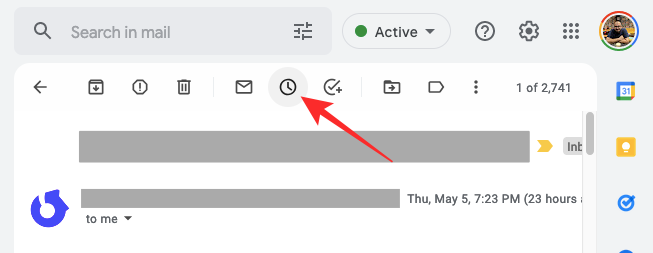
- You can also snooze an email after you open it by clicking on the Snooze button at the top (above the email’s subject line).
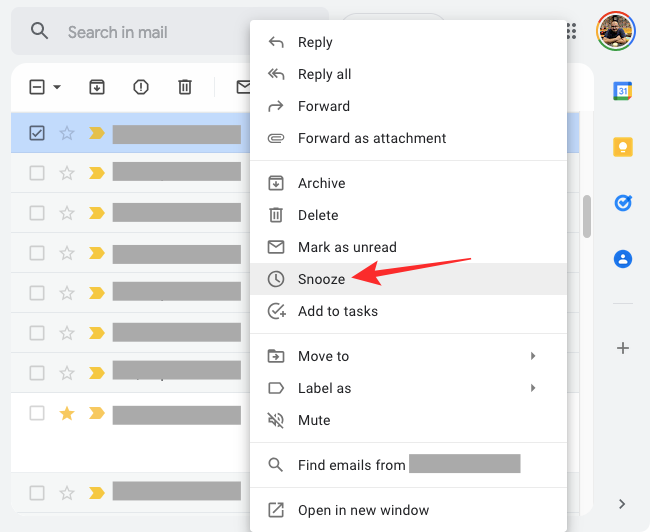
- Another alternative is to right-click on a message you want to snooze and select Snooze from the menu that appears.
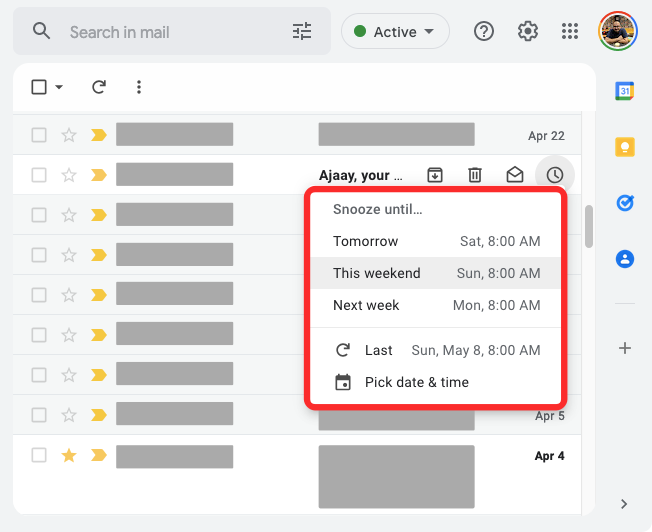
- In the overflow menu that appears, select a time you wish to be notified of this email. You can choose any of the default times from this menu – Later today, Tomorrow, This weekend, or Next week. Besides each of these options, you’ll be able to see the date and time for when the snooze time ends. If you wish to set a custom time, click on Pick date & time.
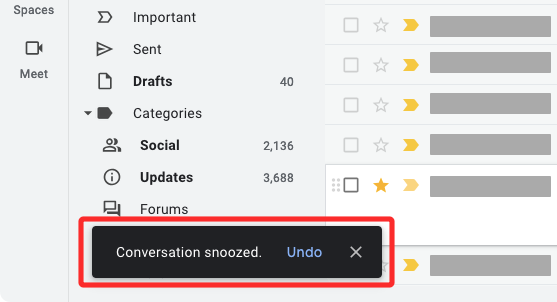
- You’ll see a “Conversation snoozed” banner at the bottom left corner of the Gmail screen. The selected email will be instantly sent to the Snoozed folder inside Gmail.
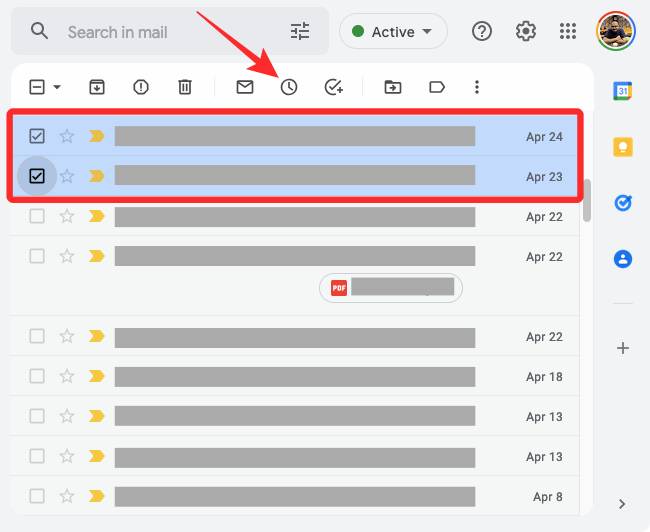
- You can also snooze multiple emails at once by checking the boxes on the left side of the desired emails and then clicking on the Snooze button at the top.
- When the snooze period ends, these messages will be automatically unmuted (unsnoozed) and will be visible inside your inbox again.
Method 2: Using Gmail app iOS/Android
- To snooze an email on your iPhone or Android phone, launch the Gmail app on your Android or iOS device.

- Inside Gmail, select an email from your inbox to snooze it.
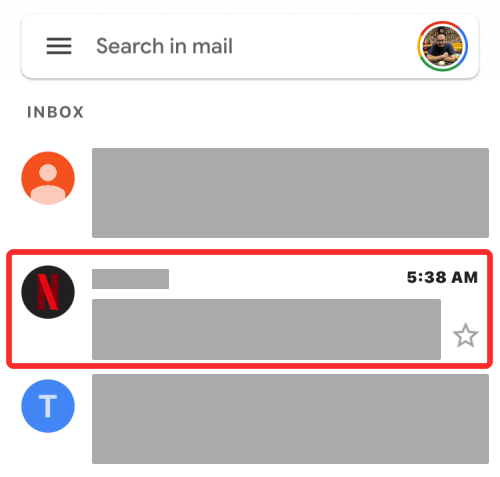
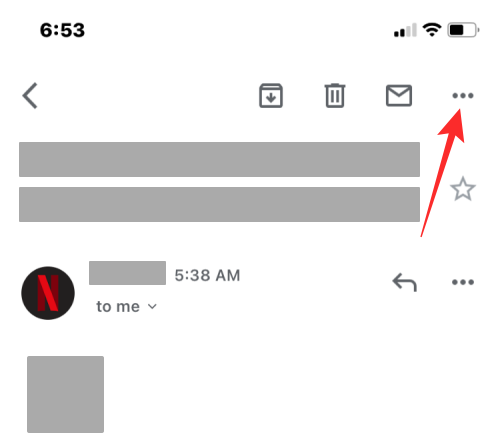
- When the mail opens, tap on the 3-dots icon at the top right corner.
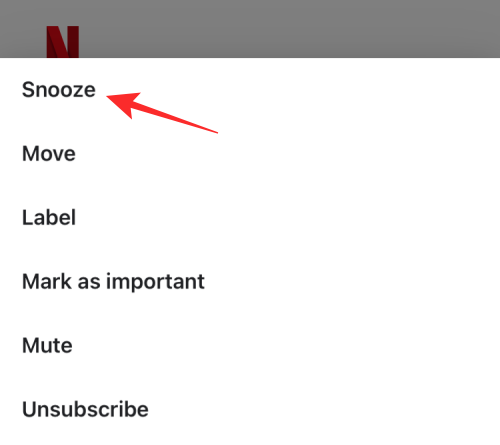
- In the menu that appears, select Snooze.
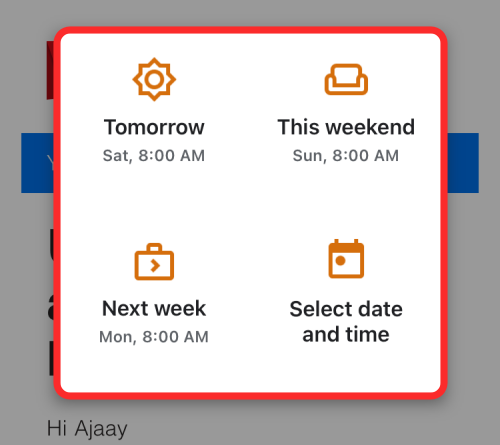
- You’ll now see an overflow menu that gives you a preset duration to snooze the message. You can select an option from this menu according to your preference – Later today, Tomorrow, This weekend, or Next week. You can also tap on Select date and time to set a custom time for snoozing.
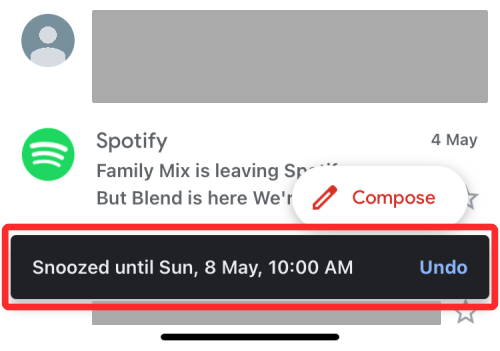
- The message will now be removed from your inbox and sent to the Snoozed folder. You should now see a banner at the bottom that reads “Snoozed until <date and time>”.
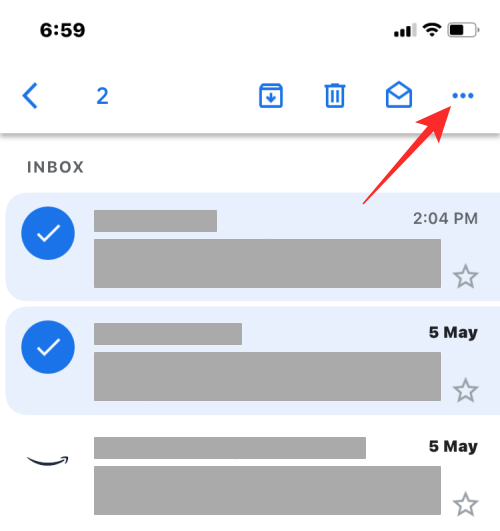
- You can also snooze multiple emails in your inbox at once by long-pressing on any one of the emails and then tapping on the desired emails to select them. When the selected messages are highlighted, tap on the 3-dots icon at the top right corner.
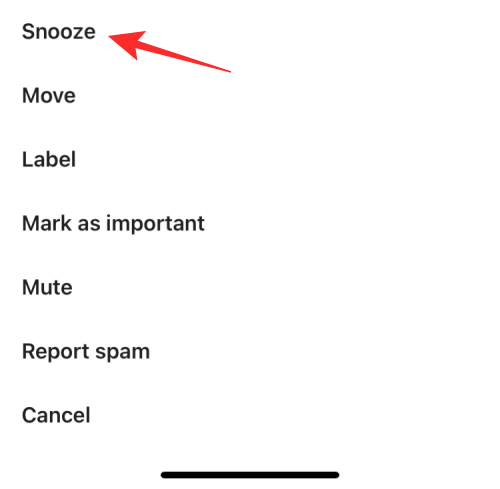
- Next, select Snooze from the popup menu and follow the instructions above to set a desired snooze period.
When the snooze period ends, these messages will be automatically unmuted (unsnoozed) and will be visible inside your inbox again.
What happens when you unmute on Gmail?
When you use the Unmute function on messages inside Gmail, the selected messages will move back into your inbox and will appear alongside other messages you received on Gmail. These messages will no longer carry the “Mute” label on them. Gmail will also send push notifications when you receive more messages from an unmuted conversation.
That’s all you need to know about unmuting messages on Gmail.






Discussion