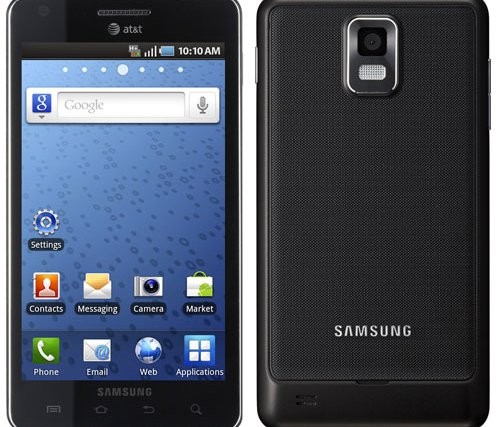
The Samsung Infuse 4G just saw the leak of a new firmware based on Android 2.3.6, UCLB1. Leaked firmware from Samsung seem to have become an everyday occurrence, but we sure don’t complain when we get to try out new firmware, which usually always have some improvements over the previous ones.
Well, join us as we guide you through the flashing procedure of the i997UCLB1 firmware on your Infuse 4G.
Warning!
The methods and procedures discussed here are considered risky and you should not attempt anything if you don’t know completely what it is. If any damage occurs to you or your device, we won’t be held liable — you only will be responsible, you’ve been warned!
Compatibility
This rom and the guide below is compatible only and only with Infuse 4G, model number I997. It’s not compatible with any other device. Check your device’s model number in: Settings » About phone. If it’s not I997, please do not attempt this.
Pre-Installation Requirements/Tips
- Backup your Apps and important data — bookmarks, contacts, SMS, APNs (internet settings), etc. This Android backup guide would help you.
- If you have Samsung’s PC software Kies installed, uninstall it first because it may interrupt the flashing process.
- Drivers! — it’s important you’ve the proper drivers installed.
Download links: 32 bit (x86) Windows | 64-bit (x64) Windows
How To Install UCLB1 Firmware on Samsung Infuse 4G:
- Download UCLB1 firmware.
→ Download Link | Filename: SGH-I997_I997UCLB1_ATT.rar. Size: 171 MB - Download Odin 1.7 from -> here
Filename: Odin v1.7.exe - Extract the downloaded file ‘SGH-I997_I997UCLB1_ATT.rar’ of UCLB1 firmware to get these 2 files (the file-names may end with .tar instead of md5 as the file extension is hidden, so don’t worry):
- I997UCLB1-Homebinary.tar.md5
- SS_DL.dll [not to be used]
- Disconnect your phone if it’s connected to PC. Switch Off your phone. Wait for vibration to confirm complete switch off.
- Now, put the Infuse 4G in Download Mode — connect USB cable to PC, then connect the cable to the phone while pressing and holding the Volume Up and Down buttons.
- Open Odin (from step 2) — double-click the Odin3 v1.7.exe.
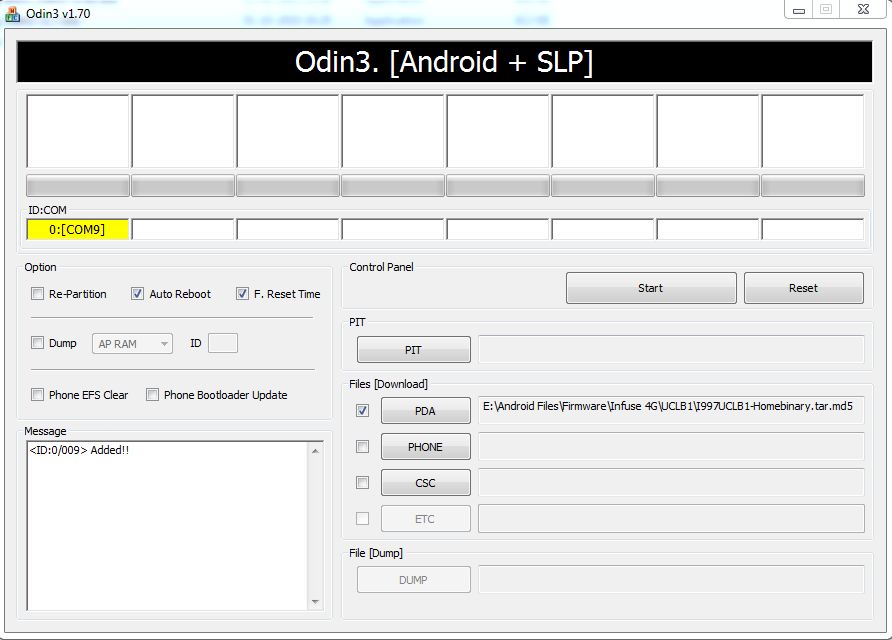
- Connect your phone to PC now. You should get the message “Added! !” under the Odin’s message box in the bottom left. If you don’t get this message, then probably there is a problem with drivers. Make sure you’ve proper drivers installed. See point 3 above under ‘pre-installation tips’.
- In Odin, click on PDA and select the file “I997UCLB1-Homebinary.tar.md5” (from step 3.1).
- Important! On Odin, make sure Auto Reboot and F. Reset Time check boxes are selected. Do not touch any other check box or tab or anything, except as was required in step 7 above.
- Double check everything said in step 8 and 9 above. Your Odin’s window should look similar to this:

- Now, hit the START button to start the flashing procedure. When the flashing is complete, your phone will automatically reboot — and when you see the Samsung logo, you can safely unplug the cable. Plus, you’ll get a PASS (with green background) message in the left-most box at the very top of the Odin.IMPORTANT Note: If ODIN gets stuck and doesn’t seem to be doing anything, or you get a FAIL message (with red background) in ODIN, do the following:
Disconnect the phone from the PC, close ODIN, remove battery, re-insert it, turn phone on in Download mode again, and do the procedure again from Step 6.
- When it has restarted, your Infuse 4G will be running the UCLB1 2.3.6 firmware. Check version in Settings>About phone.
That’s it. The UCLB1 Android 2.3.6 firmware is now installed on your Infuse 4G. Share your thoughts and problems (if any) in the comments below and we’ll do our best to help you out.


works like charm but went back to floyo, because was unable to root, nice room
works like charm but went back to floyo, because was unable to root, nice room
works like charm but went back to floyo, because was unable to root, nice room
How long does it take? Will the android screen display anything to inform you the progress? Will Odin give indication of the progress? How long at one “message” in Odin before I determine that it didn’t work?
I got it to work. It got stuck on the “attempting connection”, but on second try it worked like a charm.
How long does it take? Will the android screen display anything to inform you the progress? Will Odin give indication of the progress? How long at one “message” in Odin before I determine that it didn’t work?
How long does it take? Will the android screen display anything to inform you the progress? Will Odin give indication of the progress? How long at one “message” in Odin before I determine that it didn’t work?
I got it to work. It got stuck on the “attempting connection”, but on second try it worked like a charm.
I got it to work. It got stuck on the “attempting connection”, but on second try it worked like a charm.
Does this require rooting?
Does this require rooting?
Does this require rooting?
Its not work on mine. It displays
— Copying media files…
E :failed to mount /dbdata (File exists)
E :copy_dbdata_media:Can’t mount /dbdata
your storage not prepared yet. please use UI menu
for format and reboot actions.
Its not work on mine. It displays
— Copying media files…
E :failed to mount /dbdata (File exists)
E :copy_dbdata_media:Can’t mount /dbdata
your storage not prepared yet. please use UI menu
for format and reboot actions.
Its not work on mine. It displays
— Copying media files…
E :failed to mount /dbdata (File exists)
E :copy_dbdata_media:Can’t mount /dbdata
your storage not prepared yet. please use UI menu
for format and reboot actions.
I HAVE TO DO THIS PERMITS SUPERUSER. I can INSTALL PROPER ROM BY AN SD CARD?
I HAVE TO DO THIS PERMITS SUPERUSER. I can INSTALL PROPER ROM BY AN SD CARD?
I HAVE TO DO THIS PERMITS SUPERUSER. I can INSTALL PROPER ROM BY AN SD CARD?