Gone are the times when you needed to make extensive ROM backups on your device, saving them either on your internal or Micro-SD storage. With the latest TWRP 3.1 update having been released officially, users will now be able to make direct backups of their apps and data from their PC itself.
For those not in the know, ADB (Android Debug Bridge) is a command line tool that allows you to access every nick of your Android phone via the command line. It’s a very powerful tool, and the latest TWRP 3.1 update has brought in support for ADB for taking TWRP (nandroid) backup directly on the PC.
Below is a handy guide to create an ADB backup using TWRP recovery. Follow it to the word and you should be good to go.
How to take TWRP Backup via ADB on PC
- Setup ADB on your PC.
- Connect your device to the PC via USB.
- Enable Developer options on your device:
- Go to Settings » About phone.
- Tap Build number 7 times until it says You are now a developer.
- Under Setting » Developer options, set USB debugging to On.
- Reboot your device into TWRP recovery.
- On your PC, create a new folder where you want to save the TWRP backup files. Then do Shift + Right click on any empty white space inside the folder, and select Open command window here from the context menu.
- Once command window is open, type in the following command to initiate TWRP backup:
adb backup --twrp
- This will bring up the GUI and allow you to choose partitions from the backup page.
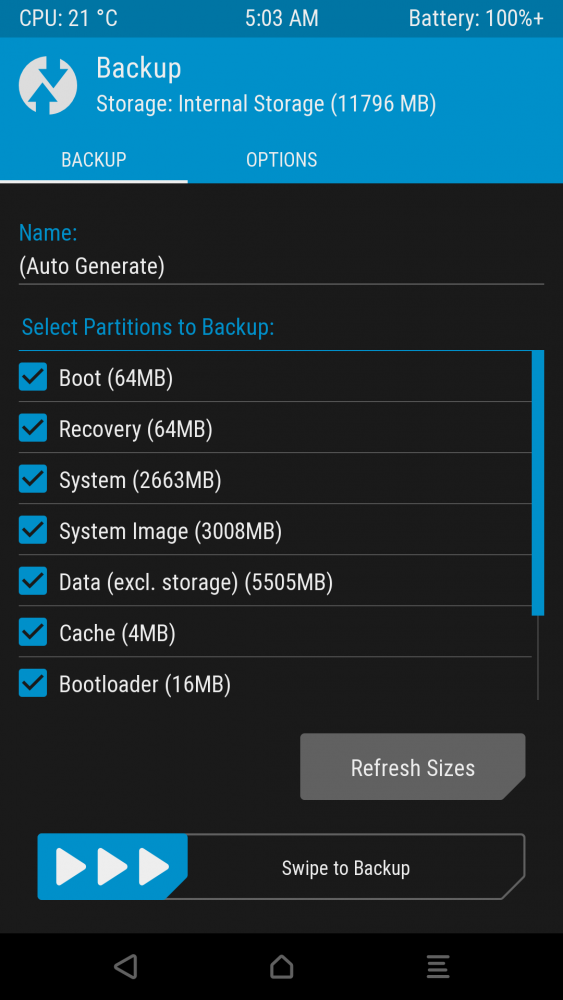
- Select the partitions you want to include in your backup and then Swipe to backup.
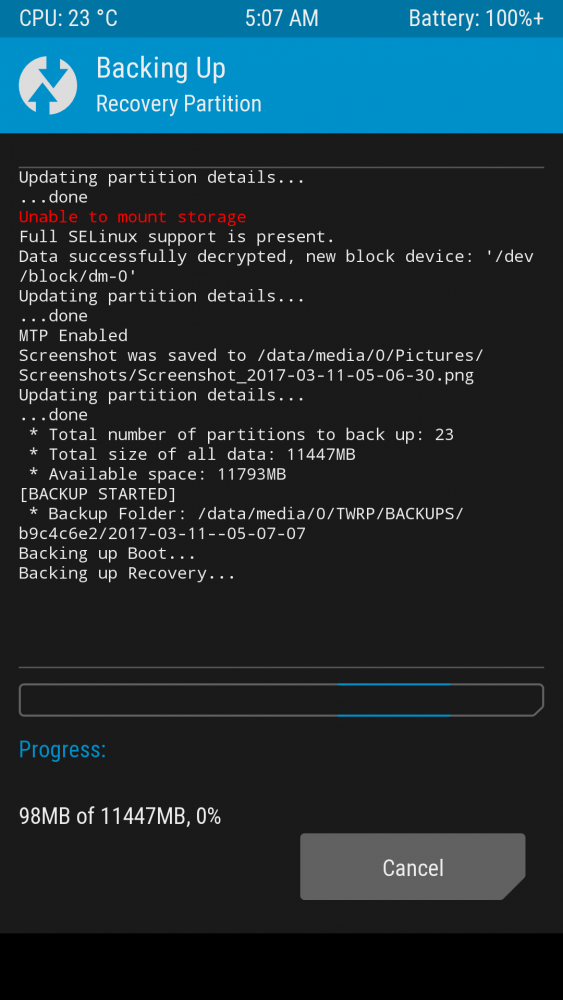
- Wait until backup process finishes. Once completed, you can disconnect your device from the PC.
How to Restore TWRP backup via ADB?
If you can take a TWRP backup via ADB, you can of course restore it back to the directly from the PC via ADB. To do that, do the following:
- Open a command window inside the folder where you saved the TWRP backup on your PC.
- Boot your device into TWRP recovery, and connect to the PC via USB.
- Issue the following command into the command window:
adb restore --twrp
That’s it.





First of all thanks for nice tutorial
I’m getting “Now unlock your device and confirm the backup operation” error
Hey Prateek, many people are encountering this error primarily because your command prompt (adb) fails to recognize that you’re connected to the TWRP recovery. I suggest that you re-insert the usb cable and reboot into TWRP recovery all over again, just to be safe.
This can be fixed by ensuring that you always plug your phone into your pc FIRST, before going into TWRP. (for anyone else encountering this error)
Same problem as prateek – nothing happens after ‘adb backup –twrp’
adb devices recognises device is in recovery, twrp is booted, but nothing starts
Is this possible using fastboot boot twrp.img or do i need to install recovery? I can’t see why that would matter
Edit rebooted and worked 🙂
Since this was officially added as a feature, is there a reason why it wasn’t included in the normal menu of “select storage”? It’s so silly having to open up a command line if it’s implemented in the recovery itself. We could already push adb backups going the nerdy way, I was hoping they would add a user friendly option. Meh, just meh.
This does work. Super easy way
Backup to PC and you backup to your internal storage. This guide seems useless.
This dioes not work friend. At least not with Win 10 and powershell. Tells me it doesn’t knwo what I’m talking about
I think you need to add the “. ” before adb commands.
So, try this: . adb backup –twrp
Let me know.
I missed the part about installing ADB on the PC, but it still doesn’t work. Couldn’t mount partition, backup failed is all it says on this galaxy s6
For me to restore the backup, typing ‘adb restore –twrp’ doesn’t work.
The way it does work for me however, is by typing ‘adb restore backup.ab’.