

Ever since its launch ChatGPT has caught the world by storm and now millions of people use it to get answers on a wide range of topics, from science and technology to history and current events. Besides answering your questions, ChatGPT can give you suggestions on movies, books, music, and more, based on your interests and preferences, help you improve your writing, practice a new language, and also engage you in conversations about your interested topic.
As powerful as it is, at the moment, the only way to converse with ChatGPT is using texts that you can type inside the service’s UI to get your desired results, again in text form. If you’re wondering whether you could use ChatGPT without needing to input text every time you want to ask a query, then you should be excited to know that there are indeed ways to use ChatGPT with your voice as the input and in this post, we’ll explain you all the ways you can get it done.
11 best ways to talk to ChatGPT on your phone or PC
You can use your voice to talk to ChatGPT and get the desired results on any device that you may use. However, depending on the device you currently own and your preference, there are different ways to converse with ChatGPT using your voice.
On PC (7 ways)
If you wish to engage in a conversation with ChatGPT using your voice from a computer, you can do that by following any of the following methods. It’s worth noting that you are required to have the following things in check before attempting to use any of these methods:
- You’re using a computer with an inbuilt or an external microphone so that your voice can be used as input.
- You have an active internet connection which is necessary to use ChatGPT or any service that’s based on it.
- There’s a web browser installed on your desktop, preferably Chrome or Firefox.
1. Using Talk-to-ChatGPT Google Chrome extension
If you’re looking for the easiest way to have a conversation with ChatGPT via voice, then the Talk-to-ChatGPT extension on Google Chrome is the way to go. The extension can be used on all desktops – Mac or Windows, as long as the user has Google Chrome installed on their device.
Talk-to-ChatGPT requires you to have ChatGPT running on Google Chrome in the foreground to work. It can recognize your voice; so you don’t need to type in your input manually. The extension can also speak out responses from ChatGPT by giving it a voice to make the conversations feel more natural.
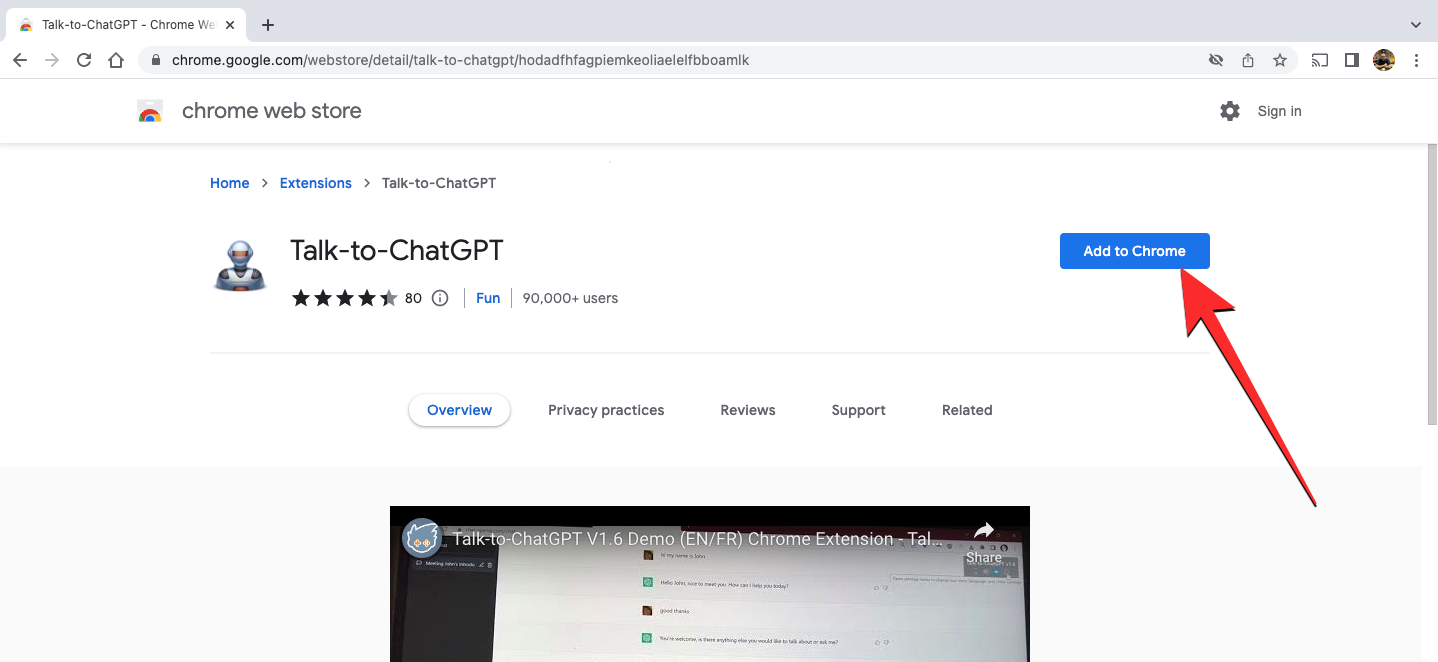
All you need to do is access the Talk-to-ChatGPT extension from this Chrome Webstore link and then add it to Chrome. This will enable the extension when you launch ChatGPT on your Chrome browser.
Once the ChatGPT homepage loads up, you should see a Start button at the top right corner. Clicking on this button will enable the extension to interact with ChatGPT on your behalf.
You may need to give this extension access to your Microphone before making the first voice query. When you start, you can speak the query you want to ask to ChatGPT and when the chatbot gives you a response, it will be converted to speech by the Talk-to-ChatGPT extension.

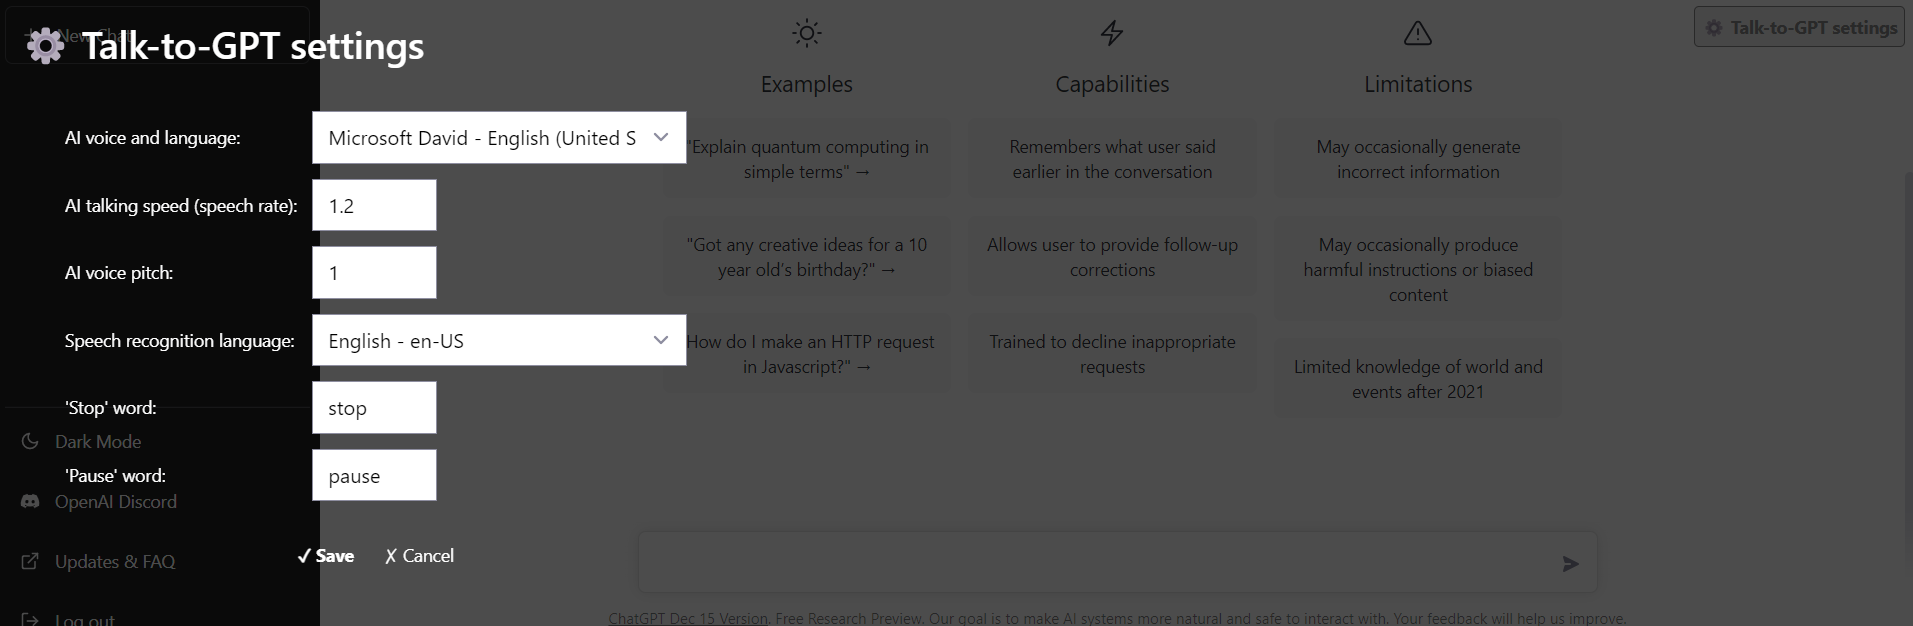
When this extension is active, you should see a box with four different options appear at the top right corner of the screen. These options let you toggle voice recognition, and text-to-speech, skip the current response, and access the extension’s settings menu. Inside the Talk-to-ChatGPT settings, you can change the AI voice and language to something other than English, modify the talking speed for the responses you get, change voice pitch, change the speech recognition language, or alter trigger words for stopping or pausing the extension.
You can see a demonstration from the extension’s developer here:
2. Using chat.D-ID
chat.D-ID is a web app that takes using ChatGPT a step further by allowing you to converse face-to-face with a photo-realistic AI face. The developers behind this tool, Israeli-based D-ID, have combined their streaming animation technology with OpenAI’s ChatGPT to create a unique text-to-video streaming experience where you can hold a real-time conversation naturally.
Instead of inputting text and getting responses in text, you can use your voice to ask the tool anything and get audio responses from the AI with accurate facial animation.
You can access chat.D-ID by going to this link which will load the tool’s web app on your web browser. You will have to sign up to start using chat.D-ID but the tool can be used for free once you’ve created an account. Once you’re signed in to your account, you will be greeted by the tool’s animated avatar named “Alice” at the top of the screen which may appear almost real-like.
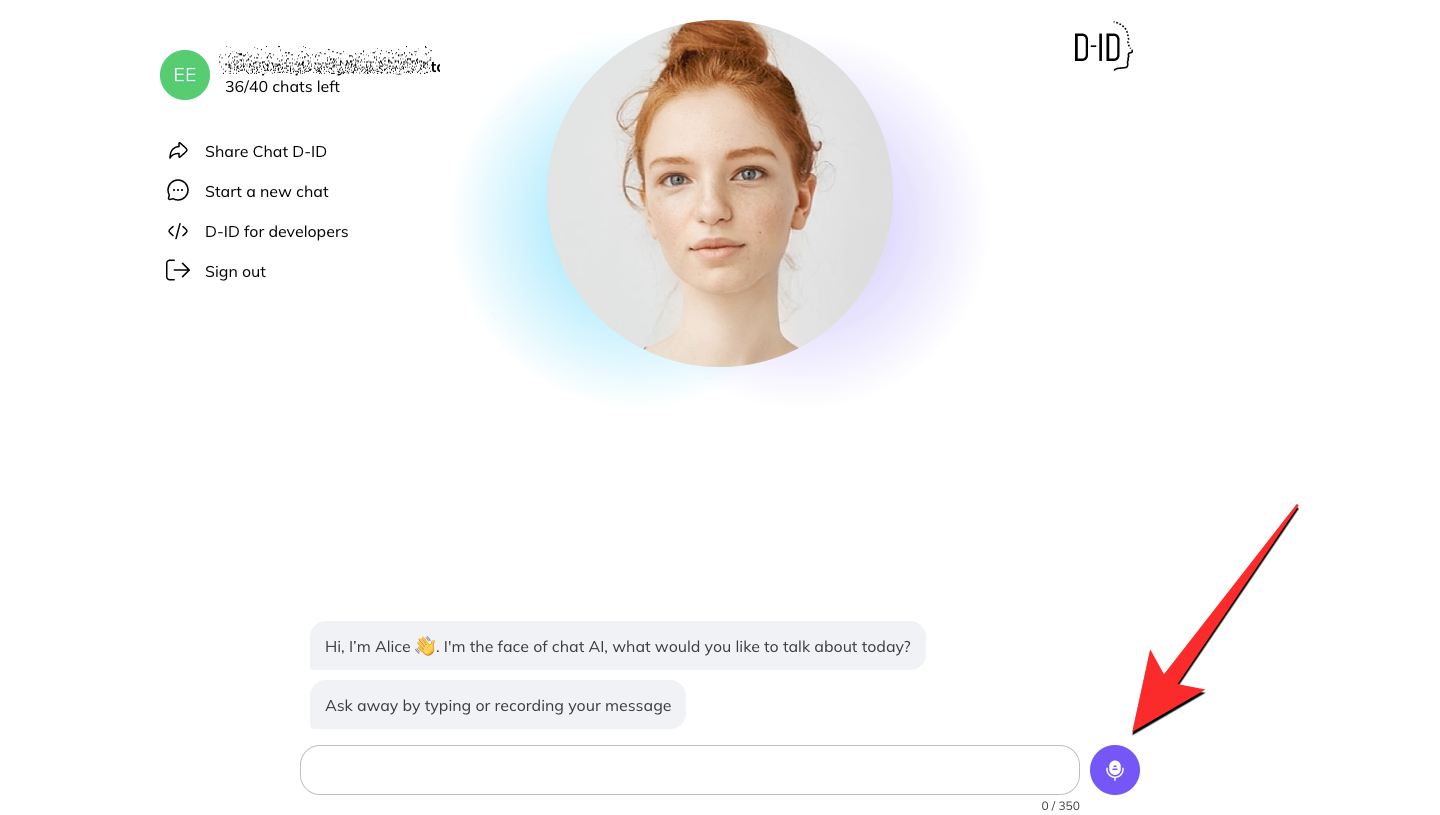
Like ChatGPT, you will see a text box at the bottom where you can type in your input. To make this interaction more easy, you can click on the Microphone button on the right side of the text box and the tool will now start listening for input.
As you speak, your text should be transcribed onto the text box which can you share as input by clicking on the Send button.
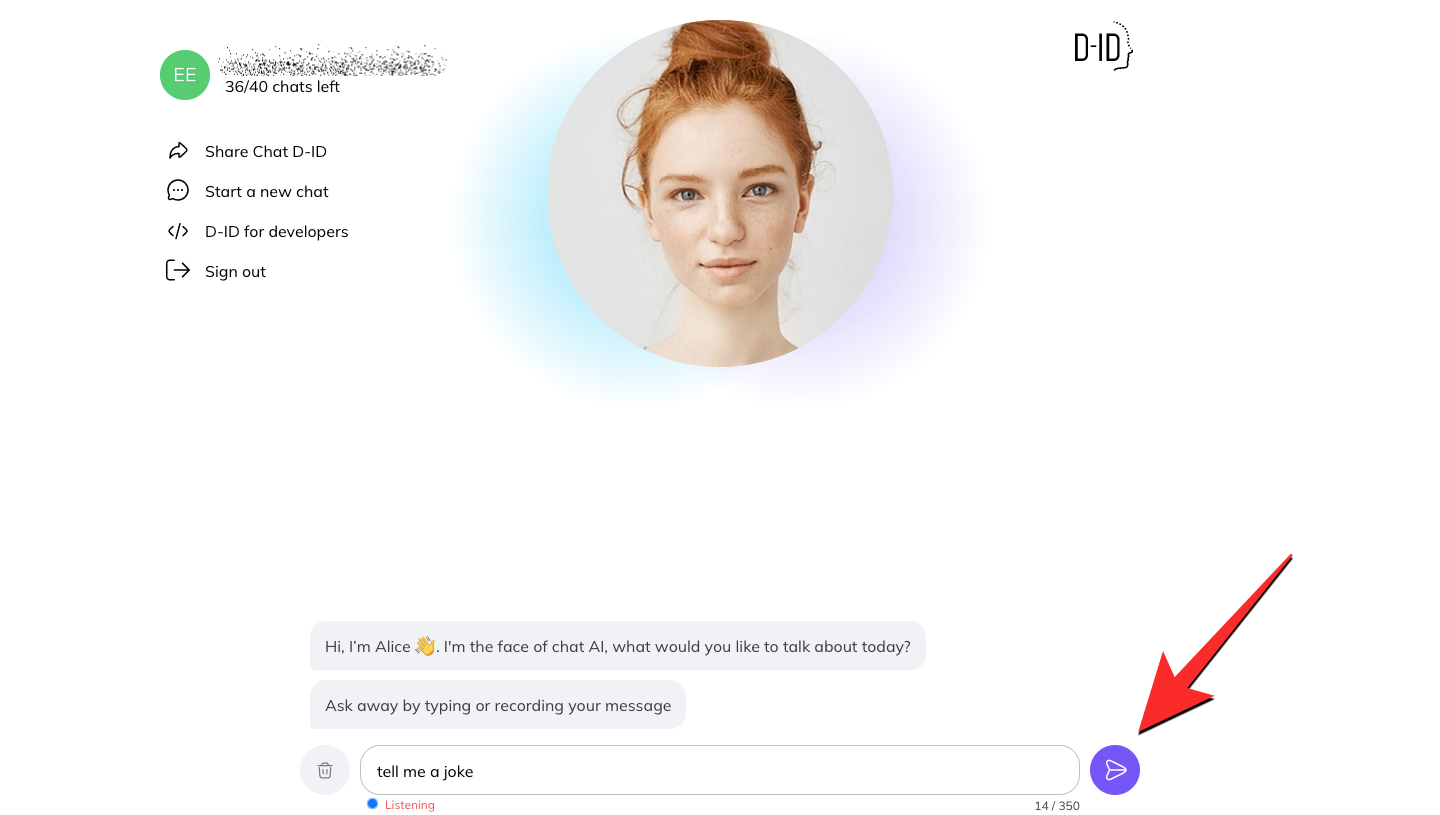
When the AI processes your request, you should see the response on the screen and Alice will also read it out with facial animation.
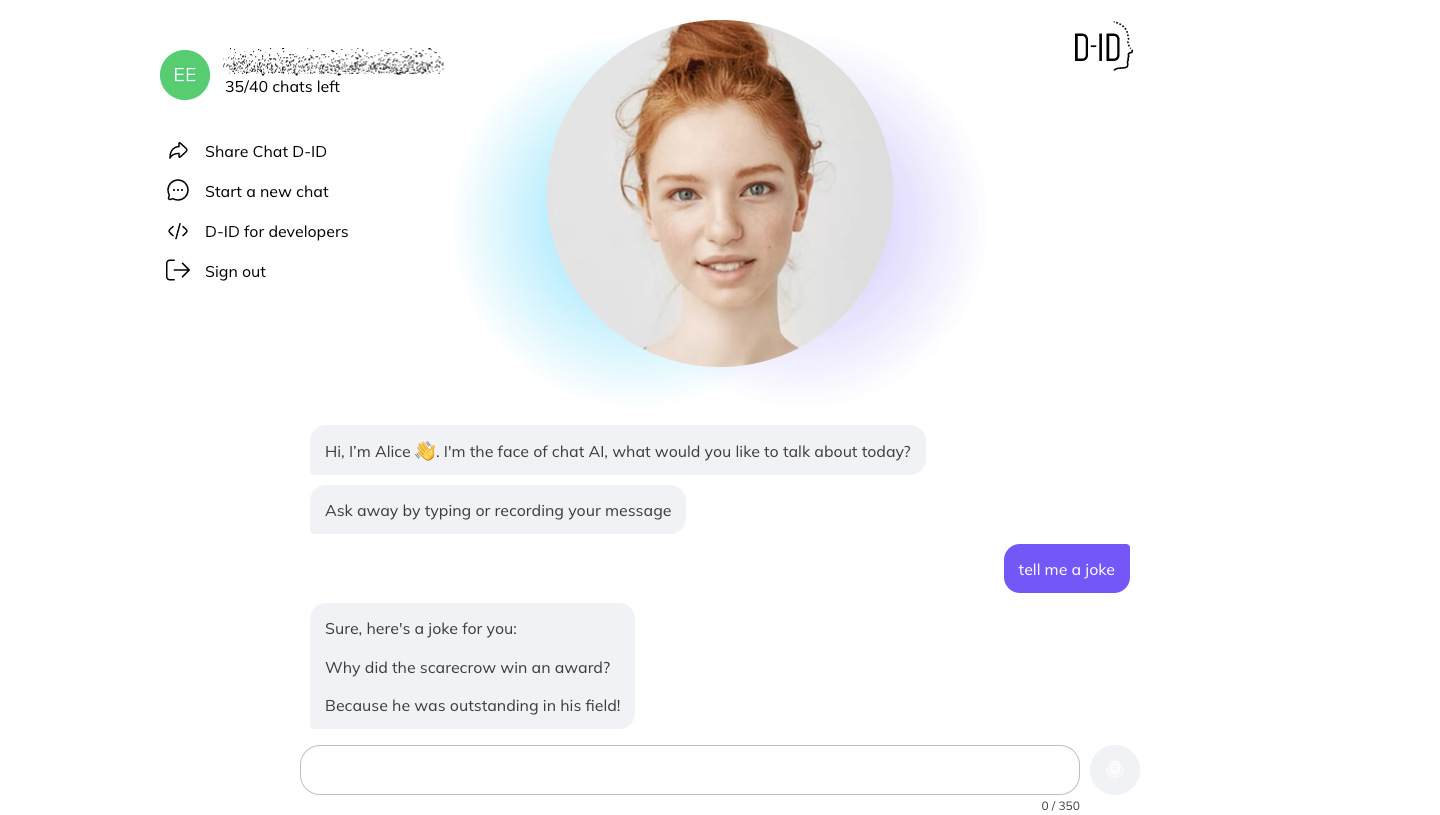
D-ID says there will soon be multiple avatars you can choose from soon and users will also get the option to turn faces from images into avatars in the future. Although the web app comes with limited usage of just 40 chats at the start, it’s a fun way to interact with AI using chat.D-ID.
3. Using Writesonic Chatsonic
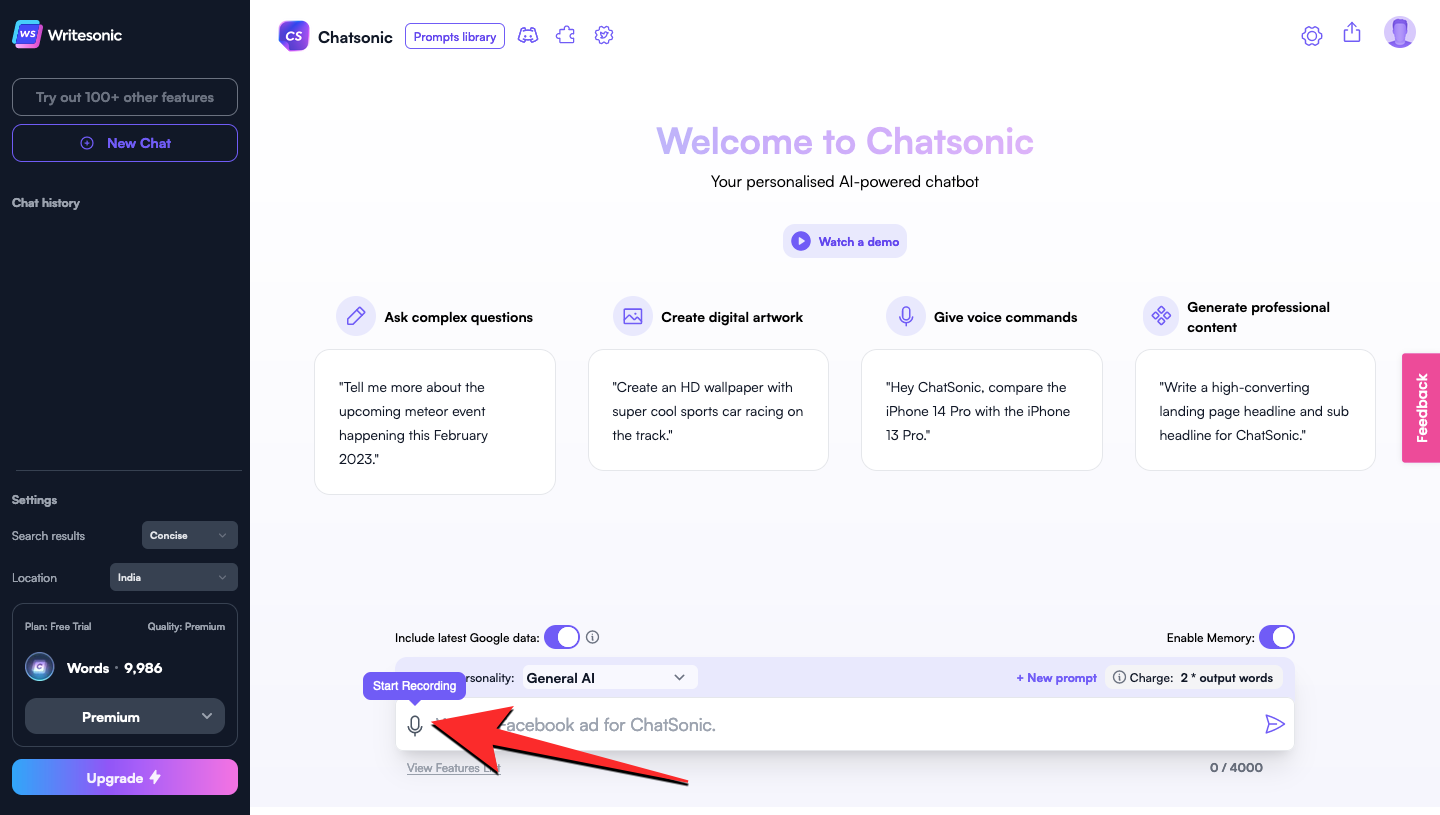
Writesonic is one of the popular AI-powered writing tools available to create content for blog posts, social media content, email marketing campaigns, product descriptions, and more. The service now offers a new tool – ChatSonic which takes advantage of ChatGPT as well as Google Search to give you relevant responses to your queries.
Before you can use the tool, you need to sign up to create an account on Writesonic from this link. Once you’re signed in, you should see Chatsonic’s chat interface on the screen showing a text box to enter your input alongside a microphone button. This microphone icon can be accessed to record your input through your voice and when you do that, the service would respond to your query in the same way ChatGPT does.
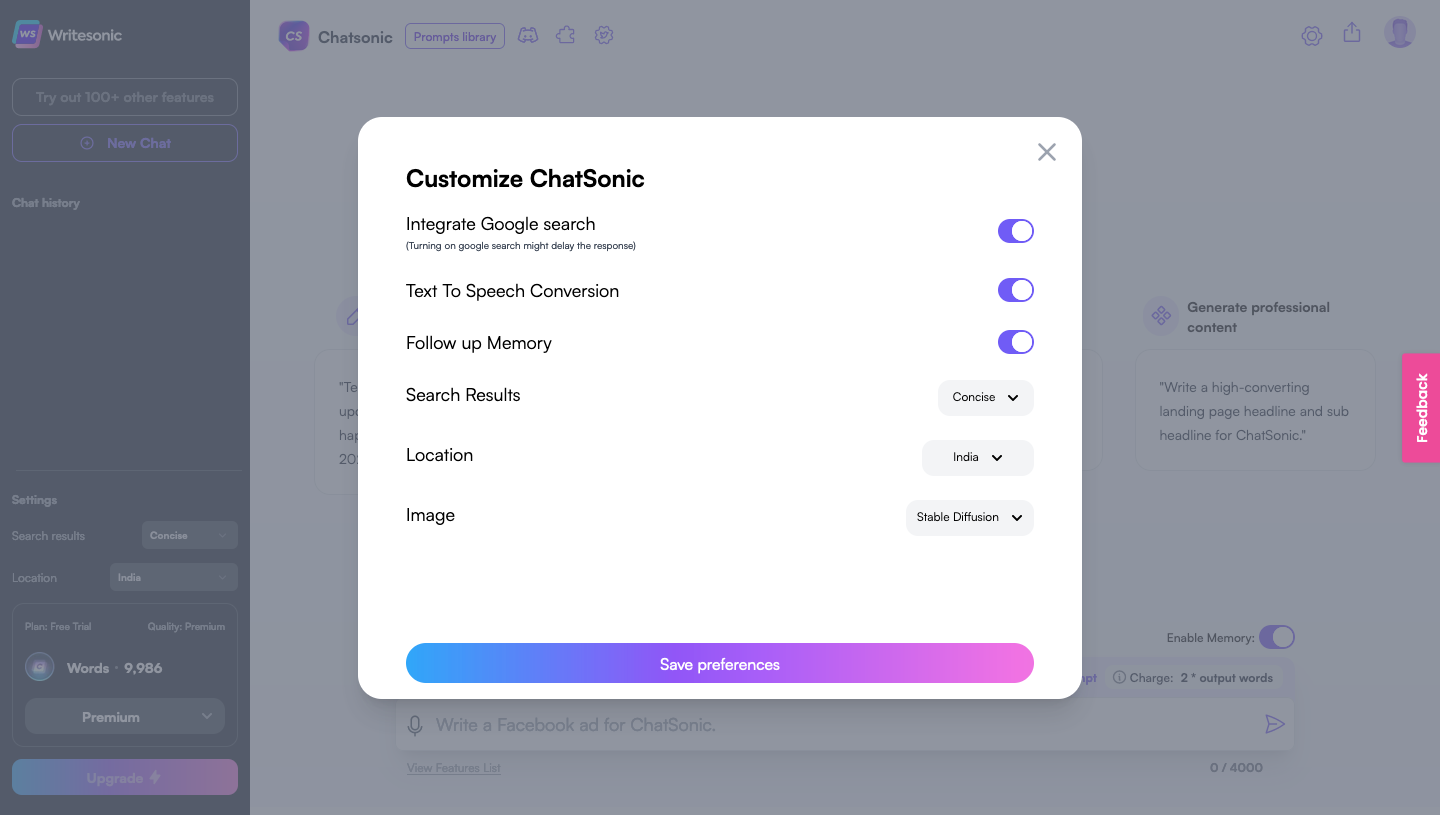
By default, Chatsonic only gives responses in texts but you can opt to receive them in audio form by accessing the Settings icon at the top right corner. Here, you can turn on Text To Speech Conversion to allow Chatsonic to read out the responses it gives. You can also toggle other options here like Google search integration, follow-up memory, the type of results you want to see (concise or detailed), your location, and more.
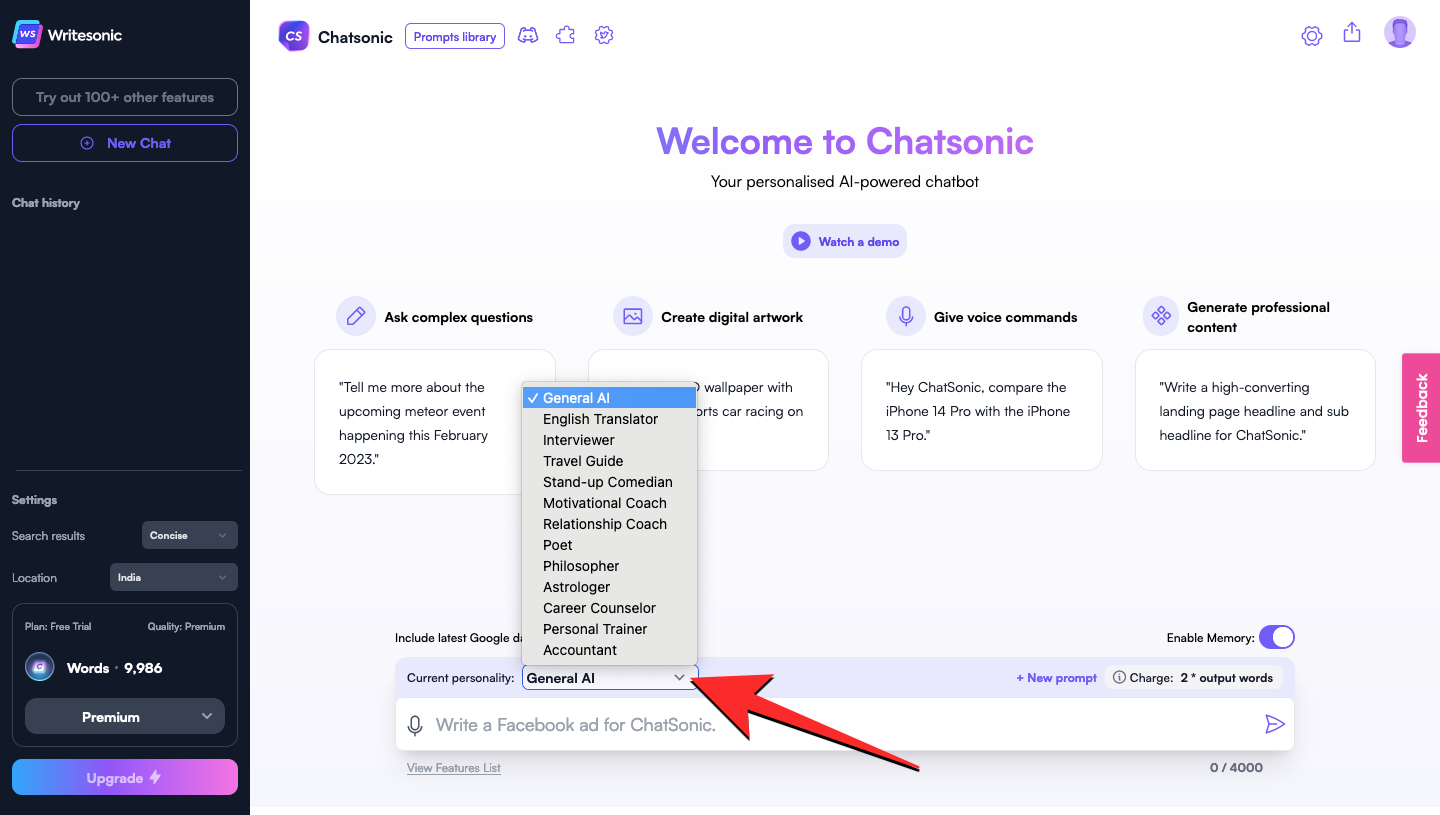
An interesting feature we found inside Chatsonic is the ability to switch the AI’s personality to something specific. You can change the AI’s personality to that of an interviewer, comedian, motivational coach, poet, philosopher, personal trainer, and more from the Current Personality dropdown menu. In addition to ChatGPT, Chatsonic also employs OpenAI’s DALL-E model to help you generate digital AI artwork from text input.
Chatsonic is free to use for up to 10,000 words per month – it’s the number of output words that get generated. When you run out of this limit, you may have to wait for the count to reset at the start of the next month or upgrade to one of their Premium plans.
4. Promptheus – Converse with ChatGPT
If wish to interact with OpenAI’s ChatGPT directly, you can check out Promptheus which is a Google Chrome extension. When you add the Promptheus extension to your Chrome browser, you’ll be able to use your voice to enter your input inside ChatGPT without needing to type your query.
You can simply press and hold the Space key on your keyboard to start recording your input. Once you lift the Space key, the input from your voice will be transcribed into text and added to the ChatGPT’s text box. You aren’t required to manually send the input as the extension does it for you as soon as you stop pressing the Space key. The extension currently supports over 40 languages, so you’ll be easily able to ask ChatGPT questions in your preferred language.
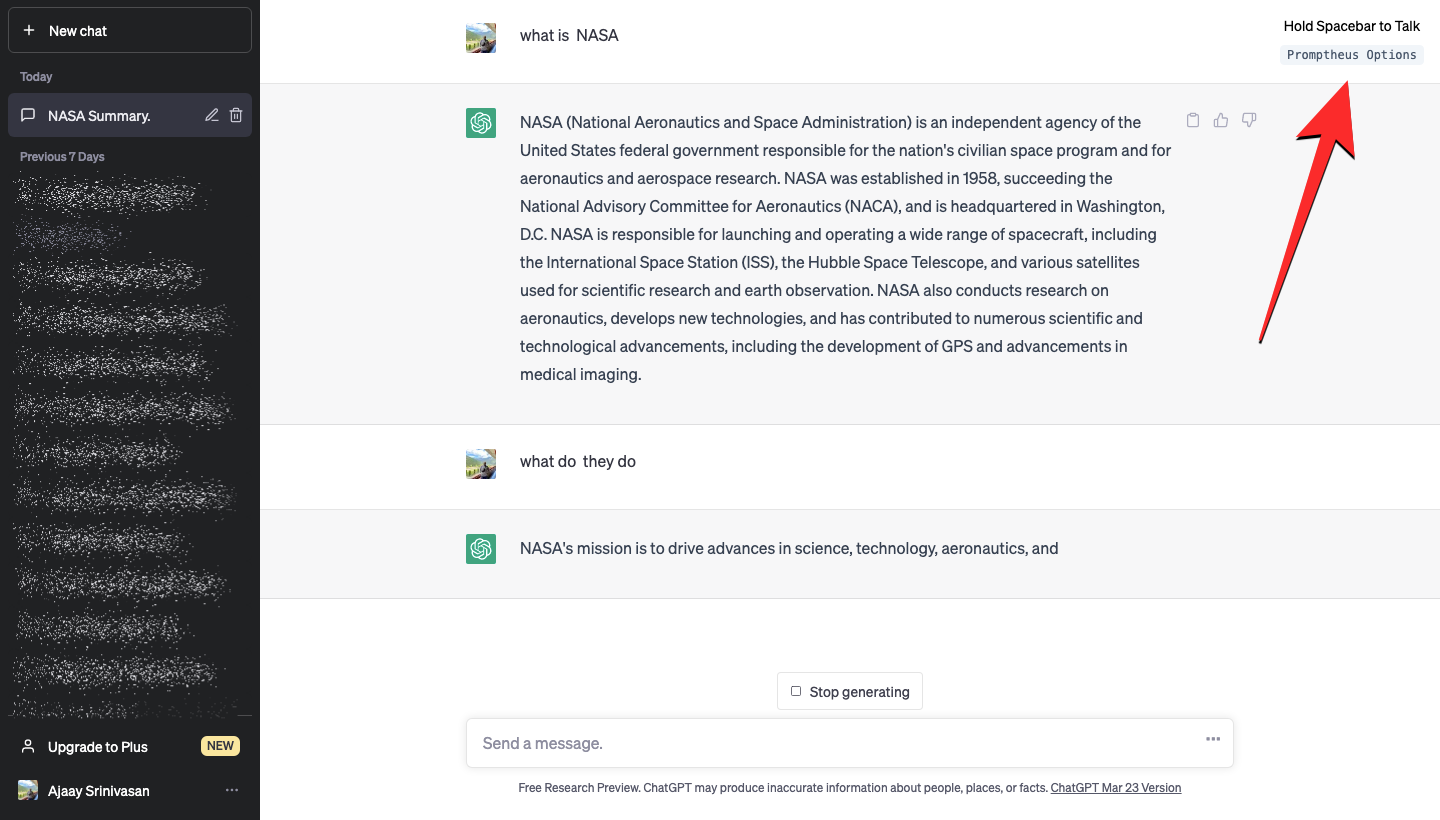
In our testing, Promptheus was able to convert our voice into text within fractions of a second and even send it as your input. Practically, you should be able to get a response from ChatGPT as soon as you lift up the Space key. The extension also lets you control different aspects which you can do by clicking on Promptheus Options at the top right corner of the screen.
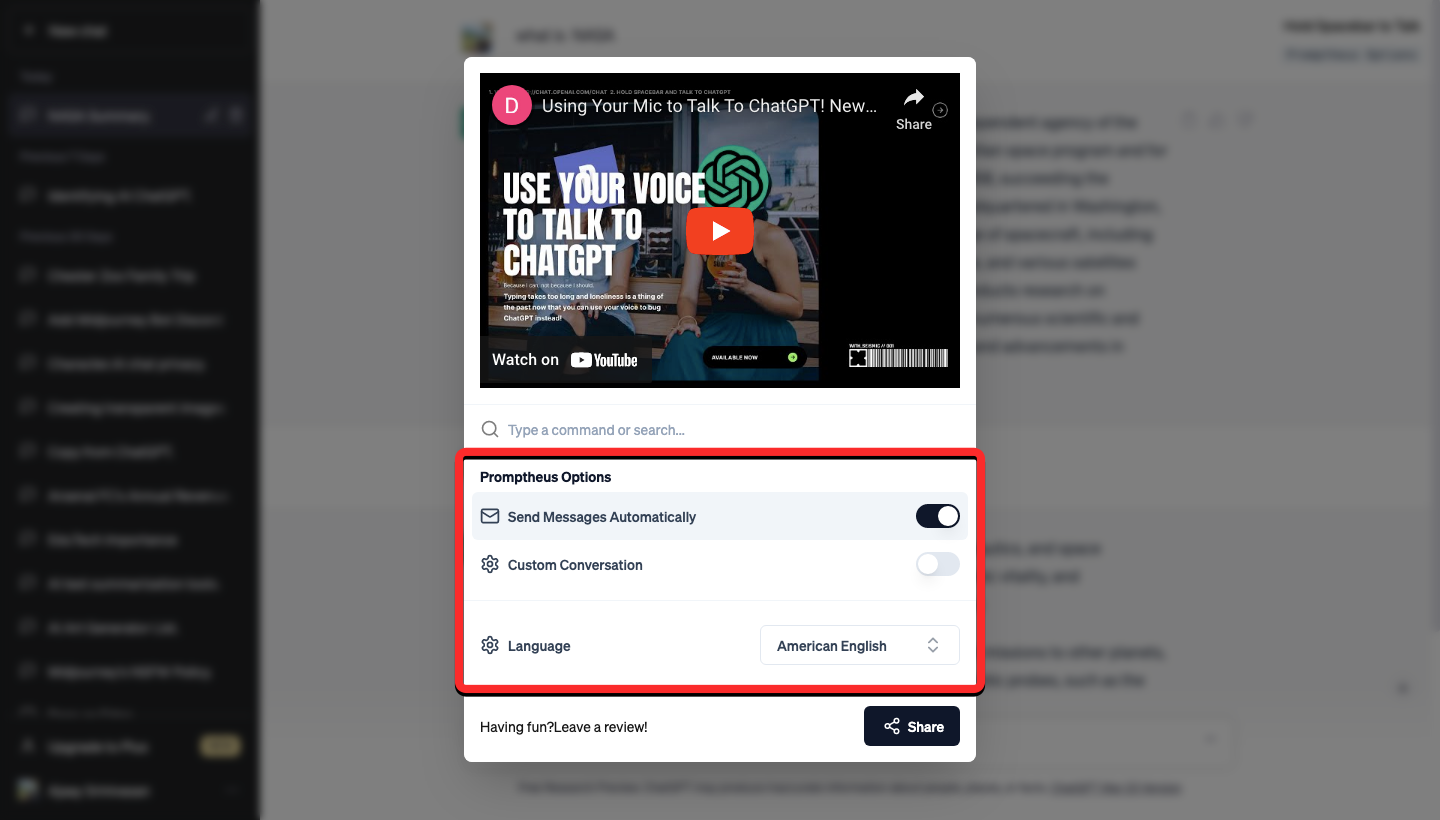
This will open the Promptheus Options box that will allow you to toggle sending messages automatically, create custom conversations, and change the input language.
5. TalkBerry – Talk To ChatGPT
TalkBerry is yet another ChatGPT extension that you can use with Google Chrome. This extension lets you talk to ChatGPT using your voice by adding a microphone button to convert your voice into text. In addition to converting your voice into text, TalkBerry can read out the responses from ChatGPT in your preferred voice and this makes interacting with ChatGPT via voice more seamless than other tools.
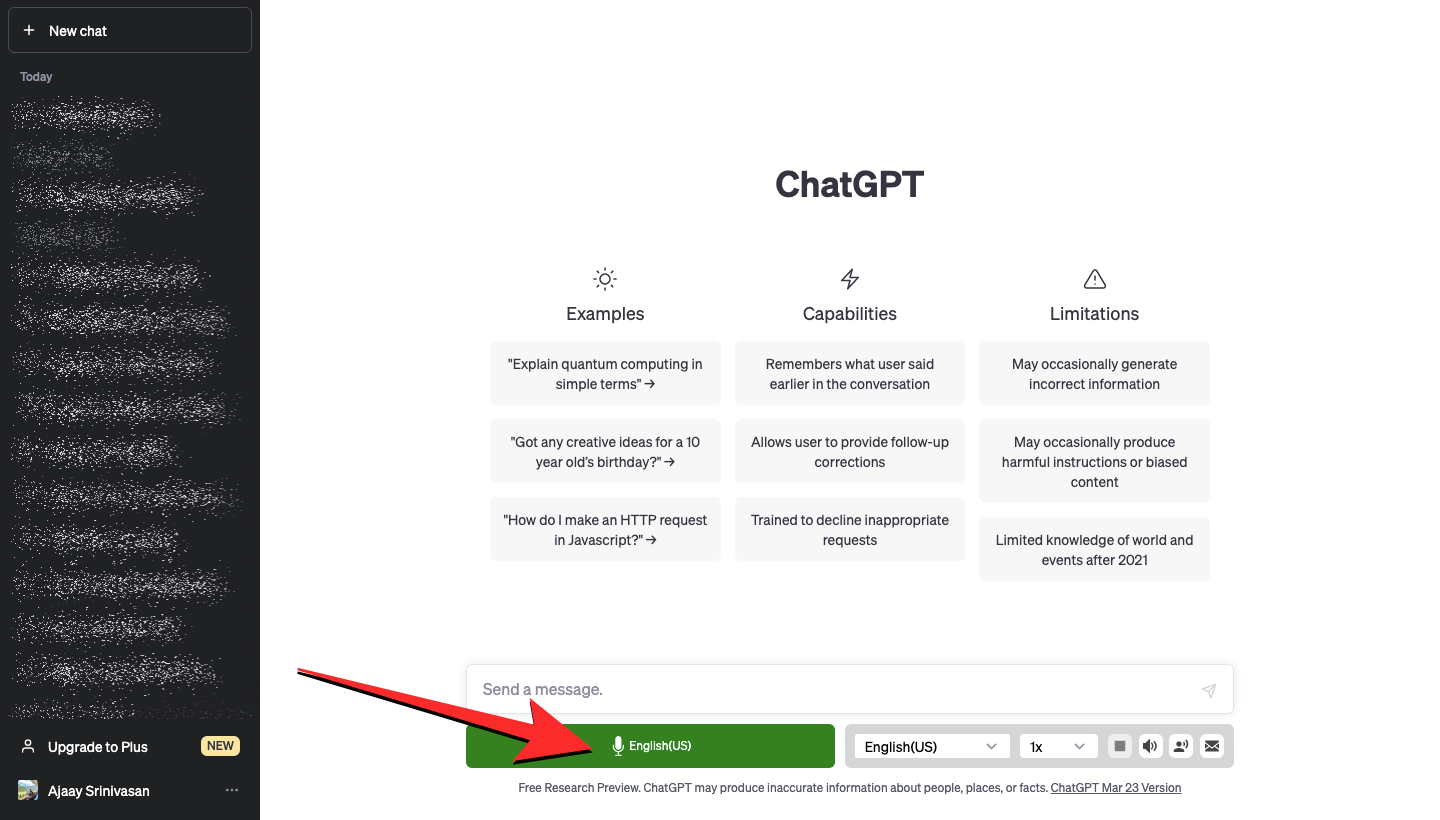
Unlike other extensions which float around at the top right corner, TalkBerry is accessible inside ChatGPT’s interface at the bottom, just under the text box where you would usually type your input. When you add TalkBerry to your Chrome browser and open ChatGPT, you should see the extension’s interface at the bottom with a green microphone button. You can click on this button to start recording your voice.
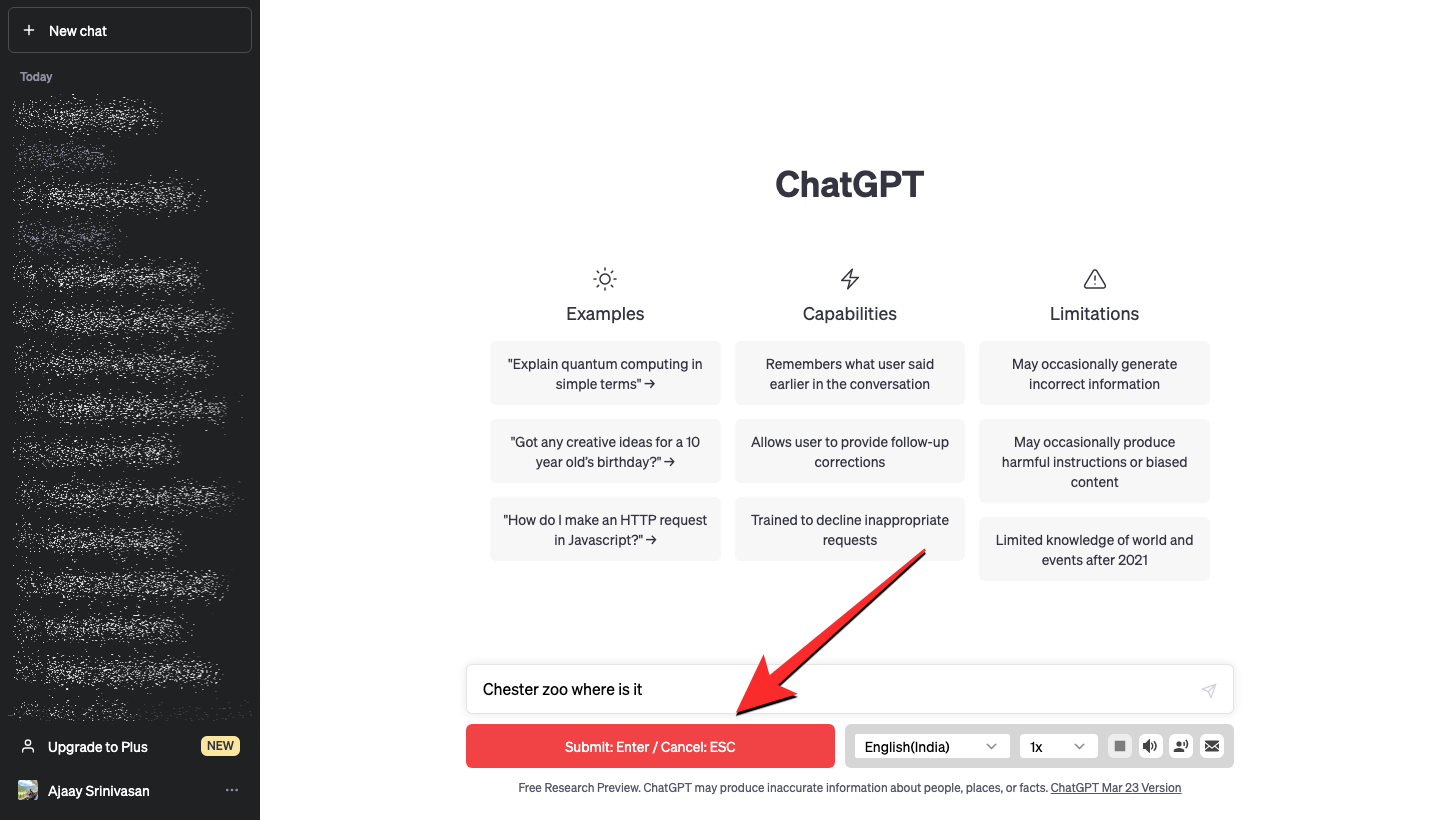
When you’re speaking the input text, you can click on the red Submit button which shows up in place of the microphone button.
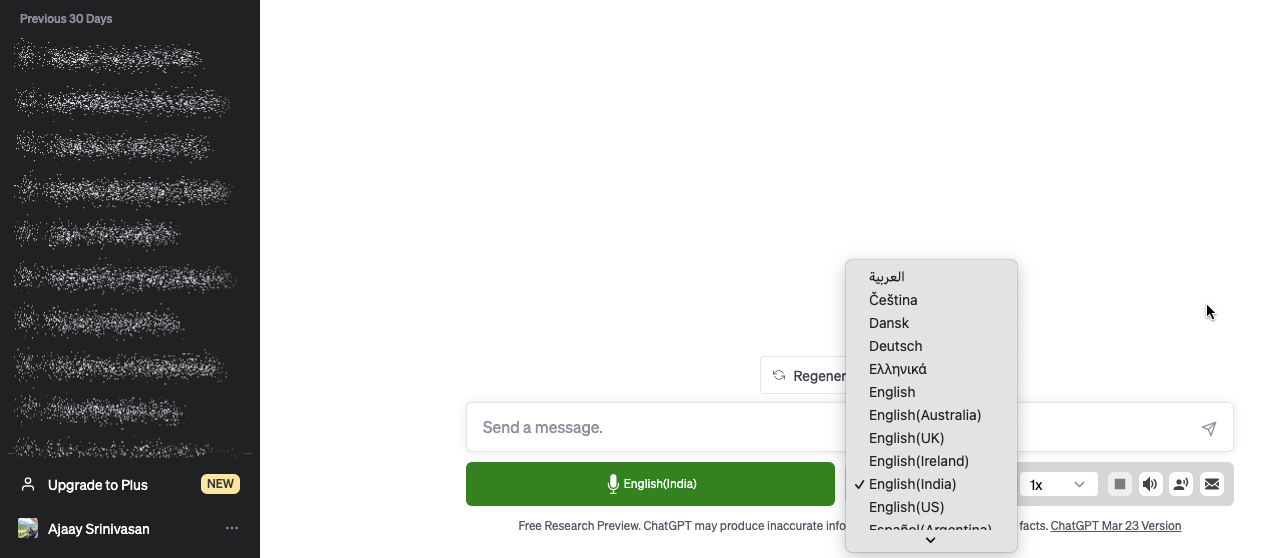
Once submitted, ChatGPT will create a response based on your query and TalkBerry will read out this output in your selected voice. You can change the output voice or language by clicking on the person icon and selecting your preferred voice/language from the overflow menu.

In addition to that, you can also change the input language for ChatGPT by clicking on the language dropdown menu on the right side of the microphone button. From here, you can select from over 30 languages which may also automatically change the output voice as well, depending on what you choose.
Besides using it to talk to ChatGPT, you can take advantage of TalkBerry to practice speaking in a foreign language as you can mix and match different input and output languages which can be helpful for those trying to learn a new language.
6. VoiceWave – ChatGPT Voice Control
Like TalkBerry, VoiceWave is another extension that gives you voice control when interacting with ChatGPT. When you add the VoiceWave extension on Google Chrome, you can send a message by pressing the Space key to toggle the microphone on/off for entering your voice input or you can configure it in such a way that it extracts your voice upon long-pressing the Space key.
By default, your input is sent to ChatGPT as soon as you say the “Send” trigger word but you can also send it automatically once you’re done speaking your input. The extension offers multilingual support to transcribe your input voice as well as the language in which you get your responses from ChatGPT.
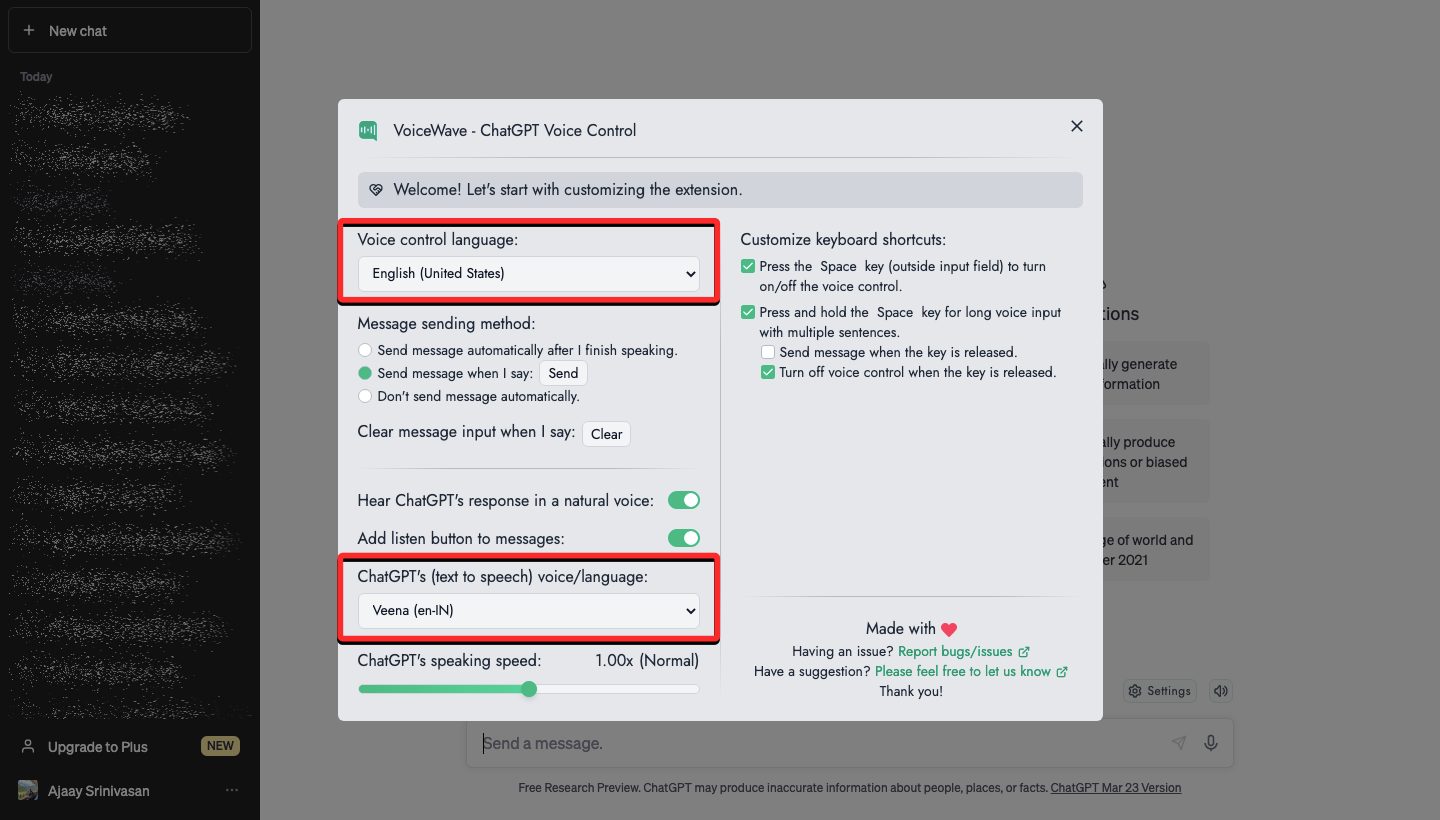
When you add the VoiceWave extension to Google Chrome and open ChatGPT, you’ll be greeted by VoiceWave’s settings box which lets you set up the extension to your liking. From here, you can choose the Voice control language (the one you plan on speaking your input in) and ChatGPT’s voice/language (the language in which ChatGPT responses are read out).
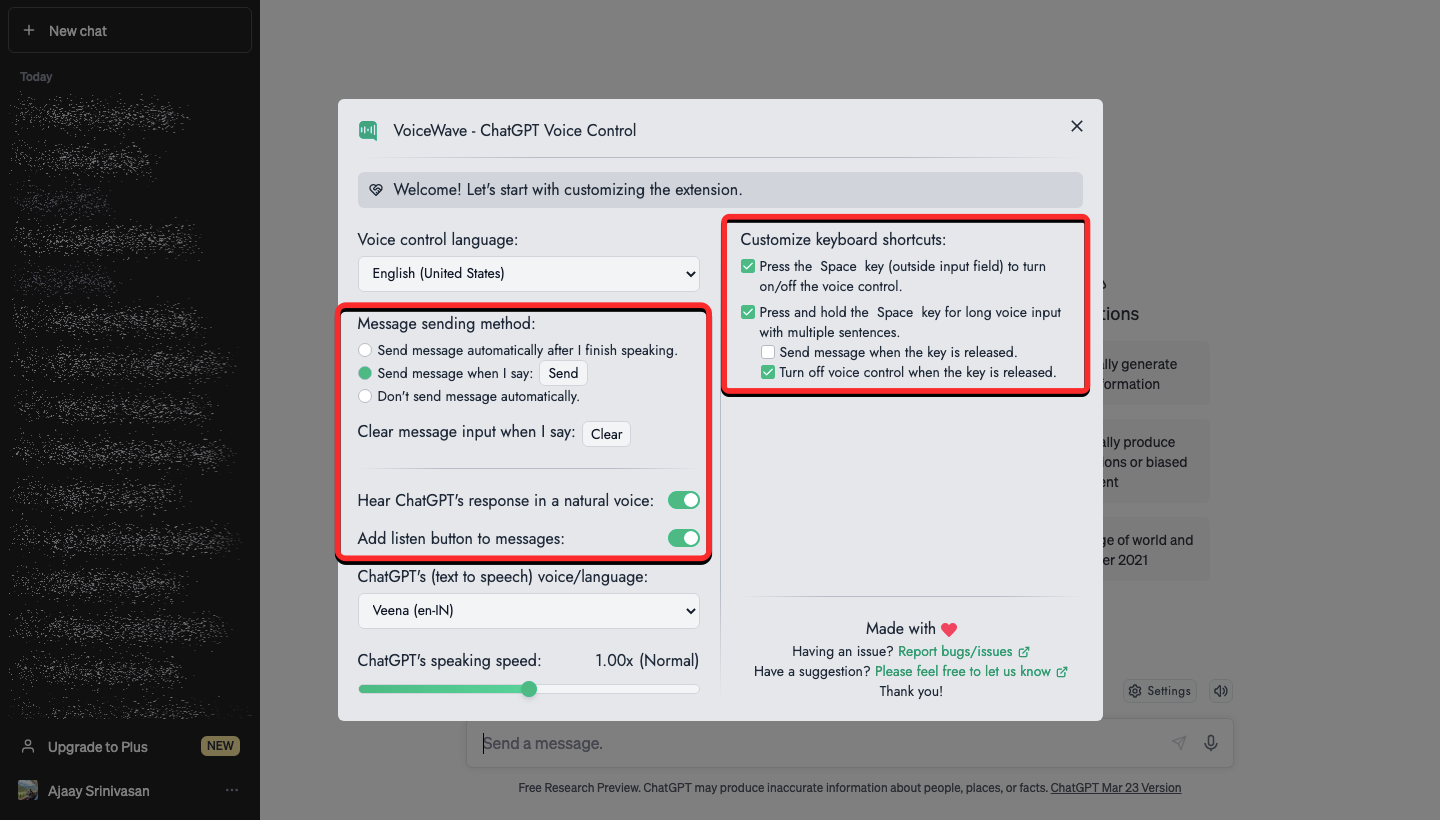
You get additional controls to toggle automatic message sending, audio responses, speaking speed, customize keyboard shortcuts, and enable a dedicated listen button for reading out individual responses manually.
Once you’re done setting up this extension, you can close the VoiceWave settings box and start interacting with ChatGPT by pressing and holding the Space key while speaking your input. VoiceWave will start transcribing your voice in real-time and when it’s listening to your input, you should see a red microphone icon at the bottom right corner as a visual cue to know when you’re being heard.
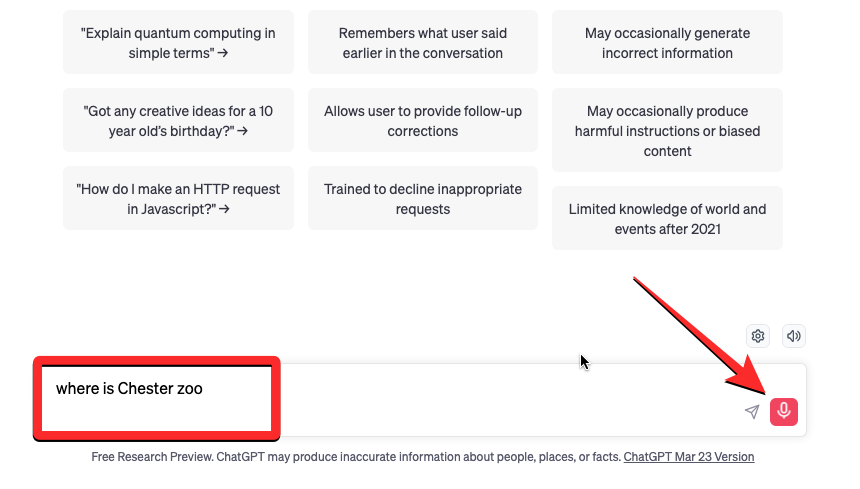
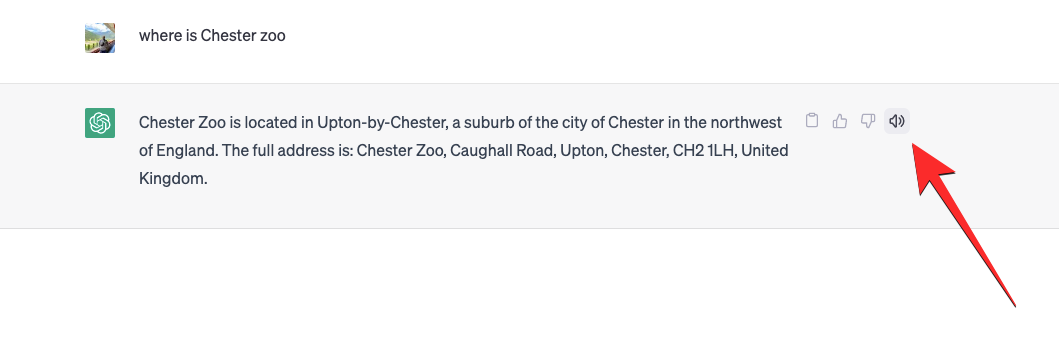
As soon as you submit your input by lifting the Space key, ChatGPT will respond to your query and VoiceWave will read out this response in your selected language and voice. If you missed out on an audio response, you can manually listen to it again by clicking on the speaker icon on the right-hand side of a response.
7. Voice Control for ChatGPT
Voice Control does the same things as other Chrome extensions listed here but is simpler to use and has more reviews on the Chrome webstore than the rest of the bunch. You get the ability to enter your ChatGPT input using your voice and the extension also lets you hear responses from the chatbot in your desired language.
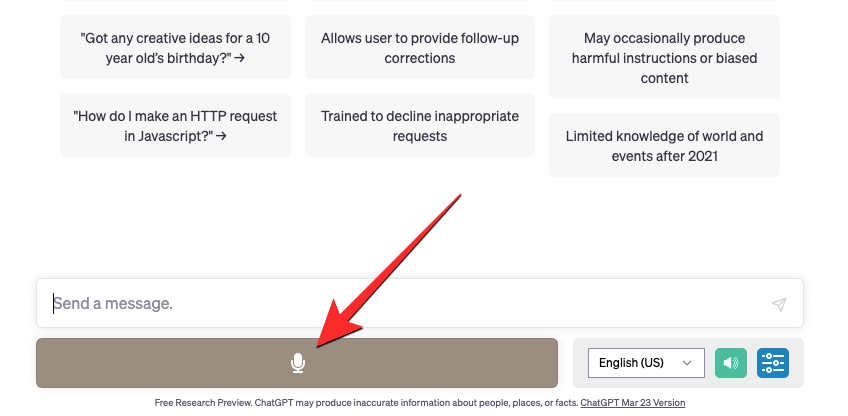
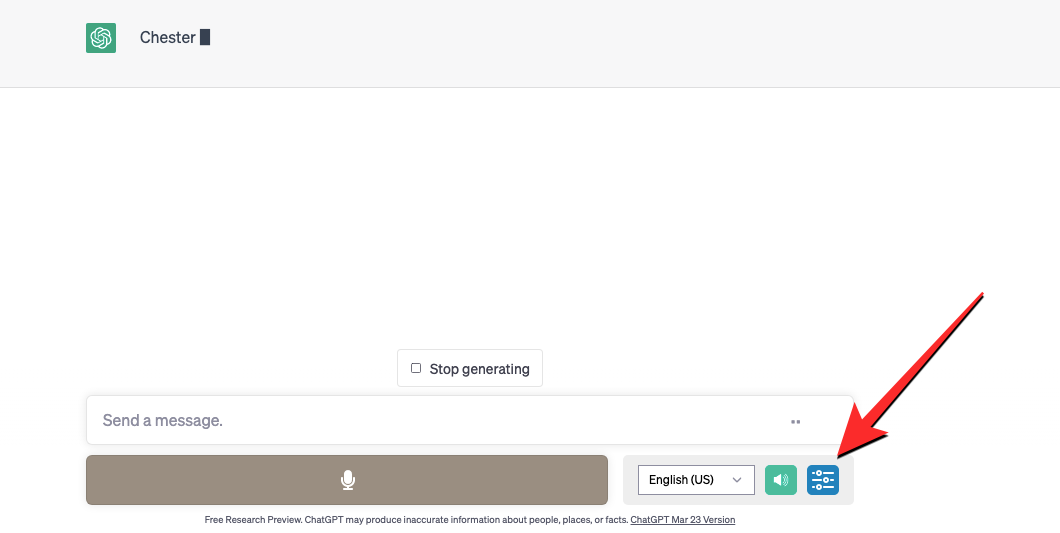
When you add Voice Control to Google Chrome, its classic interface will be enabled by default which gives you a large microphone button at the bottom of the ChatGPT screen along with options to change the input language, toggle response audio, and access the extension’s settings. You can click on the brown microphone button to start recording your query or press and hold the Space key to do it.
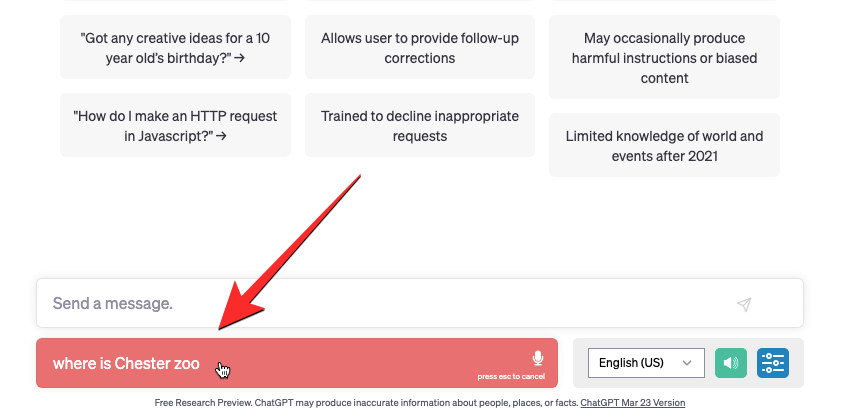
As soon as you start speaking, you should be able to see your voice’s content transcribed into text at the bottom. To send the transcribed text as input, you can click on the red microphone icon. When the text is submitted, you should see the ChatGPT’s response to it instantly which will be read out aloud thanks to Voice Control’s text-to-speech function.
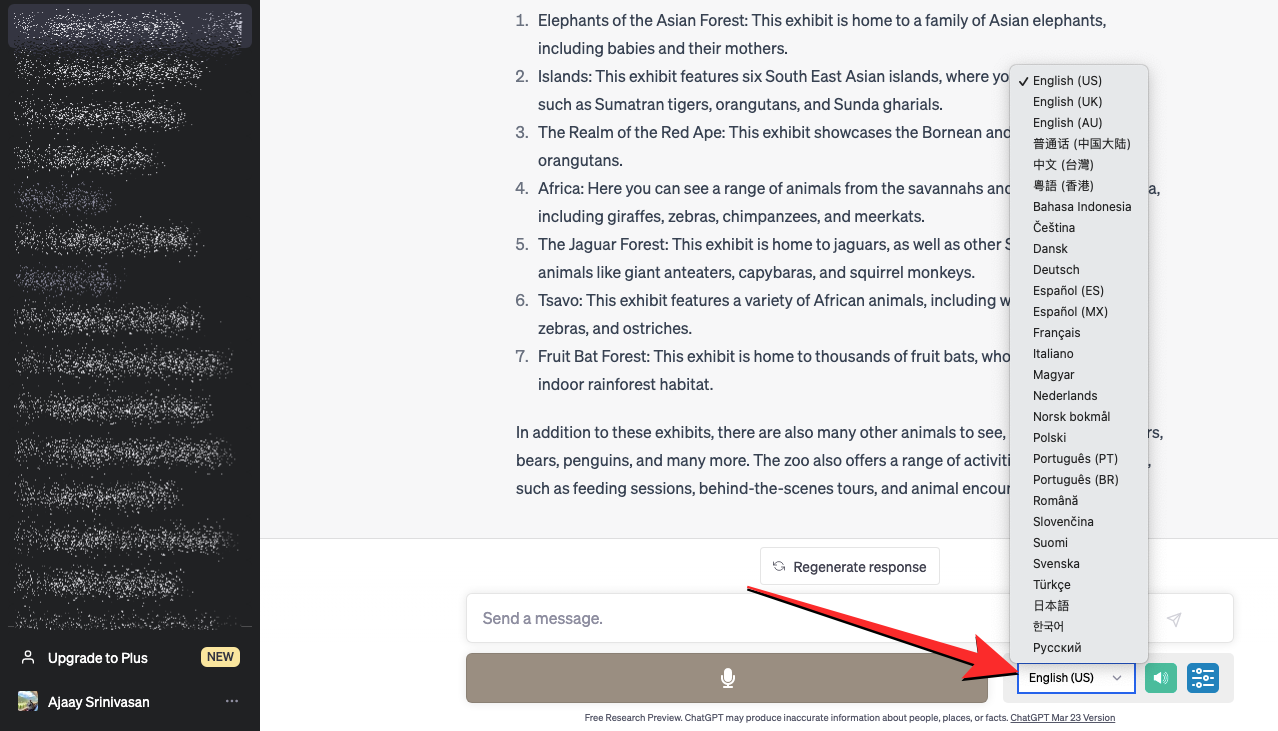
You can change the input language for ChatGPT from the language dropdown menu at the bottom. When you change this language, the language for the voice output will also change accordingly.
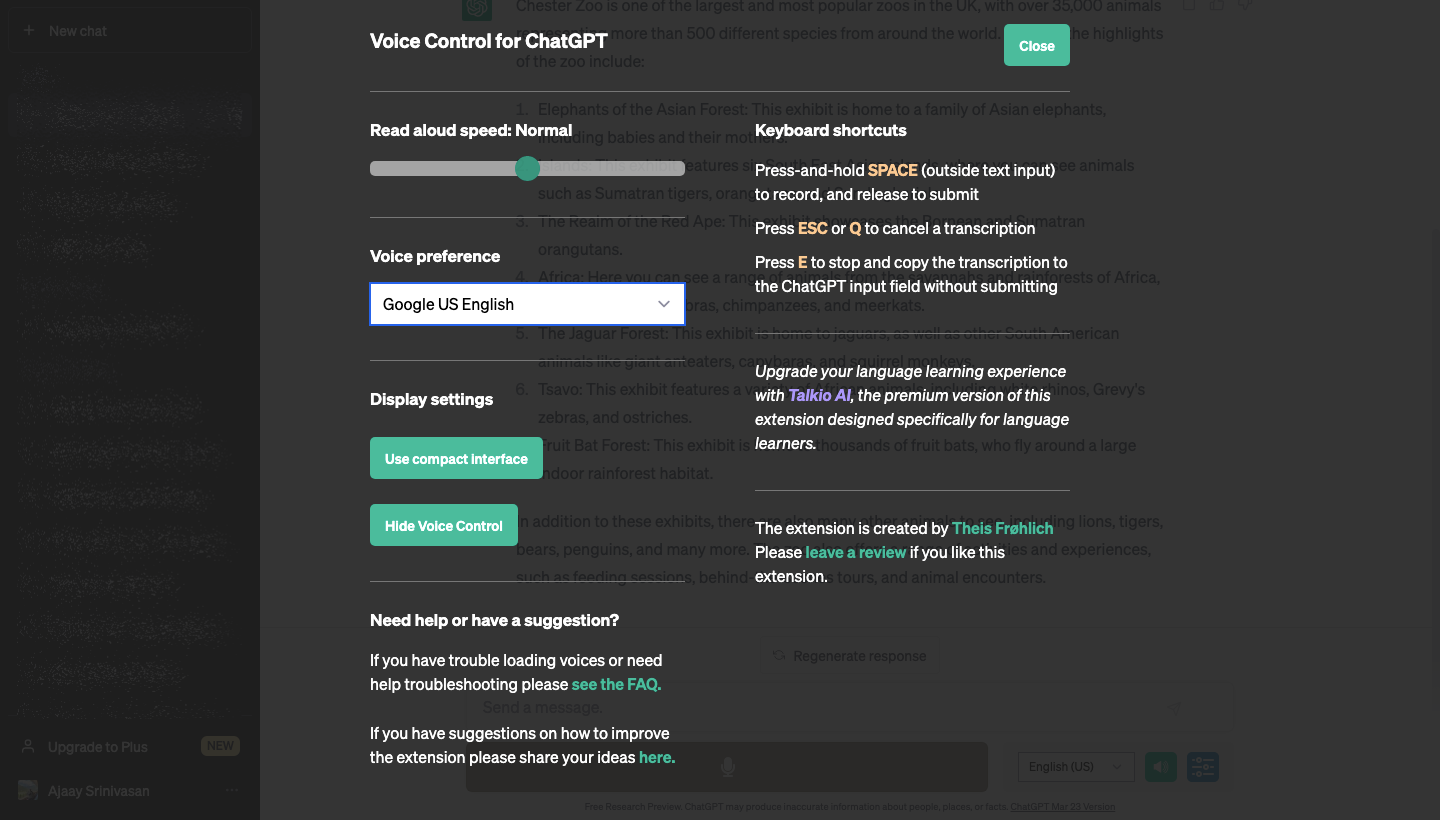
You can click on the Settings icon at the bottom to access Voice Control’s settings.
When the settings screen loads up, you will get options to change Read aloud speed, voice preference, toggle voice control, and switch to the extension’s Compact interface.
On the phone (4 ways)
If you wish to talk to ChatGPT on your phone without relying on a web browser to get it done, you can use any of the following methods to get it done.
8. Using dictation on your phone
iPhones and Android devices come with native dictation functions that let you type any text using your voice. You can use the dictation option on either platform to enter prompts on ChatGPT without needing to type them manually.
On Android
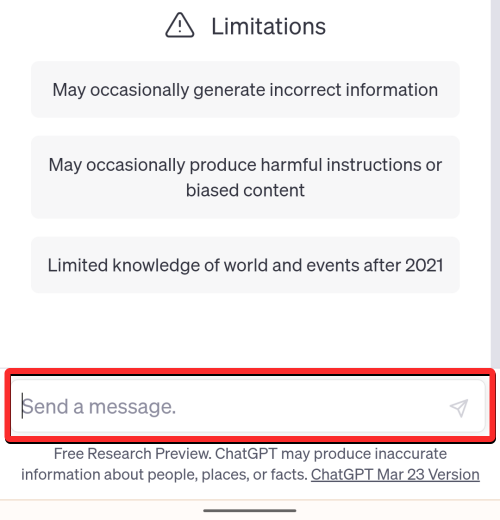
When you’re using an Android device, you can natively dictate content with your voice using the Gboard keyboard app. To turn your speech into text, open ChatGPT on a web browser on your phone and tap on the text box at the bottom.
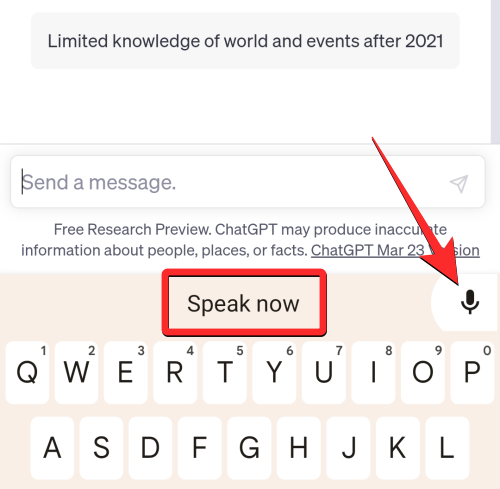
When the keyboard loads up, tap on the microphone icon at the top right corner of the keyboard interface. Doing so will show a “Speak Now” message on the keyboard after which you can speak to your phone to transcribe the said content into text.
Once your voice is fully transcribed, you can tap on the Send button to add the text you entered as input inside ChatGPT.
You can use this to enter prompts on ChatGPT with your voice but without spoken responses.
On iOS
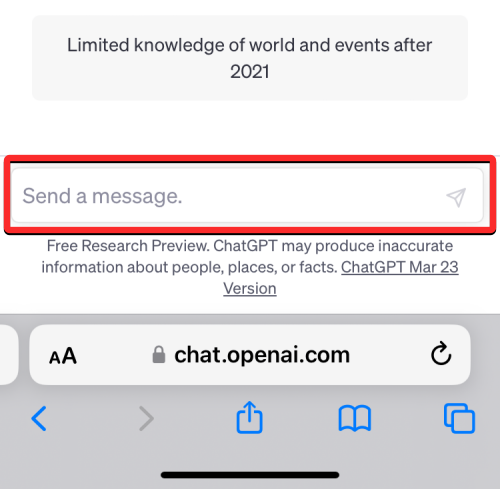
You can also use the native dictation tool on iOS to enter prompts on ChatGPT from your iPhone. To do that, launch ChatGPT on a web browser on your iPhone and tap on the text box at the bottom.
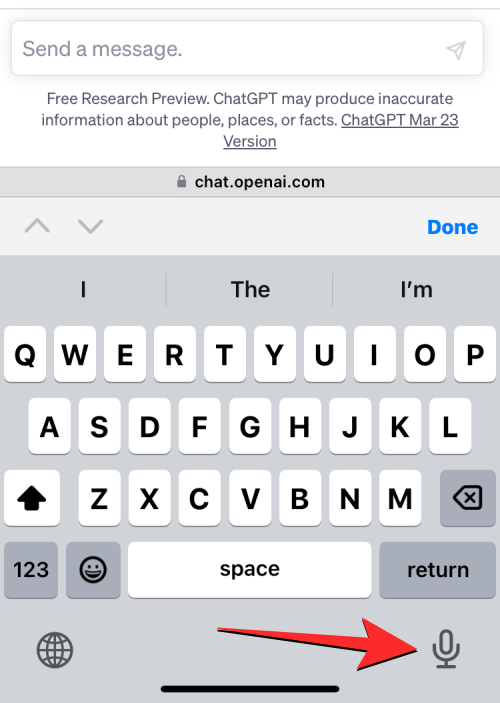
When the keyboard pops up, tap on the microphone icon at the bottom right corner and after you hear your device chime, you can start recording your input.
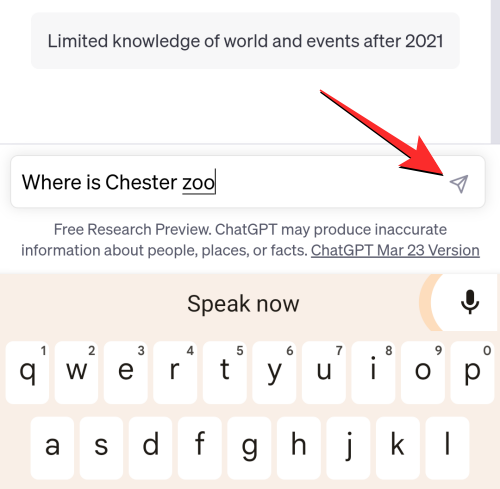
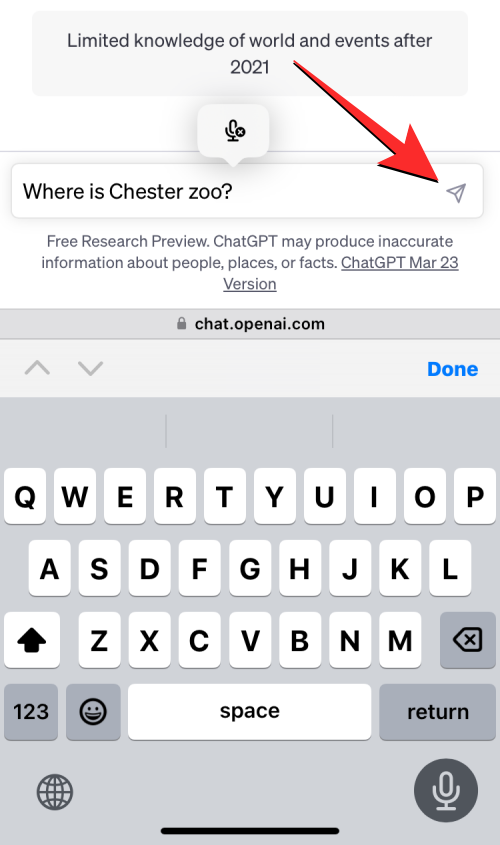
The text you speak will be transcribed in real-time and when you’re done scripting your input, you can tap on the Send icon on ChatGPT to submit it as your query.
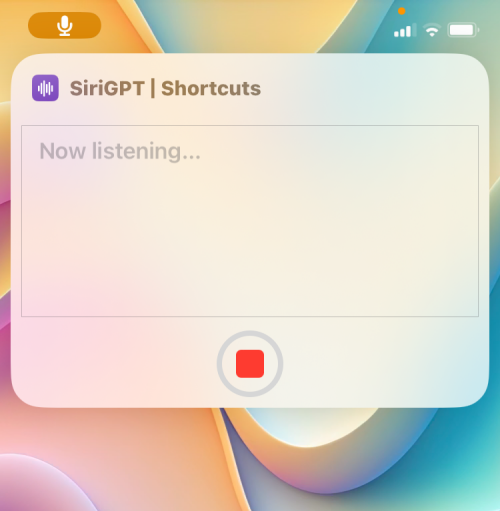
9. Using SiriGPT on iOS
ChatGPT can only be accessed on a web browser and since the tool doesn’t offer a native option to speak to the AI chatbot, you will have to find a workaround. Fortunately, there’s an iOS shortcut that lets you use Siri on your iPhone to talk to ChatGPT and get voice responses to your queries. All this is done using your OpenAI account’s API key that you can generate for use from their website. This way, you don’t need to rely on an external tool and all of your conversations with the AI will remain intact inside your OpenAI account.
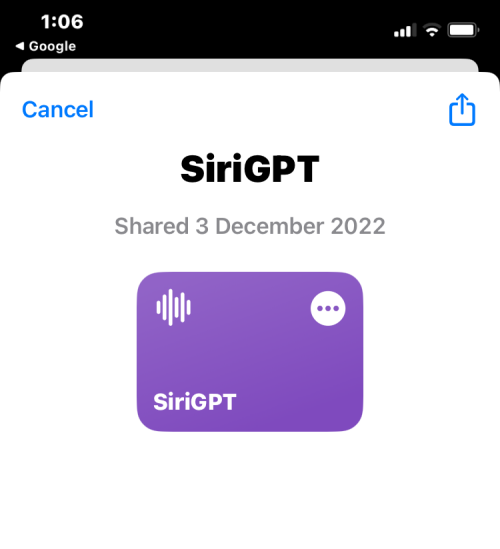
To get started, you can launch this SiriGPT shortcut page on your iPhone and add it to your device.
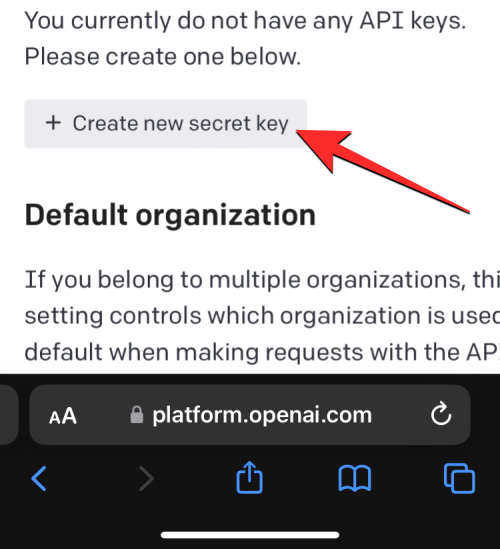
Once you’ve added it to your shortcuts, you can launch this OpenAI page on a web browser and tap on Create new secret key.
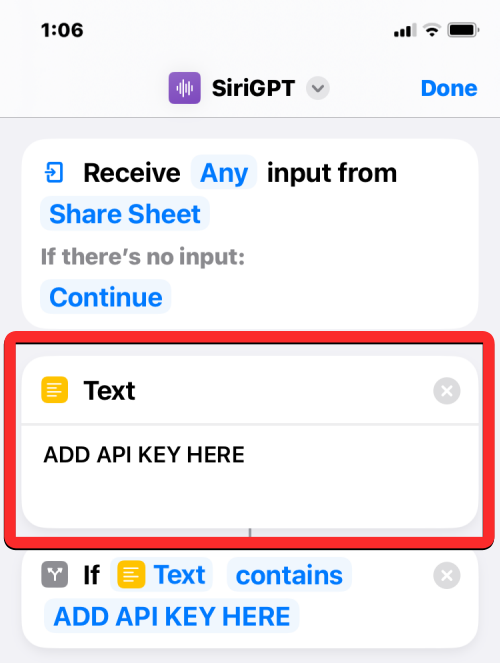
OpenAI will generate an API key that you can copy to your clipboard. Now, it’s time to set up the SiriGPT shortcut on your iPhone with your OpenAI account. The first step is to add the API key you copied into the shortcut so that all of your inputs and responses are saved on your account. For this, open the Shortcuts app and tap on the 3-dots icon inside the SiriGPT box. In a text box asking you to enter the API key, paste the key that you copied from your OpenAI account. The last step of setup is to enable dictation for the shortcut which you can do inside the Dictate Text module.
When your SiriGPT shortcut is ready to use, tap on it and allow the shortcut access to Speech Recognition and your OpenAI account’s API.
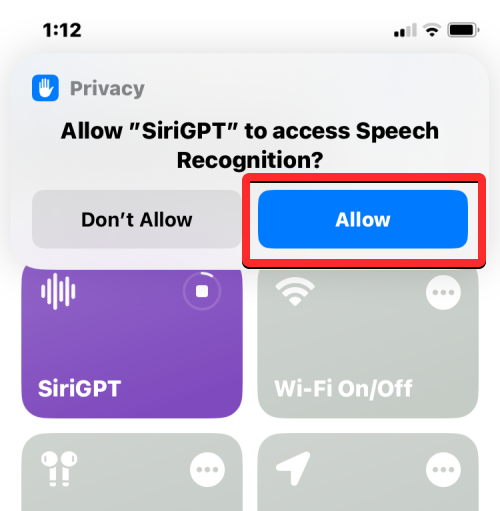
Once allowed, ask Siri using your voice and get responses with Siri’s voice.
You can configure this shortcut to be displayed on the home screen or add it as a Back Tap option on your iPhone for quick access from any screen.
10. Using VoiceGPT on Android
If you wish to talk to ChatGPT on Android effortlessly, you can download the VoiceGPT app from the Google Play Store. It’s powered by GPT-3/4 technology and offers a UI that should look familiar to you if you’ve used ChatGPT in the past. Besides text input, you can use your voice to communicate with the chatbot and can also activate text-to-speech for the AI chat to listen to its spoken output.
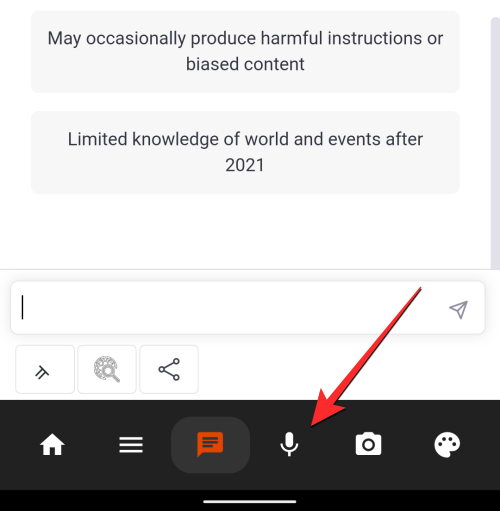
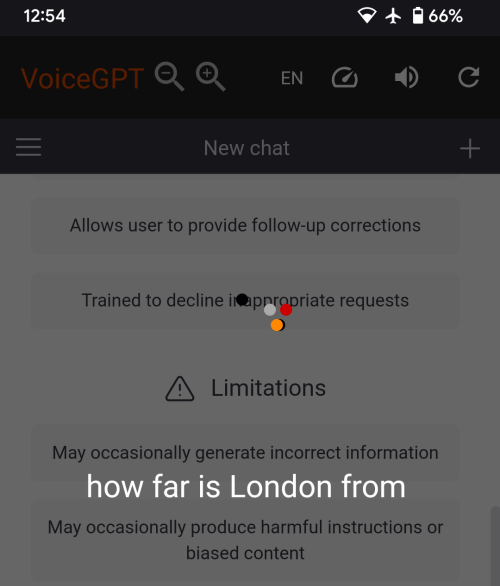
The app requires you to sign in to your OpenAI account or create a new one if you don’t have an existing account. Once you’re signed in, you can tap on the Microphone tab at the bottom, and the app will listen to your voice input and transcribe it into the chat.
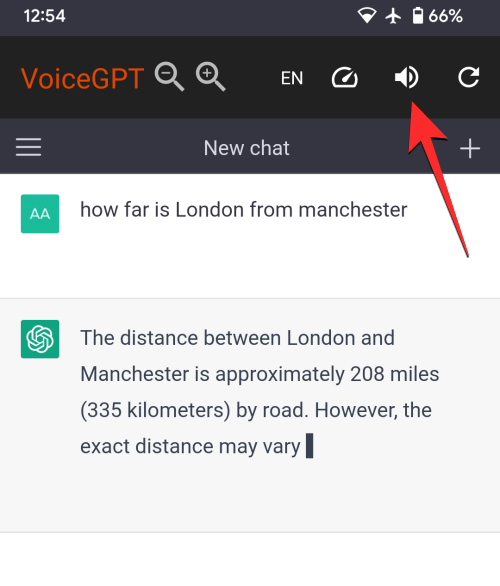
When your input is processed, the app will respond to your query using text to speech which you can toggle on/off by tapping on the speaker icon at the top right corner.
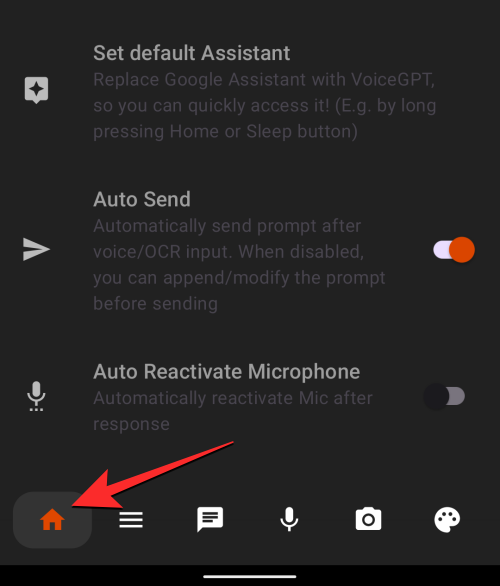
VoiceGPT also offers an option to enable a hotword to trigger the chat every time you want to enter an input using your voice. Within its settings, you can also set this chat as your default assistant, toggle Auto Send when entering prompts, Auto Reactivate Microphone once a response is out, and more. You can do that by tapping the Home tab at the bottom left corner.
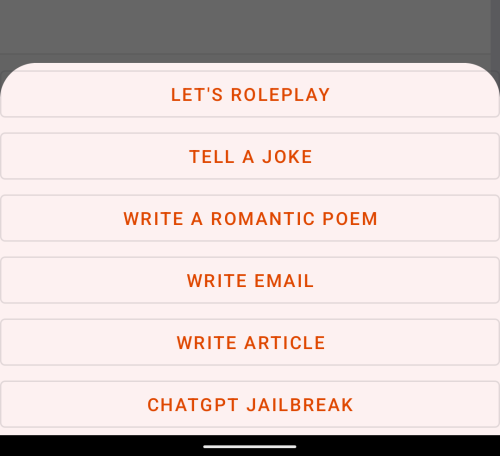
Additionally, you can choose from preset prompts to enter to have fun conversations with the AI or change the language of the conversation to something other than English.
11. Using Tasker on Android
If you wish to have a more personalized ChatGPT tool on your Android device and don’t mind following a long list of steps to set it up, then the Tasker app on Android can be helpful to you. The developer of the Android automation app, João Dias, recently shared a Reddit post to explain how you can integrate ChatGPT on an Android device using Tasker.
To use it, you first need to download the Tasker app from the Play Store which is a paid app that you can purchase for $3.49. Since this method involves using your official ChatGPT account, you may need to retrieve API keys from OpenAI and import them into the Tasker project that you can download here. When the setup is done, you can add access to ChatGPT from Tasker as shortcuts on your home screen.
After the initial setup, ChatGPT on Tasker is pretty easy to use. You can create a new chat or continue on a previous conversation directly from the home screen. There’s a Voice Chat option that uses your microphone to listen to your voice input and get audio responses. You also get options to change the AI’s personality and make it brief you about the notifications you’ve received.
You could face a challenge setting up the Voice Chat option as it requires you to sign up on Google Cloud Developer which requires adding a credit card (though, no fee for up to 4 million characters per month). Once an account is set up, you will need to extract your account’s API and import it into Tasker, which could be a lot to do for some users. When set up, however, it can be a powerful tool that may even replace the Google Assistant on your phone.
Here’s a video demonstration shared by Tasker’s developer:
That’s all you need to know about talking to ChatGPT.


Discussion