Adding page numbers to a document is a great way to keep track of your content. They help you keep your documents organized while ensuring you can easily re-order them based on your needs if ever needed. Google Docs easily allows you to insert a page number in a document. You even get the option to hide the page number from the first page of your document. But what if you want to start page numbering from a specific page in your document? Well, this is possible but requires a slightly sophisticated approach. Let’s take a look at how to start page numbering from a specific page in Google Docs.
How to start page number on page 2 or page 3 in Google Docs on PC
Starting page numbers from a specific page requires clever use of section breaks in a Google Docs document. Follow either guide below to help you along with the process.
GIF guide:
You can find a GIF image by us that covers the whole guide here. (Since its size is pretty big for an image file at 20MB something, we decided to not load it automatically and give you an option to download it if you need it.)
Step-by-step guide:
Here’s how you can start page numbering from a specific page in Google Docs. Follow the steps below to help you along with the process.
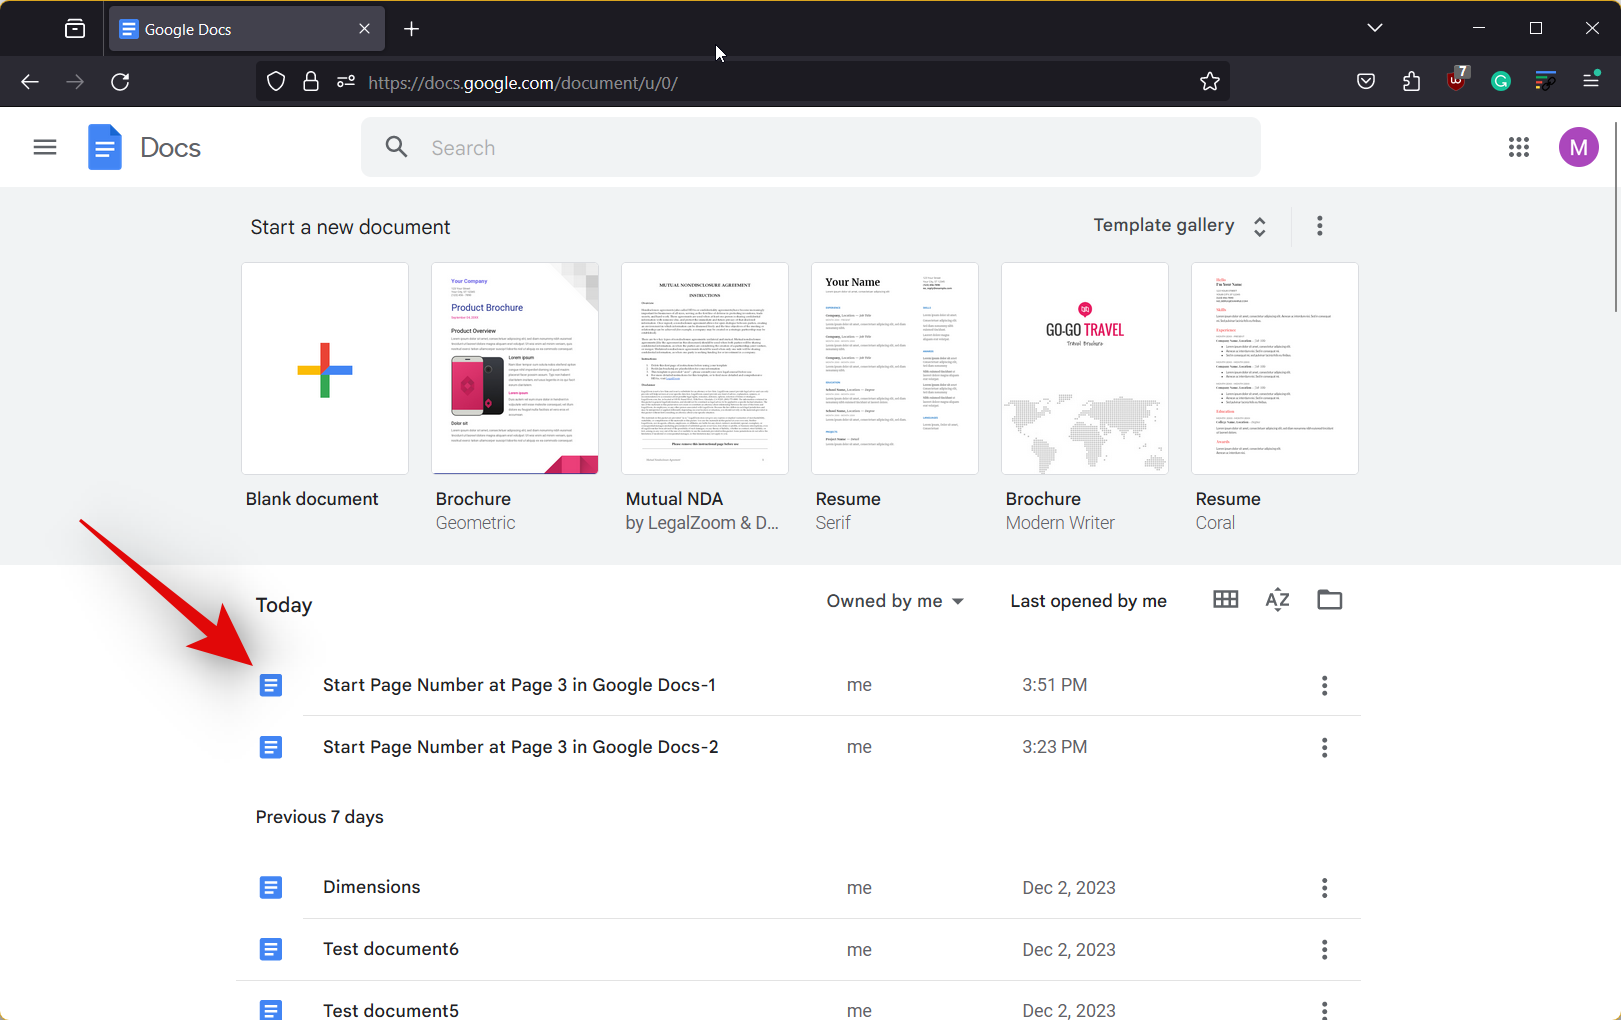
- Open docs.google.com in your browser, open the document and move the cursor to where you want to start page numbering from a specific page.
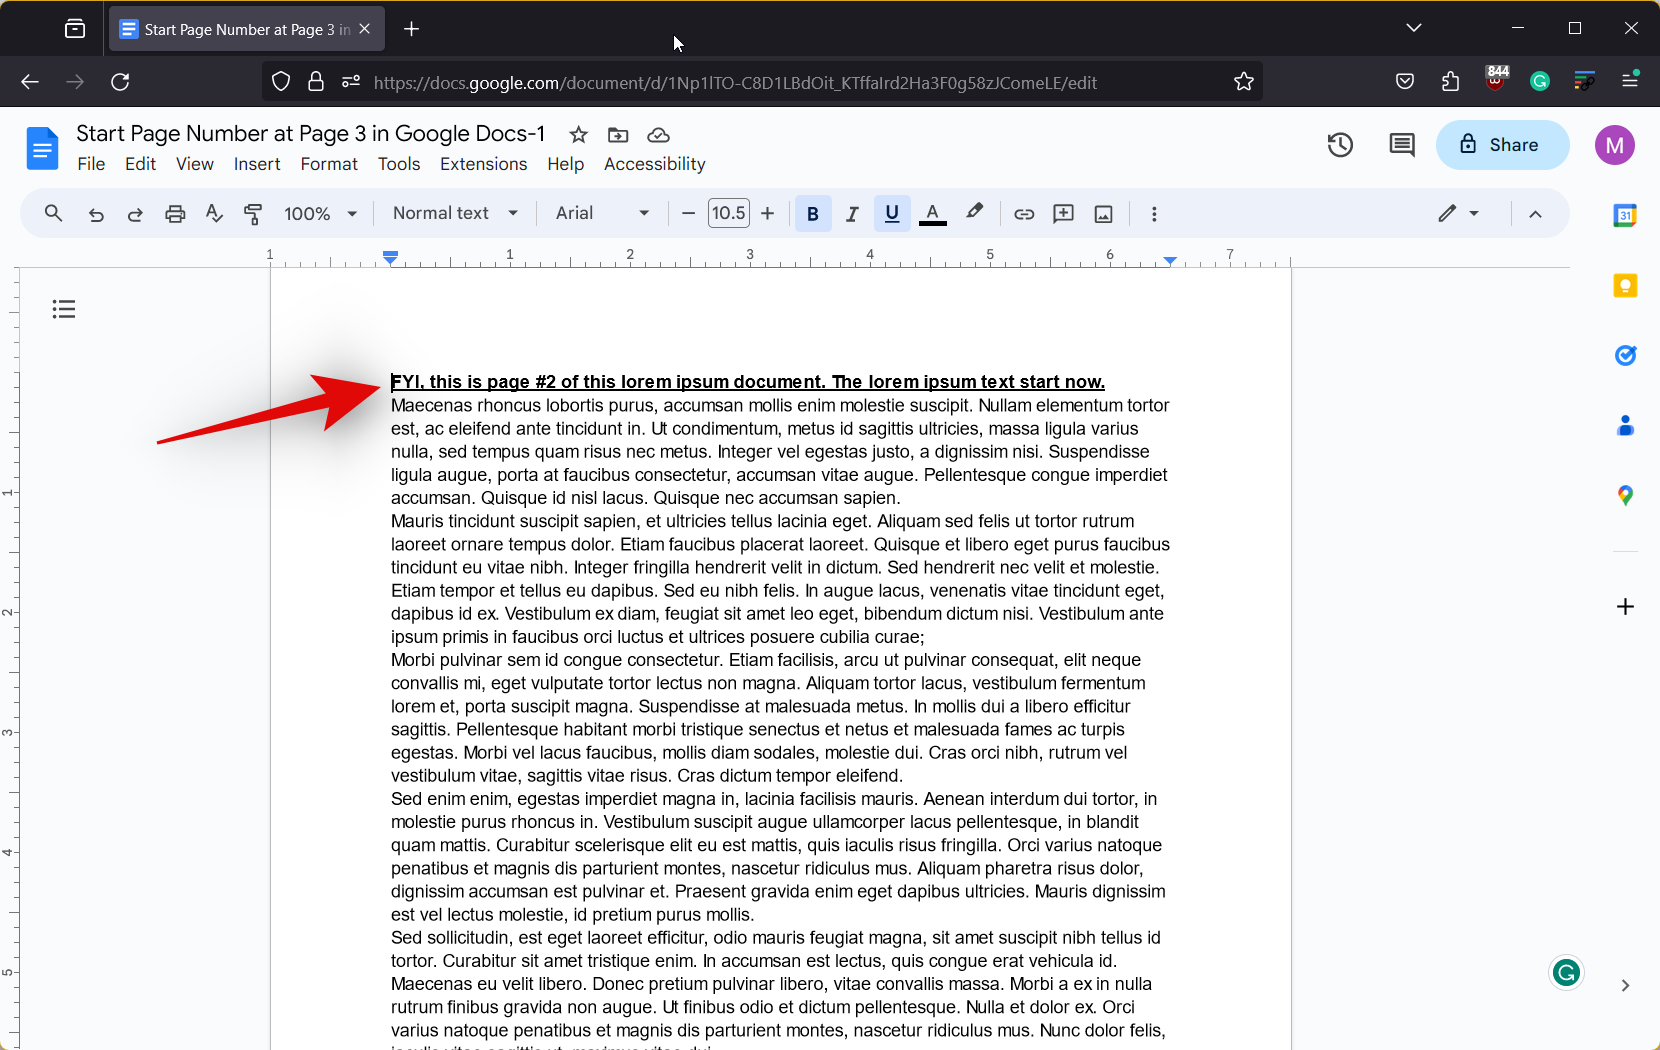
- Now, place your cursor at the top of the last page where you don’t want page numbers to appear. We’ll be using a demo document with placeholders at the top of each page so you can easily follow along with the process.
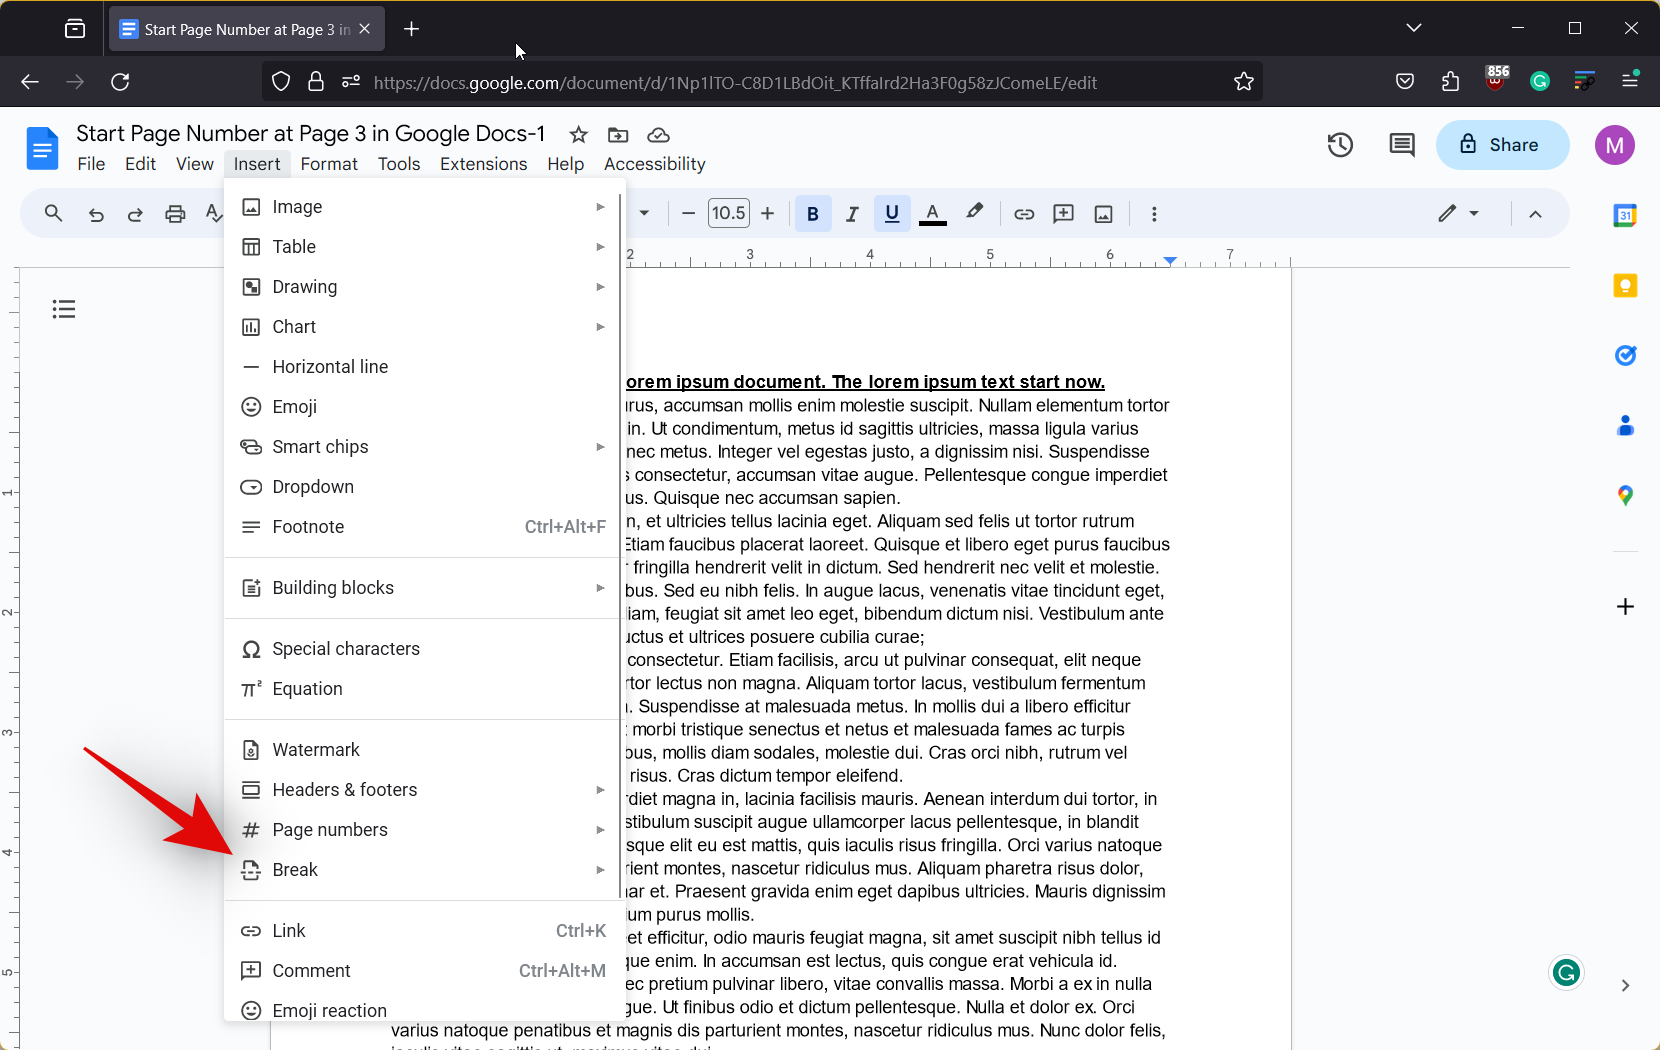
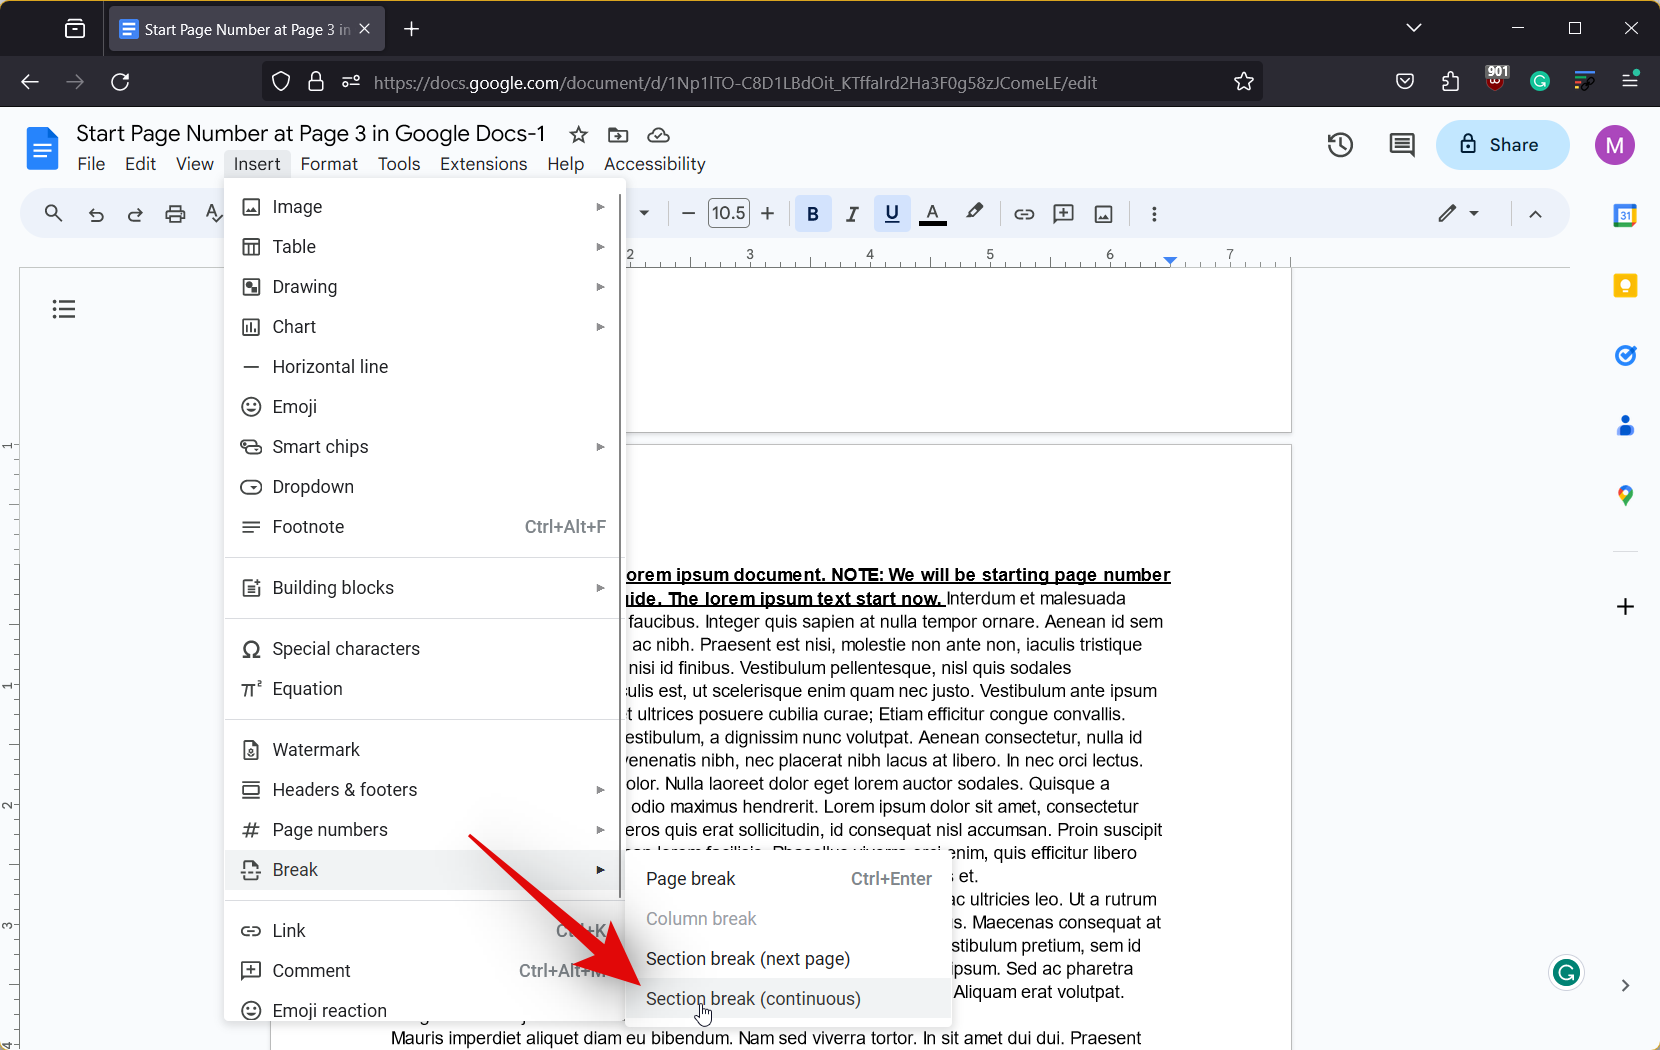
- Now click on Insert at the top and hover over Break.
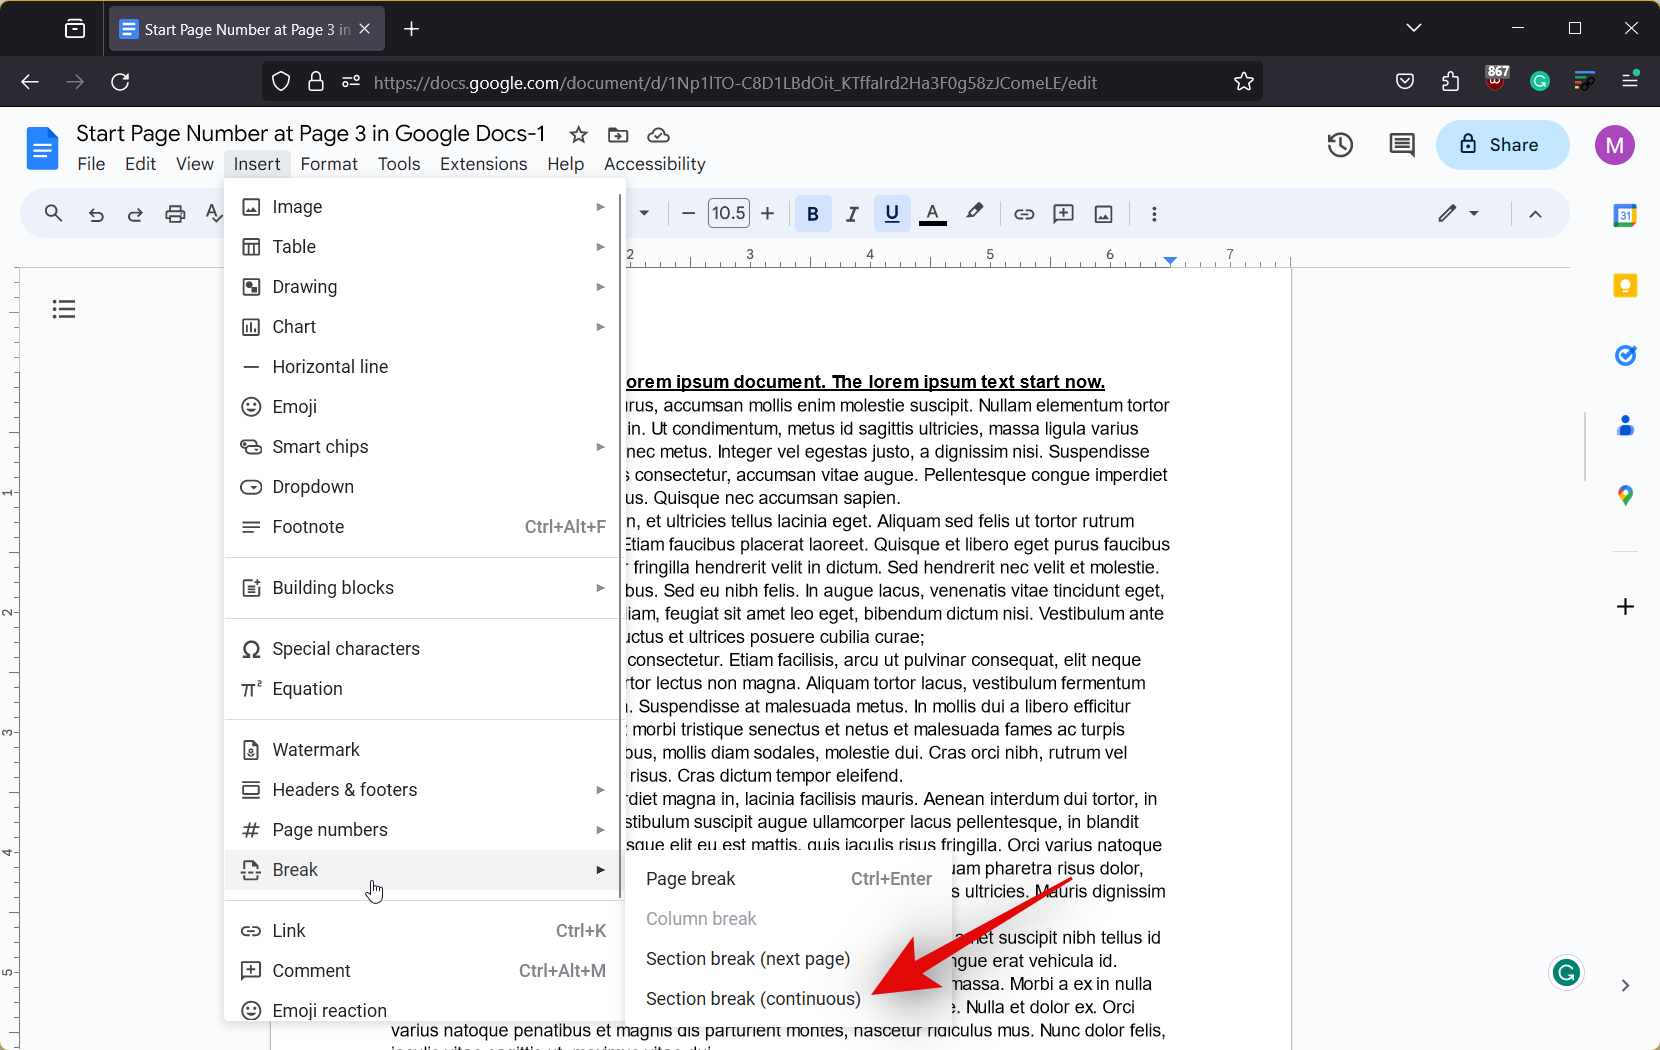
- Select Section break (continuous). A section break will now be inserted on the top of the selected page.
- Now scroll down to the first page of the section where you want page numbers to start and place your cursor at the top.
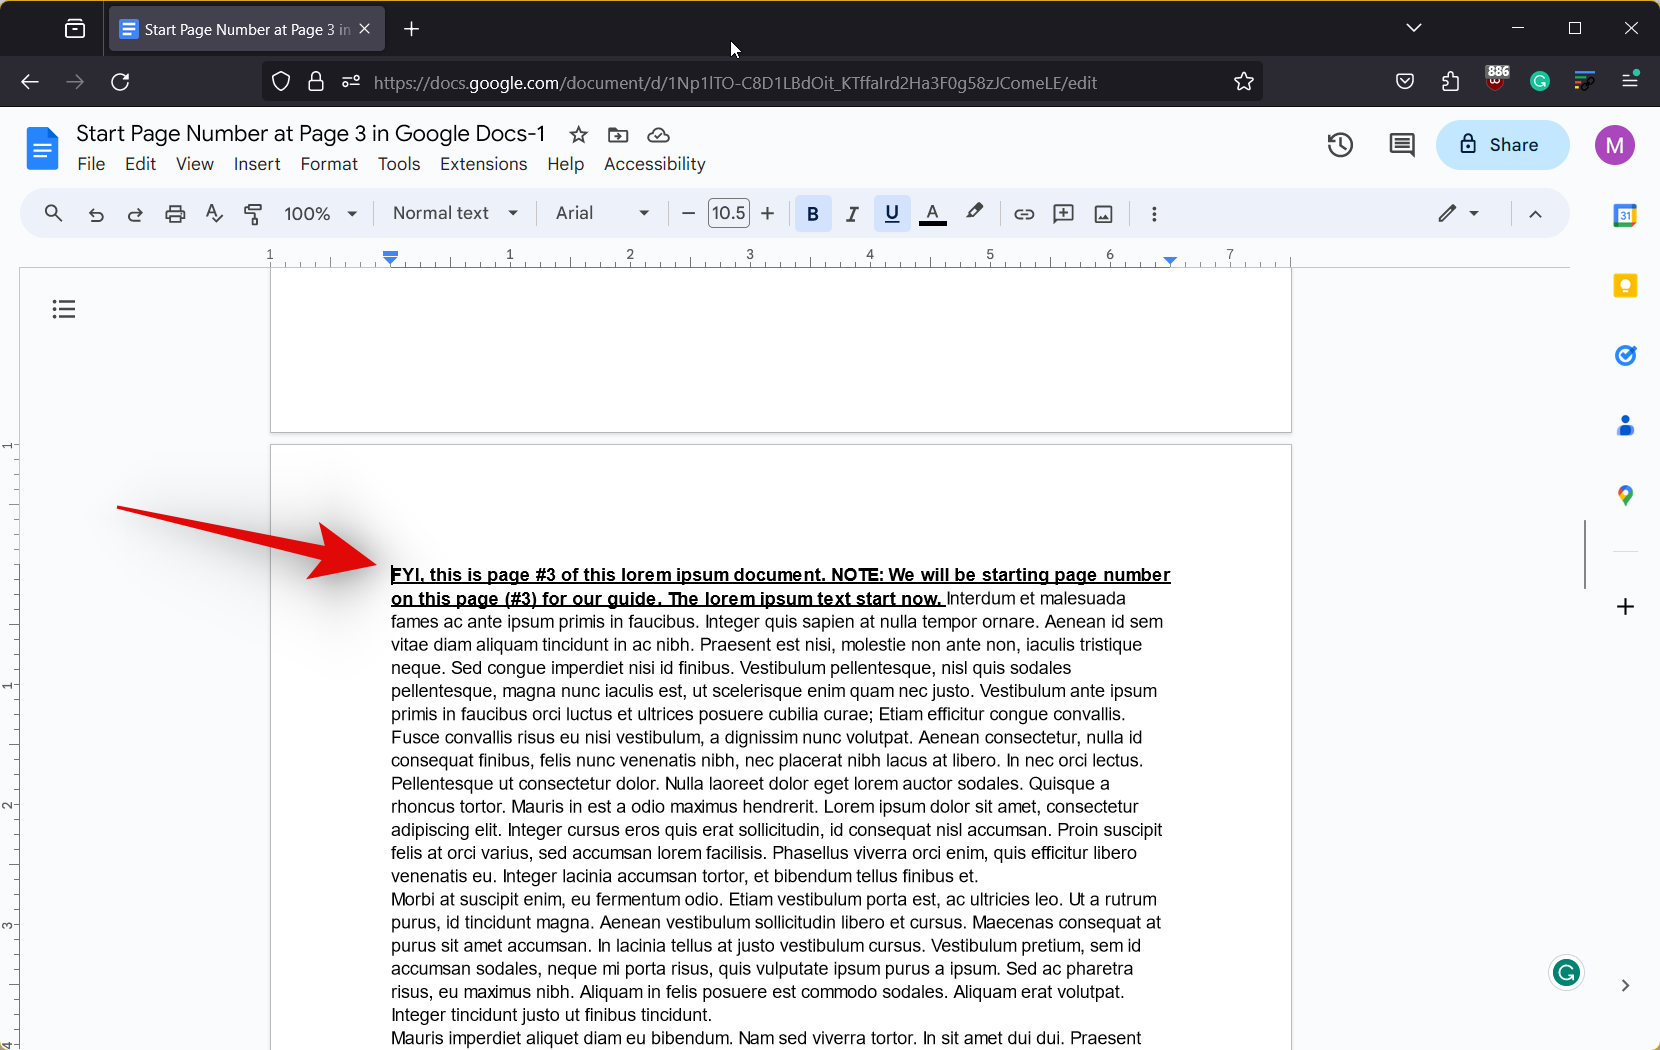
- As we did before, click on Insert, hover over Break, and select Section break (continuous).
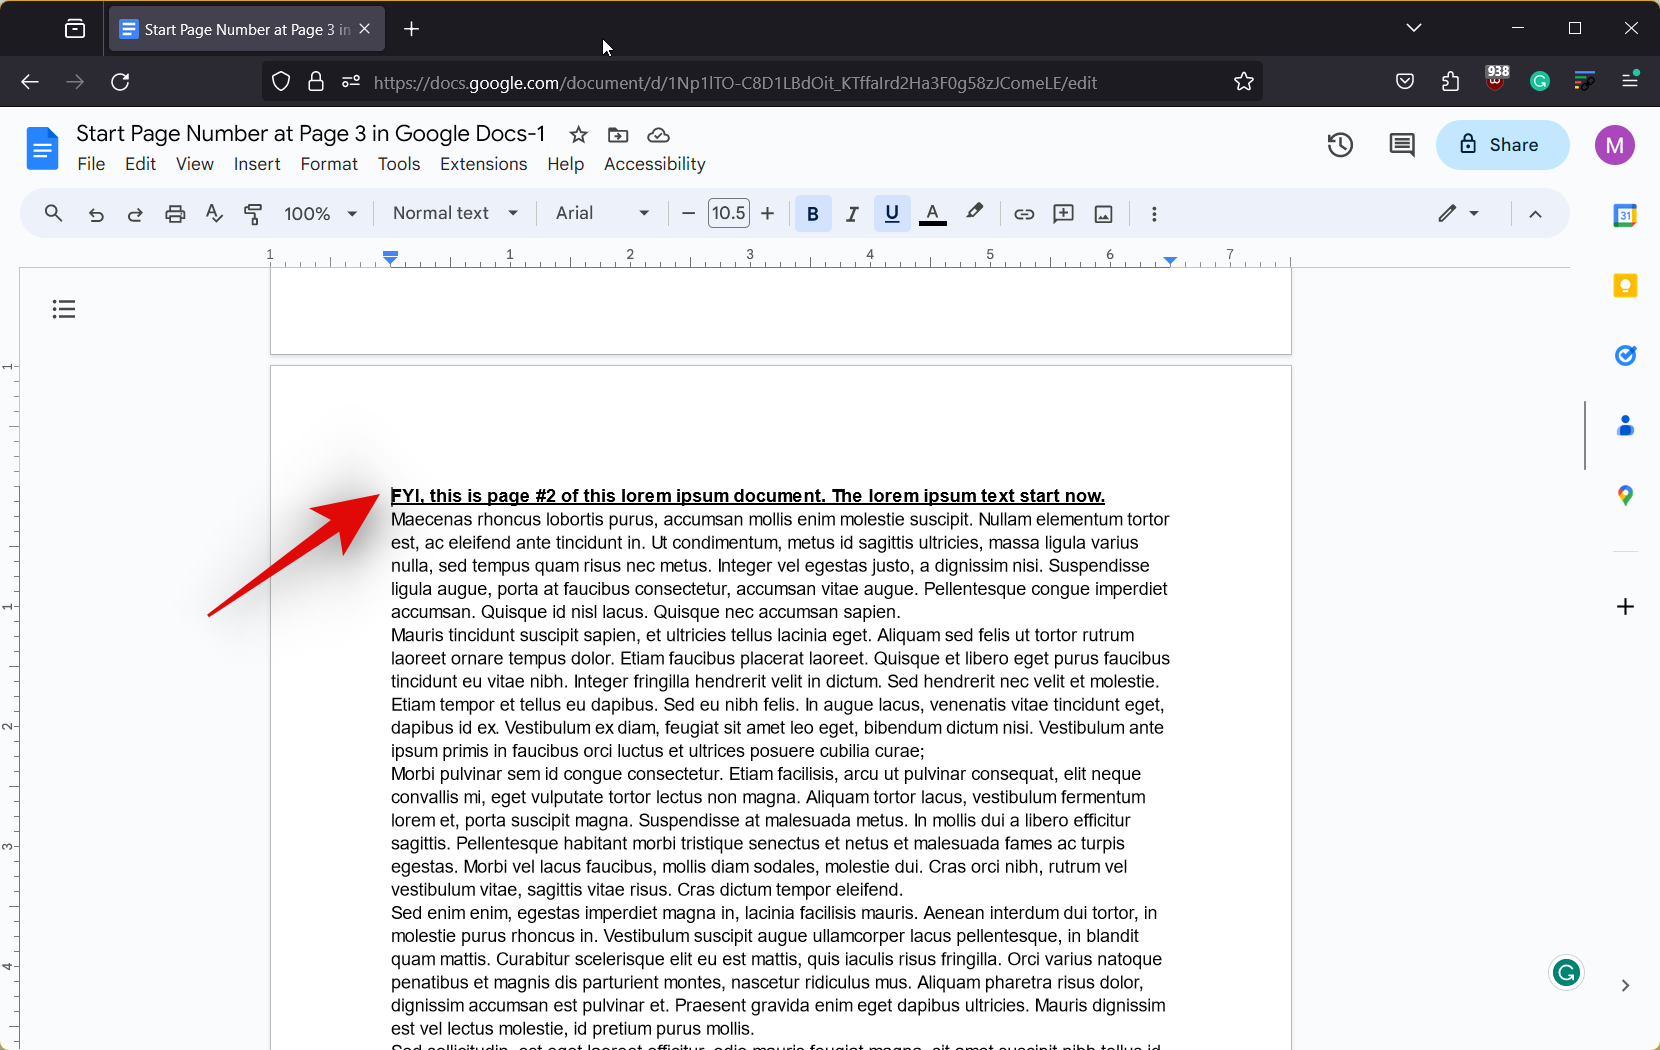
- Now head to the first page where we inserted the first section break and place your cursor at the top.
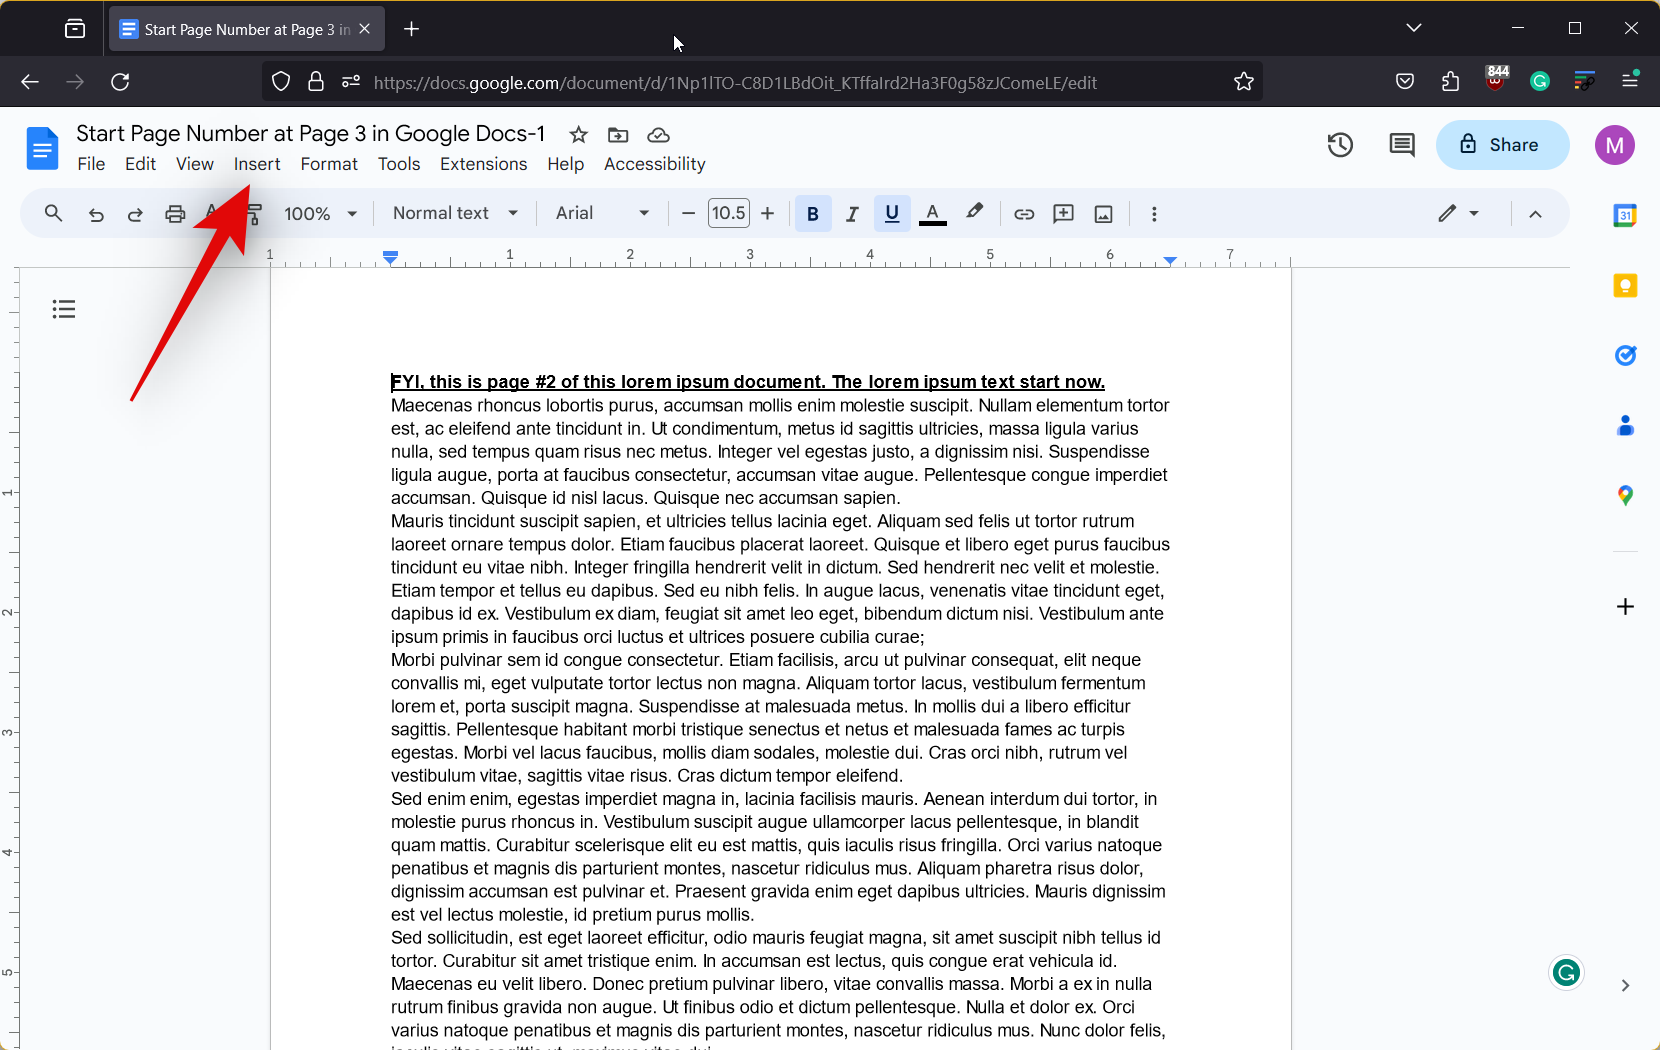
- Now click on Insert at the top.
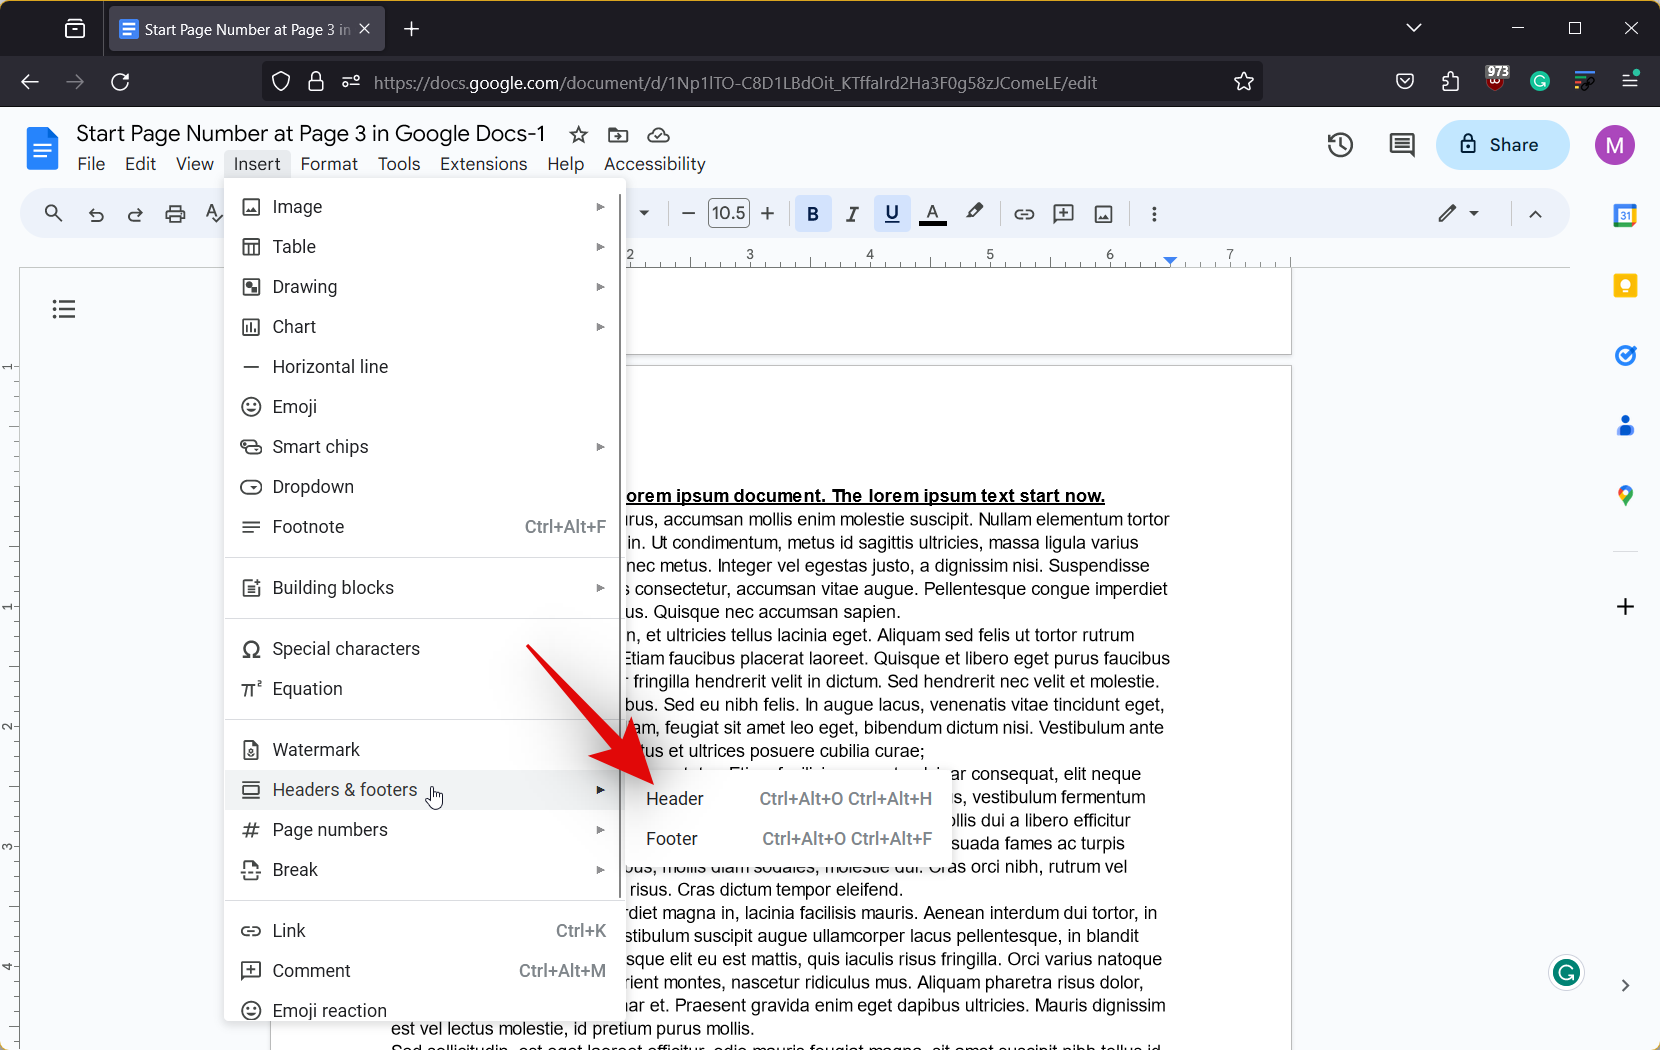
- Hover over Headers & footers and click on Header.
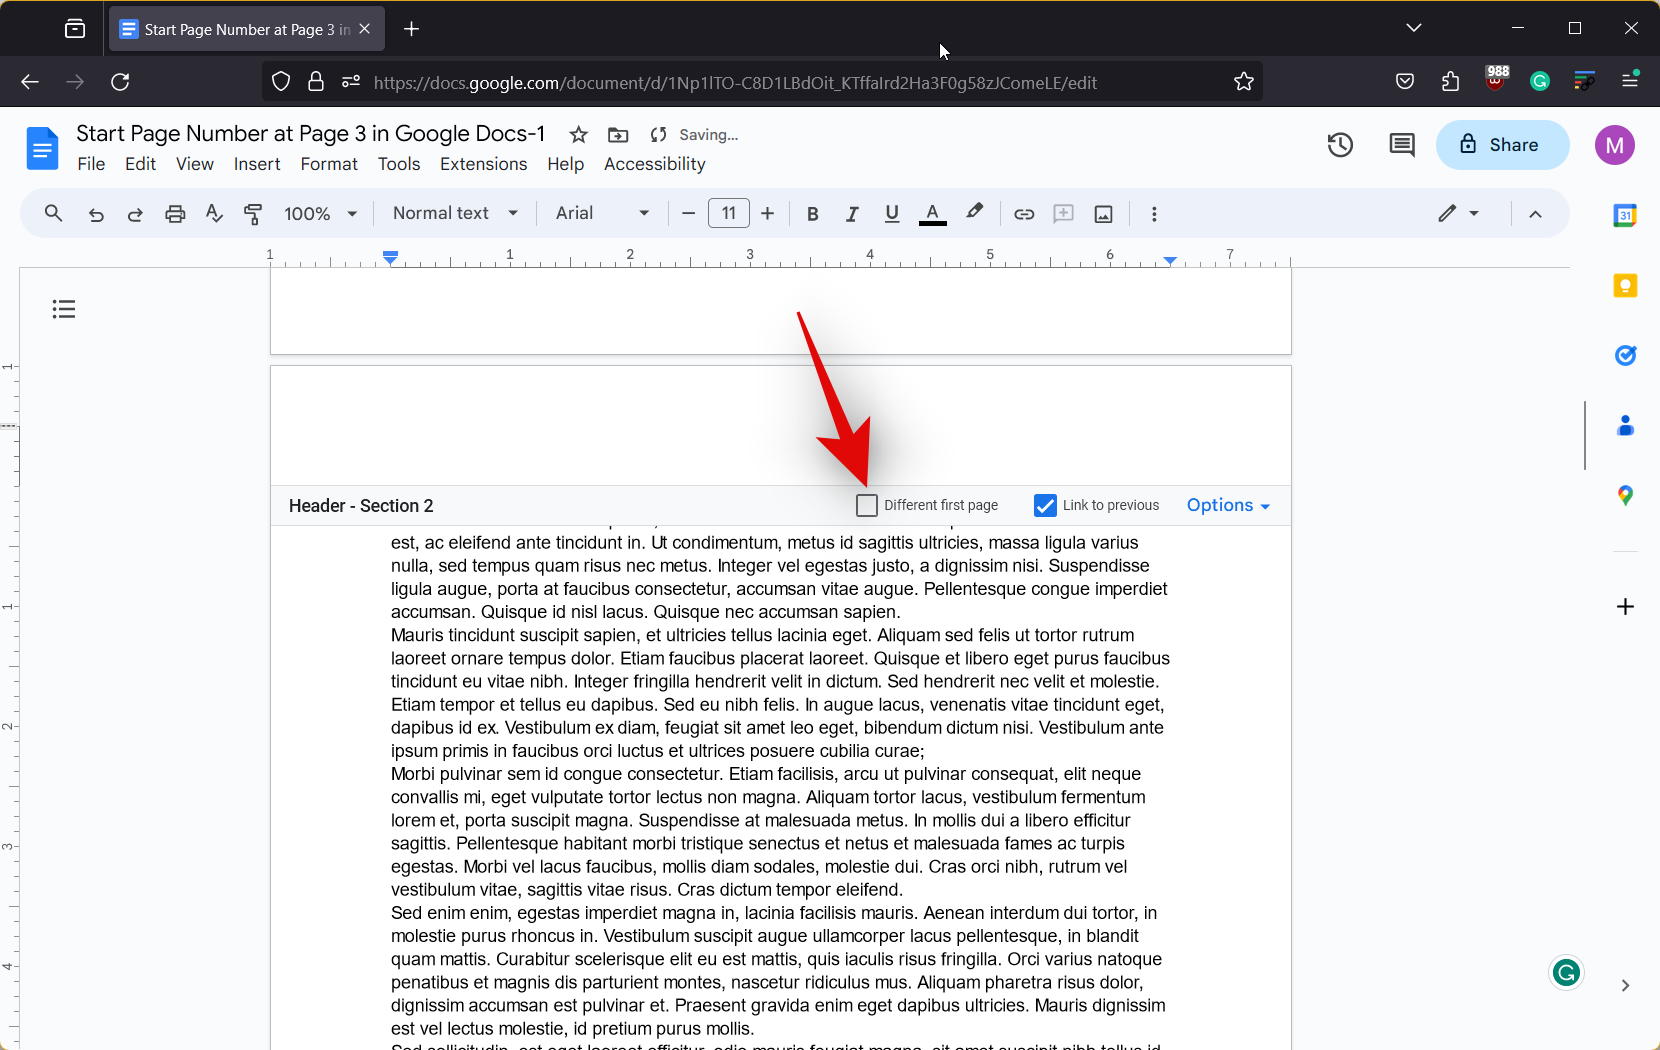
- Now click and check the box for Different first page.
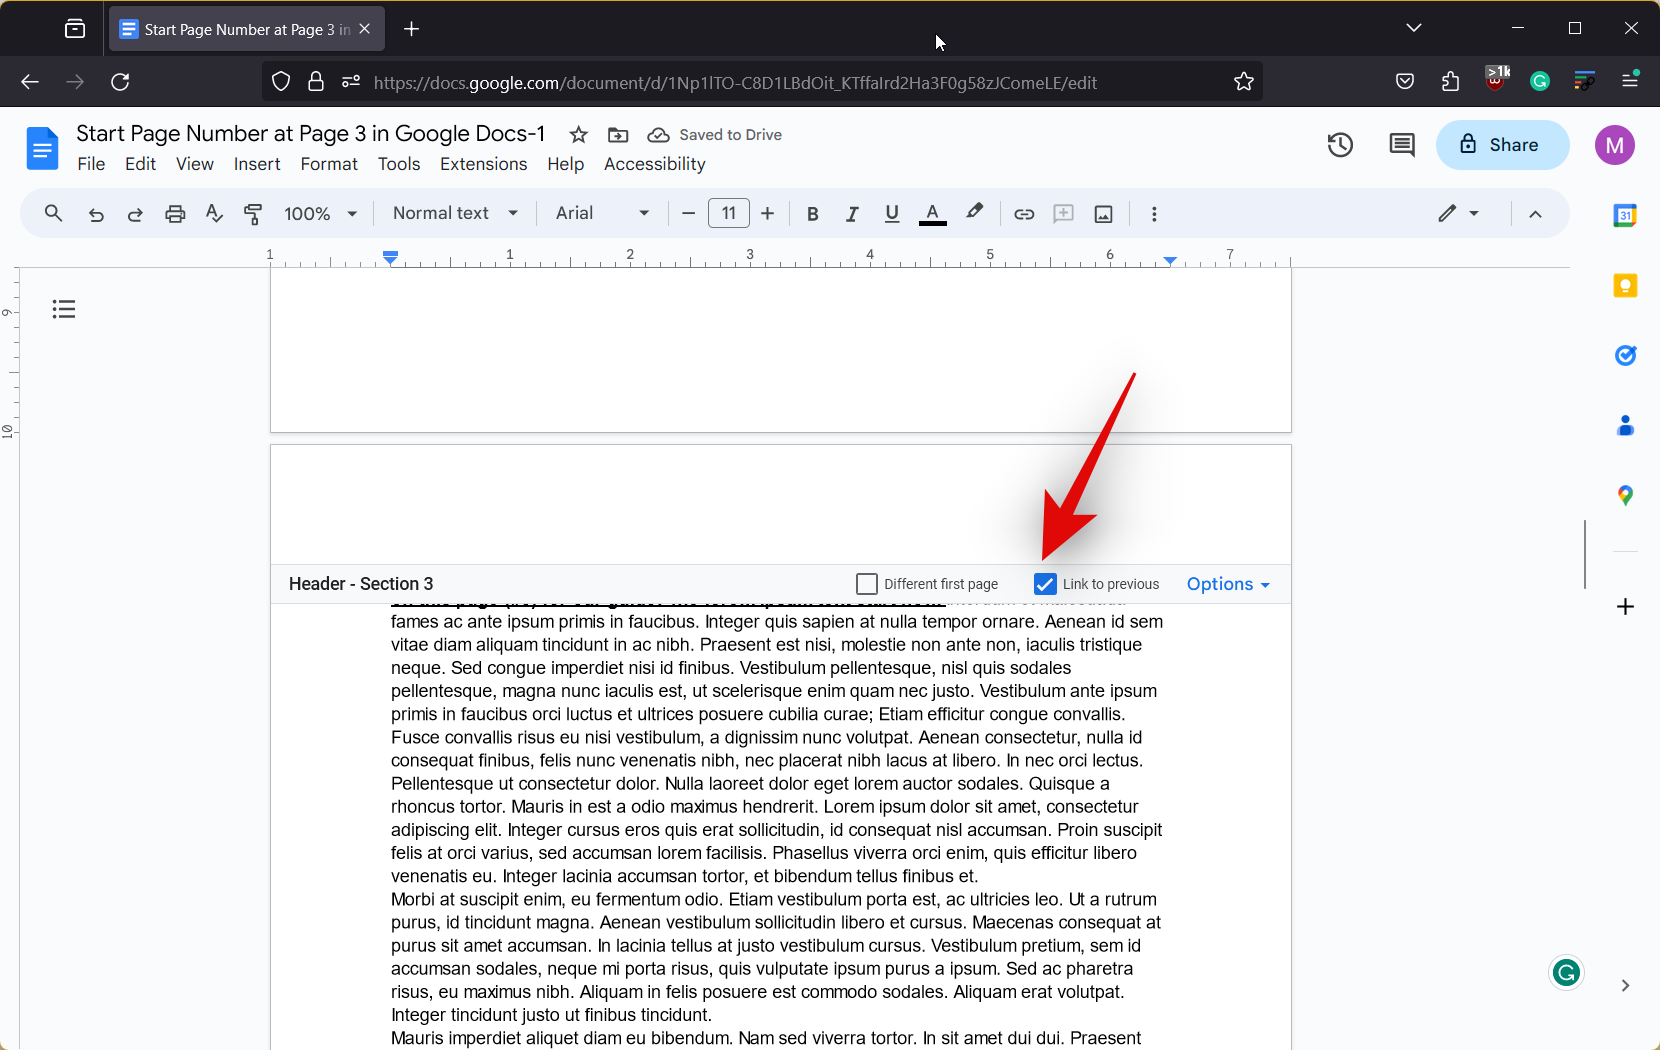
- Next, scroll down to the last page where we inserted the section break, and click and uncheck the box for Link to previous.
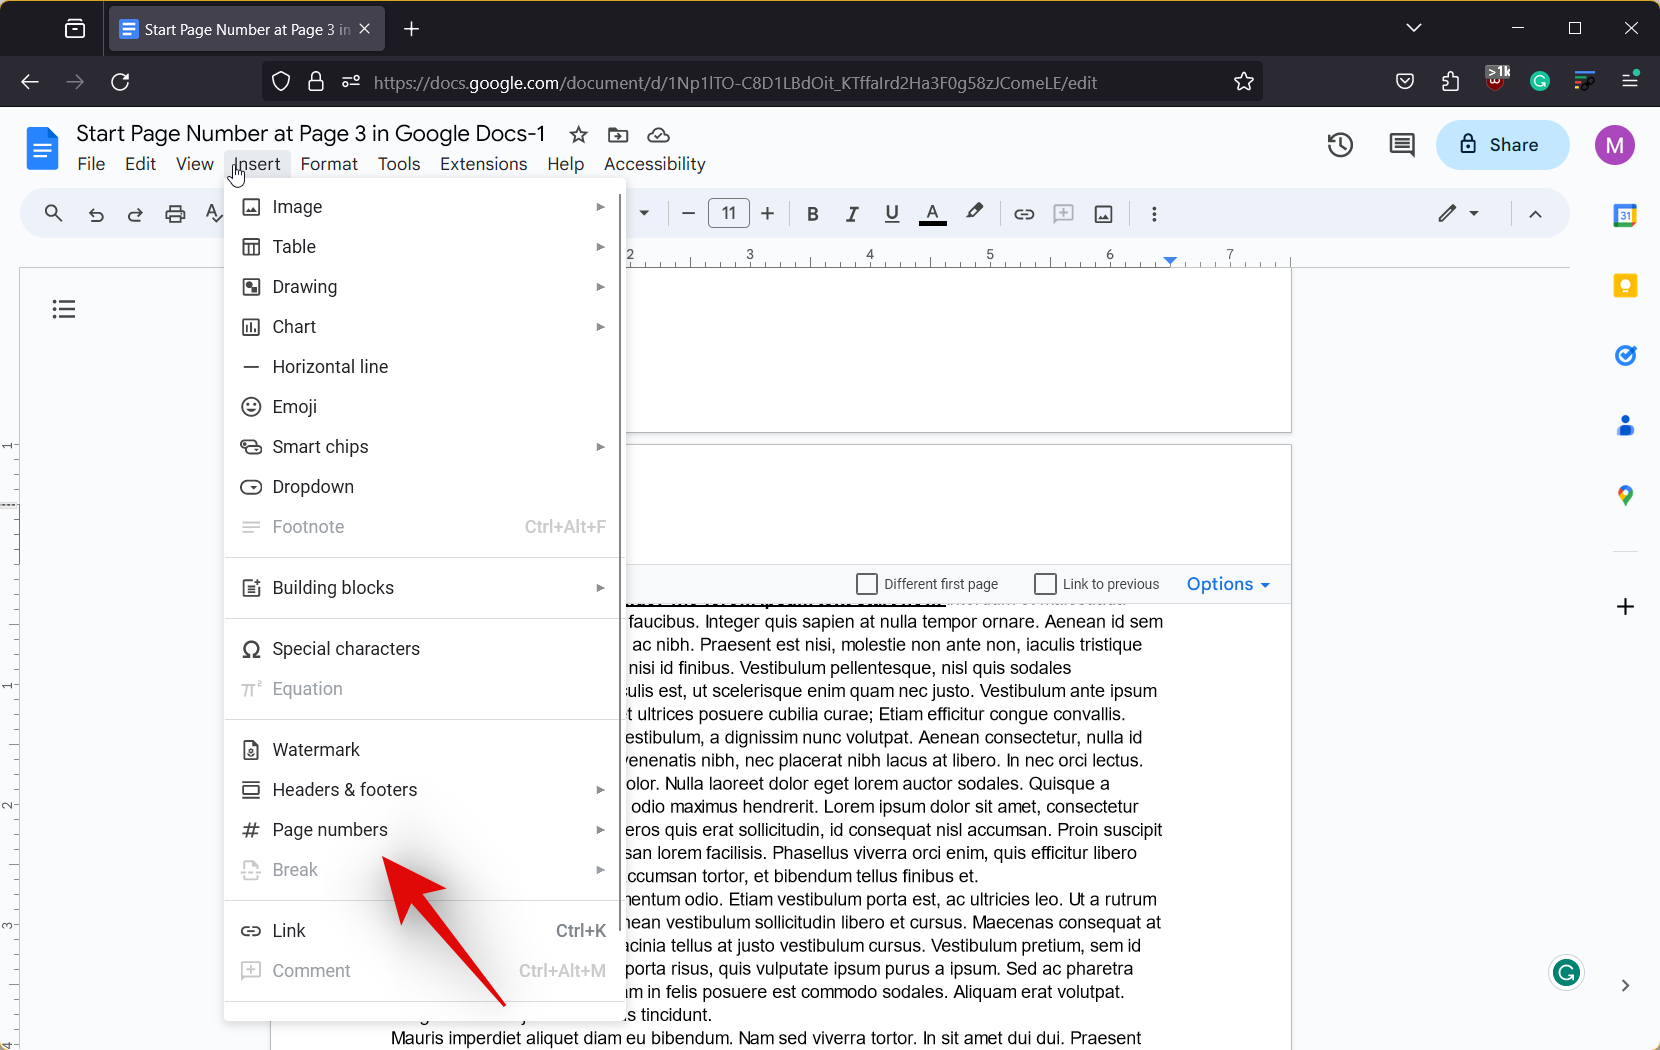
- Once done, click on Insert at the top and hover over Page numbers.
- Select your preferred page number format from one of the preset choices.
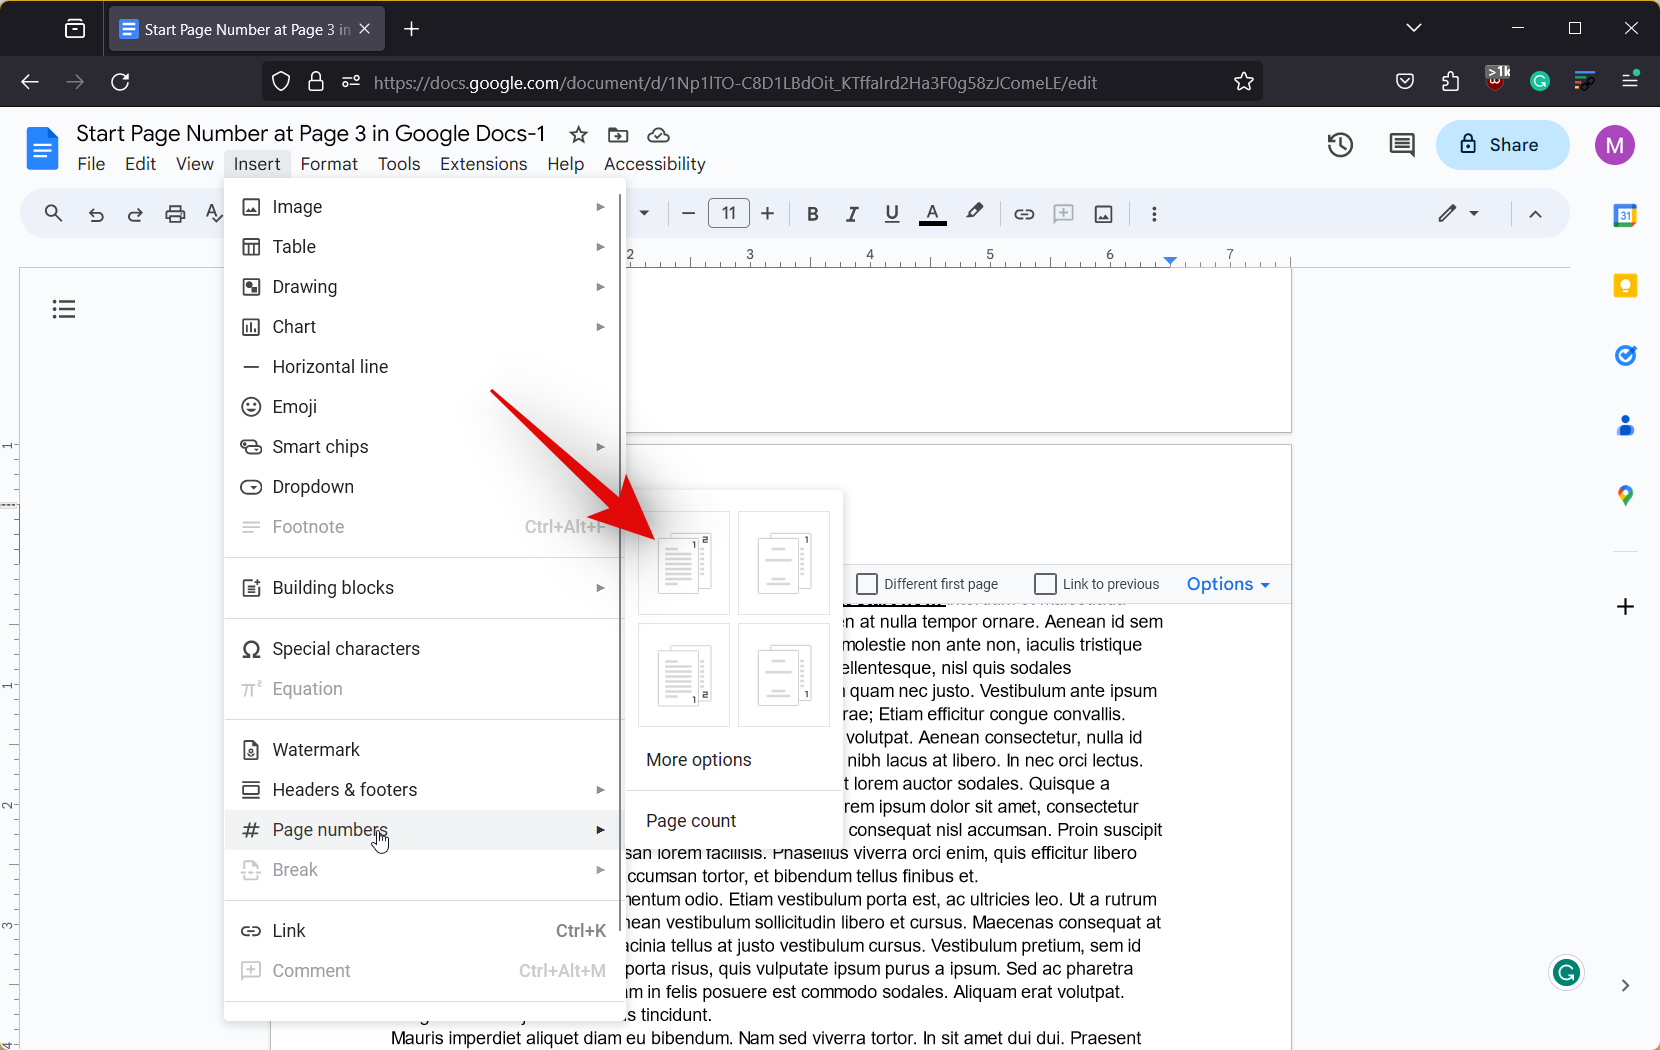
- Once the page numbers are added, they will take into account the previous pages.
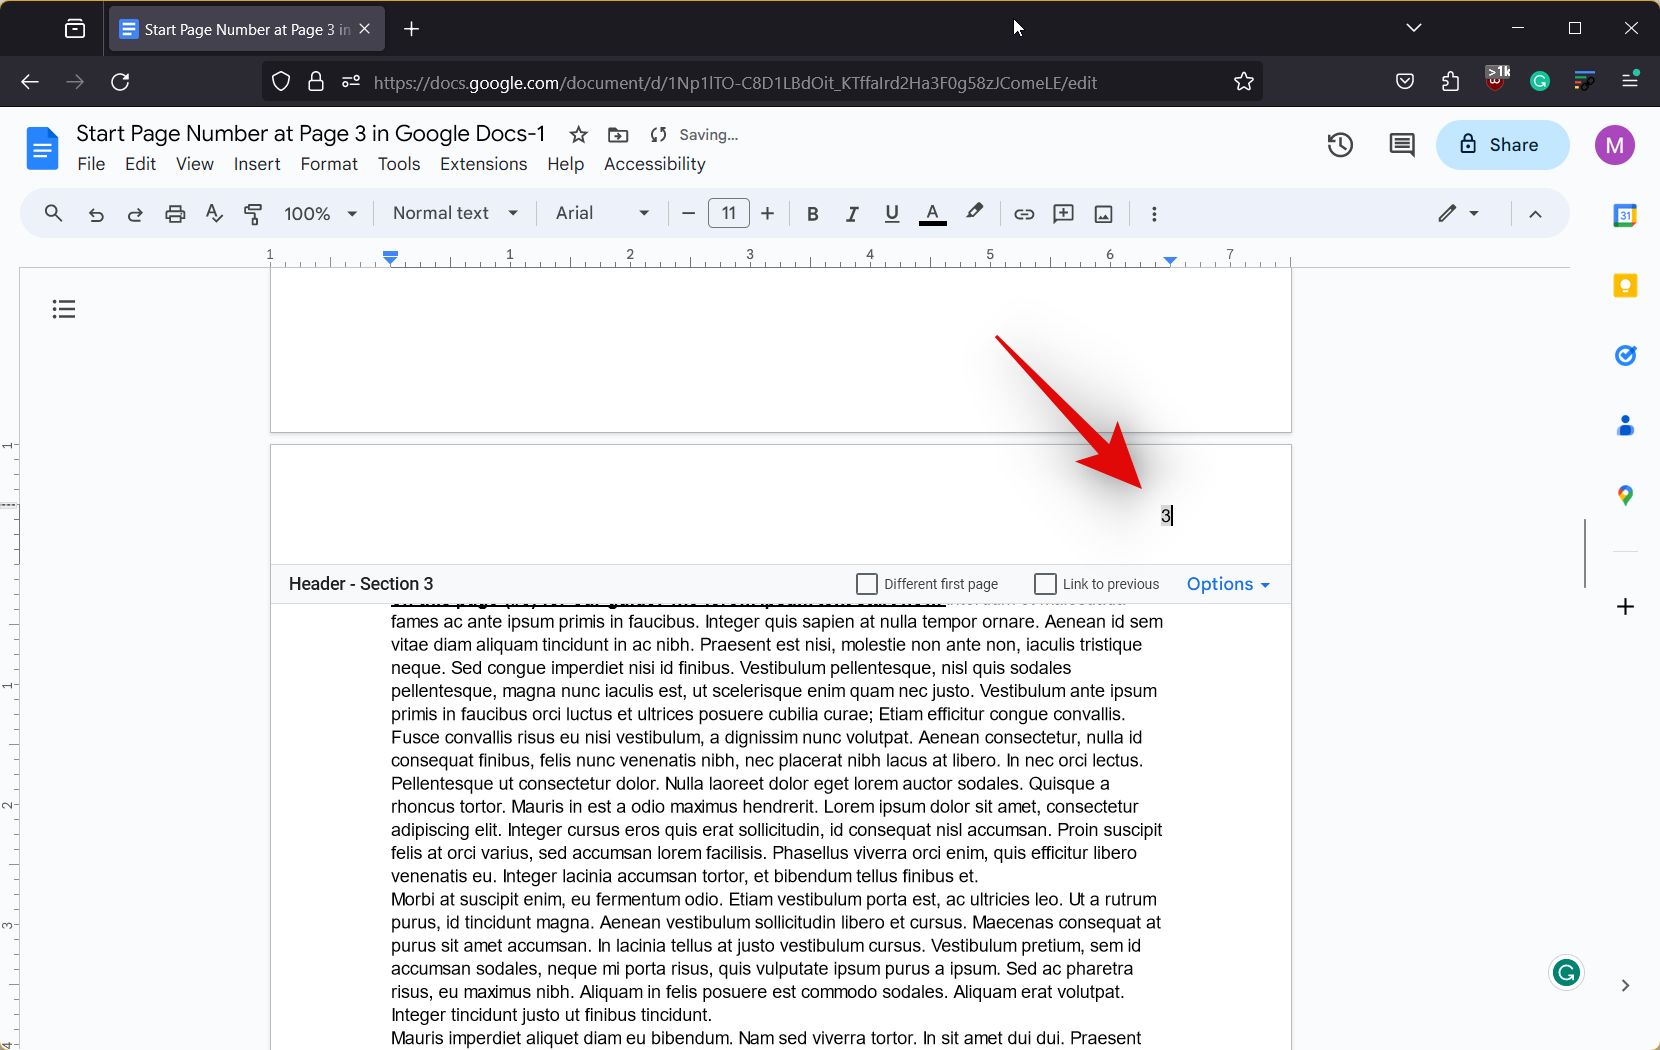
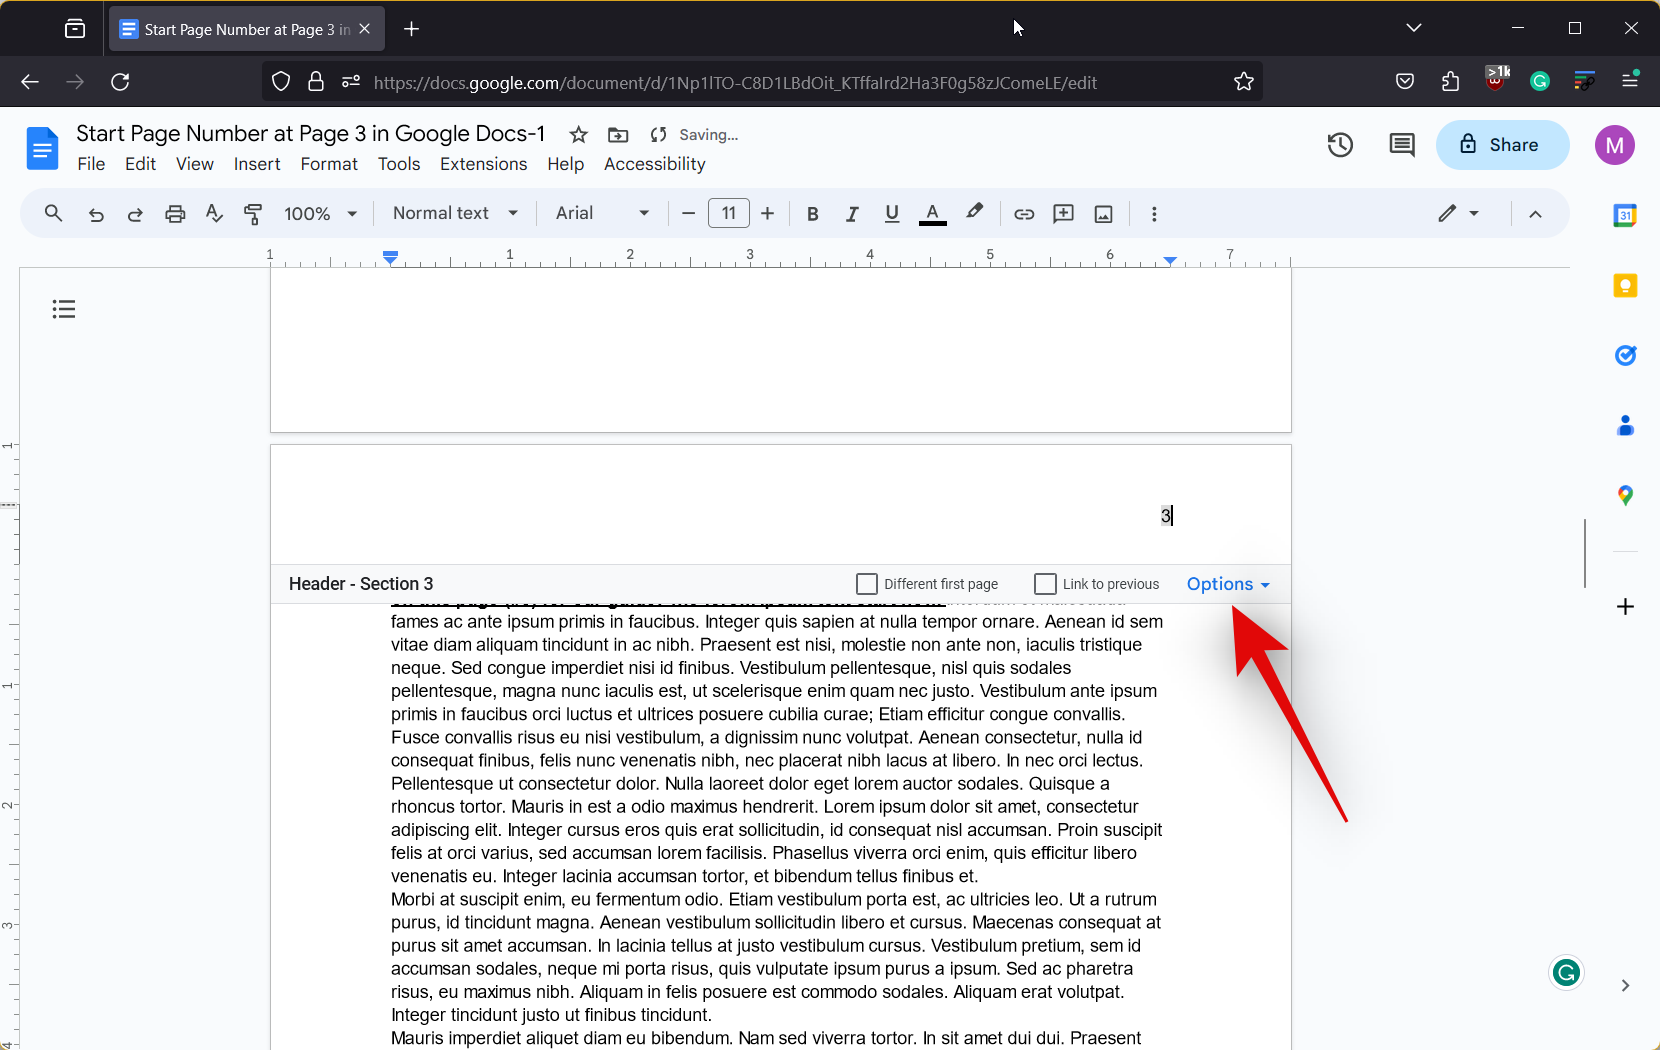
- Don’t worry, click on Options in the Header or Footer.
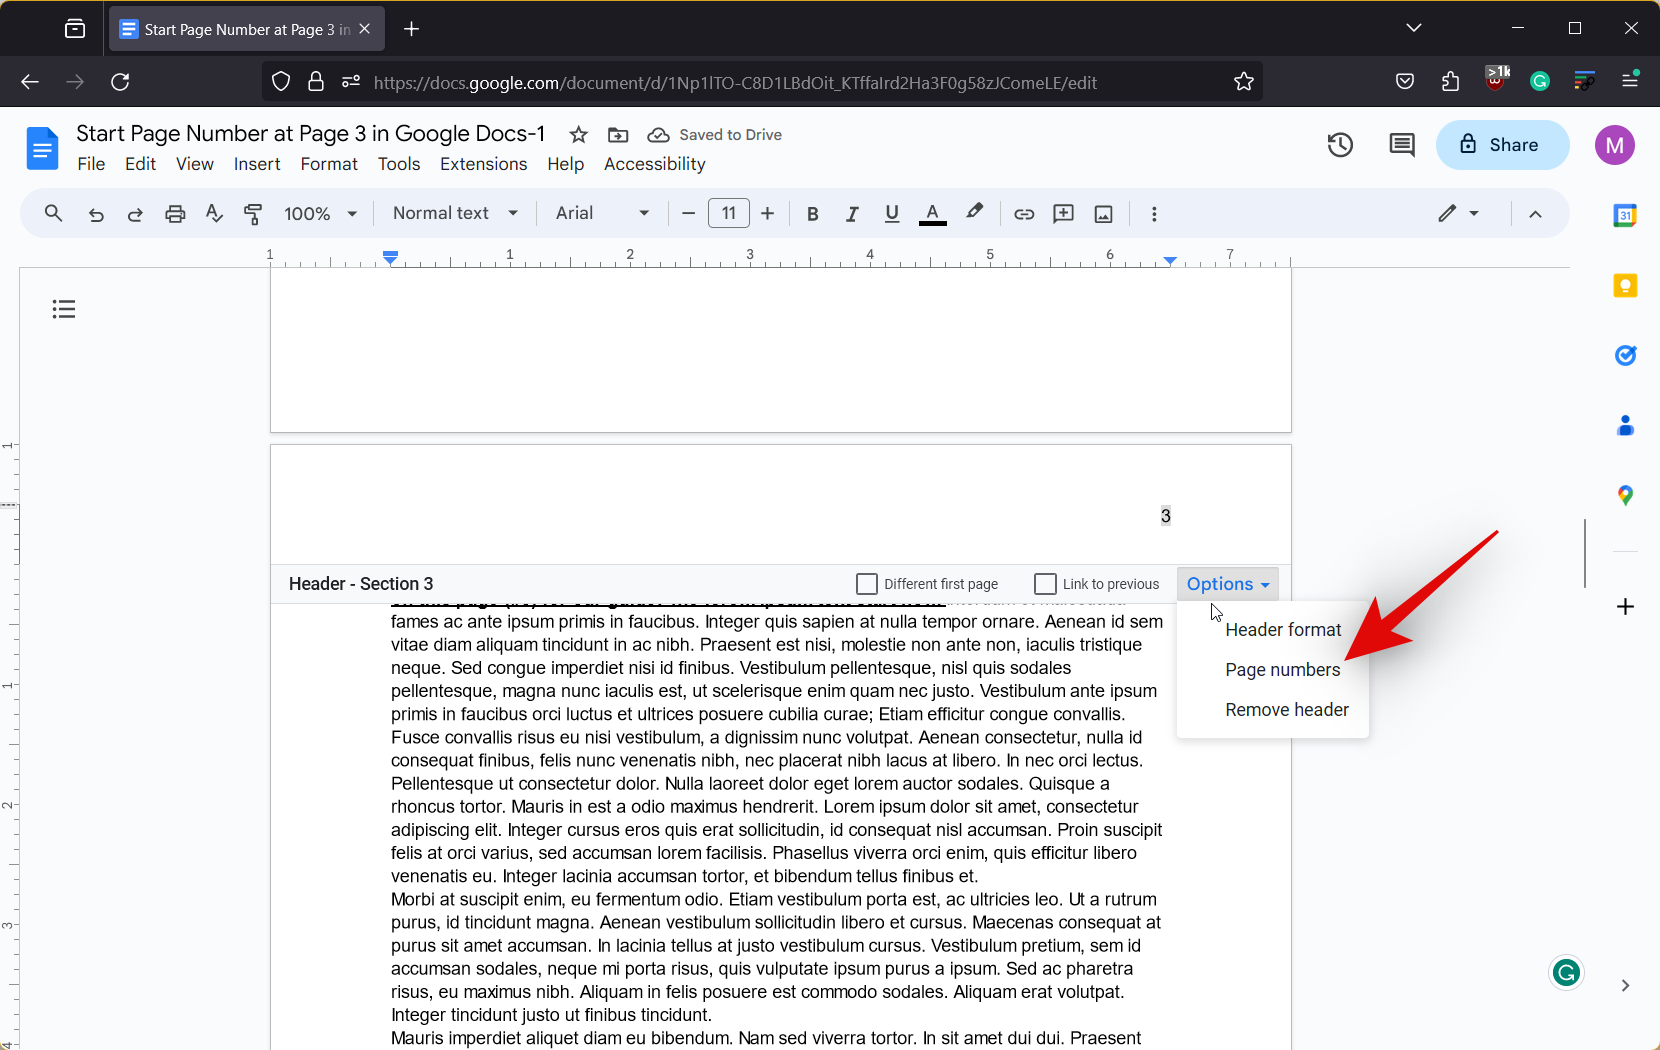
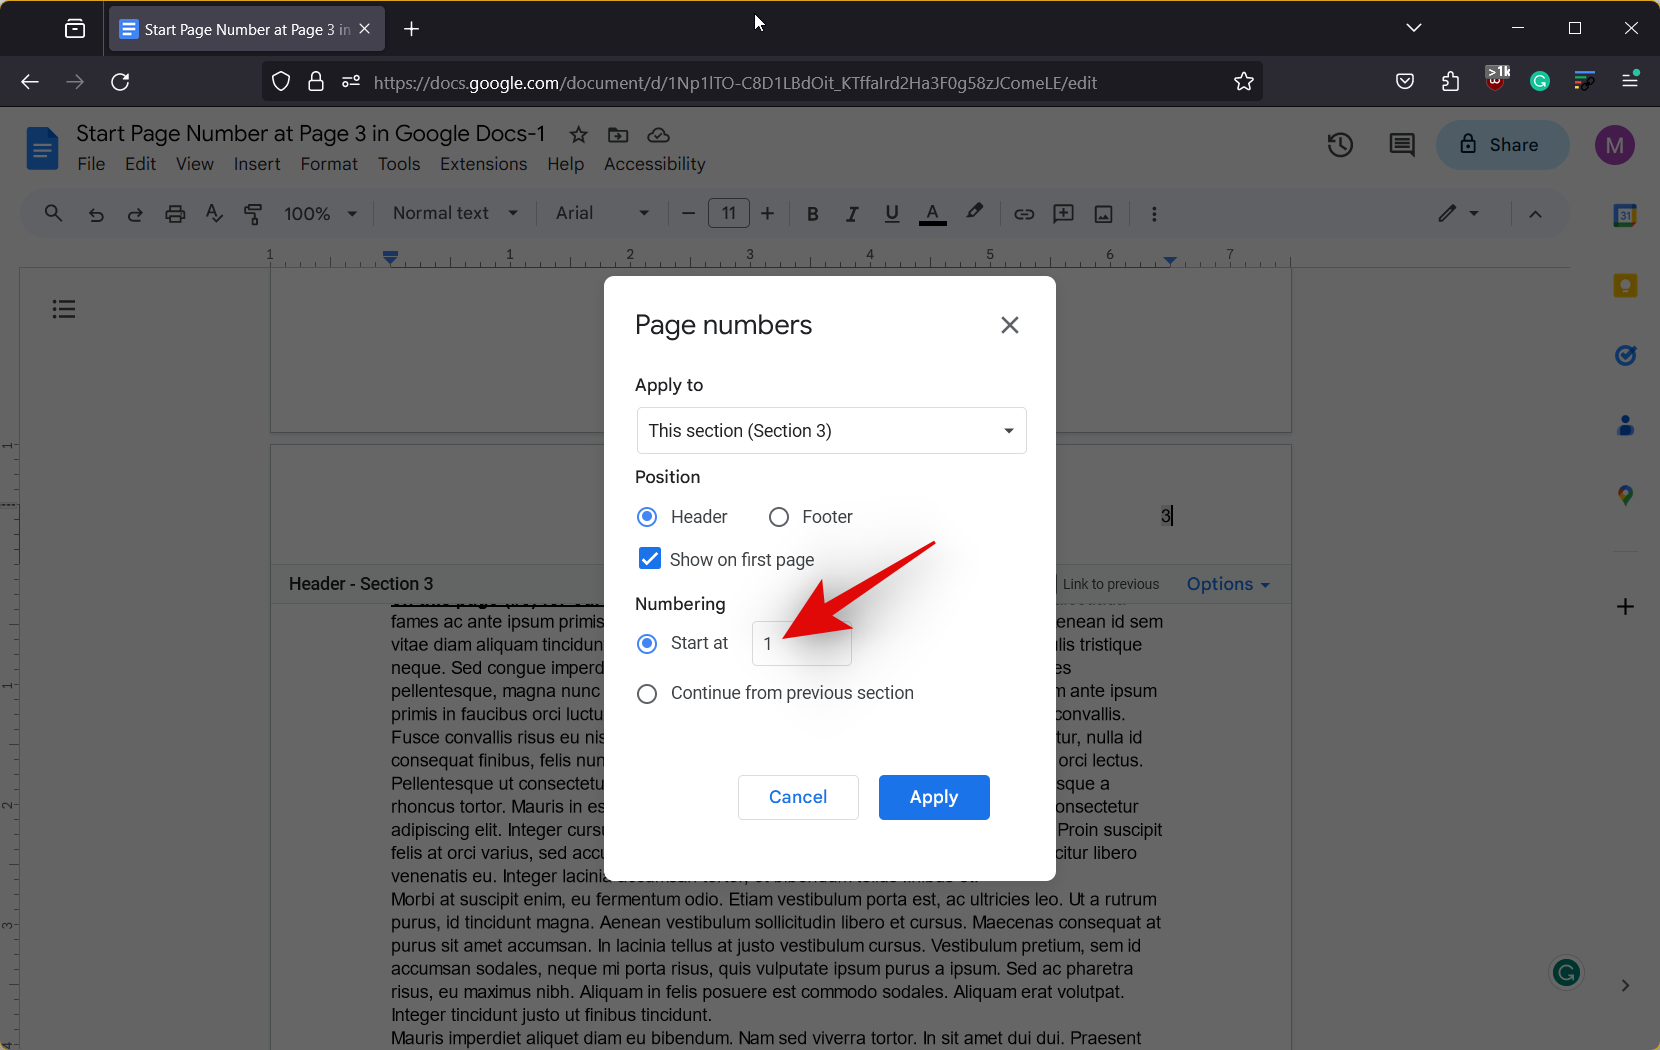
- Click and select Page numbers.
- Now leave every option at its default value, and enter 1 beside Start at under Numbering.
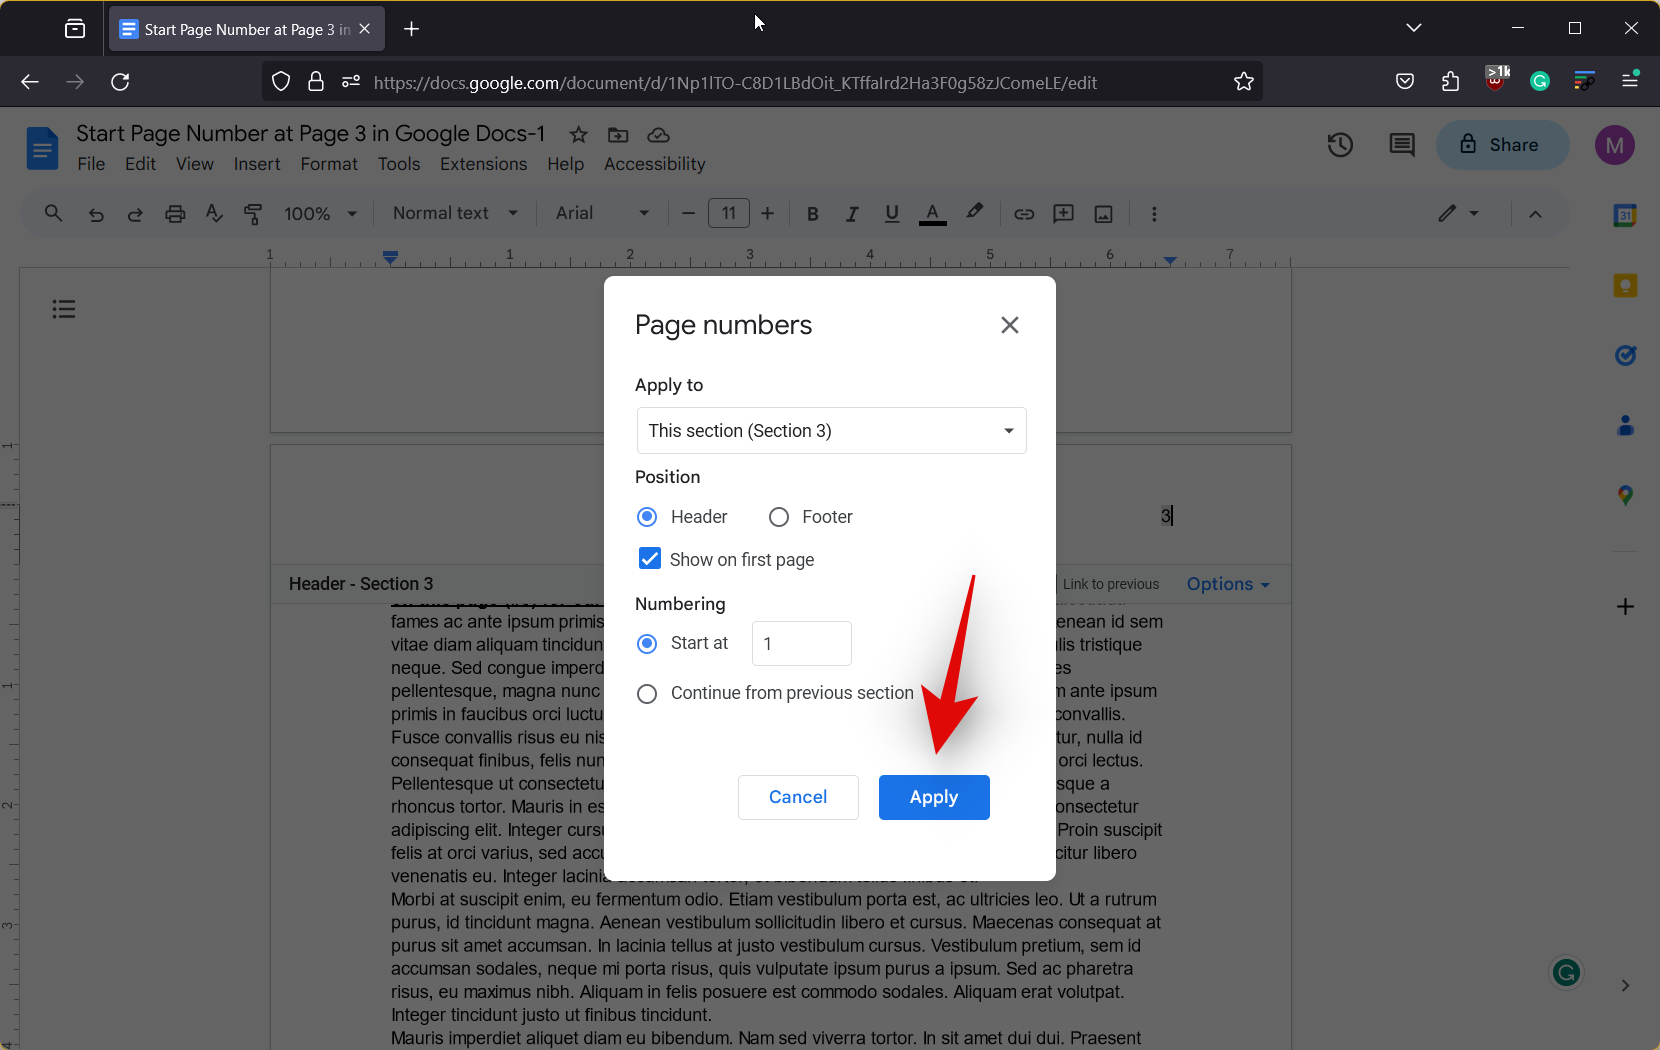
- Now click Apply.
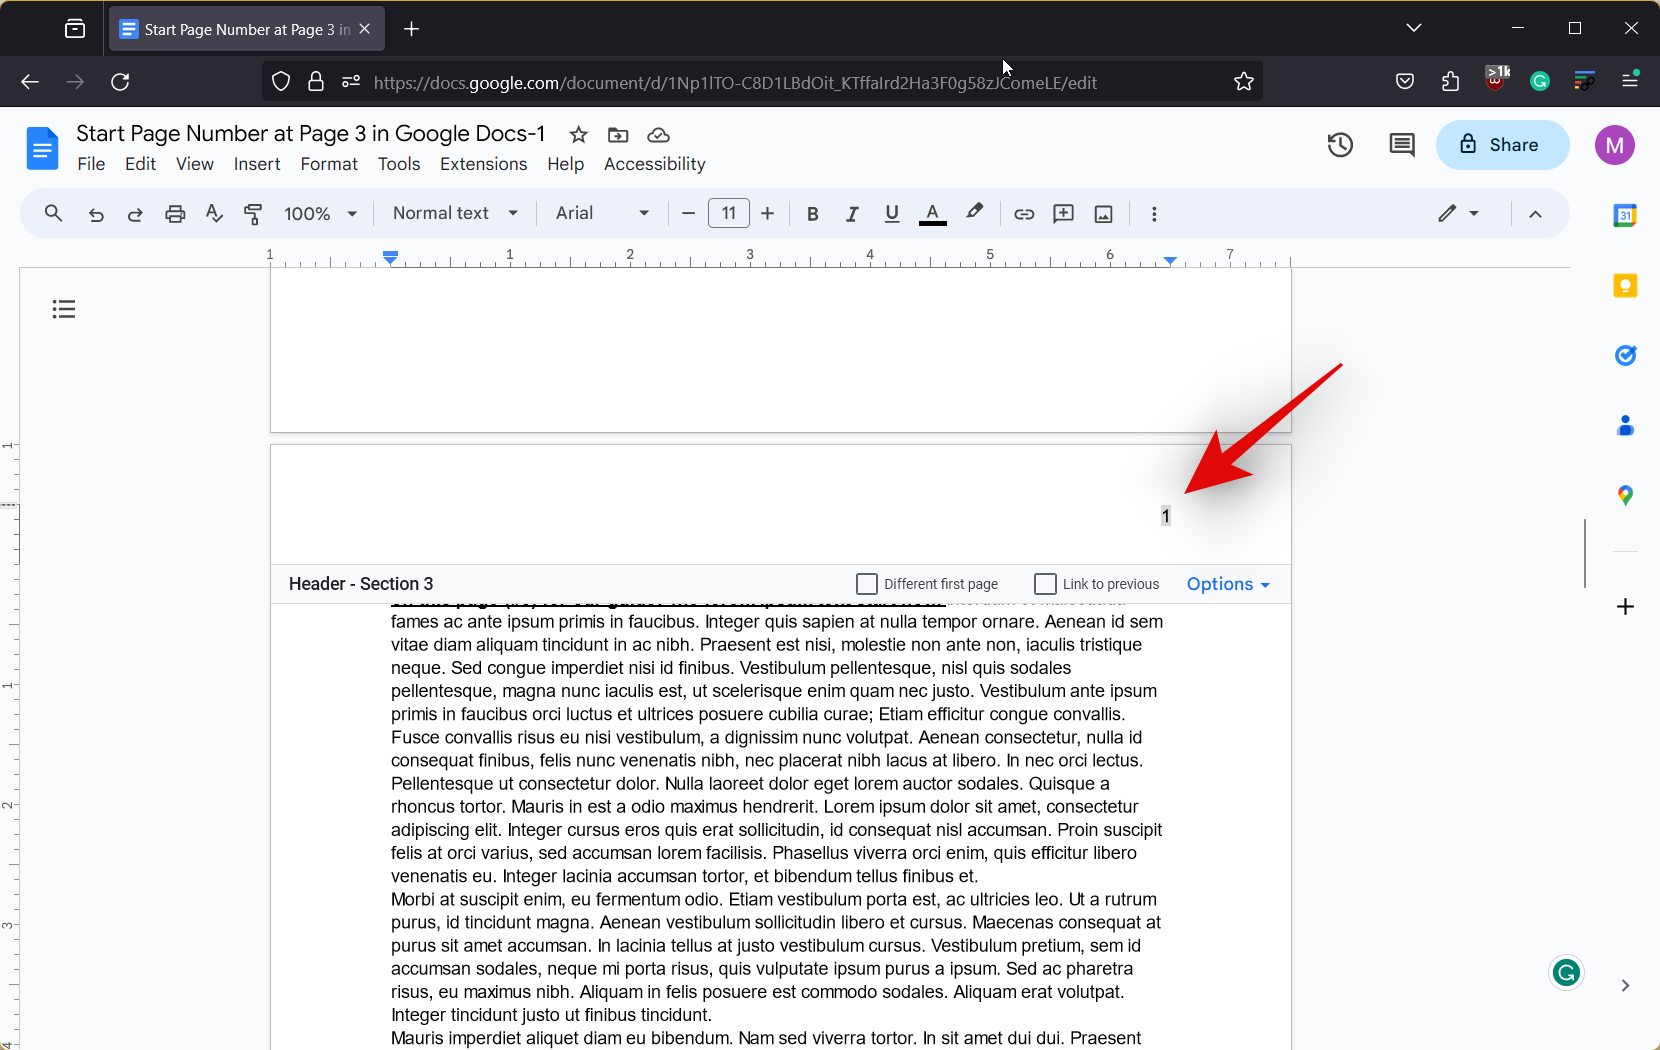
- Page numbers will now begin from 1 at the end of your second section break.
- Scroll up and double-click on the page numbers added before your section breaks to select it.
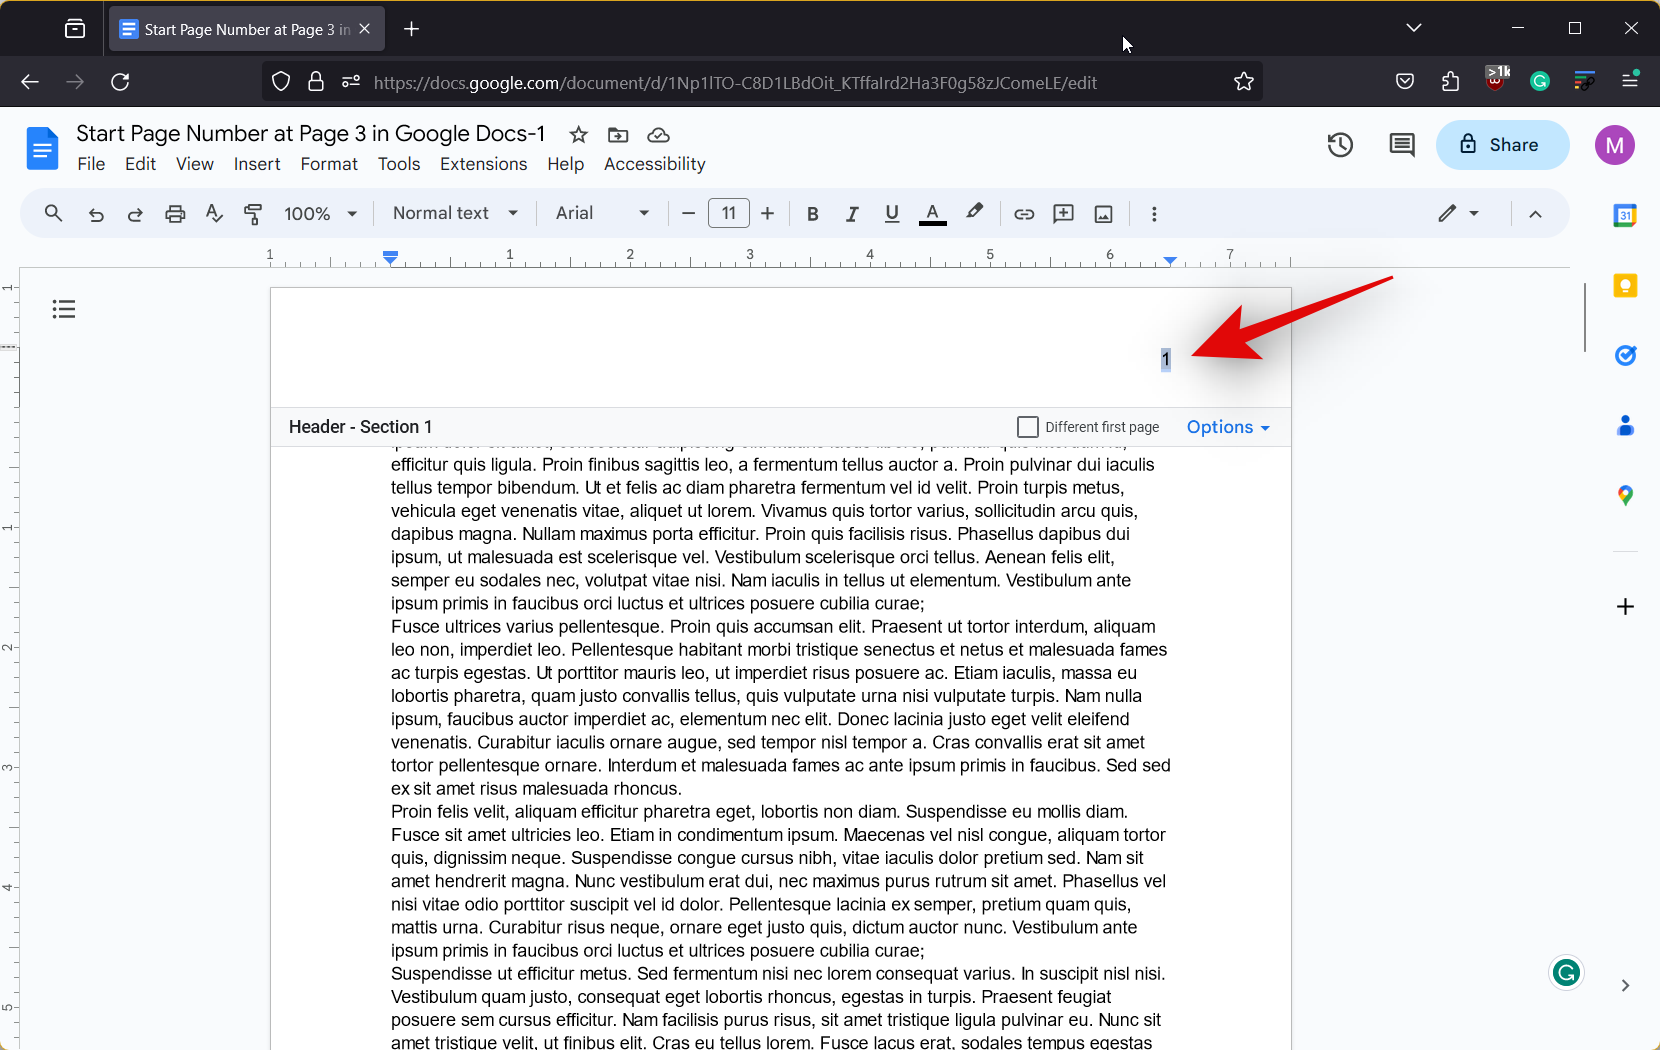
- Press Backspace or Delete on your keyboard to remove the page numbers. Repeat the steps to remove page numbers from the sections in the document where you don’t want any page numbers.
And that’s it! That’s how you can start page numbering from a specific page in Google Docs on your PC.
Can you start page numbering from a specific page when using the Google Docs mobile app?
Unfortunately, this isn’t possible in the mobile app for Google Docs as there is no option to add a section break in documents. So we recommend using a PC to help you start page numbering from a specific page in your Google Docs document.
We hope this post helped you start page numbering from a specific page in Google Docs. If you face any issues or have more questions, feel free to drop us a comment in the section below.


Discussion