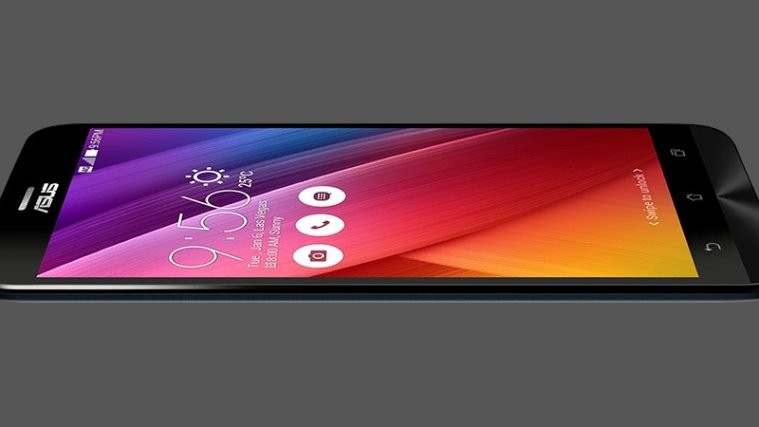
If you rooted your Zenfone 2 using the old one click root tool, there are chances that you got the ‘no camera is found’ bug creaking into your phone. Root solution tweak the system to attain superuser access and sometimes, things do get break when you root your Android device.
Anyway, there is a simple new one click root solution available to root and fix the Asus Zenfone 2 ‘no camera if found’ issue — all you have to do is download the fix given below, and run its .bat file after extracting the files.
Here’s how to root and fix ‘no camera is found’ bug on Asus Zenfone 2.
Downloads
- Root Script | File: master.zip (54 MB)
Supported devices
- Asus Zenfone 2, model no. T00F/T00J
- Don’t try on any other variant of Zenfone 2 or all series, with different model no.
- Don’t try on any other Android device.
Tip: Check the model no. in Settings > About phone. Or, you could also find the model no. on the packaging box of the device.
Installation Instructions
Warning: Warranty may be void of your device if you follow the procedures given on this page. You only are responsible for your device. We won’t be liable if any damage occurs to your device and/or its components.
Backup necessary stuff. In case your device is wiped off while following the guide below, it’s good to have a backup of contacts, photos, videos and other files already saved on PC.
- This was tested on software version 2.22.40.54 of WW model of Zenfone 2. So, make sure yours is a WW model and is running version 2.22.40.54. You can try this even if you are not exactly on 2.22.40.54, and it might work too. Otherwise, wait for the v2.22.40.54 OTA update to hit your device, and then try.
Tip: Btw, in case this root tool doesn’t work for you, you can unroot your device and fix the bug too by installing the v2.17.40.12 firmware — download from here, and flash using guide here. (This is Zenfone 5’s guide but installation procedure is exactly same.) - Make sure you have ADB and ADB drivers installed and working.
- Enable USB Debugging. Go to Settings > About phone, and then tap Build number seven times. Now, go back to Settings and then into Developer options. Find USB Debugging option, and use toggle button to enable it. Tap on OK to accept warning.
- Download the root script from above, and extract it to any folder on PC. Name it: z2-root
- Now, in z2-root folder, you must be having all these files.

- Connect your Zenfone 2 to PC.
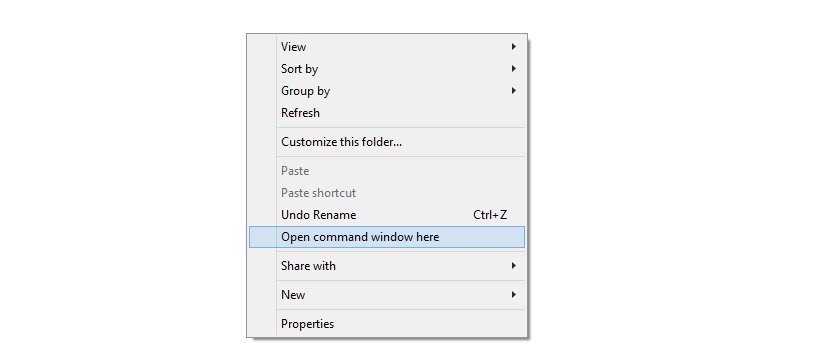
- Open the command window in z2-root folder. For this:
- Boot Zenfone 2 into fastboot mode. Copy the command below and paste it in command window. Then hit enter key.
adb reboot bootloader
- Now, run the following commands one after one to unlock fastboot on Zenfone 2. Copy paste one command at a time, and then hit enter key to run that command. Do this for both commands one by one.
fastboot flash fastboot files/root/fastboot.img
fastboot reboot-bootloader
- Now, unlock bootloader of Zenfone 2. Run the command below one by one.
fastboot flash dnx files/vanilla/dnx_fwr_ctp_a500cg.bin
fastboot flash ifwi files/root/ifwi_ctp_a500cg.bin
fastboot reboot-bootloader
- Now, root Zenfone 2. Run each command one by one.
fastboot flash recovery files/root/recovery.img
fastboot flash update files/root/dummy.zip
adb reboot bootloader
- Restore original files, so that ‘no camera is found’ bug is fixed.
fastboot flash fastboot files/vanilla/fastboot.img
fastboot flash recovery files/vanilla/recovery.img
fastboot flash dnx files/vanilla/dnx_fwr_ctp_a500cg.bin
fastboot flash ifwi files/vanilla/ifwi_ctp_a500cg.bin
fastboot reboot
That’s it. Enjoy your rooted Asus Zenfone 2 with camera bug also fixed.
If you need any help this, let us know in comments below.


can i do this with my asus zenfone 5 ? same problem, no camera is found. it almost 2 months and i havent still fixed it.
can i do this with my asus zenfone 5 ? same problem, no camera is found. it almost 2 months and i havent still fixed it.
can i do this with my asus zenfone 5 ? same problem, no camera is found. it almost 2 months and i havent still fixed it.
I am problem with in zenfone 2 Z00A
I am problem with in zenfone 2 Z00A
I am problem with in zenfone 2 Z00A