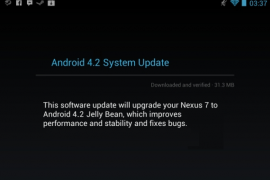
Three more days to go, and we should be seeing a notification exactly like the one in the screenshot above, on our beloved Nexus 7. Well, at least the header is going to read exactly that – Android 4.2 System Update.
And before you start scrambling for your Nexus 7, or let your imagination run wild, let me tell you upfront that the screenshot above is that of an old Android 4.1.2 update notification. I thought it would be a good idea to get everyone into a preparatory mood for the goodies that await us on the 13th. It’s amazing what a free tool like Paint can do, eh?
By now, I suppose most of you have already rooted and booted your Nexus 7 tablets into one of several Custom ROMs that are available for this absolutely delightful slab of awesomeness. I find myself guilty too, on that count, having resisted for exactly 3 days before I flashed a Custom ROM on mine.
Nothing wrong with that, except when it dawned on me that in its current rooted and flashed state, there won’t be any 4.2 dropping by, at least not OTA. And that meant that a restoration to stock 4.1.2 was in order. It would mean losing root, and consequently some of the must-have apps, features and privileges, that go with root. But then, I see that a small temporary inconvenience, versus the pleasure of knowing that you are one of the privileged few who would be moving up the Android OS version ladder. And that too at a time when a majority of other devices, including high-end ones are still awaiting the official update to base Android 4.1, a few to 4.1.2.
And now that we have finished gloating, let’s move on to more objective matters like how to restore the Nexus 7 back to Stock Android 4.1.2 Build JZ054K, in preparation for the 4.2 update. Read on to know how.
Compatibility
The guide below is compatible only and only with the ASUS Nexus 7. Do not try this with any other device
Warning!
The methods and procedures discussed here are considered risky and should not be attempted if you don’t know exactly what you’re doing. If any damage occurs to your device, we won’t be held liable.
How to restore the Nexus 7 to Stock Android 4.1.2
- This procedure will wipe all of your apps, data and settings. Backup your Apps and important data — bookmarks, contacts, documents, media etc. This Android backup guide should help you
- Since you are going through this page, we presume you are either running a Custom ROM or a rooted Stock ROM on your Nexus 7. We would be using an extremely handy tool called Wug’s Nexus Root Toolkit, created by XDA developer WugFresh. | Download Wug’s Nexus Root Toolkit File name : NRT_v1.5.5.sfx.exe
- Double click the .exe file you downloaded in Step 2 to install the toolkit on your PC. Once the installation is complete, launch the Wug’s Nexus Root Toolkit by double clicking the shortcut on your desktop.

- After making sure you have enabled USB Debugging in Developer Options, and Installation from Unknown Sources in Security Settings, connect your Asus Nexus 7 to the PC via USB cable
- From the Toolkit main menu, click the Backup button. This will create a full backup of your existing ROM, which you can restore to if something gets messed up. Wait for the back up process to complete.
- Again on the main menu, make sure that the Device is on/Normal option under Back to Stock is selected, and click the Flash Stock + Unroot button. Click the OK button in the message box that pops up

- You should now see a new message box that pops up. Select NAKASI: Android 4.1.2 – Build: JZ054K from the factory image dropdown list, and Automatically download + extract under Choice, and then click OK. See screenshot below

- The Toolkit will now start downloading the Stock 4.1.2 factory image. This might take a few minutes to more depending upon how fast your internet connection is. Take a walk and come back.
- Once the download is complete, it will show you another message box asking you whether you want to go aheas and flash the stock image. Click OK.
- This should boot your device into bootloader mode, and check for fastboot status. In case you get a Device not detected message, simply click cancel, disconnect and reconnect the device, and click OK on the Step 7 screen again.
- Once the device is detected, you should see a new message box, asking you for confirmation again. Click OK.

- This will open up a new DOS window in which you will the progress as stock 4.1.2 firmware is flashed on your device. Wait for the flash to complete and your device to boot into the OS. Then click any key while in the DOS window to exit the process.

- Exit the Toolkit, and disconnect your Nexus 7 from the PC.
- Relocking the bootloader is optional, and won’t affect OTA updates in any way. Technically, even rooting the Nexus 7 and running the stock firmware should also not affect OTA, but we suggest leaving it unlocked and unrooted, just to be on the safer side. You can always root it later, post the update.


