
Apple’s Photos app lets you edit pictures from your camera roll with ease but if you wish to stitch a bunch of them into a single picture, there is no such tool within the app that lets you do that. However, there are other ways you can make a collage on your iPhone, and in this post, we’ll help you create collages in various ways.
How to make a photo collage on iPhone [4 methods]
You can create a photo collage on your iPhone using four apps – Shortcuts, Google Photos, Layout from Instagram, and Canva.
Method 1: Using the Shortcuts app
Apple’s native Shortcuts app can be used to perform actions that aren’t built-in to an iPhone as well as automate tasks to get things done. One such thing you can do with Shortcuts is make a collage in a pattern that you want to create.
While there is a pre-existing Photo Grid shortcut inside the app’s Gallery section, it comes with a major flaw that only combines pictures horizontally, so your pictures are stacked side-by-side. This isn’t a sensible way to create collages as selecting a large number of pictures will only create a thin row of pictures that can be inconvenient to view.
- For better personalization, we’ll be using a community-made Combine Images shortcut that you can add to your iPhone. When you access this shortcut link on your iPhone, tap on the Add Shortcut button.
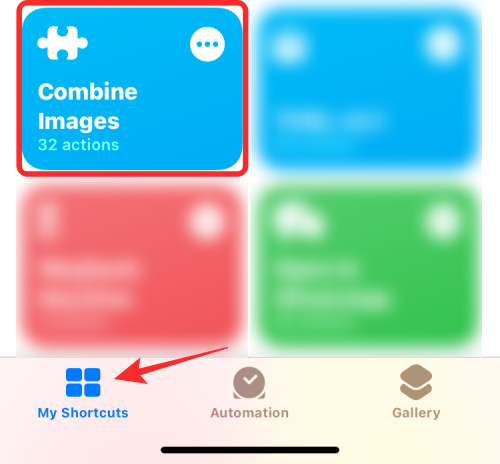
- When this shortcut is added to your device, it should appear inside the My Shortcuts tab inside the Shortcuts app. To create a collage with this shortcut, select the Combine Images shortcut.
- iOS will now open your iPhone library, showing you all the pictures you’ve captured or saved on your device. From here, select the pictures you want to make a collage from either the Photos tab or the Album tab.

- Once your preferred photos are selected tap on Add at the top right corner.

- The shortcut will prompt you with a dialog asking in which order do you want to arrange these pictures. Select either Chronological or Reverse Chronological.

- Next, enter the spacing you wish to have between the images, i.e., a gap between individual pictures in the collage. We suggest setting this space to “10”, but you can set it to your desired value of your own. If you don’t want the collage to have any white space between pictures, set this to “0”. After setting the image spacing, tap on Done.

- The shortcut will now ask you how you want the pictures to be arranged – horizontally, vertically, or in a grid. If you’re confused about which one to select, we’ll help you understand which one would suit your needs.

Combine images horizontally – If you have a bunch of portrait shots, up to 7 of them, choosing this would stack your pictures one after the other in a single row.

Combine images vertically – If you only have up to 3 shots to stack up and all of them are wide shots, you can choose this option to line up photos in a single column vertically.

Combine images in a grid – If there are 4 or more shots and you want pictures to be aligned symmetrically in a grid fashion, choose this option and the shortcut will output your collage in m x n format, depending on the number of photos you have selected.

- Once the collage is created, tap on Done at the top left corner.

- The shortcut will now ask you how you want to save your new collage. Select Save to camera roll to save the new collage and preserve your original pictures.

- The collage will now be saved on your iPhone and will be accessible inside the Photos app.
Related: How to Loop a Video on iPhone
Method 2: Using the Google Photos app
Google Photos lets you create collages in minimal steps without much effort. Although the process of creating a collage with it is easy, there are some limitations to using the app. One downside to Google Photos’ collage tool is that you can only select as many as 9 photos to combine. Another limitation is that the Photos app will create collages of the pictures you pick and once created, there’s no way to manually re-position the photos in a grid or change grid type directly. Google Photos can thus be used to make a collage in little to no time without additional tools.
- To create a collage, open the Google Photos app on iOS and tap on the Library tab at the bottom right corner.

- Inside Library, select Utilities from the top.

- On the next screen, tap on Collage under “Create New”.

- You will now have to select the pictures you want to create a collage with. You can select anywhere between 2 and 9 photos to create your collage. When you’ve made your selection of pictures, tap on Create at the top right corner.

- Google Photos will now create a collage from your selected photos with a layout that it thinks suits you best. From this screen, you can share or make other modifications to the collage from the on-screen tools.

Related: How To Inspect Element on iPhone
Method 3: Using the Layout from Instagram app
Since more of us use Instagram to upload our daily memories, you can use the app’s native Layout tool to create collages from pictures you have stored on your iPhone or capture one using an in-app camera directly.

But Instagram’s tool has two limitations – you cannot combine more than 6 pictures in a grid and although you can reposition where each picture goes, the number of available options to arrange is limited to 6 grid types.
Step 1: Add pictures to your collage
That’s why, we’ll use the standalone Layout from Instagram app for this method, to make a more personalized collage.
- Open the Layout app on your iPhone, and allow access to all your photos on the iPhone.

- Inside the Layout app, you’ll see all the recent pictures saved on your iPhone. If you want to select a different folder or album to view and select pictures from, tap on the Recents tab at the bottom left corner and select your preferred folder/album.

- Now, you’ll see all the pictures that were stored in the selected location. From here, select the pictures you want to make a collage from. You can select anywhere between 2 and 9 photos when creating a collage.

- When you’ve selected all the pictures, you will be able to see the different grids that your pictures are arranged in at the top of the screen.

- Depending on the pictures you select, you’ll see different numbers of layouts and you’ll get different layout types to choose from.

- To browse through different layouts, just swipe from right to left on the layouts row at the top.

- When you find your preferred layout from here, tap on it to make further modifications.

Step 2: Edit your collage
You’ll now see the app’s Edit screen that will let you mirror/flip pictures in a layout, replace a picture, and add borders to your collage.

- To reposition a photo inside the collage, long-press on it and move it to your desired location inside the collage to place it there.

- To resize photos in the layout, select a picture and drag any of its edges to your preferred size. You should keep in mind that, when resizing a picture inside a layout, the adjacent pictures or the ones in the same row/column will also be resized accordingly.

- To mirror a picture vertically, tap on a picture from the grid and select Mirror.

- To mirror a picture horizontally, tap on a picture from the grid and select Flip.

- To replace a picture, select it from the layout and tap on Replace.

- Next, select a picture you want to use as a replacement and then tap on Done. The new picture will replace the selected one inside the collage.

- To add borders between photos and around the collage, tap on the Borders tile at the bottom.

- Once you’ve made all changes to the collage, tap on Save at the top right corner.

- The collage will be saved automatically to your iPhone’s library and you’ll get more options to share it on Instagram, Facebook, or another app.

Method 4: Using the Canva app
If you’re like us and use Canva to design headers, presentations, and posters on Canva, you should also know that the app can also be utilized to create collages from pictures on your iPhone. If you want to customize your collage with your touch with texts and other effects, Canva can be pretty convenient as there are a bunch of templates to choose from so that you can get started with it straight away.
Before creating a collage, download the Canva app from the App Store and create an account using your Google/Apple account or an email address, if you don’t have an existing account on the service.
- Open the Canva app and you’ll land on the For you screen.

- Swipe left on the For You tab at the top and then select the More tab.

- Inside More, select Photo Collage from the list of design options.

- Now, you’ll see a bunch of collage templates to choose from. Scroll down and select the template you like to use for your collage by tapping on it.

Note: Before you select a template, you should know how many pictures you want to create a collage with and if the template has the required space to paste all your photos. Some templates will have pictures lined up in a grid and some will have texts, stickers, and frames; so choose the template that you think will best suit your collage. - The template will now load up on the screen and Canva will prompt you asking if you wish to add photos from your library for creating the collage. Here, tap on Select More Photos.

- Next, select the pictures from your iPhone library that you want to make a collage of and then tap on Done.

- After this, you should see the template that you selected.

- Here, you can add your photo from the iPhone by tapping on a picture from the template and selecting the Replace option at the bottom.

- In the popup screen that appears, tap on the desired photo you want to make a collage from.

- The selected picture will now be copied to the collage.

- You can repeat this step to select and replace other photos for your collage.

- If the template has text, you can edit it and write your caption by tapping on the text and selecting Edit.

- If you want to change the text’s font, select the text portion from the template and select Font.

- You can then select the font you want to apply to the collage.

- Canva also allows you to change the background of a template by tapping on it and selecting Color from the bottom.

- When you do so, you can select the color you want to apply to the highlighted region from available colors on the canvas, colors extracted from your photos, or other default colors.

- Additionally, you can alter the spacing between items in your collage by tapping anywhere on your design and selecting Spacing from the bottom toolbar.

- After selecting this option, adjust the grid space by dragging the slider towards left/right.

- You can make other modifications to the collage by adding animations, transparency, and other effects.
- Once you’ve made all the desired changes, tap on the Share icon at the top right corner.

- In the popup screen that appears, select Download to save the collage onto your iPhone.

That’s all you need to know about making a collage on an iPhone.
RELATED
- How to Remove Music from iPhone Lock Screen
- How To Print to PDF on your iPhone and iPad
- How to Turn Off Focus on iPhone [11 Ways Explained]
- How to Turn Off Shared Photos on iPhone and Stop Sharing Completely
- How to Play Pokemon Blue on iPhone
- What Does ‘Live’ Mean on Find My Friends on iPhone?
- What Do Yellow, Red, Blue, and Green Lines Mean on the iPhone Weather App or Widget?


